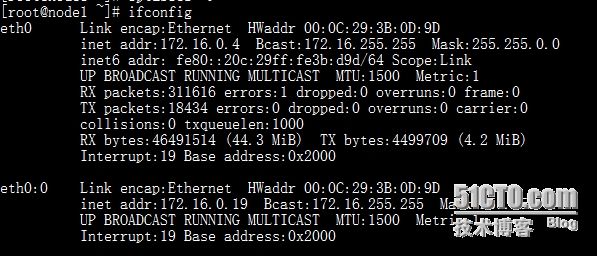
实验配置环境:
# uname -ro
2.6.32-358.el6.i686 GNU/Linux
1.修改节点名称,集群的每个节点名称够能够相互解析
1.修改节点node1主机名
# node1.magedu.com

2.修改节点node1主机名
# node2.magedu.com

3.在集群节点node1和node2的/etc/hosts添加如下两行,使其能够相互解析
# vim /etc/hosts
172.16.0.4 node1.magedu.com node1
172.16.0.7 node2.magedu.com node2
2.配置ntp服务器
1.查看是否安装ntp服务的软件包
# rpm -qa ntp
ntp-4.2.4p8-3.el6.centos.i686
2.将原来配置文件备份,提供新的编辑配置文件/etc/ntp.conf,
# vim /etc/ntp.conf

driftfile /var/lib/ntp/drift
restrict default kod nomodify notrap nopeer noquery
restrict -6 default kod nomodify notrap nopeer noquery

restrict 127.0.0.1
restrict -6 ::1
restrict 172.16.0.0 netmask 255.255.0.0 nomodify notrap

server  cn.pool.ntp.org  prefer
server  133.100.11.8

server  127.127.1.0     # local clock
fudge   127.127.1.0 stratum 10

includefile /etc/ntp/crypto/pw

keys /etc/ntp/keys
logfile /var/log/ntpstats/ntp.log

3.启动nfp服务
# service ntpd start

4.验证ntp服务
# ntpstat
synchronised to local net at stratum 11
   time correct to within 11 ms
   polling server every 1024 s

# ntpstat
synchronised to local net at stratum 11
   time correct to within 11 ms
   polling server every 1024 s
[root@localhost ~]# ntpq -p
     remote           refid      st t when poll reach   delay   offset  jitter
==============================================================================
 dns1.synet.edu. 202.118.1.46     2 u  134 1024  377   95.428  14611.6 2042.24
 133.100.11.8    133.100.53.51    2 u  306 1024  377  151.025  14205.3 2064.42
*LOCAL(0)        .LOCL.          10 l   30   64  377    0.000    0.000   0.001
3.保证节点一和节点的时间同步
在节点node1和节点node2上配置周期性任务计划,使其时间保持同步
# crontab -e
*/3 * * * * /usr/sbin/ntpdate 172.16.0.6 &> /dev/null
4.各节点之间基于ssh密钥认证通信
节点node1和节点node2不需要密码进行通信
1.将节点node1生成的公钥传到节点node2
# ssh-keygen -t rsa -P ''
# ssh-copy-id -i .ssh/id_rsa.pub root@node1

2.将节点node2生成的公钥传到节点node1
# ssh-keygen -t rsa -P ''
# ssh-copy-id -i .ssh/id_rsa.pub root@node2

3.节点node1和node2时间同步
# ssh node1 'date';date
Sun Apr 20 20:32:00 CST 2014
Sun Apr 20 20:32:00 CST 2014
5.安装配置heartbeat v2
1.解决依赖关系(版本不同解决依赖关系所安装的包有所不同)
# yum  install PyXML -y
# yum  install libnet -y
# yum install net-snmp-libs -y
# rpm -ivh heartbeat-2.1.4-12.el6.i686.rpm
# rpm -ivh heartbeat-pils-2.1.4-12.el6.i686.rpm
# rpm -ivh heartbeat-stonith-2.1.4-12.el6.i686.rpm
2.复制heartbeat集群服需要的文件
# cp /usr/share/doc/heartbeat-2.1.4/{haresources,ha.cf,authkeys} /etc/ha.d/

# ls
authkeys  harc         rc.d           resource.d
ha.cf     haresources  README.config  shellfuncs

3.配置authkeys
# openssl rand -hex 8
cc7cb7ada0d820fb
添加如下两行
# vim authkeys

auth 2
2 sha1 cc7cb7ada0d820fb

修改authkeys的权限,必须为600或400否则不能启动
# chmod 600 authkeys

3.配置核心配置文件ha.cf
logfile /var/log/ha-log 启用日志文件
#logfacility    local0
keepalive 800ms      发送心跳信息的间隔
deadtime 4           集群故障之后节点退出集群的时间间隔
warntime 3           警告时间
initdead 90          集群服务启动时的死亡时间间隔
udpport 694          监听端口
mcast eth0 225.0.19.1 694 1 0 启用多播(确保网卡支持多波)
node    node1.magedu.com
node    node2.magedu.com  添加集群节点只能使用主机名
auto_failback on          启用集群节点故障自动转回
ping 172.16.0.1        启用ping节点
compression     bz2       启用压缩功能
compression_threshold 2   超过指定的值时则压缩传输,单位KB
4.定义集群资源,使用httpd测试

4.1在node1和node2节点中安装httpd
# yum install httpd -y
# ssh node1 'yum install httpd -y'
在node1和node2确保httpd开启不能自启
# chkconfig httpd off
# chkconfig --list httpd
httpd           0:off   1:off   2:off   3:off   4:off   5:off   6:off
# ssh node1 'chkconfig httpd off'
# ssh node1 'chkconfig --list httpd'
httpd           0:off   1:off   2:off   3:off   4:off   5:off   6:off

4.2分别为node1和node2通过测试页
# vim /var/www/html/index.html
 Cluster Node2
# vim /var/www/html/index.html
Cluter Node1

4.3 在node1和node2中启动httpd服务,并测试,然后手动停止服务
#ssh node1 ' service httpd start'; service httpd start

# ssh node1 'curl node2';curl node1
  % Total    % Received % Xferd  Average Speed   Time    Time     Time  Current
                                 Dload  Upload   Total   Spent    Left  Speed
  0     0    0     0    0     0      0      0 --:--:-- --:--:-- --:--:--     0 Cluster Node2
  0    24    0    24    0     0    302      0 --:--:-- --:--:-- --:--:--   400
Cluter Node1

# ssh node1 'service httpd stop';service httpd stop;

4.4 # vim haresources 定义httpd资源
node1.magedu.com 172.16.0.19/16/eth1 httpd
5.将haresources,ha.cf,authkeys,原封不动的复制到node1中
# scp -p authkeys ha.cf haresources node1:/etc/ha.d/

# ssh node1 'ls -l /etc/ha.d/'
total 48
-rw-------. 1 root root   657 Apr 20 22:00 authkeys
-rw-r--r--. 1 root root 10591 Apr 20 22:00 ha.cf
-rwxr-xr-x. 1 root root   745 Sep 10  2013 harc
-rw-r--r--. 1 root root  5963 Apr 20 22:00 haresources
drwxr-xr-x. 2 root root  4096 Apr 20 20:48 rc.d
-rw-r--r--. 1 root root   692 Sep 10  2013 README.config
drwxr-xr-x. 2 root root  4096 Apr 20 20:48 resource.d
-rw-r--r--. 1 root root  7862 Sep 10  2013 shellfuncs
6.启动node1和node2的集群服务
# ssh node1 'service heartbeat start';service heartbeat start

# ss -untl | grep 80
tcp    LISTEN     0      128                   :::80                   :::*
7.验证集群服务:
关闭node1中的web服务,web服务正常启动,且vip自动转到inode1
8.基于heartbeat-gui配置Mariadb高可用集群服务
所有heartbeat的配置和上面的相同
1.安装heartbeat-gui
rpm -ivh heartbeat-gui-2.1.4-12.el6.i686.rpm

2.在node1和node2的ha.cf添加如下一行
# vim /etc/ha.d/ha/cf
crm on

3.在node1和node2节点中安装Mariadb(具体安装和配置可以参考以前的博客)
4.在node1和node2确保httpd开启不能自启
# chkconfig mysqld off
# chkconfig --list mysqld
mysqld           0:off   1:off   2:off   3:off   4:off   5:off   6:off
# ssh node2 'chkconfig mysqld off'
# ssh node2 'chkconfig --list mysqld'
mysqld           0:off   1:off   2:off   3:off   4:off   5:off   6:off

4.关闭node1和node2中的heartbeat,保证mysqld服务关闭
# ssh node2 'service heartbeat stop';service heartbeat stop

# ssh node2 'service mysqld status';service mysqld status
MySQL is not running[FAILED]
MySQL is not running                                       [FAILED]

5.重启node1和node2中的heartbeat服务,确保保证httpd服务关闭
# ssh node2 'service heartbeat start';service heartbeat start
# ssh node2 'service mysqld status';service mysqld status
MySQL is not running[FAILED]
MySQL is not running                                       [FAILED]

6.验证是否启用heartbeat-gui
# ss -untl | grep 5560
tcp    LISTEN     0      10                     *:5560                  *:*

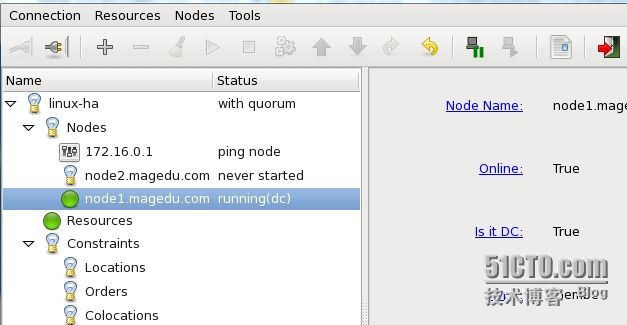
7.启用heartbeat-gui配置
# hb_gui &
9. 配置Mariadb高可用
10.添加资源
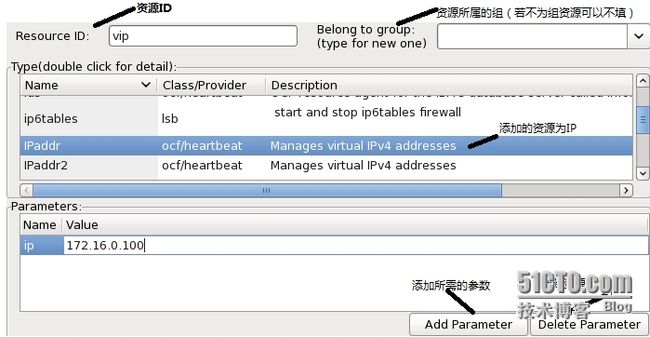
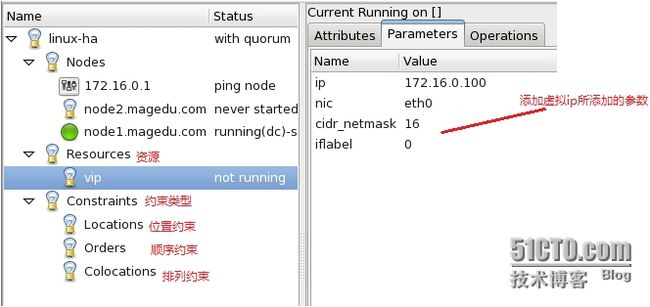
添加虚拟ip首先在Resources选项中选择添加本地资源
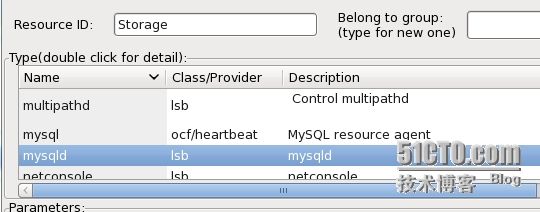
添加mysqld,直接点击add就能够添加Mariadb
定义资源约束
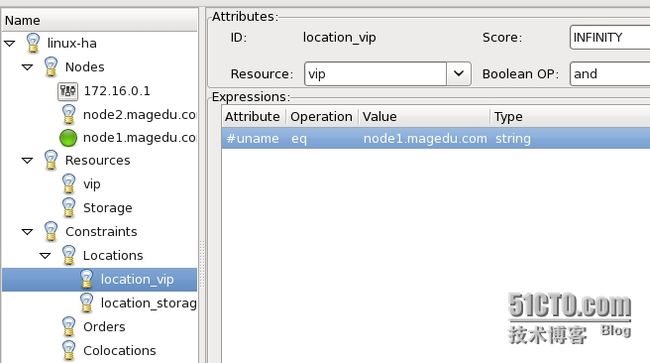
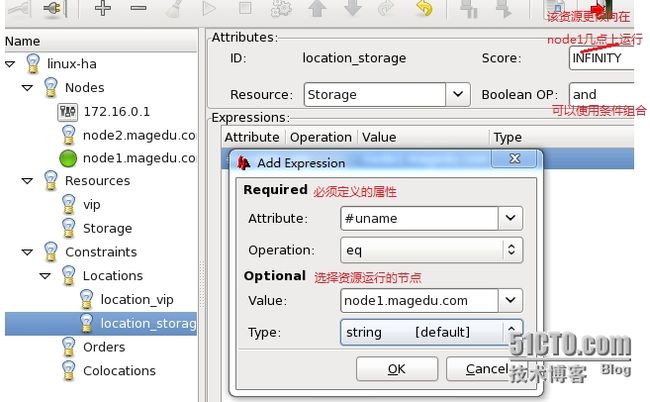
添加位置约束使vip和Mariadb更倾向node1节点
定义顺序约束,指定资源启动和关闭的顺序
定义Mariadb和vip必须运行于同一个节点
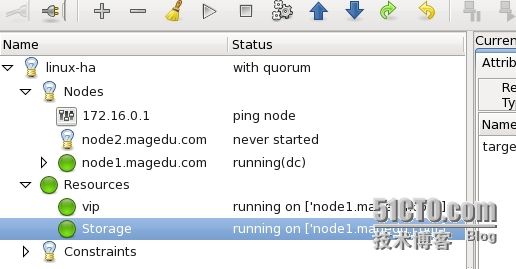
11.启动Mariadb高可用服务
12.验证配置的Mariadb高可用服务,使node1离线并且能够实现故障转移
总结:
heartbeat v1和v2必须在每一个节点都必须在每一节点上都进行相同的配置,配
置高可用主要是实现服务的高可用,一般用几个9来衡量。配置高可用集群必须修改每
个节点的名称,使其能够解析,并且每个集群节点的时间必须保持同步。当出现如下错
误时:使用hostname命令修改为响应的主机即可。
service heartbeat start
Starting High-Availability services:
Heartbeat failure [rc=6]. Failed.
heartbeat: udpport setting must precede media statementsheartbeat[12088]: 2014/04/23_23:04:40 info: Version 2 support: on
heartbeat[12088]: 2014/04/23_23:04:40 WARN: File /etc/ha.d/haresources exists.
heartbeat[12088]: 2014/04/23_23:04:40 WARN: This file is not used because crm is enabled
heartbeat: baudrate setting must precede media statementsheartbeat[12088]: 2014/04/23_23:04:40 ERROR: Current node [node1.magedu.com ] not in configuration!
heartbeat[12088]: 2014/04/23_23:04:40 info: By default, cluster nodes are named by `uname -n` and must be declared with a 'node' directive in the ha.cf file.
heartbeat[12088]: 2014/04/23_23:04:40 info: See also: http://linux-ha.org/ha.cf/NodeDirective
heartbeat[12088]: 2014/04/23_23:04:40 WARN: Logging daemon is disabled --enabling logging daemon is recommended
heartbeat[12088]: 2014/04/23_23:04:40 ERROR: Configuration error, heartbeat not started.


