前言
这是一篇对常见的CSS布局进行汇总整理。还有flex布局待我补充。
一、单列布局
1、width和max-width的区别
注意点:设置width,当屏幕宽度缩放缩小到比设置值还小时,就会产生滚动条。而如果是设置max-width的话,当屏幕宽度缩放缩小到比设置值还小时,元素的大小就会缩小到当时实际的大小(100%),而不会产生滚动条。
2、单列布局实现:
思路:使用一个外部div包裹住头部、内容、尾部,然后头部、内容、尾部设置高度,对外部div设置宽度和margin为auto,实现单列布局的居中。
  JS Bin


/*样式设置*/
.wrapper{
  border:1px solid black;
  max-width:500px;
  /*或者设置为width:500px;*/
  margin:20px auto;
}
.header{
  height:100px;
  background-color:red;
}
.container{
  height:300px;
  background-color:yellow;
}
.footer{
  height:100px;
  background-color:blue;
}
3、改进
在此基础上,做改善,去除外部标签,将wrapper的样式设置,直接放到头部、内容和尾部的样式上即可。这样可以减少标签,也可以对每个局部做控制。
  JS Bin


/*样式设置*/
.mid{
  max-width:500px;
  margin:0px auto;
}
.header{
  height:100px;
  background-color:red;
}
.container{
  height:300px;
  background-color:yellow;
}
.footer{
  height:100px;
  background-color:blue;
}
4、单栏布局——通栏的实现
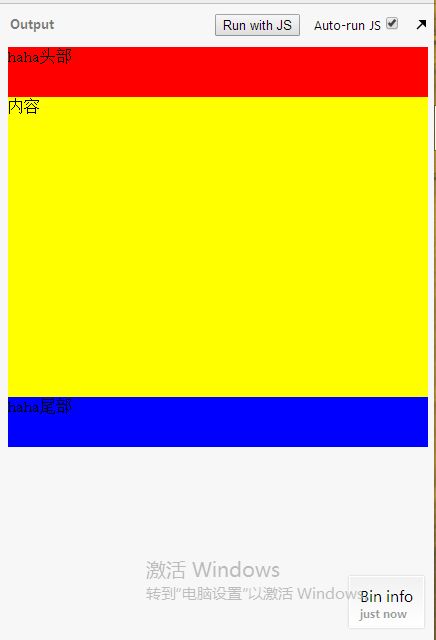
因为上下部分是实现通栏,背景色充满整个屏幕,而内容部分还要保证居中。所以将上下部分外面包裹一层,对外面一层只设置颜色,而对上下部分的div则实际设置宽度和居中的设置,来实现目的。
JS Bin
haha头部
内容
/*样式设置*/
.mid{
max-width:500px;
margin:0px auto;
}
.header{
height:50px;
background-color:red;
}
.container{
height:300px;
background-color:yellow;
}
.footer{
height:50px;
background-color:blue;
}
效果:
注意:这里对居中的设置,.mid的宽度是设置了一个最大宽度的。
这样可以避免如下情况:当页面缩小到一定程度时,出现滚动条,上下部分出现白色空隙:
如果不在例子中.mid中设置最大宽度,就需要分别在上下两部分设置最小宽度,这样页面宽度缩小到比最小宽度最小时,也还是最小宽度的大小,而不会产生空白缝隙,虽然此时就有滚动条了。.mid的宽度是设置了一个最大宽度的设置,就不会出现滚动条。
.mid{
  width:500px;
  margin:0px auto;
}
.header{
  height:50px;
  background-color:red;
  min-width:500px;
}
.container{
  height:300px;
  background-color:yellow;
}
.footer{
  height:50px;
  background-color:blue;
  min-width:500px;
}
二、内部元素水平居中
这个很明了了,不推荐使用浮动然后margin:auto的方式。直接使用行内元素居中的text-align:center设置。父元素设置文本居中,子元素设置为inline-block:
.parent{text-align:center;}
.child{display: inline-block;}
对于IE67,不支持inline-block,就使用hack的写法:
.child{*display:inline;*zoom:1}
*号是只有IE67才能识别,zoom:1让其产生BFC,触发了块级的特性。
实际例子:实现如下常见效果:
JS Bin
/*css设置*/
.container{
text-align:center;
background-color:#ccc;
font-size:0;
padding:5px;
}
.container a{
display:inline-block;
text-decoration:none;
border:1px solid #eee;
border-right:0;
font-size:14px;
padding:5px 6px;
color:#fff;
}
.container a:last-child{
border-right:1px solid #eee;
border-radius:0px 5px 5px 0px;
}
.container a:first-child{
border-radius:5px 0px 0px 5px;
}
三、双列布局
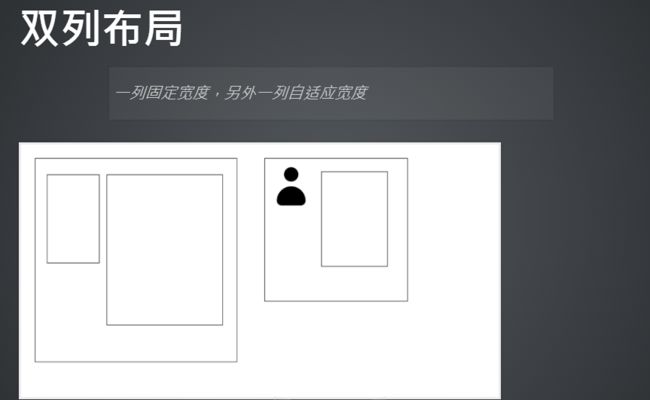
对这种一边固定宽度,另一边宽度最大化的布局的实现,就需要借助浮动和margin来设置。
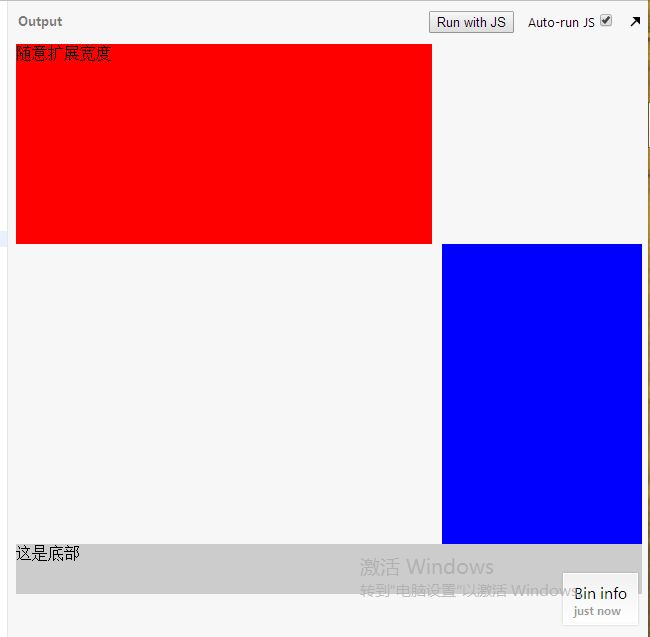
固定宽度的那一列,设置为浮动,向左或向右浮动。然后父元素清除浮动,这样footer部分才能正常文档流位置。自适应宽度的那一列,则设置margin-left或margin-right,留出缝隙出来。
具体代码:
JS Bin
随意扩展宽度
/*样式设置*/
.container:after{
content:" ";
display:block;
clear:both;
}
.left{
width:200px;
height:400px;
background-color:blue;
float:left;
}
.right{
height:400px;
background-color:red;
margin-left:210px;
}
.footer{
height:50px;
background-color:#ccc;
}
如果要实现侧边栏在右,则只需要改下浮动的方向以及margin-right即可。
注意,这里浮动的设置需要关注浏览器的渲染顺序,所以div的顺序还是不变。
随意扩展宽度
而非
随意扩展宽度
如果是这样,按照浏览器渲染顺序,则会变成:
对于浏览器的渲染顺序,在三栏布局中就更为明显:
四、三栏布局
注意html的书写顺序:
随意扩展宽度
而不是
随意扩展宽度
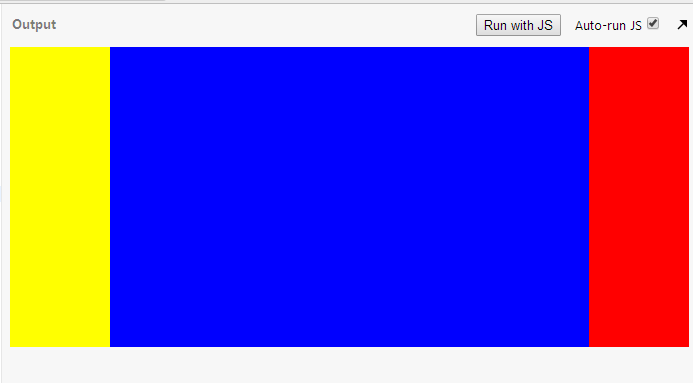
因为对于第一种写法,左右两栏都是浮动,中间content部分会当它们不存在,直接同行,而设置左右margin之后,就能留出空隙
JS Bin
随意扩展宽度
/*样式设置*/
.container:after{
content:" ";
display:block;
clear:both;
}
.aside{
width:100px;
height:300px;
background-color:blue;
float:left;
}
.aside2{
width:100px;
height:300px;
background-color:blue;
float:right;
}
.content{
height:200px;
background-color:red;
margin-right:110px;
margin-left:110px;
}
.footer{
height:50px;
background-color:#ccc;
}
效果:
五、圣杯布局
圣杯布局其实也是三栏布局,但不同之处就在于,它是将主体dom部分写在前面,仍能实现三栏布局:
随意扩展宽度
具体实现:
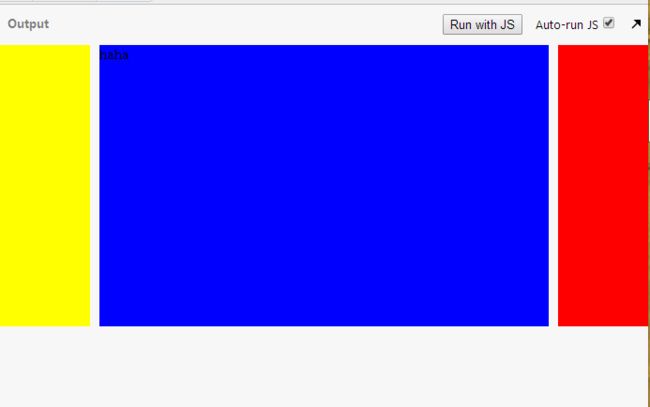
将三个div都左浮动,然后将main这个div的宽度等同于100%,等于父元素宽度。然后对左右div设置margin-left的负值,让它们三个同处一行。
然后就考虑怎么留左右缝隙的事了。因为main的宽度是父元素宽度的100%,所有如果还是使用margin-left和margin-right的方式来留左右空白是无效的,只会加长宽度。
所以设置三个div的父元素的左右padding,让整行留空白出来,然后对左右两个div设置相对定位,进行移动即可
  JS Bin


    haha


/*样式设置*/
.ct:after{
  content:"";
  display:block;
  clear:both;
  width:500px;
}
.ct{
  padding-left:100px;
  padding-right:100px;
}
.main{
  height:300px;
  background:blue;
  float:left;
  width:100%;
}
.left{
  width:100px;
  height:300px;
  background:yellow;
  float:left;
  margin-left:-100%;
  position:relative;
  left:-110px;
}
.right{
  width:100px;
  height:300px;
  background:red;
  float:left;
  margin-left:-100px;
  position:relative;
  left:110px;
}
最终效果:
六、双飞翼布局
圣杯布局的实现,然后页面缩小到一定程度,就会错乱:
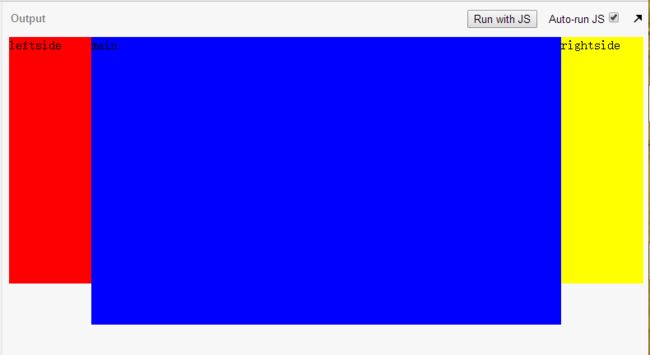
这是就需要进一步优化,就是双飞翼布局啦。
JS Bin
main
leftside
rightside
实现效果
七、浮动和负margin的区别以及应用
负margin是会改变到元素的实际所占坑位的大小的,所以当多个元素并行浮动放不下时,可以设置最后一个元素的负margin值,放到同一行。
负margin和position:relative的区别,CSS系列篇:零碎、细节点整理(二 )的这篇文章中已经梳理了。
1、应用:水平等距排列
子元素li设置浮动,父元素ul设置负margin
JS Bin
- 1
- 2
- 3
- 4
- 5
- 6
- 7
- 8
- 9
/*样式设置*/
*{
margin:0;
padding:0;
list-style:none;
}
.ct{
border:1px solid black;
width:640px;
margin:0 auto;
overflow:hidden; /*形成BFC,清除浮动*/
}
li{
width:200px;
height:200px;
background-color:red;
float:left;
margin:20px 0px 20px 20px;
}
ul{
margin-left:-20px;
}
效果:


