Oracle的网格控制器可以用来集中管理oracle数据库和中间件等,用处很多,还可以在网格控制器上简单化rac和dg的管理,唐sir有句名言:“没有网格控制器的rac,基本不能用!” oracle的网格控制器 gridcontrol,简称gc,主要由OMR,OMS和OMA三大部件组成。OMR主要指存放gc数据的资料档案库,OMS主要指应用服务器,在10g中oracle使用的是oc4j,11g则使用j2ee,因而安装11g的网格控制器,需要先安装jdk和weblogic;OMA主要指被管理对象上的agent程序,OMA将收集来的数据返回给OMS,OMS将数据存储在OMR中,用户通过访问OMS来进行管理和控制!
gc下载地址:
http://www.oracle.com/technetwork/cn/oem/grid-control/downloads/index.html
p8430622_10203_GENERIC.zip补丁下载地址:
http://www.itpub.net/forum.php?mod=viewthread&tid=1481854&page=1#pid18320282
一:环境介绍:
gc版本:10.2.0.3 64位
os版本:centos4.8 64位
二:准备工作,这部分的内容参考oracle 10g数据库快速安装手册
1.安装以下的rpm包
binutils-2.15.92.0.2-10.EL4
compat-db-4.1.25-9
control-center-2.8.0-12
gcc-3.4.3-9.EL4
gcc-c++-3.4.3-9.EL4
glibc-2.3.4-2
glibc-common-2.3.4-2
gnome-libs-1.4.1.2.90-44.1
libstdc++-3.4.3-9.EL4
libstdc++-devel-3.4.3-9.EL4
make-3.80-5
pdksh-5.2.14-30
sysstat-5.0.5-1
xscreensaver-4.18-5.rhel4.2
2.修改内核参数,/etc/sysctl.conf文件,sysctl -p使其生效
kernel.shmall = 2097152
kernel.shmmax = 2147483648
kernel.shmmni = 4096
kernel.sem = 250 32000 100 128
fs.file-max = 65536
net.ipv4.ip_local_port_range = 1024 65000
net.core.rmem_default = 262144
net.core.rmem_max = 262144
net.core.wmem_default = 262144
net.core.wmem_max = 262144
3.修改/etc/security/limct.conf文件
oracle soft nproc 2047
oracle hard nproc 16384
oracle soft nofile 1024
oracle hard nofile 65536
4.修改/etc/pam.d/login文件
session required pam_limits.so
5.修改/etc/profile文件
if [ $USER = "oracle" ]; then
if [ $SHELL = "/bin/ksh" ]; then
ulimit -p 16384
ulimit -n 65536
else
ulimit -u 16384 -n 65536
fi
fi
6.创建oinstall,dba组和oracle用户,设置用户环境变量
[oracle@grid ~]$ vi .bash_profile
export ORACLE_BASE=/u01/app/oracle
export ORACLE_HOME=$ORACLE_BASE/product/db10g
export AGENT_HOME=$ORACLE_BASE/product/agent10g
export OMS_HOME=$ORACLE_BASE/product/oms10g
export ORACLE_HOSTNAME=grid.yang.com
export ORACLE_SID=grid
export ORACLE_TERM=xterm
export PATH=/usr/sbin:$PATH
export PATH=$ORACLE_HOME/bin:$PATH
export LD_LIBRARY_PATH=$ORACLE_HOME/lib:/lib:/usr/lib
export CLASSPATH=$ORACLE_HOME/JRE:$ORACLE_HOME/jlib:$ORACLE_HOME/rdbms/jlib
[oracle@grid ~]$ mkdir -p $ORACLE_BASE
[oracle@grid ~]$ mkdir -p $ORACLE_HOME
[oracle@grid ~]$ mkdir -p $OMS_HOME
[oracle@grid ~]$ mkdir -p $AGENT_HOME
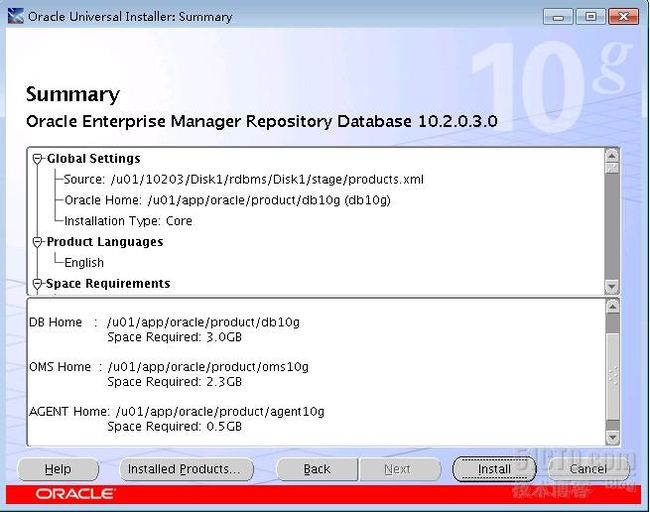
三:开始安装,这里为了简单选择使用新库安装
[oracle@grid ~]$ cd /u01/10203/Disk1/
[oracle@grid Disk1]$ ls
dcommon doc index.htm install oms rdbms response runInstaller stage
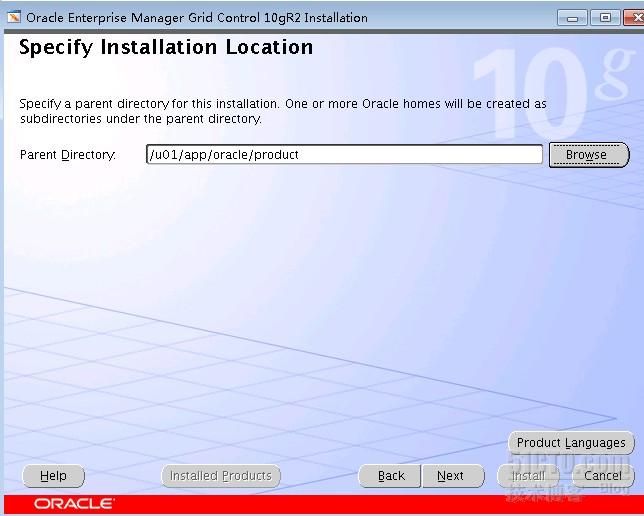
[oracle@grid Disk1]$ ./runInstaller
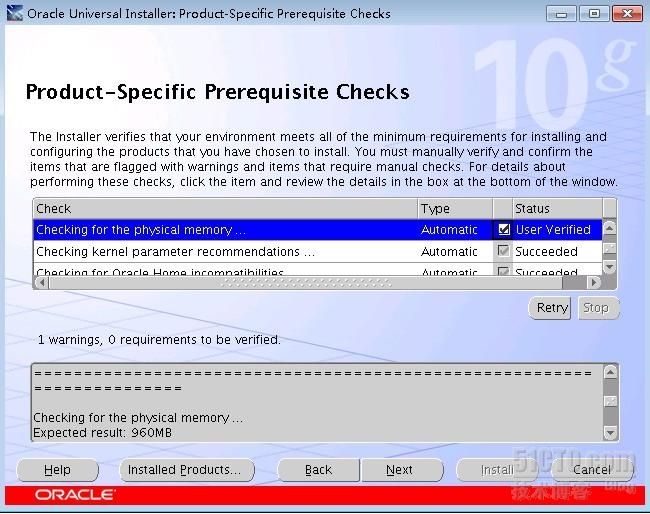
提示内存不够,直接无视!
执行脚本:
[root@grid ~]# /u01/app/oracle/oraInventory/orainstRoot.sh
[root@grid ~]# /u01/app/oracle/product/db10g/allroot.sh
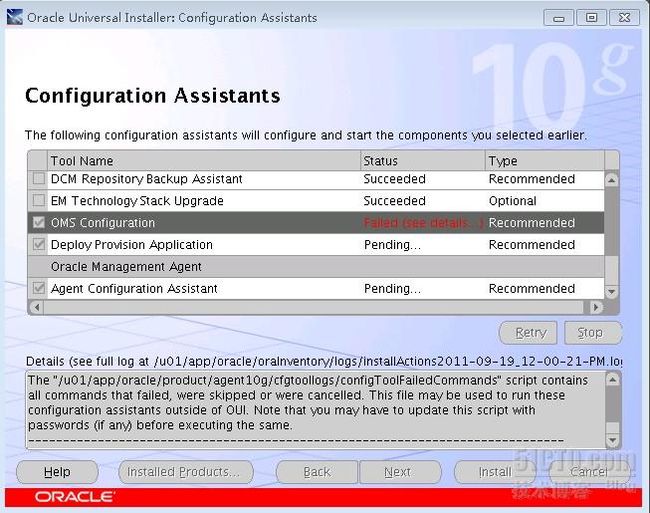
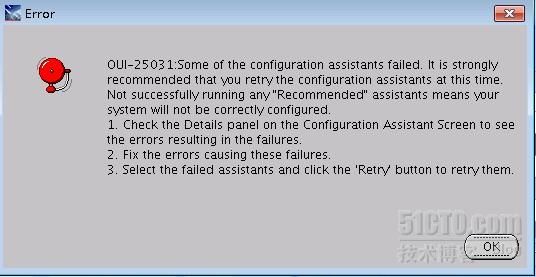
执行完脚本后点击“OK”按钮继续安装,接下来会进行建库操作,在配置OMS的时候会出现下图中的错误OUI-25031!
错误日志信息如下:
- [root@grid ~]# tail -f /u01/app/oracle/oraInventory/logs/installActions2011-09-19_12-00-21-PM.log
- INFO: The backed up file name is /u01/app/oracle/product/agent10g/cfgtoollogs/configToolFailedCommands.bak
- INFO: Created a new file /u01/app/oracle/product/oms10g/cfgtoollogs/configToolFailedCommands
- INFO: Since the option is to overwrite the existing /u01/app/oracle/product/oms10g/cfgtoollogs/configToolFailedCommands file, backing it up
- INFO: The backed up file name is /u01/app/oracle/product/oms10g/cfgtoollogs/configToolFailedCommands.bak
- SEVERE: OUI-25031:Some of the configuration assistants failed. It is strongly recommended that you retry the configuration assistants at this time.
- Not successfully running any "Recommended" assistants means your system will not be correctly configured.
- 1. Check the Details panel on the Configuration Assistant Screen to see the errors resulting in the failures.
- 2. Fix the errors causing these failures.
- 3. Select the failed assistants and click the 'Retry' button to retry them.
- INFO: User Selected: Yes/OK
这个时候需要进行打补丁操作,否则gc安装将会失败!
- [oracle@grid u01]$ unzip Linux\ x64.zip
- Archive: Linux x64.zip
- creating: 8430622/
- creating: 8430622/files/
- creating: 8430622/files/sysman/
- creating: 8430622/files/sysman/jlib/
- creating: 8430622/files/sysman/jlib/emagentSDK.jar/
- creating: 8430622/files/sysman/jlib/emagentSDK.jar/oracle/
- creating: 8430622/files/sysman/jlib/emagentSDK.jar/oracle/sysman/
- creating: 8430622/files/sysman/jlib/emagentSDK.jar/oracle/sysman/eml/
- creating: 8430622/files/sysman/jlib/emagentSDK.jar/oracle/sysman/eml/sec/
- creating: 8430622/files/sysman/jlib/emagentSDK.jar/oracle/sysman/eml/sec/util/
- inflating: 8430622/files/sysman/jlib/emagentSDK.jar/oracle/sysman/eml/sec/util/RootCert.class
- inflating: 8430622/README.txt
- creating: 8430622/etc/
- creating: 8430622/etc/xml/
- inflating: 8430622/etc/xml/ShiphomeDirectoryStructure.xml
- inflating: 8430622/etc/xml/GenericActions.xml
- creating: 8430622/etc/config/
- inflating: 8430622/etc/config/inventory
- inflating: 8430622/etc/config/actions
- [oracle@grid u01]$ cd $OMS_HOME
- [oracle@grid oms10g]$ cd bin/
- [oracle@grid bin]$ ./emctl stop oms
- Oracle Enterprise Manager 10g Release 3 Grid Control
- Copyright (c) 1996, 2007 Oracle Corporation. All rights reserved.
- Oracle Management Server is Down
- [oracle@grid bin]$ cd /u01/8430622/
- [oracle@grid 8430622]$ export ORACLE_HOME=/u01/app/oracle/product/oms10g/
- [oracle@grid 8430622]$ /u01/app/oracle/product/oms10g/OPatch/opatch apply
- Invoking OPatch 10.2.0.3.0
- Oracle interim Patch Installer version 10.2.0.3.0
- Copyright (c) 2005, Oracle Corporation. All rights reserved..
- Oracle Home : /u01/app/oracle/product/oms10g
- Central Inventory : /u01/app/oracle/oraInventory
- from : /etc/oraInst.loc
- OPatch version : 10.2.0.3.0
- OUI version : 10.2.0.3.0
- OUI location : /u01/app/oracle/product/oms10g//oui
- Log file location : /u01/app/oracle/product/oms10g/cfgtoollogs/opatch/opatch2011-09-19_12-46-38PM.log
- ApplySession applying interim patch '8430622' to OH '/u01/app/oracle/product/oms10g'
- OPatch detected non-cluster Oracle Home from the inventory and will patch the local system only.
- Backing up files and inventory (not for auto-rollback) for the Oracle Home
- Backing up files affected by the patch '8430622' for restore. This might take a while...
- Backing up files affected by the patch '8430622' for rollback. This might take a while...
- Patching component oracle.sysman.top.oms, 10.2.0.3.0...
- Updating jar file "/u01/app/oracle/product/oms10g/sysman/jlib/emagentSDK.jar" with "/sysman/jlib/emagentSDK.jar/oracle/sysman/eml/sec/util/RootCert.class"
- ApplySession adding interim patch '8430622' to inventory
- Verifying the update...
- Inventory check OK: Patch ID 8430622 is registered in Oracle Home inventory with proper meta-data.
- Files check OK: Files from Patch ID 8430622 are present in Oracle Home.
- OPatch succeeded.
- [oracle@grid 8430622]$ cd /u01/app/oracle/product/oms10g/opmn/bin/
- [oracle@grid bin]$ ./opmnctl stopall
- opmnctl: stopping opmn and all managed processes...
- [oracle@grid 8430622]$ cd $ORACLE_HOME/bin
- [oracle@grid bin]$ pwd
- /u01/app/oracle/product/oms10g/bin
- [oracle@grid bin]$ ./emctl secure oms -reset
- Oracle Enterprise Manager 10g Release 3 Grid Control
- Copyright (c) 1996, 2007 Oracle Corporation. All rights reserved.
- Enter Enterprise Manager Root Password :
- Enter Agent Registration password :
- [oracle@grid bin]$ ./emctl secure oms -reset
- Oracle Enterprise Manager 10g Release 3 Grid Control
- Copyright (c) 1996, 2007 Oracle Corporation. All rights reserved.
- Enter Enterprise Manager Root Password :
- Enter Agent Registration password :
- OPMN processes already stopped... Done.
- Securing central oms... Started.
- Checking Repository... Done.
- Checking Em Key... Done.
- Checking Repository for an existing Enterprise Manager Root Key...
- WARNING! An Enterprise Manager Root Key already exists in
- the Repository. This operation will replace your Enterprise
- Manager Root Key.
- All existing Agents that use HTTPS will need to be
- reconfigured if you proceed. Do you wish to continue and
- overwrite your Root Key
- (Y/N) ?
- Y
- Are you sure ? Reset of the Enterprise Manager Root Key
- will mean that you will need to reconfigure each Agent
- that is associated with this OMS before they will be
- able to upload any data to it. Monitoring of Targets
- associated with these Agents will be unavailable until
- after they are reconfigured.
- (Y/N) ?
- Y
- Generating Enterprise Manager Root Key (this takes a minute)... Done.
- Fetching Root Certificate from the Repository... Done.
- Generating Registration Password Verifier in the Repository... Done.
- Generating Oracle Wallet Password for Enterprise Manager OMS... Done.
- Generating Oracle Wallet for Enterprise Manager OMS... Done.
- Generating Oracle Wallet for iAS HTTP Server... Done.
- Updating HTTPS port in emoms.properties file... Done.
- Generating HTTPS Virtual Host for Enterprise Manager OMS... Done.
- Securing central oms... Ended.
- [oracle@grid u01]$ cd $OMS_HOME
- [oracle@grid oms10g]$ cd bin/
- [oracle@grid bin]$./emctl start oms
- Oracle Enterprise Manager 10g Release 3 Grid Control
- Copyright (c) 1996, 2007 Oracle Corporation. All rights reserved.
- opmnctl: opmn is already running
- Starting HTTP Server ...
- Oracle Management Server Already Started.
打完补丁后,点击retry按钮,可以看到OMS的配置已经完成
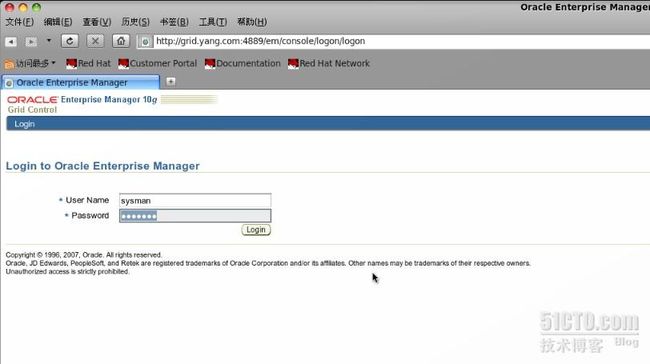
10g的gc https方式访问的端口是1159,http方式访问端口为4889,至此安装gc工作基本完成
四:访问gc,尽量使用域名来访问!
参考文档:http://kamranagayev.wordpress.com/2011/05/17/solving-the-error-oui-25031-during-oracle-10g-r2-grid-control-10-2-0-3-installation/

