前言
在自学了一段时间的自定义View开发的知识后,自己觉得是时候要写写代码好好实践下了。我打开手机上每个App看了看,应该挑选怎样的一个控件去模仿呢?最后发现广东移动App上有个流量条挺适合自己下手的,然后就开始了自己的第一次自定义View之旅。
详细注释和代码请点击这里->项目的Github地址
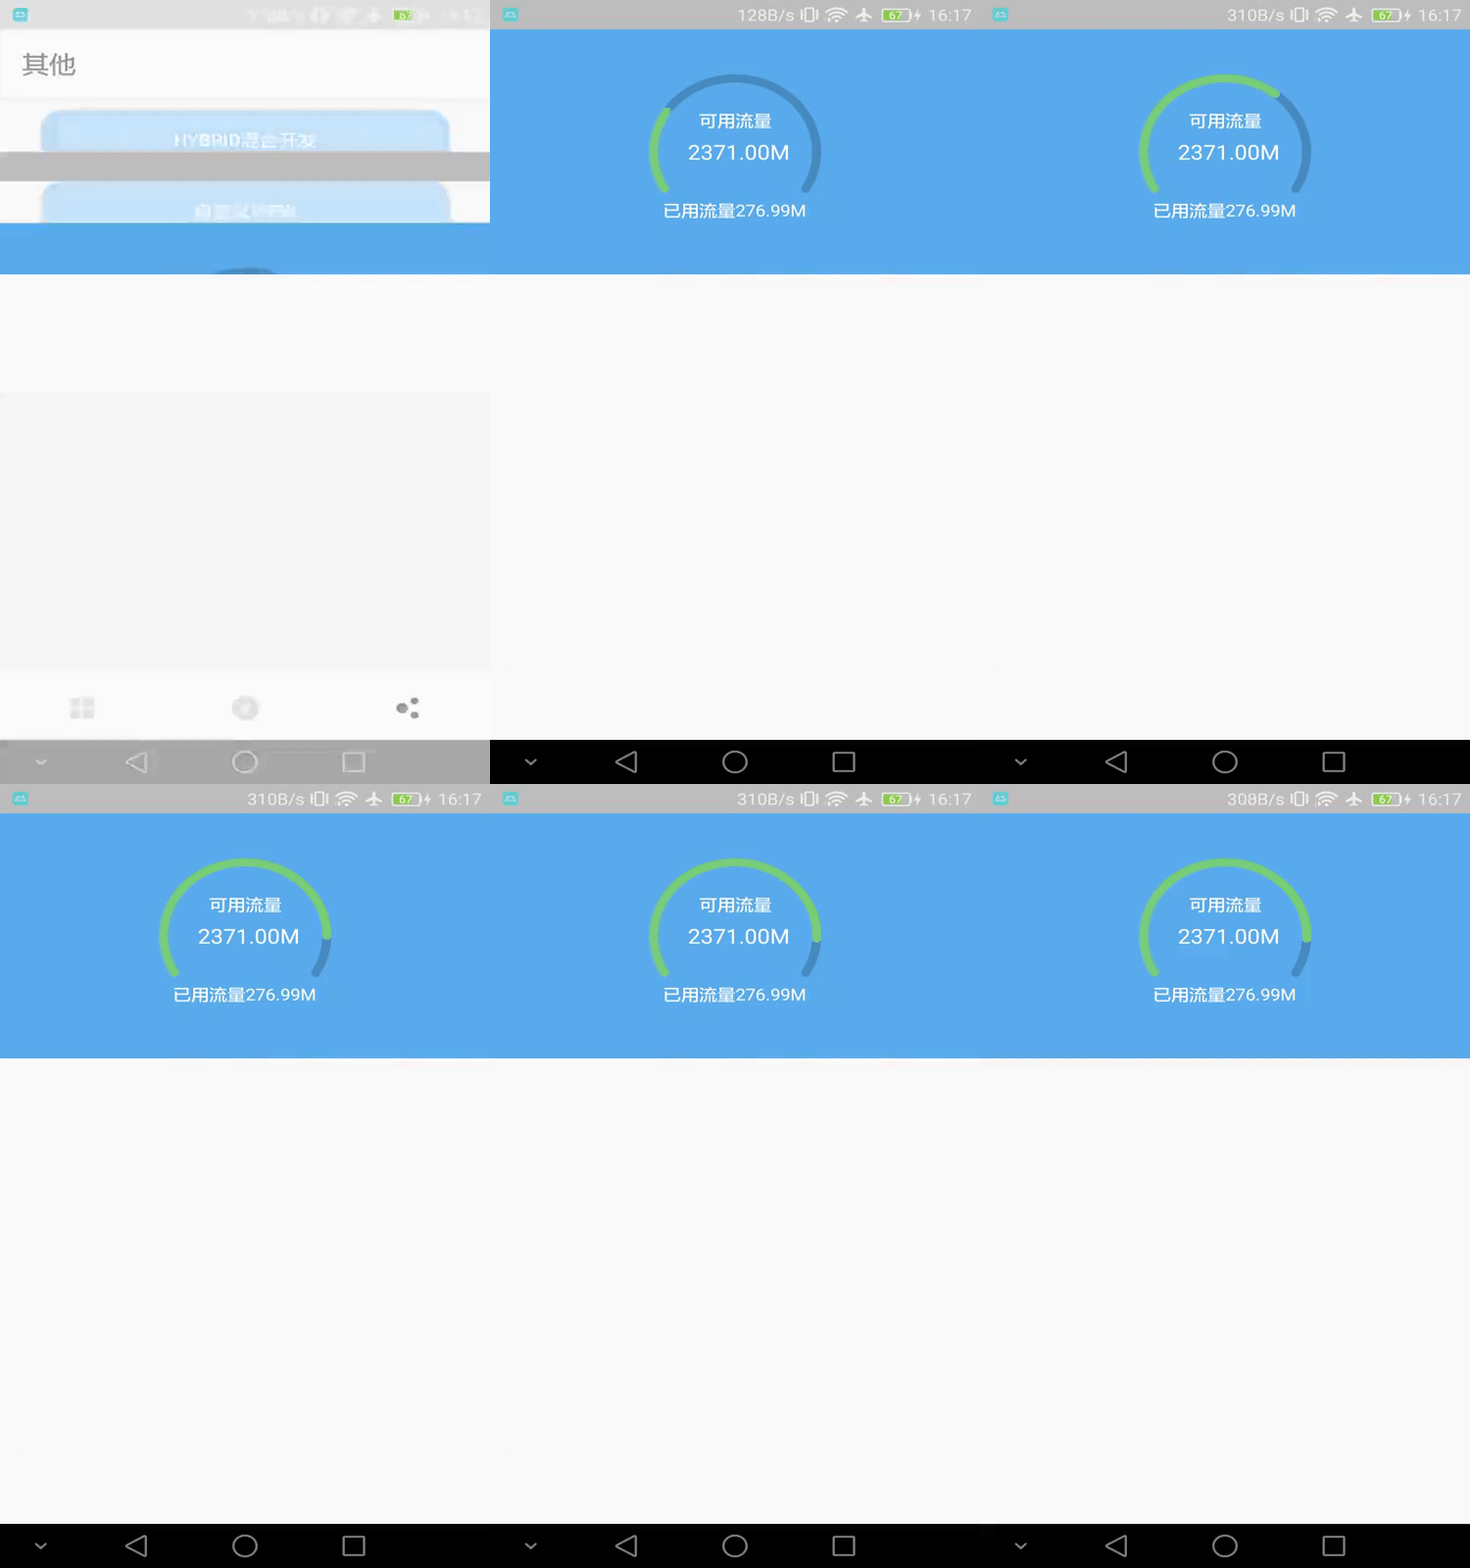
先看看效果图吧:
分析
需要绘制哪些内容?
绘制2个弧形,起始弧度一样,半径相同,一个位置在下面的半透明弧形,一个位置在上面的绿色弧形。
绘制2种Size的文本,绘制可用流量具体的数值时用比其他绘制文本的画笔Size要稍大点
需要那些数值数据?
- 绘制弧形时的半径和弧形的外接矩形,包裹文本的矩形
- 弧形最终滑过的弧度
- 可用流量具体数值和已用流量具体数值
最后就是要实现绿色弧形弧度滑动的动画效果
部分代码
- 初始化画笔
        arcPaint1 = new Paint();
        arcPaint2 = new Paint();
        initArcPaint(arcPaint1);
        initArcPaint(arcPaint2);
        arcPaint1.setColor(Color.parseColor("#7CCD7C"));
        arcPaint2.setColor(Color.parseColor("#33000000"));

        textPaint1 = new Paint();
        textPaint2 = new Paint();
        initTextPaint(textPaint1);
        initTextPaint(textPaint2);
        textPaint1.setTextSize(40f);
        textPaint2.setTextSize(50f);
- 测量
    @Override
    protected void onMeasure(int widthMeasureSpec, int heightMeasureSpec) {
        super.onMeasure(widthMeasureSpec, heightMeasureSpec);
        int widthSpecMode = MeasureSpec.getMode(widthMeasureSpec);
        int widthSpecSize = MeasureSpec.getSize(widthMeasureSpec);

        int heightSpecMode = MeasureSpec.getMode(heightMeasureSpec);
        int heightSpecSize = MeasureSpec.getSize(heightMeasureSpec);

        int defaultSize = 600;

        if (widthSpecMode == MeasureSpec.AT_MOST && heightSpecMode == MeasureSpec.AT_MOST) {
            setMeasuredDimension(defaultSize,defaultSize);
        } else if (widthSpecMode == MeasureSpec.AT_MOST) {
            setMeasuredDimension(defaultSize,heightSpecSize);
        } else if (heightSpecMode == MeasureSpec.AT_MOST) {
            setMeasuredDimension(widthSpecSize,defaultSize);
        } else {
            setMeasuredDimension(widthSpecSize,heightSpecSize);
        }
    }
- 获取需要使用参数的数值
    @Override
    protected void onSizeChanged(int w, int h, int oldw, int oldh) {
        super.onSizeChanged(w, h, oldw, oldh);
        rectF = new RectF();
        textRect = new Rect();
        //获取弧形的半径大小
        radius = (int) (Math.min(getWidth(), getHeight()) / 2 - arcPaint1.getStrokeWidth()) -100;
        rectF.left = getWidth() / 2 - radius;
        rectF.top = getHeight() / 2 - radius;
        rectF.right = getWidth() / 2 + radius;
        rectF.bottom = getHeight() / 2 + radius;
    }
- 绘制
  //绘制弧形
        canvas.drawArc(rectF,mStartAngle,mEndAngle,false,arcPaint2);
        canvas.save();
        canvas.drawArc(rectF, mStartAngle, getResult(), false, arcPaint1);
        canvas.restore();

        //获取绘制文字的宽高给textRect
        textPaint1.getTextBounds(totalText,0,totalText.length(),textRect);
        //绘制文字
        canvas.drawText(totalText, rectF.centerX() - textRect.width() / 2, rectF.centerY() + textRect.height() - 100, textPaint1);
        canvas.drawText(totalData, rectF.centerX() - textRect.width() / 2 - 25, rectF.centerY() + textRect.height() / 2, textPaint2);
        canvas.drawText(usedText, rectF.centerX() - textRect.width() / 2 - 80, rectF.centerY() + textRect.height() + 120, textPaint1);
        canvas.drawText(usedData, rectF.centerX() - textRect.width() / 2 + 80, rectF.centerY() + textRect.height() + 120, textPaint1);
- 实现动画效果
    public void setResult(float result) {
        ValueAnimator animator = ValueAnimator.ofFloat(0, (result * mEndAngle) / handleData());
        animator.setTarget(this);
        animator.setDuration(3000).start();
        animator.addUpdateListener(new ValueAnimator.AnimatorUpdateListener() {
            @Override
            public void onAnimationUpdate(ValueAnimator animation) {
                startAnim(animation);
            }
        });
    }

    private void startAnim(ValueAnimator animation) {
        this.result = (float) animation.getAnimatedValue();
        invalidate();
    }
- 在Activity中实现
    private ArcBarView arcBar;

    private float result = 0;//剩余流量
    private String totalData = "2371.00";//可用流量
    private String usedData = "276.99";//已用流量

    @Override
    protected void onCreate(Bundle savedInstanceState) {
        super.onCreate(savedInstanceState);
        setContentView(R.layout.activity_main);
        arcBar = (ArcBarView) findViewById(R.id.arc_bar);

        result = Float.parseFloat(totalData) - Float.parseFloat(usedData);

        arcBar.setTotalData(totalData+"M");
        arcBar.setUsedData(usedData+"M");
        arcBar.setResult(result);
    }
详细注释和代码请点击这里->项目的Github地址
总结
第一次模仿其他App的控件来写的自定义View,感觉代码还是有些粗糙,例如一些数据类型没有处理好,或处理起来有些麻烦。
因为这次纯粹是为了练练手,在绘制文本位置的时候有点投机取巧,直接用具体数值去处理,当View指定具体的宽高时,View上绘制的文本就会有问题了,所以在这里指明了一个坑给大家了。如果要用在项目上,千万要留意了喔!
最后,小弟不才,还望多多指教!
