iOS 9.0之前 ,使用NSURLConnection比较多
iOS 7.0之后,苹果官方推出NSURLSession,并在9.0之后推荐使用且丢弃了NSURLConnection
因为NSURLSession在异步的处理上比NSURLConnection好很多
本文作为学习和了解,详解iOS9.0之前的NSURLConnection
NSURLConnection:
- 从 iOS 2.0 开始,已经有10多年的历史了
异步方法在 iOS 5.0 之后才有 ,
在 iOS 5.0 之后,是通过代理的方式,来实现网络开发
本例使用NSURLConnection、NSFileHandle、NSOutputStream
实现了从本地服务器下载一个700M视频的demo
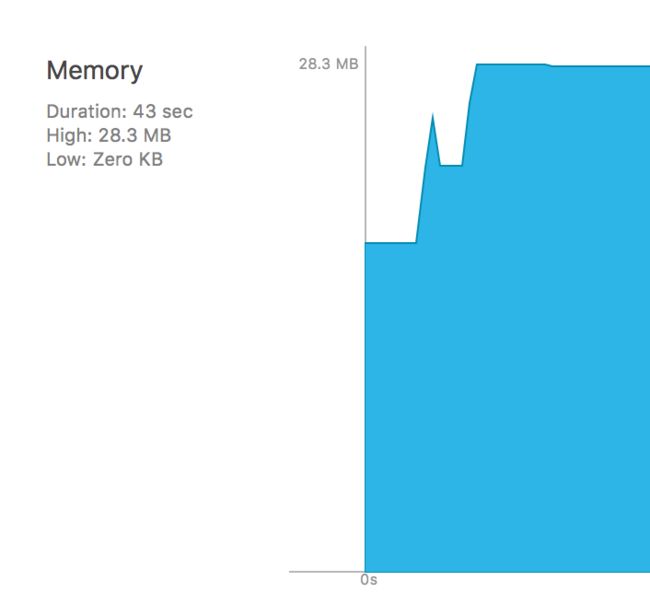
对内存进行了优化,内存一直保持在30M之内
并用GCD+NSRunloop进行异步下载
不影响UI主线程
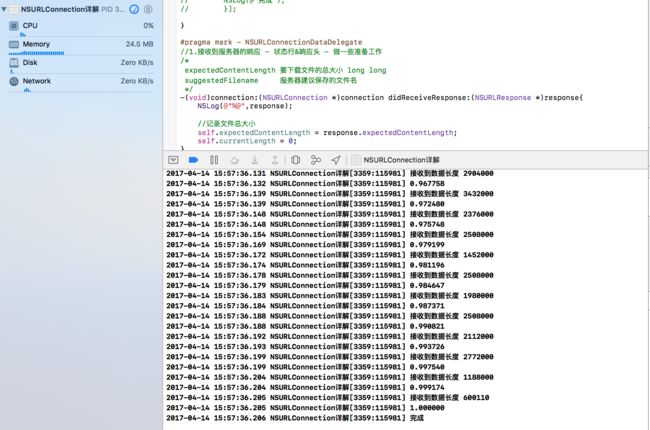
并在后台打印出下载完成进度百分比
Demo详解:
#import "ViewController.h"

// Newsstand Kit‘s 杂志包,是专门做杂志的,主要在国外使用,因为国内的书籍盗版太严重
// ISBN书号,电子书也必须是唯一的
// NSURLConnectionDownloadDelegate 方法主要针对杂志的下载提供接口
// 如果在开发中,使用 NSURLConnectionDownloadDelegate 代理方法下载,能够监听下载进度,但是无法找到下载的文件
@interface ViewController ()

@property (weak, nonatomic) IBOutlet UIProgressView *Progress;
@property(nonatomic,assign)long long expectedContentLength; //要下载文件的总长度
@property(nonatomic,assign)long long currentLength;         //当前下载的长度

//@property(nonatomic,strong) NSMutableData *fileData;        //用来每次接受到数据,拼接数据使用
@property(nonatomic,copy) NSString *tartgetFilePath;        //保存的目标路径

//@property(nonatomic,assign,getter=isFinished)BOOL finished;

@property(nonatomic,assign)CFRunLoopRef downloadRunloop;    //下载线程的运行循环
/*
 保存文件的输出流
 - (void)open;      写入之前,打开流
 - (void)close;     完成之后,关闭流
 */
@property(nonatomic,strong)NSOutputStream *fileStrem;

@end

@implementation ViewController

- (void)viewDidLoad {
    [super viewDidLoad];
    // Do any additional setup after loading the view, typically from a nib.
}

/**
 NSURLConnection - 从 iOS 2.0 开始,已经有10多年的历史了
 异步方法在 iOS 5.0 之后才有 , 在 iOS 5.0 之后,是通过代理的方式,来实现网络开发
 那时是iOS网络开发的黑暗史,网络开发很难

 就因为这个黑暗史,才成就了一些第三方框架: AFN,ASI这些第三方框架

 NS - NextStep 公司的缩写

 - 开发简单的网络请求比较方便,可以采用异步方法
 - 开发发杂的网络请求,例如:大文件下载,仍然需要使用代理来开发,非常繁琐!

 **对NSURLConnection 的一些细节有所了解

 问题:1.没有下载进度,会影响用户体验
      2.有内存峰值,下载的文件有多大,NSData就会占用多大内存

 解决方法:
 - 通过代理的方式解决

 1.进度跟进,解决思路:
    1>在响应方法中获得文件总大小
    2>每次接受到数据,计算获得数据的总长度,和总大小相比,计算出百分比

 2.保存文件的思路
    1>保存完成写入磁盘
            测试结果:和异步方法执行一样,仍然存在内存峰值。
            推测:苹果的异步方法的实现思路,和刚才的delegate实现思路一样
            问题:下载的内存峰值依旧存在
    2>下载一个写一个
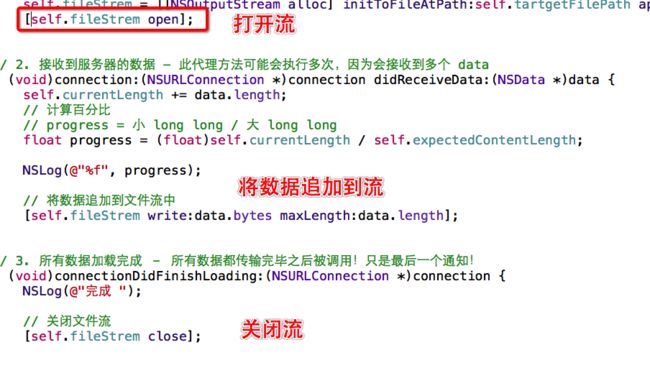
        1)NSFileHandle 彻底解决了内存峰值问题
        2)NSOutputStream 输出流
        - Socket 网络本质上,在客户端和服务器之间,数据的传递,都是以二进制流的方式传递的。
        - 对数据流的操作,一定要有一些网络底层的思想之后,才容易理解
        - 操作方式,比 FindHandle 更简洁
 */


-(void)touchesBegan:(NSSet *)touches withEvent:(UIEvent *)event{

    dispatch_async(dispatch_get_global_queue(0, 0), ^{
        //1.url
        NSString *urlString = @"http://127.0.0.1/1.mp4";
        urlString = [urlString stringByAddingPercentEscapesUsingEncoding:NSUTF8StringEncoding];
        NSURL *url = [NSURL URLWithString:urlString];

        //2.request
        NSURLRequest *request = [NSURLRequest requestWithURL:url];

        //3.connection
        //开始下载时的线程,是用 dispatch_async 创建的
        NSLog(@"开始 %@",[NSThread currentThread]);
        //    For the connection to work correctly, the calling thread’s run loop must be operating in the default run loop mode.
        //为了保证连接的工作正常,调用线程的run loop 必须运行在默认的运行循环模式下
        NSURLConnection *conn =  [NSURLConnection connectionWithRequest:request delegate:self];//使用代理

        //设置代理工作的操作队列
        [conn setDelegateQueue:[[NSOperationQueue alloc]init]];//新的问题 默认还在主线程工作,干扰主线程UI更新

        //4.启动连接
        [conn start];

//        self.finished = NO;

        //5.启动运行循环
//        while (!self.isFinished) {
//            //启动一个死循环,每次监听0.1秒
//            [[NSRunLoop currentRunLoop] runMode:NSDefaultRunLoopMode beforeDate:[NSDate dateWithTimeIntervalSinceNow:0.1]];
//        }

        //CoreFoundation框架(纯C语言,是Foundation的基础)中,提供了对运行循环更底层的操作
        /*
         CFRunLoopStop(rl)    停止当前的runloop
         CFRunLoopGetCurrent()当前线程的runloop
         CFRunLoopRun();       直接运行当前线程的运行循环

         以下代码,是最标准的 runloop 的操作方法
         */
        //1.拿到当前线程的运行循环
        self.downloadRunloop = CFRunLoopGetCurrent();
        //2.启动运行循环
        CFRunLoopRun();

        NSLog(@"到我了吗?");
    });

//直接下载视频
//    [NSURLConnection sendAsynchronousRequest:request queue:[NSOperationQueue mainQueue] completionHandler:^(NSURLResponse * _Nullable response, NSData * _Nullable data, NSError * _Nullable connectionErro){
//        [data writeToFile:@"/Users/Liu/Desktop/123.mp4" atomically:YES];
//
//        NSLog(@"完成");
//        }];

}

#pragma mark - NSURLConnectionDataDelegate
//1.接收到服务器的响应 - 状态行&响应头 - 做一些准备工作
/*
 expectedContentLength 要下载文件的总大小 long long
 suggestedFilename     服务器建议保存的文件名
 */
-(void)connection:(NSURLConnection *)connection didReceiveResponse:(NSURLResponse *)response{
    NSLog(@"%@",response);

    //记录文件总大小
    self.expectedContentLength = response.expectedContentLength;
    self.currentLength = 0;

    //生成目标文件路径
    self.tartgetFilePath = [@"/Users/Liu/Desktop" stringByAppendingPathComponent:response.suggestedFilename];

    //删除文件,removeItemAtPath 如果文件存在直接删除,如果文件不存在,什么也不做
    [[NSFileManager defaultManager]removeItemAtPath:self.tartgetFilePath error:NULL];

    //以追加的方式打开文件流
    self.fileStrem = [[NSOutputStream alloc]initToFileAtPath:self.tartgetFilePath append:YES];
    [self.fileStrem open];
}


//-(NSMutableData *)fileData{
//    if(_fileData == nil){
//        _fileData = [[NSMutableData alloc] init];
//    }
//    return _fileData;
//}

//2.接收到服务器的数据 - 此代理方法可能会执行多次 因为会收到多个data
-(void)connection:(NSURLConnection *)connection didReceiveData:(NSData *)data{
    NSLog(@"接收到数据长度 %tu",data.length);

    self.currentLength +=data.length;
    //计算百分比
    //progress = 小 long long / 大 long long
    float progress = (float)self.currentLength/self.expectedContentLength;

    NSLog(@"%f %@",progress,[NSThread currentThread]);

    //在主线程更新进度条
    dispatch_async(dispatch_get_main_queue(), ^{
        self.Progress.progress = progress;
    });

    //将数据追加到文件流中
    [self.fileStrem write:data.bytes maxLength:data.length];

//拼接数据
//
//    [self.fileData appendData:data];
}

//-(void)writeToFileWithData:(NSData *)data{
//    // 文件操作
//    /*
//     NSFileManager :主要功能:创建目录,检查目录是否存在,遍历目录,删除文件。。。主要针对文件集的操作,类似于Finder
//     NSFileHandle: 文件”句柄“, 如果在开发中,看到 Handle 这个单词,就意味着是对前面的单词“File”进行操作的对象
//                    主要功能:对同一个文件进行二进制的读写操作的对象
//     */
//
//    //注意:如果文件不存在,fp 在实例化的结果是空
//    NSFileHandle *fp = [NSFileHandle fileHandleForWritingAtPath:self.tartgetFilePath];
//
//    //判断文件是否存在 - 如果存在,则追加数据;如果不存在,直接将数据写入磁盘
//    if(fp == nil){
//        [data writeToFile:self.tartgetFilePath atomically:YES];
//    }else{
//        //如果存在,将data“追加”到现有文件
//        //1.将文件指针移动到文件的末尾
//        [fp seekToEndOfFile];
//
//        //2.写入文件
//        [fp writeData:data];
//
//        //3.关闭文件,在C语言的开发中,凡涉及到文件读写,打开和关闭通常是成对实现的
//        [fp closeFile];
//    }
//}

//3.所有数据加载完成 - 所有数据都传输完毕后调用,只是最后一个通知
-(void)connectionDidFinishLoading:(NSURLConnection *)connection{
    //结束时代理工作的线程,是指定 NSOperationQueue 调度的
    NSLog(@"完成 %@",[NSThread currentThread]);
    //把数据写入磁盘
//    [self.fileData writeToFile:self.tartgetFilePath atomically:YES];
//    //释放 fileData
//    self.fileData = nil;
    [self.fileStrem close];

//    //设置结束标记
//    self.finished = YES;

    //停止下载线程所在的运行循环
    CFRunLoopStop(self.downloadRunloop);
}

//4.下载失败或者错误,提示:在正常商业应用开发中一定要做出错误处理
-(void)connection:(NSURLConnection *)connection didFailWithError:(NSError *)error{
    NSLog(@"失败 %@",error);
}
@end
PS:本文使用的下载源在本地服务器127.0.0.1,根据需要可以修改成其他下载源。


