本文转自
Catlike Coding
Unity C# Tutorials
https://catlikecoding.com/unity/tutorials/procedural-grid/
Create a grid of points. 创建一个点的网格
Use a coroutine to analyze their placement. 使用 coroutine 来分析网格的布局
Define a surface with triangles. 用三角形定义一个面
Automatically generate normals. 自动生成 法线
Add texture coordinates and tangents. 添加纹理坐标和三角形
In this tutorial we'll create a simple grid of vertices and triangles.在这篇指导中我们将创建一个由定点和三角形组成的简单网格
This tutorial assumes that you are familiar with the basics of Unity scripting. See Clock for these basics. Constructing a Fractal provides an introduction to coroutines. This tutorial has been made for Unity 5.0.1 and up.
这个教程假定你已经熟悉基本的Unity脚本. 点这学习基础知识. 构建分形这一节课讲解了coroutines. 这个教程使用Unity5.0.1 或 更高版本.
Beneath complex appearance lies simple geometry. 看似复杂的表面下隐藏着简单的几何图形
Rendering Things 渲染物体
If you want to visualize something in Unity, you use a mesh. It could be a 3D model exported from another program. It could be a procedurally generated mesh. It could be a sprite, UI element, or particle system, for which Unity uses meshes as well. Even screen effects are rendered with a mesh.
如果你想在Unity可视化一些东西, 你需要用到mesh. 它可能是由其他程序导出的3D模型. 也可能是由程序生成的mesh. 要么是一个Sprite, UI元素 或者 粒子系统. 就算是 屏幕效果也是由一个mesh渲染的.
So what is a mesh? Conceptually, a mesh is a construct used by the graphics hardware to draw complex stuff. It contains at least a collection of vertices that define points in 3D space, plus a set of triangles – the most basic 2D shapes – that connect these points. The triangles form the surface of whatever the mesh represents.
那么mesh是什么捏? 从概念上来说, mesh是一个结构 用于图形硬件绘制复杂的东西. 它至少包含一组顶点,用于定义3D空间中的点, 以及一组连接这些点的三角形 - 最基本的2D形状. 这些三角形构成的网格组成了可以表示任何物体的表面
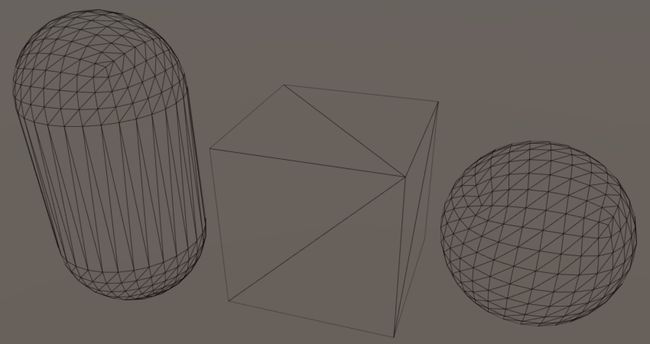
As triangles are flat and have straight edges, they can be used to perfectly visualize flat and straight things, like the faces of a cube. Curved or round surfaces can only be approximated by using many small triangles. If the triangles appear small enough – no larger than a single pixel – then you won't notice the approximation. Typically that's not feasible for realtime performance, so the surfaces will always appear jagged to some degree.
因为三角形是平的并且边是直的, 他们可以用来完美的可视化 平直 的东西, 比如cube的表面. 弧形或圆形表面只能用许多小三角形近似的表示. 通常,这对于运行时性能来说不可行, 所以表面总是会出现一定程度的锯齿。
Unity's default capsule, cube, and sphere, shaded vs. wireframe.
If you want to have a game object display a 3D model, it needs to have two components. The first is a mesh filter. This component holds a reference to the mesh you wish to show. The second is a mesh renderer. You use it to configure how the mesh is rendered. Which material should be used, whether it should cast or receive shadows, and so on.
如果你想要一个game object显示3D模型,需要2个组件. 第一个是mesh filter, 此组件包含对要显示的网格的引用。第二个是mesh renderer, 可以配置它来决定怎么样对mesh进行渲染 (应该使用哪一种材质,是否应该投射或接收阴影,等等)。
Unity's default cube game object. Unity默认的Cube game object
Why is there an array of materials? 为什么有一个material数组?
A mesh renderer can have multiple materials. This is mostly used for rendering meshes that have multiple separate triangle sets, know as sub-meshes. These are mostly used with imported 3D models and won't be covered in this tutorial.
mesh renderer 可以有多个material. 这主要用于渲染具有多个单独三角形集合的网格,称为子网格。这些大多与导入的3D模型一起使用,本教程不会介绍。
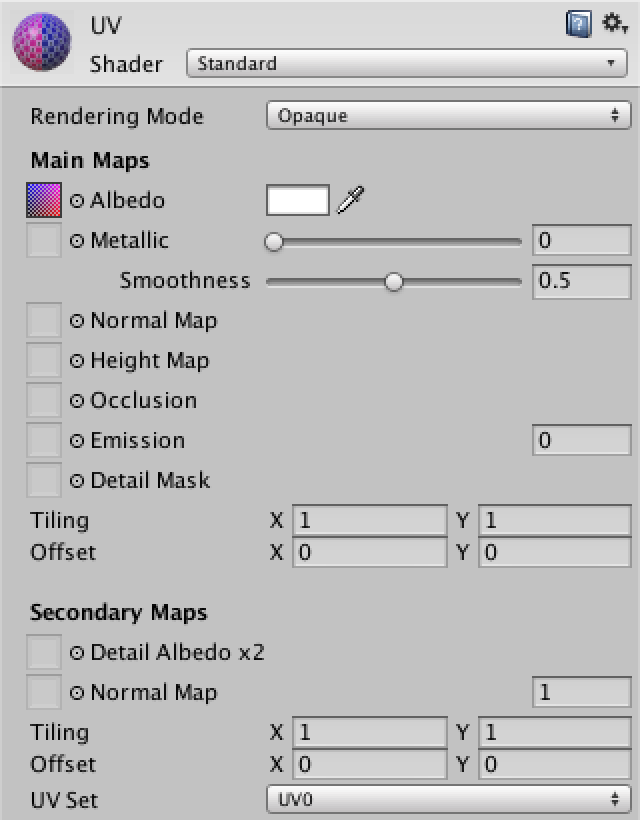
You can completely change the appearance of a mesh by adjusting its material. Unity's default material is simply solid white. You can replace it with your own by creating a new material asset via Assets / Create / Material and dragging it onto your game object. New materials use Unity's Standard shader by default, which gives you a set of controls to tweak how your surface behaves visually.
通过调整mesh的material,你可以完全改变它的外观. Unity默认材质是纯白色. 你可以新建一个新的material 通过点击 Assets / Create / Material 并拖动它到你的GameObject来替换material. 新的Material使用默认的Standard shader. 它提供了一组控件来微调表面的视觉表现。
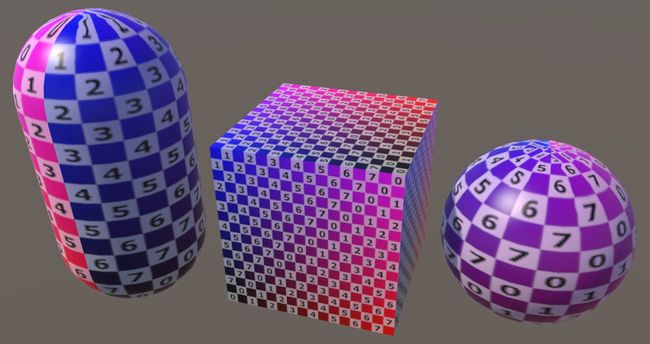
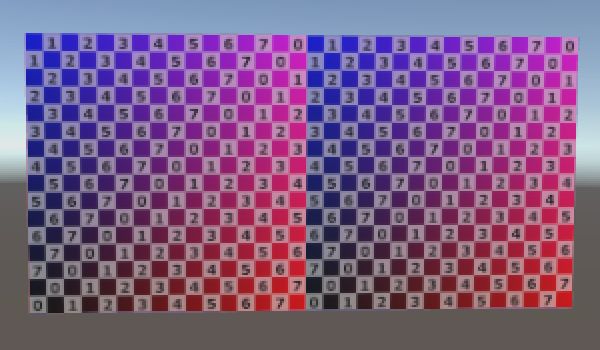
A quick way to add lots of detail to your mesh is by providing an albedo map. This is a texture that represents the basic color of a material. Of course we need to know how to project this texture onto the triangles of the mesh. This is done by adding 2D texture coordinates to the vertices. The two dimensions of texture space are referred to as U and V, which is why they're know as UV coordinates. These coordinates typically lie between (0, 0) and (1, 1), which covers the entire texture. Coordinates outside that range are either clamped or cause tiling, depending on the texture settings.
给网格添加大量细节的一个快速方法是提供反照率图. 这是一个纹理,代表了材质的基本颜色。当然,我们需要知道如何将这个纹理投射到网格的三角形上。这是通过向顶点添加2D纹理坐标来完成的。纹理空间的二个维度被称为U和V,这就是为什么它们被称为UV坐标。这些坐标通常位于(0,0)和(1,1)之间,它们覆盖了整个纹理。超出这个范围的坐标要么被clamp,要么导致Tiling,这取决于纹理设置。
A UV test texture applied to Unity's meshes.
2. Creating a Grid of Vertices 创点顶点网格
So how do you make your own mesh? Let's find out, by generating a simple rectangular grid. The grid will consist of square tiles – quads – of unit length. Create a new C# script and turn it into a grid component that has a horizontal and vertical size.
那么如何制作自己的网格呢? 让我们找到答案, 让我们通过生成一个简单的矩形网格来找到答案。网格将由单位长度的方形Tiles组成。
usingUnityEngine;
usingSystem.Collections;
public class Grid:MonoBehaviour
{
public int xSize, ySize;
}
When we add this component to a game object, we need to give it a mesh filter and mesh renderer as well. We can add an attribute to our class to have Unity automatically add them for us.
当我们将这个组件添加到游戏对象时,我们需要给它一个mesh filter和 mesh renderer。我们可以为我们的类添加一个attribute,让Unity自动添加他们.
[RequireComponent(typeof(MeshFilter),typeof(MeshRenderer))]
public class Grid:MonoBehaviour
{
public int xSize, ySize;
}
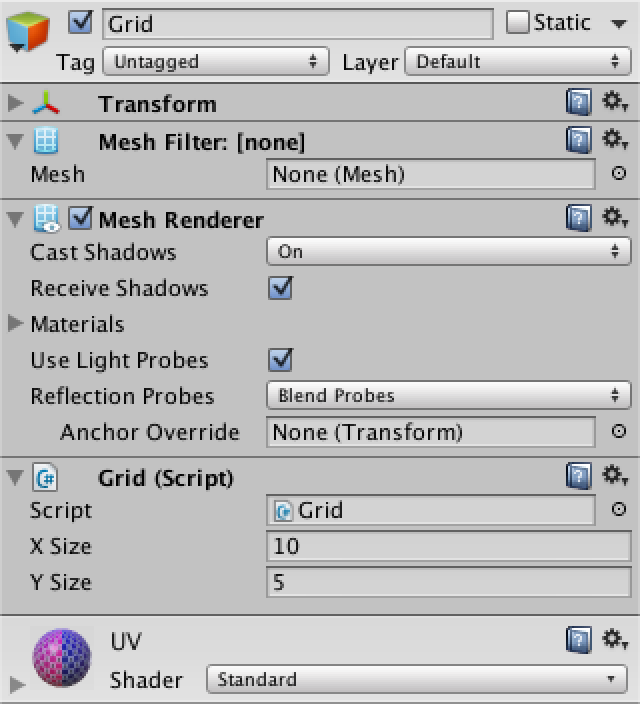
Now you can create a new empty game object, add the grid component to it, and it will have the other two components as well. Set the material of the renderer and leave the filter's mesh undefined. I set the grid's size to 10 by 5.
现在,您可以创建一个新的空游戏对象,把Grid 组件添加到它上面,并且它还将拥有另外两个组件。设置渲染器的材质并保持filter的网格未定义。我将网格的大小设置为10×5。
A grid object.
We generate the actual mesh as soon as the object awakens, which happens when we enter play mode.
进入play mode时, 当对象一醒来,我们就会生成实际的网格
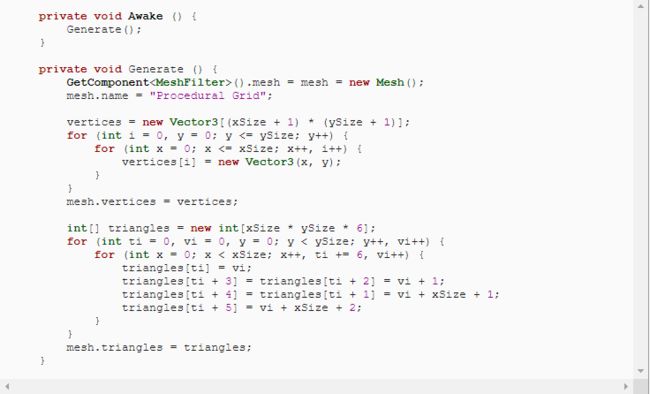
private void Awake()
{
Generate();
}
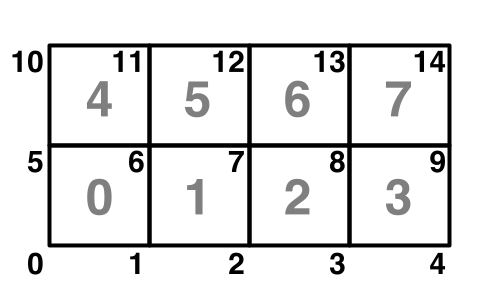
Let's focus on the vertex positions first and leave the triangles for later. We need to hold an array of 3D vectors to store the points. The amount of vertices depends on the size of the grid. We need a vertex at the corners of every quad, but adjacent quads can share the same vertex. So we need one more vertex than we have tiles in each dimension.
让我们先关注顶点位置,然后把三角形放在后面。我们需要持有一个3D向量数组来存储点。而其需要每个四边形的角上有一个顶点,但是相邻的四边形可以共享同一个顶点。所以我们需要比每个维度中的瓦片多一个顶点。(x y 轴 上的顶点都比小格子多一个)
(#x+1)(#y+1)
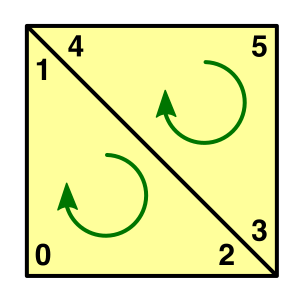
Vertex and quad indices for a 4 by 2 grid. 一个4×2网格的顶点和四个索引。
private Vector3[] vertices;
private void Generate ()
{
vertices = new Vector3 [(xSize +1) * (ySize +1)];
}
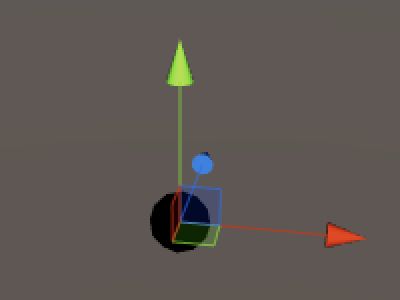
Let's visualize these vertices so we can check that we position them correctly. We can do so by adding an OnDrawGizmos method and drawing a small black sphere in the scene view for every vertex.
让我们把这些顶点可视化这样我们就可以检查它们的位置是否正确。我们可以添加一个OnDrawGizmos方法,并在场景中为每个顶点绘制一个小黑球。
private void OnDrawGizmos()
{
Gizmos.color = Color.black;
for(inti =0; i < vertices.Length; i++)
{
Gizmos.DrawSphere(vertices[i],0.1f);
}
}
What are gizmos? 什么是gizmos?
This will produce errors when we are not in play mode, because OnDrawGizmos methods are also invoked while Unity is in edit mode, when we don't have any vertices. To prevent this error, check whether the array exists and jump out of the method if it isn't.
这样会产生错误因为OnDrawGizmos可以在编辑器模式下调用. 为了防止错误,检查数组是否存在, 如果为null就跳出该方法
private void OnDrawGizmos()
{
if(vertices ==null)
{
return;
}…
}
A gizmo.
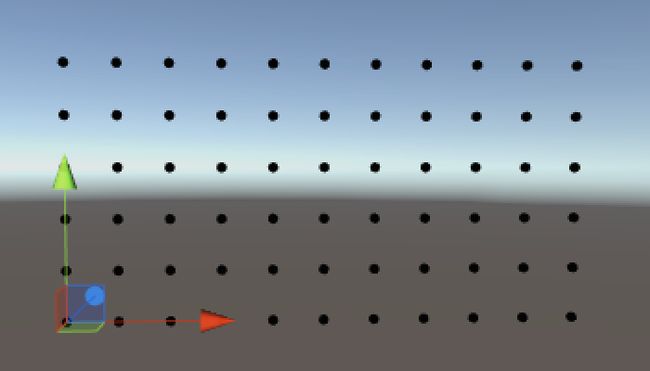
While in play mode, we see only a single sphere at the origin. This is because we haven't positioned the vertices yet, so they all overlap at that position. We have to iterate through all positions, using a double loop.
在游戏模式中,我们只能在原点看到一个球体。这是因为还没有为顶点设置position,所以它们都在那个位置重叠。我们需要使用双层循环遍历所有位置。
private void Generate ()
{
vertices =newVector3[(xSize +1) * (ySize +1)];
for(inti =0, y =0; y <= ySize; y++)
{
for(intx =0; x <= xSize; x++, i++)
{
vertices[i] =newVector3(x, y);
}
}
}
A grid of vertices.
We now see the vertices, but the order in which they were placed isn't visible. We could use color to show this, but we can also slow down the process, by using a coroutine. This is why I included using System.Collections in the script.
我们现在看到顶点,但它们的放置顺序是不可见的。我们可以使用颜色来显示这个,但是我们也可以通过使用协程来减慢这个过程。
private void Awake()
{
StartCoroutine(Generate());
}
private IEnumerator Generate ()
{
WaitForSeconds wait = new WaitForSeconds(0.05f);
vertices =newVector3[(xSize +1) * (ySize +1)];
for(inti =0, y =0; y <= ySize; y++)
{
for(intx =0; x <= xSize; x++, i++)
{
vertices[i] =newVector3(x, y);
yieldreturnwait;
}
}
}
Watching the vertices appear.
unitypackage
3. Creating the Mesh 创建Mesh
Now that we know that the vertices are positioned correctly, we can deal with the actual mesh. Besides holding a reference to it in our own component, we must also assign it to the mesh filter. Then once we dealt with the vertices, we can give them to our mesh.
现在我们知道顶点位置正确,我们可以处理实际的网格。除了在我们自己的component中保存对它的引用之外,我们还必须将它分配给mesh filter。然后,一旦处理了顶点,就可以将它们提供给mesh。
private Mesh mesh;
private IEnumerator Generate ()
{
WaitForSeconds wait =newWaitForSeconds(0.05f);
GetComponent
mesh.name ="Procedural Grid";
vertices =newVector3[(xSize +1) * (ySize +1)];
…
mesh.vertices = vertices;
}
Mesh appears in play mode.
We now have a mesh in play mode, but it doesn't show up yet because we haven't given it any triangles. Triangles are defined via an array of vertex indices. As each triangle has three points, three consecutive indices describe one triangle. Let's start with just one triangle.
我们现在在play mode已经有了一个网格,但它还没有显示出来,因为我们没有给它任何三角形。三角形是通过顶点数组的index定义的。由于每个三角形有三个点,三个连续的index描述一个三角形。 让我们从一个三角形开始吧。
private IEnumerator Generate ()
{
…
int[] triangles =newint[3];
triangles[0] =0;
triangles[1] =1;
triangles[2] =2;
mesh.triangles = triangles;
}
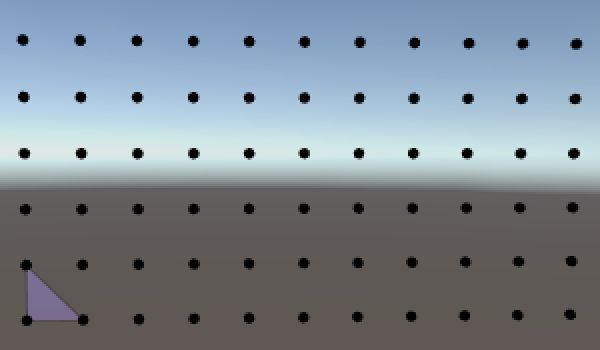
We now have one triangle, but the three points that we are using all lie in a straight line. This produces a degenerate triangle, which isn't visible. The first two vertices are fine, but then we should jump to the first vertex of the next row.
现在我们有了一个三角形,但是这3个点组成的线段都在一条直线上. 这会产生一个不可见的退化三角形(退化三角形是指面积为零的三角形)。前两个顶点没问题,但是我们应该跳到下一行的第一个顶点。
triangles[0] =0;
triangles[1] =1;
triangles[2] =xSize +1;
This does give us a triangle, but it's visible from only one direction. In this case, it's only visible when looking in the opposite direction of the Z axis. So you might need to rotate the view to see it.
这确实给了我们一个三角形,但它只能从一个方向可见。在这种情况下,它只在Z轴的相反方向上可见。因此,您可能需要旋转视图来查看它。
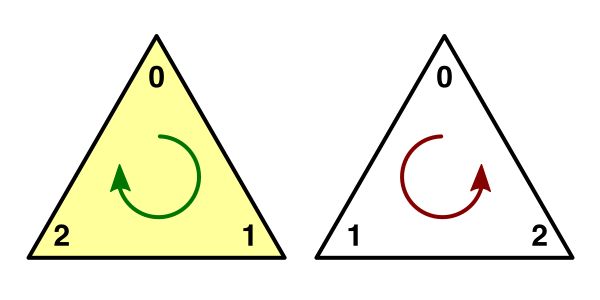
Which side a triangle is visible from is determined by the orientation of its vertex indices. By default, if they are arranged in a clockwise direction the triangle is considered to be forward-facing and visible. Counter-clockwise triangles are discarded so we don't need to spend time rendering the insides of objects, which are typically not meant to be seen anyway.
从哪个角度看三角形是可见的取决于它的顶点索引的方向。默认情况下,如果它们按顺时针方向排列,则认为三角形是正向且可见的。逆时针三角形被丢弃,所以我们不需要花时间渲染对象的内部,这些对象通常不会被看到。
The two sides of a triangle.
So to make the triangle appear when we look down the Z axis, we have to change the order in which its vertices are traversed. We can do so by swapping the last two indices.
为了让三角形出现在Z轴下方,我们必须改变顶点遍历的顺序。我们可以交换最后两个指标。
triangles[0] =0;
triangles[1] =xSize +1;
triangles[2] =1;
The first triangle.
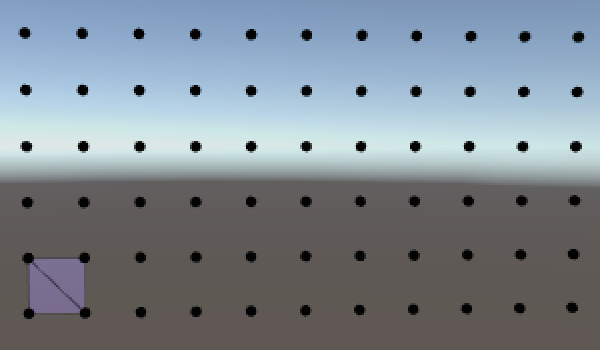
We now have one triangle that covers half of the first tile of our grid. To cover the entire tile, all we need is a second triangle.
现在我们有了一个三角形,它覆盖了网格第一块tile的一半。为了覆盖整个tile,我们需要第二个三角形。
int[] triangles =new int[6];
triangles[0] =0;
triangles[1] = xSize +1;
triangles[2] =1;
triangles[3] =1;
triangles[4] = xSize +1;
triangles[5] = xSize +2;
A quad made with two triangles.
As these triangles share two vertices, we could reduce this to four lines of code, explicitly mentioning each vertex index only once.
triangles[0] =0;triangles[3] = triangles[2] =1;triangles[4] = triangles[1] = xSize +1;triangles[5] = xSize +2;
The first quad.
We can create the entire first row of tiles by turning this into a loop. As we're iterating over both vertex and triangle indices, we have to keep track of both. Let's also move the yield statement into this loop, so we no longer have to wait for the vertices to appear.
我们可以通过将其转换为循环来创建整个第一行图块。 当我们迭代顶点和三角形索引时,我们必须跟踪两者。 让我们也将yield语句移动到这个循环中,这样我们就不必再等待顶点出现了。
int[] triangles =new int[xSize *6];
for(int ti =0, vi =0, x =0; x < xSize; x++, ti +=6, vi++)
{
triangles[ti] =vi;
triangles[ti +3] = triangles[ti +2] =vi +1;
triangles[ti +4] = triangles[ti +1] =vi +xSize +1;
triangles[ti +5] =vi +xSize +2;
yieldreturn wait;
}
The vertex gizmos now immediately appear, and the triangles all appear at once after a short wait. To see the tiles appear one by one, we have to update the mesh each iteration, instead of only after the loop.
顶点gizmos现在立即出现,三角形在短时间的等待后立即出现。要看到这些块一个一个地出现,我们必须在每次迭代中更新网格,而不仅仅是在循环之后。
mesh.triangles = triangles;
yield return wait;
Now fill the entire grid by turning the single loop into a double loop. Note that moving to the next row requires incrementing the vertex index by one, because there's one more vertex than tiles per row.
现在,通过将单个循环变为双循环来填充整个网格。注意,移动到下一行需要将顶点索引增加1个,因为每一行比tiles多一个顶点。
int[] triangles =new int[xSize *ySize *6];
for(int ti =0, vi =0,y =0; y < ySize; y++, vi++)
{
for(intx =0; x < xSize; x++, ti +=6, vi++)
{…}
}
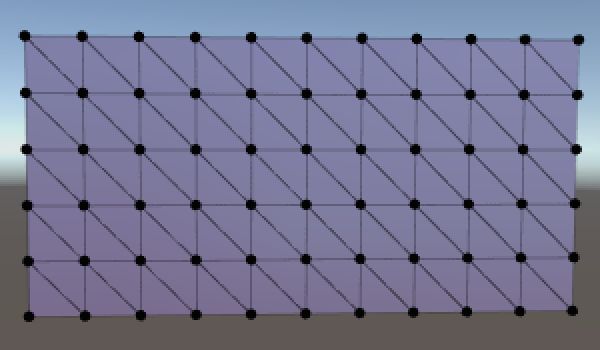
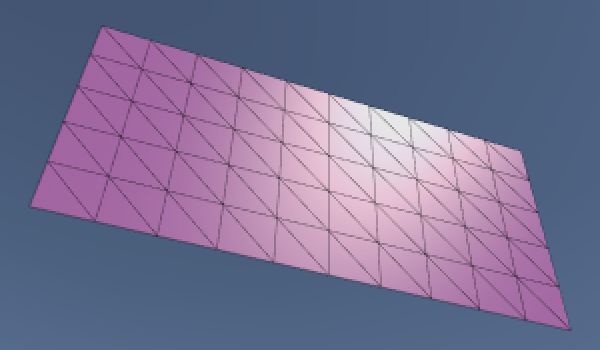
Filling the entire grid.
As you can see, the entire grid is now filled with triangles, one row at a time. Once you're satisfied with that, you can remove all the coroutine code so the mesh will be created without delay.
正如您所看到的,整个网格现在是由三角形填充的,每次一行。现在你可以删除所有的协程代码,这样网格就可以无延迟地创建。
4 . Generating Additional Vertex Data 生成附加的顶点数据
Our grid is currently lit in a peculiar way. That's because we haven't given any normals to the mesh yet. The default normal direction is (0, 0, 1) which is the exact opposite of what we need.
我们的网格目前以一种奇怪的方式照亮。那是因为我们还没有给出网格的法线。默认的法线方向是(0,0,1)这和我们需要的正好相反。
Normals are defined per vertex, so we have to fill another vector array. Alternatively, we can ask the mesh to figure out the normals itself based on its triangles. Let's be lazy this time and do that.
每个顶点定义一个法线,所以我们必须填充另一个向量数组。或者,我们可以让网格根据它的三角形求出法线。这次让我们偷懒吧。
private void Generate ()
{
…
mesh.triangles = triangles;mesh.RecalculateNormals();
}
How are normals recalculated?
Without vs. with normals. 有法线和没法线
Next up are the UV coordinates. You might have noticed that the grid currently has a uniform color, even though it uses a material with an albedo texture. This makes sense, because if we don't provide the UV coordinates ourselves then they're all zero.
接下来是UV坐标。您可能已经注意到网格当前只有一种颜色,尽管它使用了具有反照率纹理的材质。这是有道理的,因为如果我们不自己提供UV坐标那么它们都是零。
To make the texture to fit our entire grid, simply divide the position of the vertex by the grid dimensions.
要使纹理与我们的整个网格适应,只需将顶点的位置除以网格的维数。
vertices = new Vector3[(xSize +1) * (ySize +1)];
Vector2[] uv =new Vector2[vertices.Length];
for(inti =0, y =0; y <= ySize; y++)
{
for(intx =0; x <= xSize; x++, i++)
{
vertices[i] =newVector3(x, y);
uv[i] =newVector2(x / xSize, y / ySize);
}
}
mesh.vertices = vertices;
mesh.uv = uv;
Incorrect UV coordinates, clamping vs. wrapping texture.
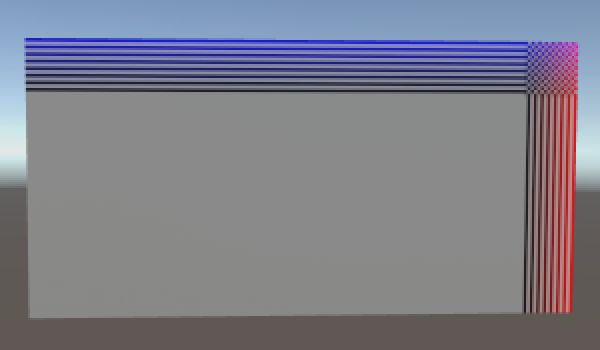
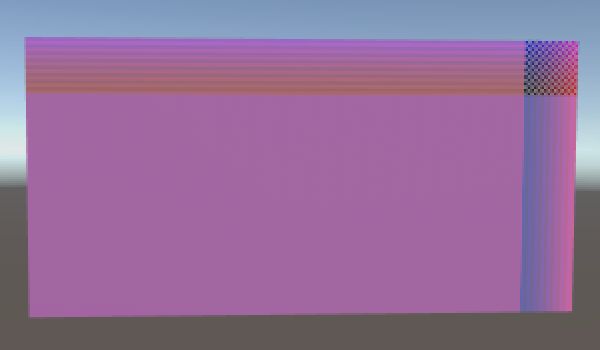
The texture shows up now, but it's not covering the entire grid. Its exact appearance depends on whether the texture's wrap mode is set to clamp or repeat. This happens because we're currently dividing integers by integers, which results in another integer. To get the correct coordinates between zero and one across the entire grid, we have to make sure that we're using floats.
纹理现在出现了,但是它没有覆盖整个网格。它的确切外观取决于纹理的wrap mode设置为clamp 还是repeat。现在这种情况是因为我们正在用整数除以整数,结果是另一个整数。为了在整个网格中得到0和1之间的正确坐标,我们必须确保使用的是浮点数。
uv[i] =newVector2((float)x / xSize,(float)y / ySize);
The texture is now projected onto the entire grid. As I've set the grid's size to ten by five, the texture will appear stretched horizontally. This can be countered by adjusting the texture's tiling settings of the material. By settings it to (2, 1) the U coordinates will be doubled. If the texture is set to repeat, then we'll see two square tiles of it.
纹理现在投射到整个网格上。当我将网格的大小设置为10×5时,纹理将呈现水平拉伸的状态。这可以通过调整材质的贴图设置来解决。通过将它设为(2,1)U坐标会加倍。如果纹理设置为重复,那么我们将看到它的两个正方形块。
Correct UV coordinates, tiling 1,1 vs. 2,1.
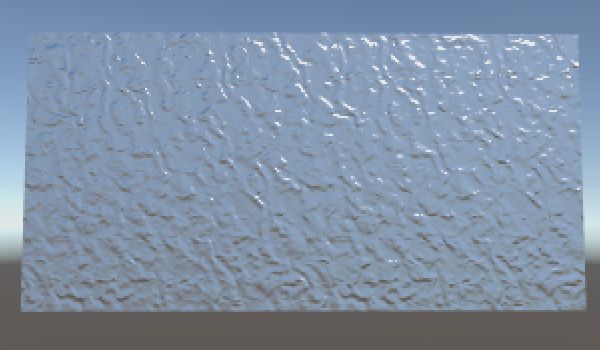
Another way to add more apparent detail to a surface is to use a normal map. These maps contain normal vectors encoded as colors. Applying them to a surface will result in much more detailed light effects than could be created with vertex normals alone.
另一种为表面添加更明显细节的方法是使用法线贴图。法线贴图包含了用颜色编码的法线。将它们应用到一个表面会产生比仅用顶点法线更细腻的光照效果。
A bumpy surface, made metallic for dramatic effect.
Applying this material to our grid doesn't give us any bumps yet. We need to add tangent vectors to our mesh first.
将这种material 应用到我们的网格中还没有任何高低不平颠簸的感觉 。我们需要先在网格中加入切线。
How do tangents work? 切线有什么用?
Normal maps are defined in tangent space. This is a 3D space that flows around the surface of an object. This approach allows us to apply the same normal map in different places and orientations.
法线贴图是在切空间中定义的。这是一个围绕物体表面流动的三维空间。这种方法允许我们在不同的位置和方向上应用相同的法线贴图。
The surface normal represents upward in this space, but which way is right? That's defined by the tangent. Ideally, the angle between these two vectors is 90°. The cross product of them yields the third direction needed to define 3D space. In reality the angle is often not 90° but the results are still good enough.
表面法线在这个空间中表示向上的方向,但哪个方向是正确的? 这是由切线定义的。 理想情况下,这两个矢量之间的角度为90°。 它们的叉积产生了定义3D空间所需的第三个方向。 实际上,角度通常不是90°,但结果仍然足够好。
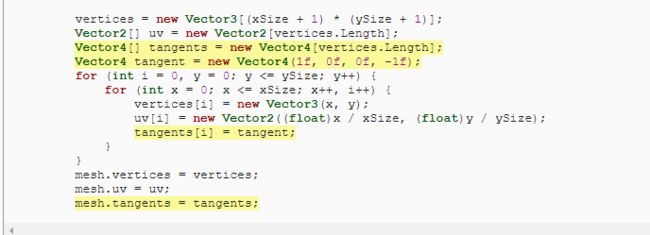
So a tangent is a 3D vector, but Unity actually uses a 4D vector. Its fourth component is always either −1 or 1, which is used to control the direction of the third tangent space dimension – either forward or backward. This facilitates mirroring of normal maps, which is often used in 3D models of things with bilateral symmetry, like people. The way Unity's shaders perform this calculation requires us to use −1.
切线 是一个3D向量,但Unity实际上用的是4D向量。其第四个值总是−1或1,用于控制第三切线空间维度的方向,向前或向后(法线和切线叉积可以求出副切线 这个值用于控制它的方向)。这有助于映射法线贴图,它通常用于双边对称事物的三维模型中,比如人。Unity着色器执行此计算要求使用−1。
As we have a flat surface, all tangents simply point in the same direction, which is to the right.
因为我们有一个平面,所有的切线都指向同一个方向,也就是右边。
A flat surface pretending to be bumpy.
Now you know how to create a simple mesh and make it look more complex with materials. Meshes need vertex positions and triangles, usually UV coordinates too – up to four sets – and often tangents as well. You can also add vertex colors, although Unity's standard shaders don't use those. You can create your own shaders that do use those colors, but that's something for another tutorial.
现在你知道如何创建一个简单的网格,然后用material让它看起来更加复杂。网格需要顶点位置和三角形,通常也需要UV坐标——最多4个集合——还有切线。你也可以添加顶点颜色,尽管Unity的标准着色器不使用这些。您可以创建自己的着色器,使用这些颜色,但这是另一个教程的内容。
Once you're satisfied with your grid, you can move on to the Rounded Cube tutorial.
如果您对本节课程感觉还行听得懂,就可以继续学习 Rounded Cube 教程。


