前言
很多小伙伴都问我,ios开发中UI界面到底使用存代码还是用xib或者故事版做,这个问题一直争论很久,我这里给不了正确的答案,看你自己怎么用了,喜欢用哪个就用哪个,不过既然作为ios开发中,用纯代码往往是纯实力派,因为没有代码完不成的事情,我这里支持存代码,我们回到话题,布局约束往往是很让人头痛的事情,方法也有很多种,我这里介绍一下如何选择最佳布局,以及介绍如何灵活运用布局的框架,从而熟练布局约束
介绍
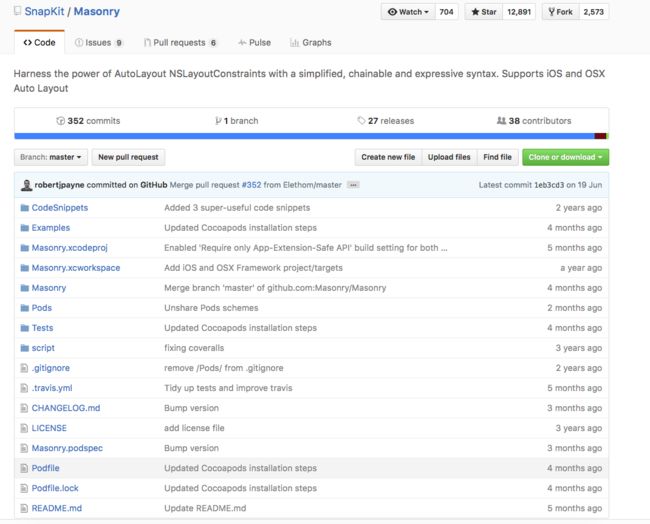
Masonry是一个轻量级的布局框架,拥有自己的描述语法,采用更优雅的链式语法封装自动布局,简洁明了并具有高可读性,而且同时支持 iOS 和 Max OS X。Masonry是一个用代码写iOS或OS界面的库,可以代替Auto layout,这里我就不多介绍了,大家可以去github下载地址https://github.com/SnapKit/Masonry
mas_makeConstraints 是给view添加约束,约束有几种,分别是边距,宽,高,左上右下距离,基准线。添加过约束后可以有修正,修正有offset(位移)修正和multipliedBy(倍率)修正。
语法一般是
make.equalTo or make.greaterThanOrEqualTo or make.lessThanOrEqualTo + 倍数和位移修正。注意点1: 使用
mas_makeConstraints方法的元素必须事先添加到父元素的中,例如[self.view addSubview:view];注意点2:
masequalTo和equalTo区别:masequalTo比equalTo多了类型转换操作,一般来说,大多数时候两个方法都是 通用的,但是对于数值元素使用mas_equalTo。对于对象或是多个属性的处理,使用equalTo。特别是多个属性时,必须使用equalTo,例如make.left.and.right.equalTo(self.view);注意点3: 注意到方法with和and,这连个方法其实没有做任何操作,方法只是返回对象本身,这这个方法的左右完全是为了方法写的时候的可读性 。
make.left.and.right.equalTo(self.view);和make.left.right.equalTo(self.view);是完全一样的,但是明显的加了and方法的语句可读性 更好点。
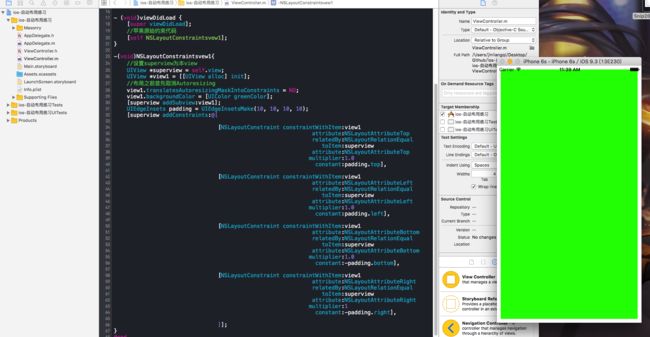
- 我们先来一个简单的示例,先用苹果原生的代码写一个视图布局
- (void)viewDidLoad {
    [super viewDidLoad];
    //苹果原始约束代码
    [self NSLayoutConstraintsvew1];
}

-(void)NSLayoutConstraintsvew1{
    //设置superview为本view
    UIView *superview = self.view;
    UIView *view1 = [[UIView alloc] init];
    //布局之前首先取消Autoresizing
    view1.translatesAutoresizingMaskIntoConstraints = NO;
    view1.backgroundColor = [UIColor greenColor];
    [superview addSubview:view1];
    UIEdgeInsets padding = UIEdgeInsetsMake(10, 10, 10, 10);
    [superview addConstraints:@[

                                [NSLayoutConstraint constraintWithItem:view1
                                                             attribute:NSLayoutAttributeTop
                                                             relatedBy:NSLayoutRelationEqual
                                                                toItem:superview
                                                             attribute:NSLayoutAttributeTop
                                                            multiplier:1.0
                                                              constant:padding.top],

                                [NSLayoutConstraint constraintWithItem:view1
                                                             attribute:NSLayoutAttributeLeft
                                                             relatedBy:NSLayoutRelationEqual
                                                                toItem:superview
                                                             attribute:NSLayoutAttributeLeft
                                                            multiplier:1.0
                                                              constant:padding.left],

                                [NSLayoutConstraint constraintWithItem:view1
                                                             attribute:NSLayoutAttributeBottom
                                                             relatedBy:NSLayoutRelationEqual
                                                                toItem:superview
                                                             attribute:NSLayoutAttributeBottom
                                                            multiplier:1.0
                                                              constant:-padding.bottom],

                                [NSLayoutConstraint constraintWithItem:view1
                                                             attribute:NSLayoutAttributeRight
                                                             relatedBy:NSLayoutRelationEqual
                                                                toItem:superview
                                                             attribute:NSLayoutAttributeRight
                                                            multiplier:1
                                                              constant:-padding.right],

                                ]];
}
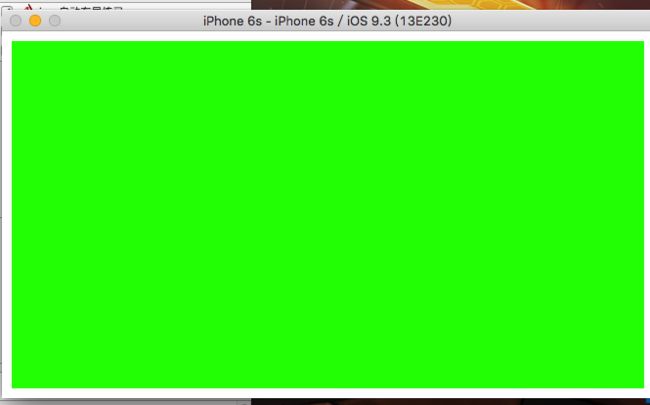
- 效果视图
- 看到这些代码人都想死,这么简单的一个布局约束,要这么多的代码,要是来一个复杂的那还的得了,一半不建议开发中使用原生布局,很乱,比较复杂,多了自己都搞不清楚,妈的什么鬼
使用Masonry来布局
- 上面的示例我们怎么用Masonry来呢?
-(void)MasonryView1{
    UIView *superview = self.view;
    UIView *view1 = [[UIView alloc] init];
    //布局之前首先取消Autoresizing
    view1.translatesAutoresizingMaskIntoConstraints = NO;
    view1.backgroundColor = [UIColor orangeColor];
    [superview addSubview:view1];
    UIEdgeInsets padding = UIEdgeInsetsMake(30, 30, 30, 30);

    [view1 mas_makeConstraints:^(MASConstraintMaker *make) {
        make.top.equalTo(superview.mas_top).with.offset(padding.top);
        make.left.equalTo(superview.mas_left).with.offset(padding.left);
        make.bottom.equalTo(superview.mas_bottom).with.offset(-padding.bottom);
        make.right.equalTo(superview.mas_right).with.offset(-padding.right);
    }];
}
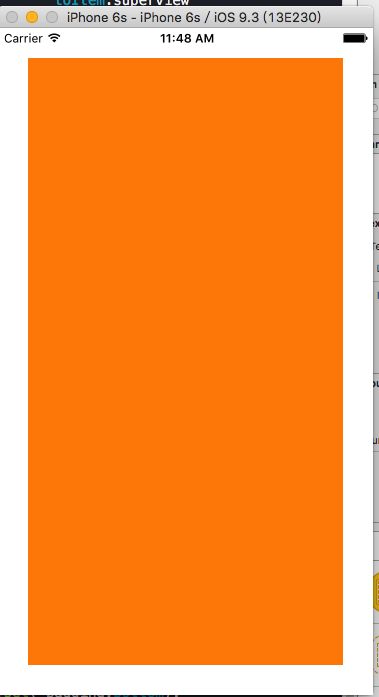
- 效果
UIEdgeInsets padding = UIEdgeInsetsMake(30, 30, 30, 30);这句话的意思是相当于主页面的约束,刚才是用0,0,0,0来明显看到视图上下左右缩进了30
我们多来几个例子,按照初级,中级,高级划分,灵活使用
- Masonry初级使用例子
- (void)viewDidLoad {
    [super viewDidLoad];
//    [self exp1];
//    [self exp2];
     [self exp3];
}


-(void)exp1{
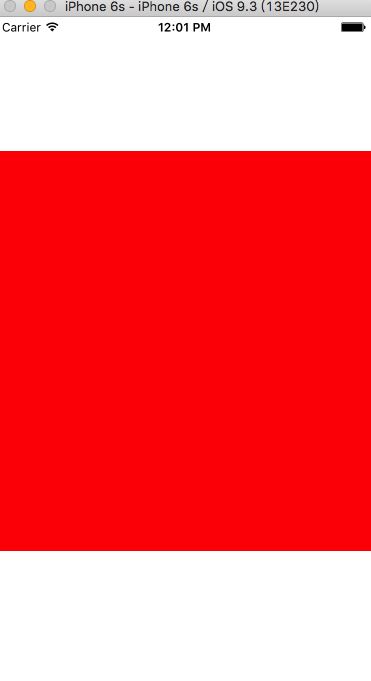
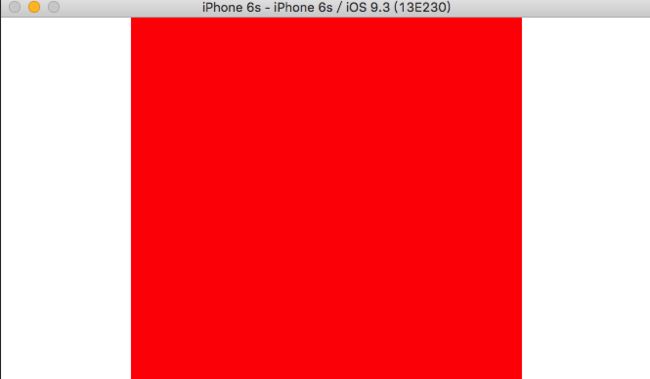
   //中心点和self.View相同,宽度为400*400

    UIView *view = [UIView new];
    [view setBackgroundColor:[UIColor redColor]];
    [self.view addSubview:view];
    [view mas_remakeConstraints:^(MASConstraintMaker *make) {
        make.center.equalTo(self.view);
        make.size.mas_equalTo(CGSizeMake(400, 400));
    }];
}

-(void)exp2{
    //上下左右边距都为10

    UIView *view = [UIView new];
    [view setBackgroundColor:[UIColor redColor]];
    [self.view addSubview:view];
    [view mas_remakeConstraints:^(MASConstraintMaker *make) {
        //方法一
//        make.edges.equalTo(self.view).with.insets(UIEdgeInsetsMake(10, 10, 10, 10));
        make.center.equalTo(self.view);
        //方法二
          make.left.equalTo(self.view).with.offset(10);
          make.right.equalTo(self.view).with.offset(-10);
          make.top.equalTo(self.view).with.offset(10);
          make.bottom.equalTo(self.view).with.offset(-10);

    }];
}

-(void)exp3{
    //让两个高度为150的view垂直居中且等宽且等间隔排列 间隔为10

    UIView *view1 = [UIView new];
    [view1 setBackgroundColor:[UIColor redColor]];
    [self.view addSubview:view1];
    UIView *view2 = [UIView new];
    [view2 setBackgroundColor:[UIColor redColor]];
    [self.view addSubview:view2];
    [view1 mas_makeConstraints:^(MASConstraintMaker *make) {
        make.centerY.mas_equalTo(self.view.mas_centerY);
        make.height.mas_equalTo(150);
        make.width.mas_equalTo(view2.mas_width);
        make.left.mas_equalTo(self.view.mas_left).with.offset(10);
        make.right.mas_equalTo(view2.mas_left).offset(-10);
    }];
    [view2 mas_makeConstraints:^(MASConstraintMaker *make) {
        make.centerY.mas_equalTo(self.view.mas_centerY);
        make.height.mas_equalTo(150);
        make.width.mas_equalTo(view1.mas_width);
        make.left.mas_equalTo(view1.mas_right).with.offset(10);
        make.right.equalTo(self.view.mas_right).offset(-10);
    }];
}
效果图一
效果图二
- 这个实例刚开始已经有了,绿色的视图,我这里不演示了
效果图三
Masonry中级使用例子
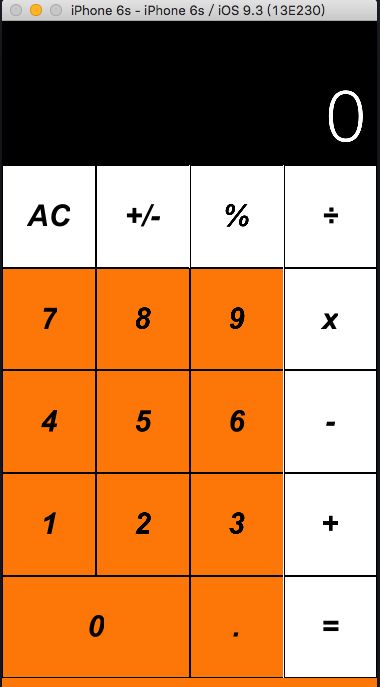
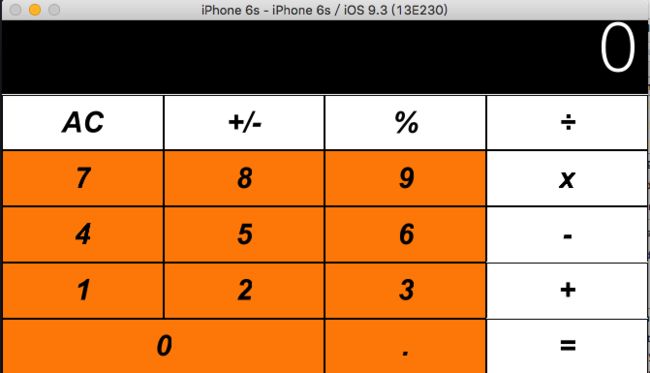
上述例子比较简单,初级使用很容易上手,我们加大一点难度,布局一个计算器
//    中级布局实例 ios自带计算器布局
-(void)exp4{

    /*
     申明区域,displayView是显示区域,keyboardView是键盘区域
     */

    UIView *displayView = [UIView new];
    [displayView setBackgroundColor:[UIColor blackColor]];
    [self.view addSubview:displayView];
    UIView *keyboardView = [UIView new];
    [keyboardView setBackgroundColor:[UIColor orangeColor]];
    [self.view addSubview:keyboardView];
    //先按1:3分割 displView(显示结果区域)和 keyboardView(键盘区域)
    [displayView mas_makeConstraints:^(MASConstraintMaker *make) {
        make.top.equalTo(self.view.mas_top);
        make.left.and.right.equalTo(self.view);
        make.height.equalTo(keyboardView).multipliedBy(0.3f);
    }];
    [keyboardView mas_makeConstraints:^(MASConstraintMaker *make) {
        make.top.equalTo(displayView.mas_bottom);
        make.bottom.equalTo(self.view.mas_bottom);
        make.left.and.right.equalTo(self.view);
    }];
    //设置显示位置的数字为0
    UILabel *displayNum = [[UILabel alloc]init];
    [displayView addSubview:displayNum];
    displayNum.text = @"0";
    displayNum.font = [UIFont fontWithName:@"HeiTi SC" size:70];
    displayNum.textColor = [UIColor whiteColor];
    displayNum.textAlignment = NSTextAlignmentRight;
    [displayNum mas_makeConstraints:^(MASConstraintMaker *make) {
        make.left.and.right.equalTo(displayView).with.offset(-10);
        make.bottom.equalTo(displayView).with.offset(-10);
    }];
    //定义键盘键名称,?号代表合并的单元格
    NSArray *keys = @[@"AC",@"+/-",@"%",@"÷"
                      ,@"7",@"8",@"9",@"x"
                      ,@"4",@"5",@"6",@"-"
                      ,@"1",@"2",@"3",@"+"
                      ,@"0",@"?",@".",@"="];
    int indexOfKeys = 0;
    for (NSString *key in keys){
        //循环所有键
        indexOfKeys++;
        int rowNum = indexOfKeys %4 ==0? indexOfKeys/4:indexOfKeys/4 +1;
        int colNum = indexOfKeys %4 ==0? 4 :indexOfKeys %4;
        NSLog(@"index is:%d and row:%d,col:%d",indexOfKeys,rowNum,colNum);
        //键样式
        UIButton *keyView = [UIButton buttonWithType:UIButtonTypeCustom];
        [keyboardView addSubview:keyView];
        [keyView setTitleColor:[UIColor blackColor] forState:UIControlStateNormal];
        [keyView setTitle:key forState:UIControlStateNormal];
        [keyView.layer setBorderWidth:1];
        [keyView.layer setBorderColor:[[UIColor blackColor]CGColor]];
        [keyView.titleLabel setFont:[UIFont fontWithName:@"Arial-BoldItalicMT" size:30]];
        //键约束
        [keyView mas_makeConstraints:^(MASConstraintMaker *make) {
            //处理 0 合并单元格
            if([key isEqualToString:@"0"] || [key isEqualToString:@"?"] ){
                if([key isEqualToString:@"0"]){
                    [keyView mas_makeConstraints:^(MASConstraintMaker *make) {
                        make.height.equalTo(keyboardView.mas_height).with.multipliedBy(.2f);
                        make.width.equalTo(keyboardView.mas_width).multipliedBy(.5);
                        make.left.equalTo(keyboardView.mas_left);
                        make.baseline.equalTo(keyboardView.mas_baseline).with.multipliedBy(.9f);
                    }];
                }if([key isEqualToString:@"?"]){
                    [keyView removeFromSuperview];
                }
            }
            //正常的单元格
            else{
                make.width.equalTo(keyboardView.mas_width).with.multipliedBy(.25f);
                make.height.equalTo(keyboardView.mas_height).with.multipliedBy(.2f);
                //按照行和列添加约束,这里添加行约束
                switch (rowNum) {
                    case 1:
                    {
                        make.baseline.equalTo(keyboardView.mas_baseline).with.multipliedBy(.1f);
                        keyView.backgroundColor = [UIColor colorWithRed:205 green:205 blue:205 alpha:1];
                    }
                        break;
                    case 2:
                    {
                        make.baseline.equalTo(keyboardView.mas_baseline).with.multipliedBy(.3f);
                    }
                        break;
                    case 3:
                    {
                        make.baseline.equalTo(keyboardView.mas_baseline).with.multipliedBy(.5f);
                    }
                        break;
                    case 4:
                    {
                        make.baseline.equalTo(keyboardView.mas_baseline).with.multipliedBy(.7f);
                    }
                        break;
                    case 5:
                    {
                        make.baseline.equalTo(keyboardView.mas_baseline).with.multipliedBy(.9f);
                    }
                        break;
                    default:
                        break;
                }
                //按照行和列添加约束,这里添加列约束
                switch (colNum) {
                    case 1:
                    {
                        make.left.equalTo(keyboardView.mas_left);
                    }
                        break;
                    case 2:
                    {
                        make.right.equalTo(keyboardView.mas_centerX);
                    }
                        break;
                    case 3:
                    {
                        make.left.equalTo(keyboardView.mas_centerX);
                    }
                        break;
                    case 4:
                    {
                        make.right.equalTo(keyboardView.mas_right);
                        [keyView setBackgroundColor:[UIColor colorWithRed:243 green:127 blue:38 alpha:1]];
                    }
                        break;
                    default:
                        break;
                }
            }
        }];
    }
}
- 计算器的效果图
- 这是实例比较有难度了,建议好好练习一下,以及灵活运用
最后本次的最难以及实战的高级使用了
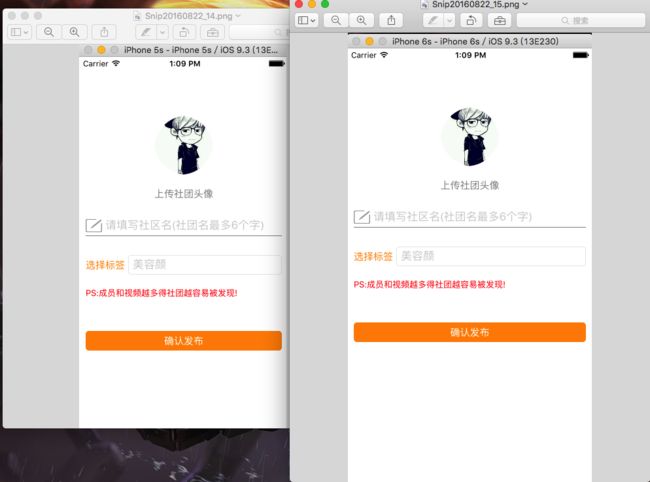
Masonry高级使用例子1
#import "ViewController.h"
#import "Masonry.h"
@interface ViewController()  {

}

@end

@implementation ViewController

- (void)viewDidLoad {
    [super viewDidLoad];
    [self createUI];
}

-(void)createUI{
    //上传头像
    UIButton *iconBtn = [[UIButton alloc] init];
    [iconBtn.layer setMasksToBounds:YES];
    [iconBtn.layer setCornerRadius:50.0];
    [iconBtn setBackgroundImage:[UIImage imageNamed:@"1.png"] forState:UIControlStateNormal];
    [iconBtn addTarget:self action:@selector(iconButton) forControlEvents:UIControlEventTouchDown];
    [self.view addSubview:iconBtn];

    [iconBtn mas_remakeConstraints:^(MASConstraintMaker *make) {
        make.size.mas_equalTo(CGSizeMake(90, 90));
        make.centerX.equalTo(self.view);
        make.top.width.offset(90);
    }];

    //上传社区头像文字提醒
    UILabel *iconLabel = [[UILabel alloc]init];
    iconLabel.textColor = [UIColor grayColor];
    iconLabel.text = @"上传社团头像";
    iconLabel.font = [UIFont systemFontOfSize:15];
    [self.view addSubview:iconLabel];

    [iconLabel mas_makeConstraints:^(MASConstraintMaker *make) {
        make.centerX.equalTo(iconBtn);
        make.top.equalTo(iconBtn.mas_bottom).with.offset(20);
    }];
    //社团编辑图标
    UIImageView *editIcon = [[UIImageView alloc]init];
    editIcon.image = [UIImage imageNamed:@"2.png"];
    [self.view addSubview:editIcon];

    [editIcon mas_makeConstraints:^(MASConstraintMaker *make) {
        make.size.mas_equalTo(CGSizeMake(25, 20));
        make.left.equalTo(self.view).with.offset(10);
        make.top.equalTo(iconLabel.mas_bottom).with.offset(30);
    }];

    //社团名
    UITextField *nameText = [[UITextField alloc]init];
    nameText.placeholder = @"请填写社区名(社团名最多6个字)";
    [self.view addSubview:nameText];

    [nameText mas_makeConstraints:^(MASConstraintMaker *make) {
        make.height.mas_equalTo(@20);
        make.centerY.equalTo(editIcon);
        make.right.equalTo(self.view).with.offset(-10);
        make.left.equalTo(editIcon.mas_right).with.offset(5);
    }];
    //分割线
    UIImageView *xian = [[UIImageView alloc]init];
    xian.backgroundColor = [UIColor grayColor];
    [self.view addSubview:xian];

    [xian mas_makeConstraints:^(MASConstraintMaker *make) {
        make.height.mas_equalTo(@1);
        make.left.equalTo(self.view).with.offset(10);
        make.right.equalTo(self.view).with.offset(-10);
        make.top.equalTo(editIcon.mas_bottom).with.offset(5);
    }];
    //选择标签
    UILabel *tagLabel = [[UILabel alloc]init];
    tagLabel.text = @"选择标签";
    tagLabel.textColor =[UIColor orangeColor];
    tagLabel.font = [UIFont systemFontOfSize:15];
    [self.view addSubview:tagLabel];

    [tagLabel mas_makeConstraints:^(MASConstraintMaker *make) {
        make.height.mas_equalTo(@20);
        make.width.mas_equalTo(@60);
        make.left.equalTo(self.view).with.offset(10);
        make.top.equalTo(xian).with.offset(35);
    }];

    //跳转标签选择
    UITextField *tagText = [[UITextField alloc]init];
    tagText.placeholder = @"美容颜";
    tagText.borderStyle=UITextBorderStyleRoundedRect;
    tagText.delegate = self;
    [tagText addTarget:self action:@selector(textTag) forControlEvents:UIControlEventTouchDown];
    [self.view addSubview:tagText];

    [tagText mas_makeConstraints:^(MASConstraintMaker *make) {
        make.centerY.equalTo(tagLabel);
        make.right.equalTo(self.view).with.offset(-10);
        make.left.equalTo(tagLabel.mas_right).with.offset(5);
    }];

    //label标识语
    UILabel *label = [[UILabel alloc]init];
    label.font = [UIFont systemFontOfSize:13];
    label.textColor = [UIColor redColor];
    label.text = @"PS:成员和视频越多得社团越容易被发现!";
    [self.view addSubview:label];

    [label mas_makeConstraints:^(MASConstraintMaker *make) {
        make.left.equalTo(self.view).with.offset(10);
        make.right.equalTo(self.view).with.offset(-10);
        make.top.equalTo(tagText.mas_bottom).with.offset(20);
    }];


    UIButton *commitBtn = [[UIButton alloc]init];
    [commitBtn.layer setCornerRadius:5];
    [commitBtn setBackgroundColor:[UIColor orangeColor]];
    commitBtn.titleLabel.font = [UIFont systemFontOfSize:15];
    [commitBtn setTitle:@"确认发布" forState:UIControlStateNormal];
    [commitBtn addTarget:self action:@selector(commitButton) forControlEvents:UIControlEventTouchDown];
    [self.view addSubview:commitBtn];

    [commitBtn mas_makeConstraints:^(MASConstraintMaker *make) {
        make.height.mas_equalTo(@30);
        make.left.equalTo(self.view).with.offset(10);
        make.right.equalTo(self.view).with.offset(-10);
        make.top.equalTo(label.mas_bottom).with.offset(50);
    }];


}


@end
- 效果图
- Masonry高级使用例子2
#import "ZengxinViewController.h"
#import "UIColorUtil.h"
#import "Masonry.h"
//app的高度
#define QJLAppWidth ([UIScreen mainScreen].bounds.size.width)
//app的宽度
#define QJLAppHeight ([UIScreen mainScreen].bounds.size.height)

#define MAS_SHORTHAND
#define MAS_SHORTHAND_GLOBALS

@interface ZengxinViewController ()
/*中心视图*/
@property (nonatomic, strong) UIView *contenView;
/*这里暂时没有命名,文字*/
@property (nonatomic, strong) UILabel *label;
/*征信视图*/
@property (nonatomic, strong) UIView *zengxinlogview;
/*征信输入账号视图*/
@property (nonatomic, strong) UITextField *zengxinField;
/*征信密码视图*/
@property (nonatomic, strong) UIView *zengxinpdsview;
/*征信输入密码视图*/
@property (nonatomic, strong) UITextField *zengxinpdsField;
/*征信ID视图*/
@property (nonatomic, strong) UIView *zengxinidview;
/*征信输入ID视图*/
@property (nonatomic, strong) UITextField *zengxinidField;
/*征信确认按钮*/
@property (nonatomic, strong) UIButton *zengxinBtn;
/*确认按钮下的标签*/
@property (nonatomic, strong) UILabel *zengxinlabel;
@end

@implementation ZengxinViewController

- (void)viewDidLoad {
    [super viewDidLoad];
    [self Nav];
    [self setUpUI];
    // Do any additional setup after loading the view from its nib.
}

-(void)Nav{
    //创建一个导航栏
    UINavigationBar *navBar = [[UINavigationBar alloc] initWithFrame:CGRectMake(0, 0, QJLAppWidth, 66)];
    //把导航栏集合添加到导航栏中,设置动画关闭,设置颜色
    [navBar pushNavigationItem:[self navItem] animated:NO];
    //设置NavigationBar背景颜色
    [[UINavigationBar appearance] setBarTintColor:[UIColorUtil colorWithHexString:@"#1F83FF"]];
    [self.view addSubview:navBar];
}
-(UINavigationItem *)navItem{
    // 创建一个导航项
    UINavigationItem *navigationItem = [[UINavigationItem alloc]
                                        initWithTitle:@"人行征信"];
    [[UINavigationBar appearance] setTitleTextAttributes:@{NSForegroundColorAttributeName:[UIColor colorWithRed:255/255.0 green:255/255.0 blue:255/255.0 alpha:1.0]}];
    // 创建一个左边按钮
    UIButton *leftButton = [[UIButton alloc]initWithFrame:CGRectMake(0,0,15,22)];
    [leftButton setImage:[UIImage imageNamed:@"back.png"]forState:UIControlStateNormal];
    [leftButton addTarget:self action:@selector(leftButton)forControlEvents:UIControlEventTouchUpInside];
    UIBarButtonItem *rightItem = [[UIBarButtonItem alloc]initWithCustomView:leftButton];
    [navigationItem setLeftBarButtonItem:rightItem];
    return navigationItem;
}

-(void)leftButton{
    [self.navigationController popViewControllerAnimated:YES];
}

-(void)setUpUI{

    //中心视图灰色
    _contenView=[[UIView alloc]initWithFrame:CGRectMake(0, 66, QJLAppWidth, QJLAppHeight-66)];
    _contenView.backgroundColor = [UIColorUtil colorWithHexString:@"#EFEFF4"];
    [self.view addSubview:_contenView];


    //label标识
    _label = [[UILabel alloc]init];
    _label.font = [UIFont systemFontOfSize:11];
    _label.textColor = [UIColorUtil colorWithHexString:@"#999999"];
    _label.text = @"'信而富'请求访问您的个人征信报告,诺您尚未注册服务账号 \n请先到“中国人民银行个人征信服务”平台注册账号";
    _label.lineBreakMode = NSLineBreakByWordWrapping;
    _label.numberOfLines = 3;
    [self.contenView addSubview:_label];

    [_label mas_makeConstraints:^(MASConstraintMaker *make) {
        make.size.mas_equalTo(CGSizeMake(QJLAppWidth, 40));
        make.top.mas_equalTo(0);
        make.left.mas_equalTo(10);
    }];

    //征信登入账号视图
    _zengxinlogview = [[UIView alloc]init];
    _zengxinlogview.backgroundColor = [UIColor whiteColor];
    [self.contenView addSubview:_zengxinlogview];

    [_zengxinlogview mas_remakeConstraints:^(MASConstraintMaker *make) {
        make.size.mas_equalTo(CGSizeMake(QJLAppWidth, 45));
        make.top.equalTo(_label.mas_top).mas_equalTo(45);
        make.right.mas_equalTo(0);
        make.left.mas_equalTo(0);
    }];

    _zengxinField = [[UITextField alloc]init];
    _zengxinField.placeholder = @"征信中心登录账号";
    [self.zengxinlogview addSubview:_zengxinField];

    [_zengxinField mas_remakeConstraints:^(MASConstraintMaker *make) {
        make.size.mas_equalTo(CGSizeMake(QJLAppWidth, 45));
        make.top.equalTo(_label.mas_top).mas_equalTo(45);
        make.right.mas_equalTo(0);
        make.left.mas_equalTo(10);
    }];


    //征信登入密码视图
    _zengxinpdsview = [[UIView alloc]init];
    _zengxinpdsview.backgroundColor = [UIColor whiteColor];
    [self.contenView addSubview:_zengxinpdsview];

    [_zengxinpdsview mas_remakeConstraints:^(MASConstraintMaker *make) {
        make.size.mas_equalTo(CGSizeMake(QJLAppWidth, 45));
        make.top.equalTo(_zengxinlogview.mas_top).mas_equalTo(46);
        make.right.mas_equalTo(0);
        make.left.mas_equalTo(0);
    }];

    _zengxinpdsField = [[UITextField alloc]init];
    _zengxinpdsField.placeholder = @"征信中心登录密码";
    [self.zengxinpdsview addSubview:_zengxinpdsField];

    [_zengxinpdsField mas_remakeConstraints:^(MASConstraintMaker *make) {
        make.size.mas_equalTo(CGSizeMake(QJLAppWidth, 45));
        make.top.equalTo(_zengxinlogview.mas_top).mas_equalTo(46);
        make.right.mas_equalTo(0);
        make.left.mas_equalTo(10);
    }];

    //征信登入ID视图
    _zengxinidview = [[UIView alloc]init];
    _zengxinidview.backgroundColor = [UIColor whiteColor];
    [self.contenView addSubview:_zengxinidview];

    [_zengxinidview mas_remakeConstraints:^(MASConstraintMaker *make) {
        make.size.mas_equalTo(CGSizeMake(QJLAppWidth, 45));
        make.top.equalTo(_zengxinpdsview.mas_top).mas_equalTo(46);
        make.right.mas_equalTo(0);
        make.left.mas_equalTo(0);
    }];

    _zengxinidField = [[UITextField alloc]init];
    _zengxinidField.placeholder = @"身份证验证码";
    [self.zengxinidview addSubview:_zengxinidField];

    [_zengxinidField mas_remakeConstraints:^(MASConstraintMaker *make) {
        make.size.mas_equalTo(CGSizeMake(QJLAppWidth, 45));
        make.top.equalTo(_zengxinpdsview.mas_top).mas_equalTo(46);
        make.right.mas_equalTo(0);
        make.left.mas_equalTo(10);
    }];


    //征信确认的按钮
    _zengxinBtn = [[UIButton alloc]init];
    [_zengxinBtn setBackgroundColor:[UIColorUtil colorWithHexString:@"#AAAAAA"]];
    [_zengxinBtn setTitle: @"确认" forState: UIControlStateNormal];
    [_zengxinBtn setTitleColor:[UIColor whiteColor] forState:UIControlStateNormal];
    [_zengxinBtn addTarget:self action:@selector(btnButton)forControlEvents:UIControlEventTouchUpInside];
    [self.contenView addSubview:_zengxinBtn];

    [_zengxinBtn mas_makeConstraints:^(MASConstraintMaker *make) {
        make.size.mas_equalTo(CGSizeMake(QJLAppWidth, 40));
        make.top.equalTo(_zengxinidview.mas_top).mas_equalTo(100);
        make.right.mas_equalTo(-10);
        make.left.mas_equalTo(10);
    }];

    //label标识
    _zengxinlabel = [[UILabel alloc]init];
    _zengxinlabel.font = [UIFont systemFontOfSize:11];
    _zengxinlabel.textColor = [UIColorUtil colorWithHexString:@"#999999"];
    _zengxinlabel.text = @"(信而富会对你您的所有资料进行严格保密)";
    _zengxinlabel.textAlignment = UITextAlignmentCenter;
    [self.contenView addSubview:_zengxinlabel];

    [_zengxinlabel mas_makeConstraints:^(MASConstraintMaker *make) {
        make.size.mas_equalTo(CGSizeMake(QJLAppWidth, 20));
        make.top.equalTo(_zengxinBtn.mas_top).mas_equalTo(40);
        make.right.mas_equalTo(-10);
        make.left.mas_equalTo(10);
    }];
}

-(void)btnButton{
    printf("确认");
}
@end
番外篇
- 这里我多加一个例子,就是用xib来约束布局来画一个页面,本人花了很久是时间来
结尾
- 其实还有更多的内容没有说明,还有很多的东西也有很多,我这里只是简单的介绍一下,如何快速入手,比起其他的人用法我这是没法比了,这些例子希望能够帮助小伙伴们的布局困难,也希望你们不要害怕动手,,不敢去尝试写。
只要动手才会有错误,只有错误才会前进 - 李明杰
