概述
SVProgressHUD V2.1.2是一款运行于iOS、tvOS中的轻量级指示器, 常用于指示一个任务正在持续进行中, 其采用单例模式创建对象, 所以我们在使用过程中只需通过[SVProgressHUD method]的方式调用对应方法即可
[SVProgressHUD show];
dispatch_async(dispatch_get_global_queue(DISPATCH_QUEUE_PRIORITY_DEFAULT, 0), ^{
    // time-consuming task
    dispatch_async(dispatch_get_main_queue(), ^{
        [SVProgressHUD dismiss];
    });
});
在网络上关于SVProgressHUD框架的使用教程有很多, 本文对此不再赘述, 本文将重点介绍框架的结构和技术点
SVIndefiniteAnimatedView
概述
SVIndefiniteAnimatedView继承自UIView类, 用于实现一个无限指示器, 该类在.h文件中提供如下3个属性分别用于定义无限指示器的厚度、半径及颜色
@property (nonatomic, assign) CGFloat strokeThickness;
@property (nonatomic, assign) CGFloat radius;
@property (nonatomic, strong) UIColor *strokeColor;
实现原理
无限指示器原理
SVIndefiniteAnimatedView类在.m文件中提供如下属性, 利用该属性便可非常巧妙地实现无限指示器效果
@property (nonatomic, strong) CAShapeLayer *indefiniteAnimatedLayer;
注: 本文默认读者了解CALayer的mask属性
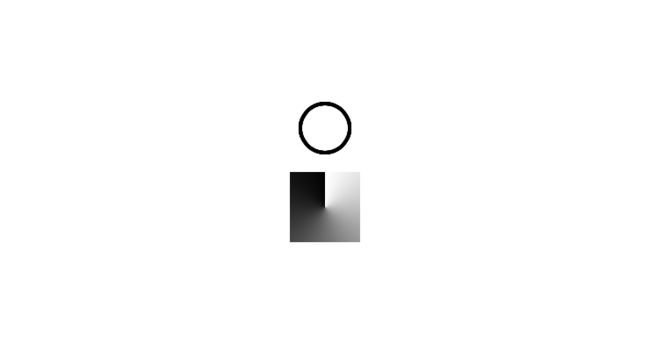
indefiniteAnimatedLayer是一个圆形layer, 其mask遮罩属性是一个以特定图片为内容的layer(后文称其为"maskLayer"), 二者如下图所示
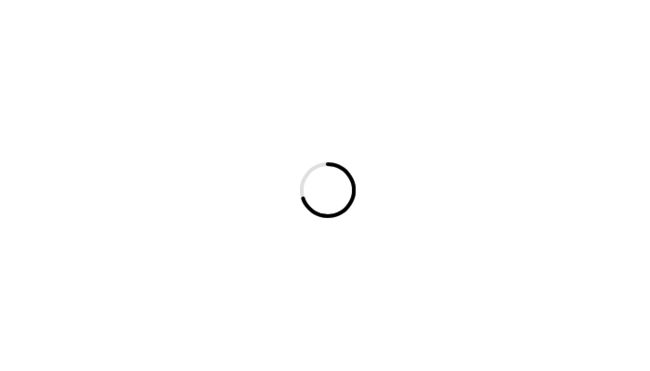
通过CABasicAnimation针对maskLayer的transform.rotation添加动画, 使其不断地顺时针进行旋转; 通过CAAnimationGroup为indefiniteAnimatedLayer的strokeStart和strokeEnd添加动画, 使其不断地顺时针进行旋转, 同时保证拥有一个不变的缺口, 二者如下图所示
将maskLayer作为indefiniteAnimatedLayer的mask遮罩属性, 便实现了无限指示器效果
- (CAShapeLayer*)indefiniteAnimatedLayer {
    if(!_indefiniteAnimatedLayer) {
        CGPoint arcCenter = CGPointMake(self.radius+self.strokeThickness/2+5, self.radius+self.strokeThickness/2+5);
        UIBezierPath* smoothedPath = [UIBezierPath bezierPathWithArcCenter:arcCenter radius:self.radius startAngle:(CGFloat) (M_PI*3/2) endAngle:(CGFloat) (M_PI/2+M_PI*5) clockwise:YES];

        _indefiniteAnimatedLayer = [CAShapeLayer layer];
        _indefiniteAnimatedLayer.contentsScale = [[UIScreen mainScreen] scale];
        _indefiniteAnimatedLayer.frame = CGRectMake(0.0f, 0.0f, arcCenter.x*2, arcCenter.y*2);
        _indefiniteAnimatedLayer.fillColor = [UIColor clearColor].CGColor;
        _indefiniteAnimatedLayer.strokeColor = self.strokeColor.CGColor;
        _indefiniteAnimatedLayer.lineWidth = self.strokeThickness;
        _indefiniteAnimatedLayer.lineCap = kCALineCapRound;
        _indefiniteAnimatedLayer.lineJoin = kCALineJoinBevel;
        _indefiniteAnimatedLayer.path = smoothedPath.CGPath;

        CALayer *maskLayer = [CALayer layer];

        NSBundle *bundle = [NSBundle bundleForClass:[SVProgressHUD class]];
        NSURL *url = [bundle URLForResource:@"SVProgressHUD" withExtension:@"bundle"];
        NSBundle *imageBundle = [NSBundle bundleWithURL:url];

        NSString *path = [imageBundle pathForResource:@"angle-mask" ofType:@"png"];

        maskLayer.contents = (__bridge id)[[UIImage imageWithContentsOfFile:path] CGImage];
        maskLayer.frame = _indefiniteAnimatedLayer.bounds;
        _indefiniteAnimatedLayer.mask = maskLayer;

        NSTimeInterval animationDuration = 1;
        CAMediaTimingFunction *linearCurve = [CAMediaTimingFunction functionWithName:kCAMediaTimingFunctionLinear];

        CABasicAnimation *animation = [CABasicAnimation animationWithKeyPath:@"transform.rotation"];
        animation.fromValue = (id) 0;
        animation.toValue = @(M_PI*2);
        animation.duration = animationDuration;
        animation.timingFunction = linearCurve;
        animation.removedOnCompletion = NO;
        animation.repeatCount = INFINITY;
        animation.fillMode = kCAFillModeForwards;
        animation.autoreverses = NO;
        [maskLayer addAnimation:animation forKey:@"rotate"];

        CAAnimationGroup *animationGroup = [CAAnimationGroup animation];
        animationGroup.duration = animationDuration;
        animationGroup.repeatCount = INFINITY;
        animationGroup.removedOnCompletion = NO;
        animationGroup.timingFunction = linearCurve;

        CABasicAnimation *strokeStartAnimation = [CABasicAnimation animationWithKeyPath:@"strokeStart"];
        strokeStartAnimation.fromValue = @0.015;
        strokeStartAnimation.toValue = @0.515;

        CABasicAnimation *strokeEndAnimation = [CABasicAnimation animationWithKeyPath:@"strokeEnd"];
        strokeEndAnimation.fromValue = @0.485;
        strokeEndAnimation.toValue = @0.985;

        animationGroup.animations = @[strokeStartAnimation, strokeEndAnimation];
        [_indefiniteAnimatedLayer addAnimation:animationGroup forKey:@"progress"];
    }
    return _indefiniteAnimatedLayer;
}
注: indefiniteAnimatedLayer的动画效果实现很巧妙, 为了达到想要的效果, 将indefiniteAnimatedLayer的path设置为两周, 这里读者可以仔细体会
显示原理
SVIndefiniteAnimatedView类中重写了如下方法, 当父视图存在时(即视图被add时), 将indefiniteAnimatedLayer添加为self.layer的子layer; 当父视图不存在时(即视图被remove时), 将indefiniteAnimatedLayer从self.layer中移除
- (void)willMoveToSuperview:(UIView*)newSuperview {
    if (newSuperview) {
        [self layoutAnimatedLayer];
    } else {
        [_indefiniteAnimatedLayer removeFromSuperlayer];
        _indefiniteAnimatedLayer = nil;
    }
}
注: 该方法在父视图将要发生改变(add/remove)时会被系统调用, 该方法默认实现没有进行任何操作, 子类可以覆盖该方法以执行一些额外的操作, 当视图被add时, newSuperview为父视图; 当视图被remove时, newSuperview为nil
大小原理
SVIndefiniteAnimatedView类中重写了如下方法, 当调用sizeToFit方法时, 系统会自动调用如下方法, 并设置自身大小
- (CGSize)sizeThatFits:(CGSize)size {
    return CGSizeMake((self.radius+self.strokeThickness/2+5)*2, (self.radius+self.strokeThickness/2+5)*2);
}
SVProgressAnimatedView
概述
SVProgressAnimatedView继承自UIView类, 用于实现一个进度指示器, 该类在.h文件中提供如下4个属性分别用于定义进度指示器的厚度、半径、颜色及进度
@property (nonatomic, assign) CGFloat strokeThickness;
@property (nonatomic, assign) CGFloat radius;
@property (nonatomic, strong) UIColor *strokeColor;
@property (nonatomic, assign) CGFloat strokeEnd;
实现原理
进度指示器原理
SVProgressAnimatedView类在.m文件中提供如下属性, 利用该属性便可非常巧妙地实现进度指示器效果
@property (nonatomic, strong) CAShapeLayer *ringAnimatedLayer;
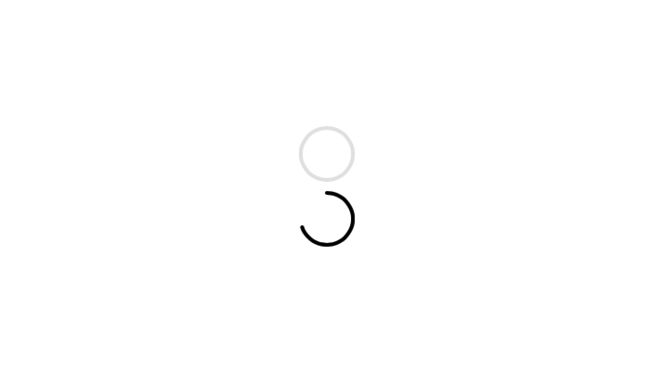
ringAnimatedLayer是一个圆形layer, 如下图所示
将两个颜色不同的SVProgressAnimatedView叠加, 便实现了进度指示器效果
- (CAShapeLayer*)ringAnimatedLayer {
    if(!_ringAnimatedLayer) {
        CGPoint arcCenter = CGPointMake(self.radius+self.strokeThickness/2+5, self.radius+self.strokeThickness/2+5);
        UIBezierPath* smoothedPath = [UIBezierPath bezierPathWithArcCenter:arcCenter radius:self.radius startAngle:(CGFloat)-M_PI_2 endAngle:(CGFloat) (M_PI + M_PI_2) clockwise:YES];

        _ringAnimatedLayer = [CAShapeLayer layer];
        _ringAnimatedLayer.contentsScale = [[UIScreen mainScreen] scale];
        _ringAnimatedLayer.frame = CGRectMake(0.0f, 0.0f, arcCenter.x*2, arcCenter.y*2);
        _ringAnimatedLayer.fillColor = [UIColor clearColor].CGColor;
        _ringAnimatedLayer.strokeColor = self.strokeColor.CGColor;
        _ringAnimatedLayer.lineWidth = self.strokeThickness;
        _ringAnimatedLayer.lineCap = kCALineCapRound;
        _ringAnimatedLayer.lineJoin = kCALineJoinBevel;
        _ringAnimatedLayer.path = smoothedPath.CGPath;
    }
    return _ringAnimatedLayer;
}
显示原理
SVProgressAnimatedView类中重写了如下方法, 当父视图存在时(即视图被add时), 将ringAnimatedLayer添加为self.layer的子layer; 当父视图不存在时(即视图被remove时), 将ringAnimatedLayer从self.layer中移除
- (void)willMoveToSuperview:(UIView*)newSuperview {
    if (newSuperview) {
        [self layoutAnimatedLayer];
    } else {
        [_ringAnimatedLayer removeFromSuperlayer];
        _ringAnimatedLayer = nil;
    }
}
注: 该方法在父视图将要发生改变(add/remove)时会被系统调用, 该方法默认实现没有进行任何操作, 子类可以覆盖该方法以执行一些额外的操作, 当视图被add时, newSuperview为父视图; 当视图被remove时, newSuperview为nil
大小原理
SVProgressAnimatedView类中重写了如下方法, 当调用sizeToFit方法时, 系统会自动调用如下方法, 并设置自身大小
- (CGSize)sizeThatFits:(CGSize)size {
    return CGSizeMake((self.radius+self.strokeThickness/2+5)*2, (self.radius+self.strokeThickness/2+5)*2);
}
SVRadialGradientLayer
概述
SVRadialGradientLayer继承自CALayer类, 用于实现一个放射渐变层, 该类在.h文件中提供如下属性用于定义放射渐变层的放射中心
@property (nonatomic) CGPoint gradientCenter;
实现原理
- (void)drawInContext:(CGContextRef)context {
    size_t locationsCount = 2;
    CGFloat locations[2] = {0.0f, 1.0f};
    CGFloat colors[8] = {0.0f, 0.0f, 0.0f, 0.0f, 0.0f, 0.0f, 0.0f, 0.75f};
    CGColorSpaceRef colorSpace = CGColorSpaceCreateDeviceRGB();
    CGGradientRef gradient = CGGradientCreateWithColorComponents(colorSpace, colors, locations, locationsCount);
    CGColorSpaceRelease(colorSpace);

    float radius = MIN(self.bounds.size.width , self.bounds.size.height);
    CGContextDrawRadialGradient (context, gradient, self.gradientCenter, 0, self.gradientCenter, radius, kCGGradientDrawsAfterEndLocation);
    CGGradientRelease(gradient);
}
SVProgressHUD
概述
SVProgressHUD继承自UIView类, 该类提供了两类方法供使用者调用, 其中+setXXX:方法用于设置HUD的样式、遮罩、颜色等, +showXXX:方法用于设置HUD的显示, 而+dismissXX:方法用于设置HUD的隐藏
SVProgressHUD的视图层级结构如下图所示
实现原理
+setXXX:方法
+setXXX:方法实现很简单, 每一个方法都只是在调用对应的-setXXX:方法,
+ (void)setDefaultMaskType:(SVProgressHUDMaskType)maskType {
    [self sharedView].defaultMaskType = maskType;
}

- (void)setDefaultMaskType:(SVProgressHUDMaskType)maskType {
    if (!_isInitializing) _defaultMaskType = maskType;
}
注: 其中isInitializing在initWithFrame:方法开始时被设置为YES, 结束时被设置为NO
+showXXX:方法
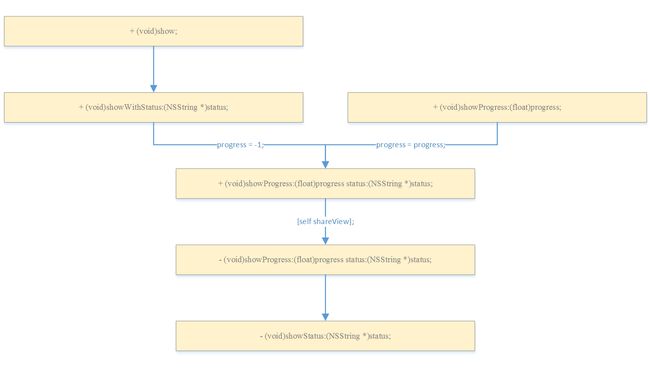
SVProgressHUD中提供如下几种用于展示无限指示器和进度指示器的方法, 他们的调用流程如下图所示
+ (void)show;
+ (void)showWithStatus:(NSString*)status;
+ (void)showProgress:(float)progress;
+ (void)showProgress:(float)progress status:(NSString*)status;
通过观察我们可以发现, 几个方法最终都会调用如下方法, 接下来我们将对该方法进行分析(注: 笔者仅摘录了方法核心部分)
- (void)showProgress:(float)progress status:(NSString*)status {
    __weak SVProgressHUD *weakSelf = self;
    [[NSOperationQueue mainQueue] addOperationWithBlock:^{
        __strong SVProgressHUD *strongSelf = weakSelf;
        if(strongSelf){
            [strongSelf updateViewHierarchy];

            strongSelf.imageView.hidden = YES;
            strongSelf.imageView.image = nil;
            strongSelf.fadeOutTimer = nil;

            strongSelf.statusLabel.text = status;
            strongSelf.progress = progress;

            if(progress >= 0) {
                [strongSelf cancelIndefiniteAnimatedViewAnimation];

                if(!strongSelf.ringView.superview){
#if __IPHONE_OS_VERSION_MAX_ALLOWED >= 80000
                    [strongSelf.hudVibrancyView.contentView addSubview:strongSelf.ringView];
#else
                    [strongSelf.hudView addSubview:strongSelf.ringView];
#endif
                }
                if(!strongSelf.backgroundRingView.superview){
#if __IPHONE_OS_VERSION_MAX_ALLOWED >= 80000
                    [strongSelf.hudVibrancyView.contentView addSubview:strongSelf.backgroundRingView];
#else
                    [strongSelf.hudView addSubview:strongSelf.backgroundRingView];
#endif
                }

                [CATransaction begin];
                [CATransaction setDisableActions:YES];
                strongSelf.ringView.strokeEnd = progress;
                [CATransaction commit];
            } else {
                [strongSelf cancelRingLayerAnimation];

#if __IPHONE_OS_VERSION_MAX_ALLOWED >= 80000
                [strongSelf.hudVibrancyView.contentView addSubview:strongSelf.indefiniteAnimatedView];
#else
                [strongSelf.hudView addSubview:strongSelf.indefiniteAnimatedView];
#endif
                if([strongSelf.indefiniteAnimatedView respondsToSelector:@selector(startAnimating)]) {
                    [(id)strongSelf.indefiniteAnimatedView startAnimating];
                }
            }

            [strongSelf showStatus:status];
        }
    }];
}
通过梳理, 该方法流程如下图所示
SVProgressHUD中提供如下几种用于展示图片的方法, 他们的调用流程如下图所示
+ (void)showInfoWithStatus:(NSString*)status;
+ (void)showSuccessWithStatus:(NSString*)status;
+ (void)showErrorWithStatus:(NSString*)status;
+ (void)showImage:(UIImage*)image status:(NSString*)status;
通过观察我们可以发现, 几个方法最终都会调用如下方法, 接下来我们将对该方法进行分析(注: 笔者仅摘录了方法核心部分)
- (void)showImage:(UIImage*)image status:(NSString*)status duration:(NSTimeInterval)duration {
    __weak SVProgressHUD *weakSelf = self;
    [[NSOperationQueue mainQueue] addOperationWithBlock:^{
        __strong SVProgressHUD *strongSelf = weakSelf;
        if(strongSelf){
            [strongSelf updateViewHierarchy];

            strongSelf.progress = SVProgressHUDUndefinedProgress;
            [strongSelf cancelRingLayerAnimation];
            [strongSelf cancelIndefiniteAnimatedViewAnimation];

            UIColor *tintColor = strongSelf.foregroundColorForStyle;
            UIImage *tintedImage = image;
            if (image.renderingMode != UIImageRenderingModeAlwaysTemplate) {
                tintedImage = [image imageWithRenderingMode:UIImageRenderingModeAlwaysTemplate];
            }
            strongSelf.imageView.tintColor = tintColor;
            strongSelf.imageView.image = tintedImage;
            strongSelf.imageView.hidden = NO;

            strongSelf.statusLabel.text = status;

            [strongSelf showStatus:status];

            strongSelf.fadeOutTimer = [NSTimer timerWithTimeInterval:duration target:strongSelf selector:@selector(dismiss) userInfo:nil repeats:NO];
            [[NSRunLoop mainRunLoop] addTimer:strongSelf.fadeOutTimer forMode:NSRunLoopCommonModes];
        }
    }];
}
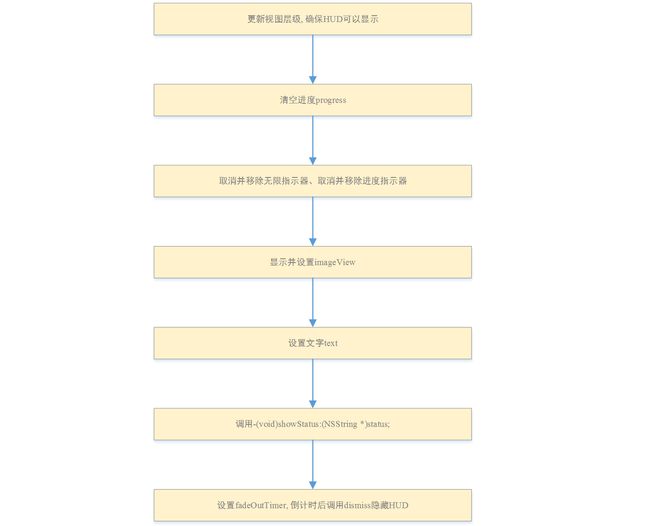
通过梳理, 该方法流程如下图所示
上方介绍的两个方法都会调用如下方法, 接下来我们将对该方法进行分析(注: 笔者仅摘录了方法核心部分)
- (void)showStatus:(NSString*)status {
    [self updateHUDFrame];
    [self positionHUD:nil];

    if(self.defaultMaskType != SVProgressHUDMaskTypeNone) {
        self.controlView.userInteractionEnabled = YES;
    } else {
        self.controlView.userInteractionEnabled = NO;
    }

#if __IPHONE_OS_VERSION_MAX_ALLOWED >= 80000
    if(self.hudView.contentView.alpha != 1.0f){
#else
    if(self.hudView.alpha != 1.0f){
#endif
        [[NSNotificationCenter defaultCenter] postNotificationName:SVProgressHUDWillAppearNotification
                                                            object:self
                                                          userInfo:[self notificationUserInfo]];

        self.hudView.transform = CGAffineTransformScale(self.hudView.transform, 1.3, 1.3);

        __block void (^animationsBlock)(void) = ^{
            self.hudView.transform = CGAffineTransformScale(self.hudView.transform, 1/1.3f, 1/1.3f);

#if __IPHONE_OS_VERSION_MAX_ALLOWED >= 80000
            self.hudView.contentView.alpha = 1.0f;
#else
            self.hudView.alpha = 1.0f;
#endif
            self.backgroundView.alpha = 1.0f;
        };

        __block void (^completionBlock)(void) = ^{
#if __IPHONE_OS_VERSION_MAX_ALLOWED >= 80000
            if(self.hudView.contentView.alpha == 1.0f){
#else
            if(self.hudView.alpha == 1.0f){
#endif
                [self registerNotifications];

                [[NSNotificationCenter defaultCenter] postNotificationName:SVProgressHUDDidAppearNotification
                                                                    object:self
                                                                  userInfo:[self notificationUserInfo]];
            }
        };

        if (self.fadeInAnimationDuration > 0) {
            [UIView animateWithDuration:self.fadeInAnimationDuration
                                  delay:0
                                options:(UIViewAnimationOptions) (UIViewAnimationOptionAllowUserInteraction | UIViewAnimationCurveEaseIn | UIViewAnimationOptionBeginFromCurrentState)
                             animations:^{
                                 animationsBlock();
                             } completion:^(BOOL finished) {
                                 completionBlock();
                             }];
        } else {
            animationsBlock();
            completionBlock();
        }

        [self setNeedsDisplay];
    }
}
通过梳理, 该方法流程如下图所示
+dismissXXX:方法
SVProgressHUD中提供如下几种用于隐藏的方法, 他们的调用流程如下图所示
+ (void)dismiss;
+ (void)dismissWithCompletion:(SVProgressHUDDismissCompletion)completion;
+ (void)dismissWithDelay:(NSTimeInterval)delay;
+ (void)dismissWithDelay:(NSTimeInterval)delay completion:(SVProgressHUDDismissCompletion)completion;
通过观察我们可以发现, 几个方法最终都会调用如下方法, 接下来我们将对该方法进行分析(注: 笔者仅摘录了方法核心部分)
- (void)dismissWithDelay:(NSTimeInterval)delay completion:(SVProgressHUDDismissCompletion)completion {
    __weak SVProgressHUD *weakSelf = self;
    [[NSOperationQueue mainQueue] addOperationWithBlock:^{
        __strong SVProgressHUD *strongSelf = weakSelf;
        if(strongSelf){
            [[NSNotificationCenter defaultCenter] postNotificationName:SVProgressHUDWillDisappearNotification
                                                                object:nil
                                                              userInfo:[strongSelf notificationUserInfo]];

            __block void (^animationsBlock)(void) = ^{
                strongSelf.hudView.transform = CGAffineTransformScale(strongSelf.hudView.transform, 1/1.3f, 1/1.3f);

#if __IPHONE_OS_VERSION_MAX_ALLOWED >= 80000
                strongSelf.hudView.contentView.alpha = 0.0f;
#else
                strongSelf.hudView.alpha = 0.0f;
#endif
                strongSelf.backgroundView.alpha = 0.0f;
            };

            __block void (^completionBlock)(void) = ^{
#if __IPHONE_OS_VERSION_MAX_ALLOWED >= 80000
                if(strongSelf.hudView.contentView.alpha == 0.0f){
#else
                if(strongSelf.hudView.alpha == 0.0f){
#endif
                    [strongSelf.controlView removeFromSuperview];
                    [strongSelf.backgroundView removeFromSuperview];
                    [strongSelf.hudView removeFromSuperview];
                    [strongSelf removeFromSuperview];

                    strongSelf.progress = SVProgressHUDUndefinedProgress;
                    [strongSelf cancelRingLayerAnimation];
                    [strongSelf cancelIndefiniteAnimatedViewAnimation];

                    [[NSNotificationCenter defaultCenter] removeObserver:strongSelf];

                    [[NSNotificationCenter defaultCenter] postNotificationName:SVProgressHUDDidDisappearNotification
                                                                        object:strongSelf
                                                                      userInfo:[strongSelf notificationUserInfo]];

#if !defined(SV_APP_EXTENSIONS) && TARGET_OS_IOS
                    UIViewController *rootController = [[UIApplication sharedApplication] keyWindow].rootViewController;
                    [rootController setNeedsStatusBarAppearanceUpdate];
#endif

                    if (completion) {
                        completion();
                    }
                }
            };

            dispatch_time_t dipatchTime = dispatch_time(DISPATCH_TIME_NOW, (int64_t)(delay * NSEC_PER_SEC));
            dispatch_after(dipatchTime, dispatch_get_main_queue(), ^{
                if (strongSelf.fadeOutAnimationDuration > 0) {
                    [UIView animateWithDuration:strongSelf.fadeOutAnimationDuration
                                          delay:0
                                        options:(UIViewAnimationOptions) (UIViewAnimationOptionAllowUserInteraction | UIViewAnimationCurveEaseOut | UIViewAnimationOptionBeginFromCurrentState)
                                     animations:^{
                                         animationsBlock();
                                     } completion:^(BOOL finished) {
                                         completionBlock();
                                     }];
                } else {
                    animationsBlock();
                    completionBlock();
                }
            });

            [strongSelf setNeedsDisplay];
        } else if (completion) {
            completion();
        }
    }];
}
通过梳理, 该方法流程如下图所示
结语
通过+setXXX:方法设置的样式、遮罩、颜色等必须在+showXXX:方法之前调用方可生效, 但是经过测试发现, 即使放在+showXXX:方法之后调用亦可生效(两个方法在同一方法中调用, 而非过一会再调用), 笔者认为是因为在如下三个方法的实现中调用了[[NSOperationQueue mainQueue] addOperationWithBlock:^{}], 这样便是向主操作队列中添加了一个操作, 而该操作被排在了+setXXX:和+showXXX:的后面, 所以这两个方法的调用顺序不影响最终的结果
- (void)showProgress:(float)progress status:(NSString*)status;
- (void)showImage:(UIImage*)image status:(NSString*)status duration:(NSTimeInterval)duration;
- (void)dismissWithDelay:(NSTimeInterval)delay completion:(SVProgressHUDDismissCompletion)completion;
SVProgressHUD开源框架从2011年维护至今, 由75位贡献者发布了30个release版本, 这里集合了众人的智慧. 笔者在分析代码时可能有理解错误之处, 望读者不吝指出, 谢谢

