一、什么是内存泄漏?
在Android的开发中,经常听到“内存泄漏”这个词。“内存泄漏”就是一个对象已经不需要再使用了,但是因为其它的对象持有该对象的引用,导致它的内存不能被回收。那么在android开发过程中,有哪些比较常见的场景呢?
其实主要就是activity或者fragment内存泄漏了。
那么,泄漏的原因一般有哪些呢?
1、数据库游标忘记关闭了。
2、bitmap忘记回收
3、不当的使用handler
4、timer等不当的使用。
5、地图等
总之,归纳起来一句话来讲:
目前开发者遇到的内存泄漏普遍就是以上几种了,这里列举的仅仅是我遇到的比较多的场景,也不排除还有其他场景。
二、那么遇到内存泄漏一般是怎么追踪并解决问题的呢?
通常,开发者会利用android studio自带的工具进行分析:
1、让自己的app先跑上一段时间,在怀疑会产生内存泄漏的几个地方来回的多切换几次。
然后,打开着界面,在点击这里。
对,通常先GC一下,因为,内存泄漏并不会因为GC而消除,GC只是将一些不必要的干扰因素排除掉而已。
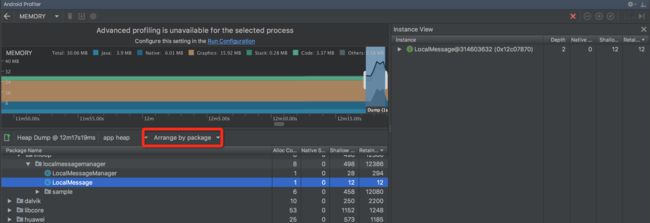
2、然后点GC右边的那个按钮,dump一下内存,来进行分析,dump之后,自动出现这个界面
为了方便查看,我们通常会根据包名Arrage by package分类查看,其实我们只关心自己应用包名先的activity,fragment之类的一些。
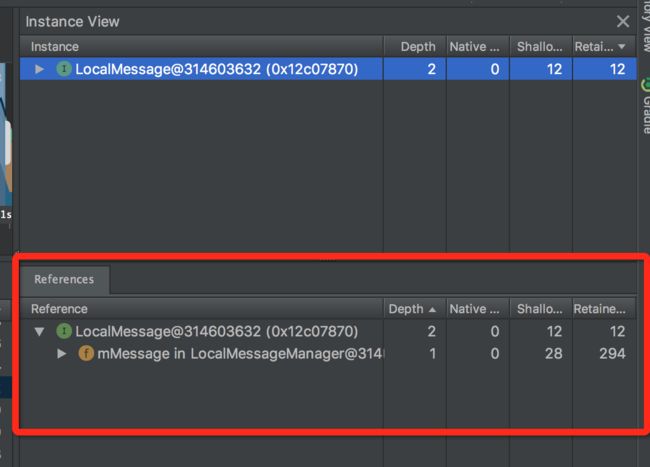
3、这里,右边会列举出实例的个数,通常出现几个实例的activity其实就是你该严重怀疑的对象了,那么
根据这里的引用树,最终层层剥根,你就可以轻易发现最终是谁引用到了这个activity,而导致他泄漏了。
三,恩,回顾一下,这个过程,真是太麻烦了,那么,有没有一个神器可以不用这么麻烦,就帮我们发现内存泄漏,以及定位出原因呢?
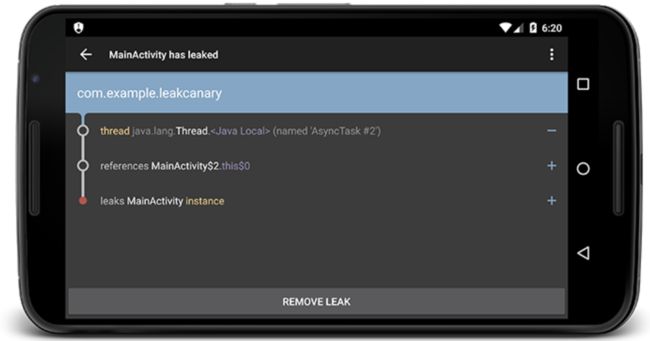
答案显然是有的,他就是 LeakCanary
1、leak canary的原理:
实际上就是有一个线程专门去分析内存图谱,然后,有一些列的lifecircler之类的钩子监听activity 的destory方法,如果一旦发现某个activity执行的 destroy发放,但是,他的实例还一直存在于内存中,那就判定这个activity泄漏了。
一下就是HeapAnalyzer的一段代码片段:
 /**
   * Searches the heap dump for a {@link KeyedWeakReference} instance with the corresponding key,
   * and then computes the shortest strong reference path from that instance to the GC roots.
   */
  public AnalysisResult checkForLeak(File heapDumpFile, String referenceKey) {
    long analysisStartNanoTime = System.nanoTime();

    if (!heapDumpFile.exists()) {
      Exception exception = new IllegalArgumentException("File does not exist: " + heapDumpFile);
      return failure(exception, since(analysisStartNanoTime));
    }

    try {
      HprofBuffer buffer = new MemoryMappedFileBuffer(heapDumpFile);
      HprofParser parser = new HprofParser(buffer);
      Snapshot snapshot = parser.parse();
      deduplicateGcRoots(snapshot);

      Instance leakingRef = findLeakingReference(referenceKey, snapshot);

      // False alarm, weak reference was cleared in between key check and heap dump.
      if (leakingRef == null) {
        return noLeak(since(analysisStartNanoTime));
      }

      return findLeakTrace(analysisStartNanoTime, snapshot, leakingRef);
    } catch (Throwable e) {
      return failure(e, since(analysisStartNanoTime));
    }
  }

private AnalysisResult findLeakTrace(long analysisStartNanoTime, Snapshot snapshot,
      Instance leakingRef) {

    ShortestPathFinder pathFinder = new ShortestPathFinder(excludedRefs);
    ShortestPathFinder.Result result = pathFinder.findPath(snapshot, leakingRef);

    // False alarm, no strong reference path to GC Roots.
    if (result.leakingNode == null) {
      return noLeak(since(analysisStartNanoTime));
    }

    LeakTrace leakTrace = buildLeakTrace(result.leakingNode);

    String className = leakingRef.getClassObj().getClassName();

    // Side effect: computes retained size.
    snapshot.computeDominators();

    Instance leakingInstance = result.leakingNode.instance;

    long retainedSize = leakingInstance.getTotalRetainedSize();

    // TODO: check O sources and see what happened to android.graphics.Bitmap.mBuffer
    if (SDK_INT <= N_MR1) {
      retainedSize += computeIgnoredBitmapRetainedSize(snapshot, leakingInstance);
    }

    return leakDetected(result.excludingKnownLeaks, className, leakTrace, retainedSize,
        since(analysisStartNanoTime));
  }
其中,这段代码清晰表明:
      Instance leakingRef = findLeakingReference(referenceKey, snapshot);

      // False alarm, weak reference was cleared in between key check and heap dump.
      if (leakingRef == null) {
        return noLeak(since(analysisStartNanoTime));
      }

      return findLeakTrace(analysisStartNanoTime, snapshot, leakingRef);
如果一个该销毁的context还被持有,那么就是泄漏了。
2、leak canary 使用:
如果你使用android studio开发,那么相当简单
在build.gralde中添加
dependencies {
  debugCompile 'com.squareup.leakcanary:leakcanary-android:1.5.4'
  releaseCompile 'com.squareup.leakcanary:leakcanary-android-no-op:1.5.4'
}

然后:在你的Application中添加一下代码即可。
public class ExampleApplication extends Application {

  @Override public void onCreate() {
    super.onCreate();
    if (LeakCanary.isInAnalyzerProcess(this)) {
      // This process is dedicated to LeakCanary for heap analysis.
      // You should not init your app in this process.
      return;
    }
    LeakCanary.install(this);
    // Normal app init code...
  }
}
其中
releaseCompile 'com.squareup.leakcanary:leakcanary-android-no-op:1.5.4'
是一个空操作集合,表示,在生产环境下,不会进行内心泄漏检测,只是在开发调试环境起作用,为什么要这么做呢?很显然,一个是为了app流畅,内存泄漏分析是需要消耗性能的,第二个,用户其实对你的app内存泄漏并不关心,一般用户也不明白这是个什么鬼,你突然弹出一个提醒说某某activity泄漏了,用户也是一脸懵逼。


