Django REST framework JWT 和登录功能实现
前后分离token的方式做登录身份校验,jwt校验方式更加简单便捷化,无需通过redis缓存,而是直接根据token取出保存的用户信息,以及对token可用性校验,单点登录更为简单。
配置环境:
python 3.7
Django==2.1.11
djangorestframework-jwt==1.10.0
一、安装
pip install djangorestframework-jwt
二、配置
1.打开项目中settings配置
import datetime
# drf框架的配置信息
REST_FRAMEWORK = {
    # 设置所有接口都需要被验证
    'DEFAULT_PERMISSION_CLASSES': (
        #’rest_framework.permissions.IsAuthenticatedOrReadOnly’,
    ),
    # 用户登陆认证方式
    'DEFAULT_AUTHENTICATION_CLASSES': (
        ‘rest_framework_jwt.authentication.JSONWebTokenAuthentication’,
        #’rest_framework.authentication.SessionAuthentication’,
        #’rest_framework.authentication.BasicAuthentication’,
    ),
}

# jwt载荷中的有效期设置
JWT_AUTH = {
    #token 有效期
    'JWT_EXPIRATION_DELTA': datetime.timedelta(hours=8),
    'JWT_ALLOW_REFRESH': True,
     #续期有效期(该设置可在24小时内带未失效的token 进行续期)
    'JWT_REFRESH_EXPIRATION_DELTA': datetime.timedelta(hours=24),
    # 自定义返回格式,需要手工创建
    'JWT_RESPONSE_PAYLOAD_HANDLER': ‘Users.utils.jwt_response_payload_handler’,
}
2.创建自定义返回数据格式
# 创建用户应用
python manage.py startapp Users
在Users应用目录下新建utils.py 并配置文件
    “””
    自定义jwt认证成功返回数据
    :token  返回的jwt
    :user   当前登录的用户信息[对象]
    :request 当前本次客户端提交过来的数据
    :role 角色
    “””
def jwt_response_payload_handler(token, user=None, request=None, role=None):

    if user.first_name:
        name = user.first_name
    else:
        name = user.username
    return {
        "authenticated": ‘true’,
        'id': user.id,
        "role": role,
        'name': name,
        'username': user.username,
        'email': user.email,
        'token': token,
    }
三、使用
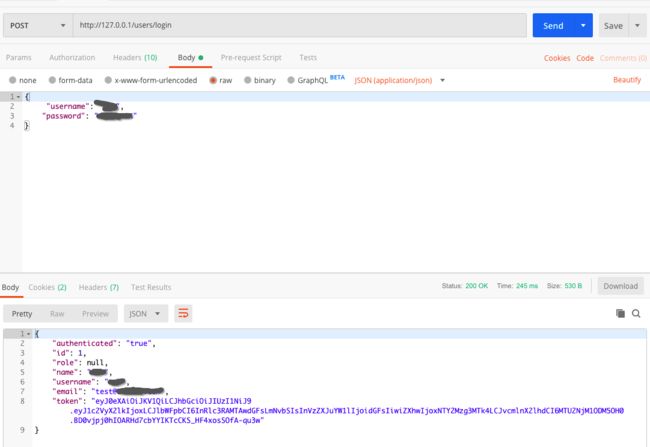
- 申请token
1.打开项目中urls.py 配置路由
from django.contrib import admin
from django.urls import path, include

urlpatterns = [
    path('admin/', admin.site.urls),
    path('users/', include('Users.urls’)),
]
2.在Users应用目录下创建并打开urls.py
# jwt内部实现的登陆视图
from rest_framework_jwt.views import obtain_jwt_token, refresh_jwt_token
from django.urls import path
urlpatterns = [
    path(r"login", obtain_jwt_token),
]
3.打开postman
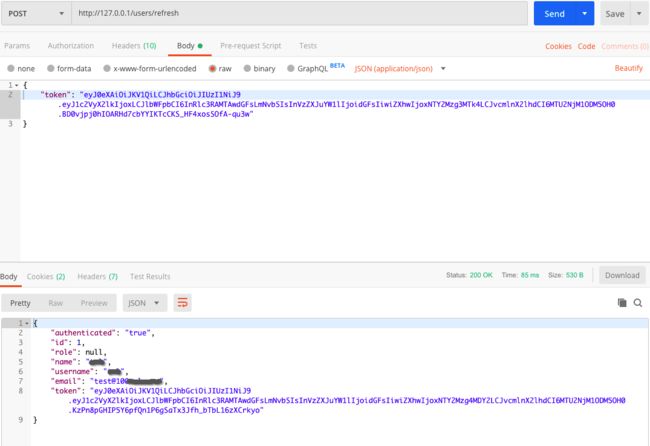
- token 续期
在Users应用目录下打开urls.py
# jwt内部实现的登陆视图
from rest_framework_jwt.views import obtain_jwt_token, refresh_jwt_token
from django.urls import path
urlpatterns = [
    path(r"login", obtain_jwt_token),
    path(r"refresh", refresh_jwt_token),
]
四、验证
验证的时候,我们使用的是rest_framework 框架,该框架使用将在其他文档详细叙述。
permission是权限验证 IsAuthenticated必须登录用户 IsOwnerOrReadOnly必须是当前登录的用户
from rest_framework.permissions import IsAuthenticated,IsAuthenticatedOrReadOnly
# 分页配置
class LargeResultsSetPagination(PageNumberPagination):

    page_size = 10
    page_size_query_param = 'page_size'
    max_page_size = 10000
# 域名列表
class DomainManageList(viewsets.ReadOnlyModelViewSet):

    # authentication是用户认证
    authentication_classes = (JSONWebTokenAuthentication,)
    # permission是权限验证 IsAuthenticated必须登录用户 IsOwnerOrReadOnly必须是当前登录的用户
    # permission_classes = (IsAuthenticated, IsOwnerOrReadOnly)
    #判断是否登陆
    permission_classes = (IsAuthenticated, )

    #查询所有信息
    queryset = Domain_Manage.objects.all()

    #序列化
    serializer_class = DomainManageListSerializers
    pagination_class = LargeResultsSetPagination

