iOS10中,通知被整合进了UserNotification框架,用起来更加灵活了。之前只能简单的定义标题,内容类似酱。。。牛逼了之后呢
- 支持自定义音效和启动图
- 可以向内容中添加自定义附件,比如音视频
- 根据延迟时间,自定义时间,地理位置进行设置
- 添加action
- 自定义界面
厉害吗
一、UserNotification中的常用类
- UNNotificationCenter:单例类,通知的注册,添加,请求。。。
- UNNotificationContent:封装通知的具体内容
- UNNotificationTrigger:通知触发器,具体自定义。子类包括UNTimeInervalNotificationTrigger计时通知触发器,UNCalendarNotificationTrigger周期通知触发器,
UNLocationNotificationTrigger地域通知触发器 - UNNotificationCenterDelegate:监听通知状态
- UNNotificationCategory:通知模版,可以对action进行整合
- UNNotificationAction:用于定义通知模版中的用户交互
- UNNotificationAttachment:可以添加媒体附件
- UNNotificationSettings:通知相关设置
- UNNotificationRequest:通知请求类,整合通知内容和触发方式
- UNNotificationResponse:通知回执
- UNNotification:通知对象,封装通知请求
- UNNotificationSound:通知音效
二、通知注册
引入头文件#import
[[UNUserNotificationCenter currentNotificationCenter] requestAuthorizationWithOptions:UNAuthorizationOptionBadge | UNAuthorizationOptionSound | UNAuthorizationOptionAlert completionHandler:^(BOOL granted, NSError * _Nullable error) {
        //权限是否成功
        if (granted) {
            //权限申请成功,进行代理的设置
            [UNUserNotificationCenter currentNotificationCenter].delegate = self;
        }
}];
三、创建通知内容
//通知内容设置
UNMutableNotificationContent *content = [[UNMutableNotificationContent alloc]init];
content.title = @"我是标题";
content.subtitle = @"我是副标题";
content.body = @"我是内容";
content.sound = [UNNotificationSound defaultSound];
content.badge = @1;
content.launchImageName = @"xcode";

//设置推送时间或周期
NSDateComponents *components = [[NSDateComponents alloc]init];
components.hour = @"9";
components.minute = @"28";

//请求通知
UNCalendarNotificationTrigger *trigger = [UNCalendarNotificationTrigger triggerWithDateMatchingComponents:components repeats:YES];
UNNotificationRequest *request = [UNNotificationRequest requestWithIdentifier:@"LOCALNOTIFICATION_iOS10" content:content trigger:trigger];
[[UNUserNotificationCenter currentNotificationCenter] addNotificationRequest:request withCompletionHandler:^(NSError * _Nullable error) {

    if (error) {
        UIAlertController *alert = [UIAlertController alertControllerWithTitle:@"Error" message:@"请检查设置" preferredStyle:UIAlertControllerStyleAlert];
        UIAlertAction *cancelAction = [UIAlertAction actionWithTitle:@"取消" style:UIAlertActionStyleCancel handler:nil];
        [alert addAction:cancelAction];
        [[UIApplication sharedApplication].keyWindow.rootViewController presentViewController:alert animated:YES completion:nil];
    }

}];
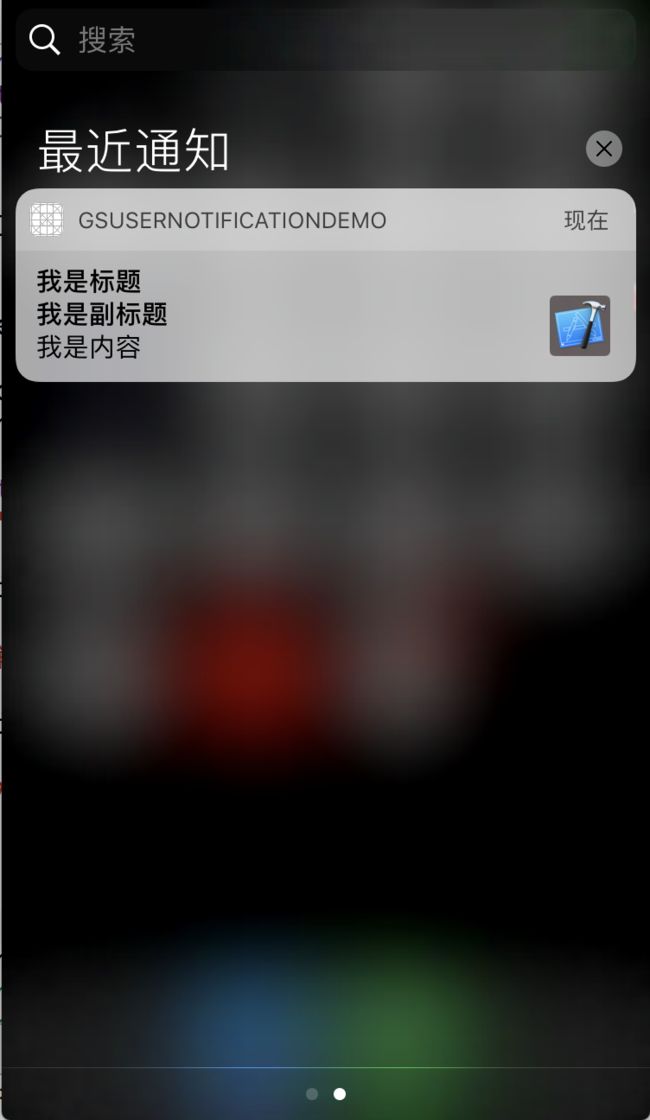
最基本设置.png
四、触发方式
1.UNTimeIntervalNotificationTrigger 设置一段时间后发送通知
@interface UNTimeIntervalNotificationTrigger : UNNotificationTrigger

@property (NS_NONATOMIC_IOSONLY, readonly) NSTimeInterval timeInterval;

+ (instancetype)triggerWithTimeInterval:(NSTimeInterval)timeInterval repeats:(BOOL)repeats;

- (nullable NSDate *)nextTriggerDate;

@end
2.UNCalendarNotificationTrigger 设置某个时间点触发
@interface UNCalendarNotificationTrigger : UNNotificationTrigger

@property (NS_NONATOMIC_IOSONLY, readonly, copy) NSDateComponents *dateComponents;

// The next date is calculated using matching date components.
+ (instancetype)triggerWithDateMatchingComponents:(NSDateComponents *)dateComponents repeats:(BOOL)repeats;

- (nullable NSDate *)nextTriggerDate;

@end
3.UNLocationNotificationTrigger 设置进入某一区域时触发
@interface UNLocationNotificationTrigger : UNNotificationTrigger

@property (NS_NONATOMIC_IOSONLY, readonly, copy) CLRegion *region;

+ (instancetype)triggerWithRegion:(CLRegion *)region repeats:(BOOL)repeats __WATCHOS_PROHIBITED;

@end
五、添加内容附件
内容附件可以是图片,音频,视频,由UNNotificationAttachment负责封装,赋值给UNMutableNotificationContent类的attachments属性。
UNNotificationAttachment *attach = [UNNotificationAttachment attachmentWithIdentifier:@"LOCALNOTIFICATION_imageAttach" URL:[NSURL fileURLWithPath:[[NSBundle mainBundle] pathForResource:@"xcode" ofType:@"png"]] options:nil error:nil];
content.attachments = @[attach];
⚠️UNNotificationContent的附件虽然是一个数组,但是系统的通知模板只能展示其中的第一个附件,设置多个附件也不会有额外的效果,但是如果开发者进行UI自定义,则此数组就可以派上用场了。
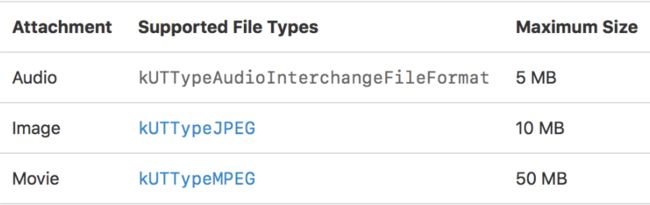
附件格式大小要求.png
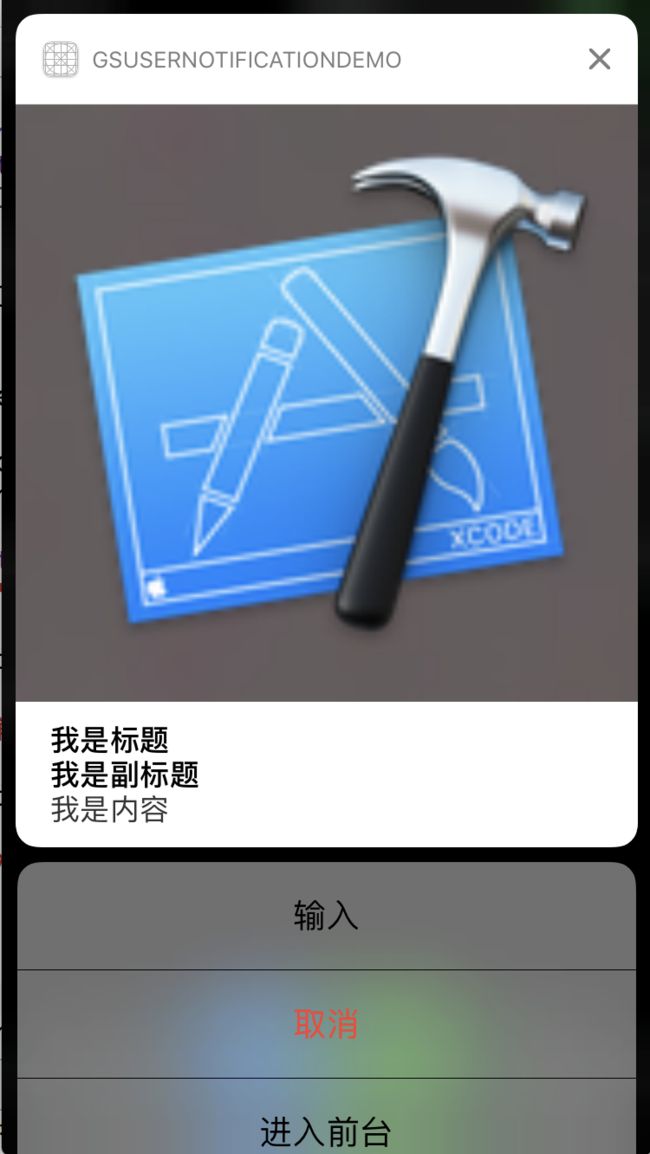
添加附件内容效果图.png
六、定义通知模版UNNotificationCategory
1.添加输入框
//1.添加输入框
UNTextInputNotificationAction *action = [UNTextInputNotificationAction actionWithIdentifier:@"UN_TextInputNotification_Action" title:@"title" options:UNNotificationActionOptionAuthenticationRequired textInputButtonTitle:@"ButtonTitle" textInputPlaceholder:@"PlaceHolder"];

//2.加入通知模版
UNNotificationCategory *category = [UNNotificationCategory categoryWithIdentifier:@"UN_TextInputNotification_Action" actions:@[action] intentIdentifiers:@[] options:UNNotificationCategoryOptionCustomDismissAction];

//3.设置为content的属性
content.categoryIdentifier = @"UN_TextInputNotification_Action";

//4.将模版加入center
[[UNUserNotificationCenter currentNotificationCenter] setNotificationCategories:[NSSet setWithObjects:category, nil]];
2.添加用户交互
//添加活动标题(最多可添加4个)
UNNotificationAction *action1 = [UNNotificationAction actionWithIdentifier:@"action1" title:@"解锁" options:UNNotificationActionOptionAuthenticationRequired];
UNNotificationAction *action2 = [UNNotificationAction actionWithIdentifier:@"action2" title:@"取消" options:UNNotificationActionOptionDestructive];
UNNotificationAction *action3 = [UNNotificationAction actionWithIdentifier:@"action3" title:@"进入前台" options:UNNotificationActionOptionForeground];

UNNotificationCategory *category = [UNNotificationCategory categoryWithIdentifier:@"LOCALNOTIFICATION_Category" actions:@[action1,action2,action3] intentIdentifiers:@[] options:UNNotificationCategoryOptionCustomDismissAction];

content.categoryIdentifier = @"LOCALNOTIFICATION_Category";

[[UNUserNotificationCenter currentNotificationCenter] setNotificationCategories:[NSSet setWithObjects:category, nil]];

添加输入框效果图.png
七、通知回调处理
遵循协议
#pragma mark - UNNotificationCenterDelegate
//是否在应用内展示通知
- (void)userNotificationCenter:(UNUserNotificationCenter *)center willPresentNotification:(UNNotification *)notification withCompletionHandler:(void (^)(UNNotificationPresentationOptions options))completionHandler
{
    //展示
    completionHandler(UNNotificationPresentationOptionBadge|
                      UNNotificationPresentationOptionSound|
                      UNNotificationPresentationOptionAlert);
    //不展示
    //completionHandler(UNNotificationActionOptionNone);
}
//处理用户与推送的交互
- (void)userNotificationCenter:(UNUserNotificationCenter *)center didReceiveNotificationResponse:(UNNotificationResponse *)response withCompletionHandler:(void(^)())completionHandler
{
    //根据类别标识符
    if ([response.notification.request.content.categoryIdentifier isEqualToString:@"LOCALNOTIFICATION_Category"]) {
        [self handleWithResponse:response];
    }

    completionHandler();
}

-(void)handleWithResponse:(UNNotificationResponse *)response
{
    NSString *actionIdentifier = response.actionIdentifier;
    if ([actionIdentifier isEqualToString:@"UN_TextInputNotification_Action"]) {

        UNTextInputNotificationResponse *input = (UNTextInputNotificationResponse *)response;
        NSLog(@"%@",input.userText);

    }else if ([actionIdentifier isEqualToString:@"action2"]){

        NSLog(@"取消");

    }else if ([actionIdentifier isEqualToString:@"action3"]){

        NSLog(@"进入前台");

    }
}
八、自定义模版
1.新建扩展Notification Content Extension
file -> new -> target -> NotificationContent
创建完成后,工程中多了一个Notification Content的扩展,自带storyboard和plist文件。
2.配置plist文件
- UNNotificationExtensionCategory:设置模板的categoryId,用于与UNNotificationContent对应。
- UNNotificationExtensionInitialContentSizeRatio:设置自定义通知界面的高度与宽度的比,宽度为固定宽度,在不同设备上有差别,开发者需要根据宽度计算出高度进行设置,系统根据这个比值来计算通知界面的高度。
- UNNotificationExtensionDefaultContentHidden:是有隐藏系统默认的通知界面。

plist配置.png
3.布局UI
UI布局在.m文件中进行
- (void)didReceiveNotification:(UNNotification *)notification
{
    self.label.text = notification.request.content.body;
    self.subTitleLabel.text = notification.request.content.subtitle;
    self.titleLabel.text = notification.request.content.title;
    UNNotificationAttachment *attachment = notification.request.content.attachments.firstObject;
    if (attachment.URL.startAccessingSecurityScopedResource) {
        UIImage *img = [[UIImage alloc]initWithContentsOfFile:attachment.URL.path];
        // 压缩避免图片过大展示不全
        NSData *imageData = UIImageJPEGRepresentation(img, 1.0);
        UIImage *resultImage = [[UIImage alloc] initWithData:imageData];
        self.imgView.image = resultImage;
        [attachment.URL stopAccessingSecurityScopedResource];
    }
}
⚠️自定义模版上可以添加任何控件,但是无法进行用户交互,唯一可以进行用户交互的方式是通过协议中的媒体按钮及其回调方法。
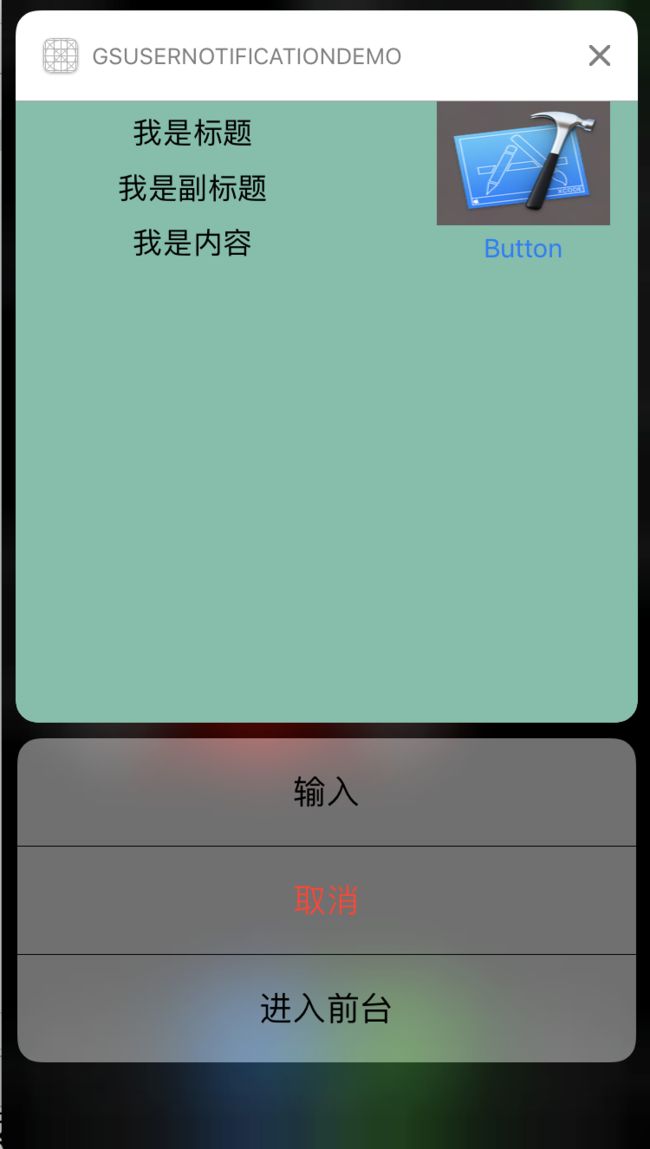
自定义模版效果图.png
九、移除本地推送
//移除将要推送的
- (void)removePendingNotificationRequestsWithIdentifiers:(NSArray *)identifiers;
- (void)removeAllPendingNotificationRequests;
//移除已经推送的
- (void)removeDeliveredNotificationsWithIdentifiers:(NSArray *)identifiers;
- (void)removeAllDeliveredNotifications;