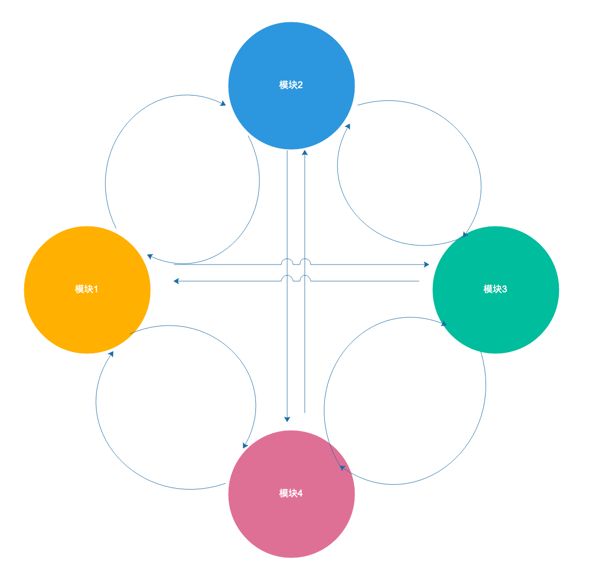
app内部的路由设计主要两种思路: target-action 和 url-scheme 方案
一. target-action 方案 (推荐)
CTMediator
该方案借助OC的runtime特性,通过实现了服务的自动发现,无需注册即可实现组件间调用。优于url-scheme方案,所以重点讲一下CTMediator及其使用。
组件化之前各组件页面通过import调用,互相侵入,耦合严重
组件化之后,把组件具体的方法都写在Category里,调用的方式都是performTarget: action: params: shouldCacheTarget:方法,最终去掉了中间件Mediator对组件的依赖,各个组件之间互相不再依赖,组件间调用只依赖中间者Mediator,Mediator不依赖其他任何组件。
CTMediator实现流程如下图
在已有工程中实施该方案分为四步
1 创建私有Pod工程和Category工程
主工程MainProject假设为一个非常简单的应用,一共就三个页面。首页push了AViewController,AViewController里又push了BViewController。我们可以理解成这个工程由三个业务组成:首页、A业务、B业务。
创建私有仓库 A 和A_category
我们这一次组件化的实施目标就是把A业务组件化出来,首页和B业务都还放在主工程。
2 在主工程中引入A_Category工程,并让主工程编译通过
通过cocoapods 引入A_Category,
去主工程的Podfile下添加pod "A_Category", :path => "../A_Category"来本地引用A_Category。
然后编译一下,说找不到AViewController的头文件。此时我们把头文件引用改成#import
然后继续编译,说找不到AViewController这个类型。看一下这里是使用了AViewController的地方,于是我们在Development Pods下找到CTMediator+A.h,在里面添加一个方法:
- (UIViewController *)A_aViewController;
再去CTMediator+A.m中,补上这个方法的实现,把主工程中调用的语句作为注释放进去,将来写Target-Action要用:
- (UIViewController *)A_aViewController
{
    /*
        AViewController *viewController = [[AViewController alloc] init];
     */
    return [self performTarget:@"A" action:@"viewController" params:nil shouldCacheTarget:NO];
}
补充说明一下,performTarget:@"A"中给到的@"A"其实是Target对象的名字。一般来说,一个业务Pod只需要有一个Target就够了,但一个Target下可以有很多个Action。Action的名字也是可以随意命名的,只要到时候Target对象中能够给到对应的Action就可以了。
关于Target-Action我们会在第三步中去实现,现在不实现Target-Action是不影响主工程编译的。
category里面这么写就已经结束了,后面的实施过程中就不会再改动到它了。
然后我们把主工程调用AViewController的地方改为基于CTMediator Category的实现:
    UIViewController *viewController = [[CTMediator sharedInstance] A_aViewController];
    [self.navigationController pushViewController:viewController animated:YES];
再编译一下,编译通过。
到此为止主工程就改完了,现在跑主工程点击这个按钮跳不到A页面是正常的,因为我们还没有在A工程中实现Target-Action。
而且此时主工程中关于A业务的改动就全部结束了,后面的组件化实施过程中,就不会再有针对A业务线对主工程的改动了。
3 添加Target-Action,并让A工程编译通过
关掉所有XCode窗口。然后打开两个工程:A_Category工程和A工程。
我们在A工程中创建一个文件夹:Targets,然后看到A_Category里面有performTarget:@"A",所以我们新建一个对象,叫做Target_A。
然后又看到对应的Action是viewController,于是在Target_A中新建一个方法:Action_viewController。Target对象如下:
@interface Target_A : NSObject
- (UIViewController *)Action_viewController:(NSDictionary *)params;

@end

实现文件:
#import "Target_A.h"
#import "AViewController.h"

@implementation Target_A

- (UIViewController *)Action_viewController:(NSDictionary *)params
{
    AViewController *viewController = [[AViewController alloc] init];
    return viewController;
}

@end
因为Target对象处于A的命名域中,所以Target对象中可以随意import A业务线中的任何头文件。
Target对象的Action不仅仅用于返回ViewController实例的,它可以用来执行各种属于业务线本身的任务。例如上传文件,转码等等各种任务其实都可以作为一个Action来给外部调用,Action完成这些任务的时候,业务逻辑是可以写在Action方法里面的。
Action具备调度业务线提供的任何对象和方法来完成自己的任务的能力。它的本质就是对外业务的一层服务化封装。
然后我们再继续编译A工程,发现找不到BViewController。由于我们这次组件化实施的目的仅仅是将A业务线抽出来,BViewController是属于B业务线的,所以我们没必要把B业务也从主工程里面抽出来。但为了能够让A工程编译通过,我们需要提供一个B_Category来使得A工程可以调度到B,同时也能够编译通过。
B_Category的创建步骤跟A_Category是一样的:新建Xcode工程、新建Repo、配置Repo、添加Category代码。
B_Category添加好后,我们同样在A工程的Podfile中本地指过去,然后跟在主工程的时候一样。
@interface CTMediator (B)

- (UIViewController *)B_viewControllerWithContentText:(NSString *)contentText;

@end

实现文件:
#import "CTMediator+B.h"

@implementation CTMediator (B)

- (UIViewController *)B_viewControllerWithContentText:(NSString *)contentText
{
    /*
        BViewController *viewController = [[BViewController alloc] initWithContentText:@"hello, world!"];
     */
    NSMutableDictionary *params = [[NSMutableDictionary alloc] init];
    params[@"contentText"] = contentText;
    return [self performTarget:@"B" action:@"viewController" params:params shouldCacheTarget:NO];
}

@end
然后我们对应地在A工程中修改头文件引用为#import
 UIViewController *viewController = [[CTMediator sharedInstance] B_viewControllerWithContentText:@"hello, world!"];
    [self.navigationController pushViewController:viewController animated:YES];
此时再编译一下,编译通过了。注意哦,这里A业务线跟B业务线就已经完全解耦了,跟主工程就也已经完全解耦了。
4 收尾
此时我们给B业务线创建了Category,但没有创建Target-Action。所以我们要去主工程创建一个B业务线的Target-Action。创建的时候其实完全不需要动到B业务线的代码,只需要新增Target_B对象即可:
Target_B头文件:
#import

@interface Target_B : NSObject

- (UIViewController *)Action_viewController:(NSDictionary *)params;

@end

Target_B实现文件:
#import "Target_B.h"
#import "BViewController.h"

@implementation Target_B

- (UIViewController *)Action_viewController:(NSDictionary *)params
{
    NSString *contentText = params[@"contentText"];
    BViewController *viewController = [[BViewController alloc] initWithContentText:contentText];
    return viewController;
}

@end
这个Target对象在主工程内不存在任何侵入性,将来如果B要独立成一个组件的话,把这个Target对象带上就可以了。
收尾工作就到此结束,我们创建了三个私有Pod:A、A_Category、B_Category。
接下来我们要做的事情就是给这三个私有Pod发版,所有的Pod发完版之后,我们再把Podfile里原来的本地引用改回正常引用
二. url-scheme 方案
MGJRouter
#import typedef void (^componentBlock) (NSDictionary *param);

@interface URL_Roueter : NSObject
+ (instancetype)sharedInstance;
- (void)registerURLPattern:(NSString *)urlPattern toHandler:(componentBlock)blk;
- (void)openURL:(NSString *)url withParam:(id)param;
@end

====================

#import "URL_Roueter.h"

@interface URL_Roueter()
@property (nonatomic, strong) NSMutableDictionary *cache;
@end


@implementation URL_Roueter

+ (instancetype)sharedInstance
{
    static URL_Roueter *router;
    static dispatch_once_t onceToken;
    dispatch_once(&onceToken, ^{
        router = [[URL_Roueter alloc] init];
    });
    return router;
}

-(NSMutableDictionary *)cache{
    if (!_cache) {
        _cache = [NSMutableDictionary new];
    }
    return _cache;
}
- (void)registerURLPattern:(NSString *)urlPattern toHandler:(componentBlock)blk {
    [self.cache setObject:blk forKey:urlPattern];
}

- (void)openURL:(NSString *)url withParam:(id)param {
    componentBlock blk = [self.cache objectForKey:url];
    if (blk) blk(param);
}
 @end
#import "A_VC.h"
#import "URL_Roueter.h"

@implementation A_VC
//把自己对外提供的服务(block)用url标记,注册到路由管理中心组件
+(void)load{
 [[URL_Roueter sharedInstance]registerURLPattern:@``"test://A_Action"` `toHandler:^(NSDictionary* para) {`
        NSString *para1 = para[@"para1"];
        [[self new] action_A:para1];
    }];
}
-(void)viewDidLoad{
    [super viewDidLoad];
    UIButton *btn = [UIButton new];
    [btn setTitle:@"调用组件B" forState:UIControlStateNormal];
    btn.frame = CGRectMake(100, 100, 100, 50);
    [btn addTarget:self action:@selector(btn_click) forControlEvents:UIControlEventTouchUpInside];
    [btn setBackgroundColor:[UIColor redColor]];

    self.view.backgroundColor = [UIColor blueColor];
    [self.view addSubview:btn];

}
//调用组件B的功能
-(void)btn_click{
[[URL_Roueter sharedInstance]openURL:@"test://B_Action" withParam:@{@"para1":@"PARA1", @"para2":@(222),@"para3":@(333),@"para4":@(444)}];
}
-(void)action_A:(NSString*)para1 {
    NSLog(@"call action_A: %@",para1);
}
@end
组件B实现的代码类似.
实现原理很简单:每个组件在自己的load方面里面,把自己对外提供的服务(回调block)通过url-scheme标记好,然后注册到URL-Router里面。
URL-Router接受各个组件的注册,用字典保存了每个组件注册过来的url和对应的服务,只要其他组件调用了openURL方法,就会去这个字典里面根据url找到对应的block执行(也就是执行其他组件提供的服务)
组件化架构漫谈
iOS组件化
iOS组件化 - 路由设计思路分析
在现有工程中实施基于CTMediator的组件化方案


