翻译自:https://www.raywenderlich.com/155780/gameplaykit-tutorial-entity-component-system-agents-goals-behaviors-2
原文作者:Ryan Ackermann
(注:以下内容中代码部分本人将进行OC转换,并将常用头文件添加进PCH,所以代码中并没有添加头文件的步骤,如要看Swift代码,请移步原文)
正文:
GameplayKit在iOS9后引入的一个令人惊叹的框架,它可以非常容易地实现在游戏中进行模块化任务执行。
GameplayKit是个实用工具集合,其中包括像寻路,随机算法,状态机,规则系统等等。
在这个教程中,你将关注GameplayKit中两个部分:实体组件系统、代理,目标和行为。
GameplayKit的这些功能可以让你在游戏变得更大更复杂时,让你的代码在不同的方法下变得更加清晰且复用。
OK,让我们赶紧开始吧!
开始准备
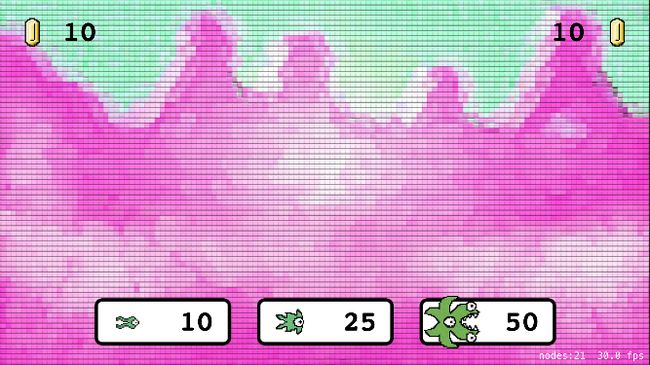
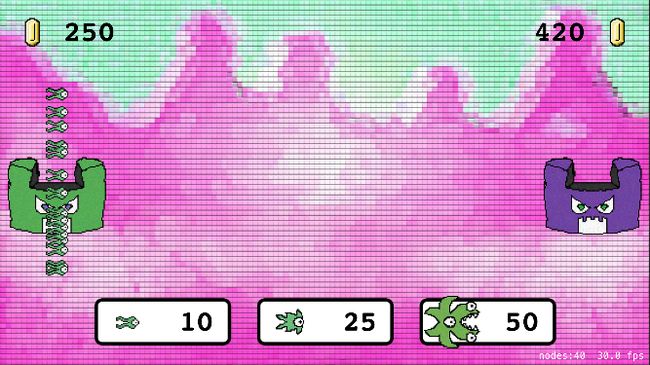
在这个GameplayKit教程中,你将开发一个名为MonsterWars的简单小游戏。下载开始项目,在Xcode中打开,然后build运行一下,你将看到以下界面:
现在,这个游戏仅仅是一个UI外壳,并没有游戏机制。以下是这个游戏的机制:
- 你可以看到左上角,你会不停地获取金钱,然后点击屏幕下方按钮,使用金钱购买单位。
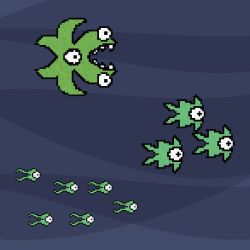
- 游戏中有三种单位类型:Quirk(速度快且便宜),Zap(远程攻击)和Munch(缓慢但拥有范围啃咬的能力)。
- 如果你的单位将敌方城堡击溃,则胜利。
看一下现有的代码,当你有一些眉目的时候,看看这个GameplayKit教程的目录结构:这就是典型的实体组件系统。
到底什么是实体组件系统?
十分简单,实体组件系统是一种架构方法,在你的游戏不断变大,不断变得复杂的时候,代码间的相互依赖却不会因此增长。
这就需要两个部分来完成这样的事情:
- 实体:实体在游戏中是一个对象,玩家、敌人或者城堡都是实体。由于实体就是一个对象,你可以通过应用组件来使这个对象实现很多有趣的动作行为。
- 组件:在实体中,一个组件包含特定的逻辑来执行特定的工作,例如改变外形或者发射一枚火箭。你可以为你的实体制作各种不同动作行为的组件,比方说你需要一个移动组件,一个生命组件,一个近战攻击的组件等等。
这个系统最棒的优点就是你可以复用组件,将其组装到你任何需要该组件的实体上,这样你的代码看上去就更加干净整洁。
注意:如果你想对理论方面进行深究,查看原文作者几年前写的老教程,他从实体组件系统的开始进行讲解,并将其与其他模式进行比较。
第一个组件
现在开始,我们首先创建一个组件让其在场景中代表一个精灵。在GameplayKit中,我们创建组件都是继承于GKComponent的子类。
首先,我们选择项目中的MonsterWars_OC组,右键,选择New Group,然后创建一个Components的新组。
然后右键Components组,选择New File...,选择iOS/Source/Cocoa Touch Class选项,创建GKComponent的子类名为SpriteComponent。
做到这,你的项目应该像这样:
打开 SpriteComponent.h文件,加入以下代码:
//1
@property (strong, nonatomic) SKSpriteNode *node;
//2
- (instancetype)initWithTexture:(SKTexture*) texture;
打开SpriteComponent.m文件,加入以下代码:
- (instancetype)initWithTexture:(SKTexture *)texture {
    if (self = [super init]) {
        self.node = [[SKSpriteNode alloc]initWithTexture:texture color:[SKColor whiteColor] size:texture.size];
    }

    return self;
}
代码说明:
1.声明了一个公开的node,方便以后获取。
2.声明了一个公开的init方法,用来创建component的同时初始化node,在这个方法中我们将参数纹理添加给node,并将它的颜色默认为白色,大小为纹理对应的大小。
第一个实体
在GameplayKit中,GKEntity代表了实体。你可以通过添加组件来让实体进行工作,就像我们之前创建组件一样简单。
在你的游戏中,为你的每一个类型对象添加实体通常是非常有用的,在这个游戏示例中,这里有五种不同类型的对象:城堡,Quirk单位,Zap单位,Munch单位和激光。
你的GKEntity子类要尽可能的简单,通常情况下,它仅仅作为一个初始化器,可以添加你想要的组件即可。
我们来为城堡添加实体,右键项目中的MonsterWars_OC组,创建一个Entities的新组。
我们在Entities新组下创建一个GKEntity的子类,名为Castle。
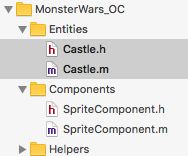
完成这些,你的项目应该像这样:
打开 Castle.h,加入以下代码:
//1
- (instancetype)initWithImageName:(NSString*) imageName;
打开Castle.m,加入以下代码:
- (instancetype)initWithImageName:(NSString *)imageName {
    if (self = [super init]) {
    //2
    SpriteComponent *spriteComponent = [[SpriteComponent alloc]initWithTexture:[SKTexture textureWithImageNamed:imageName]];
    [self addComponent:spriteComponent];
}

    return self;
}
这里有两个事情需要提醒:
1.如前所述,为游戏中每个类型对象创建GKEntity子类是很方便的。另一种方法,创建一个基础的GKEntity,并动态去添加你想要类型的组件,但经常你想只为特定的对象创建相应实体,那就用上面所述的方法。
2.在目前的情况下,你只需要为此实体添加一个组件-即你之前创建的组件。
现在,咱们已经有了一个实体和一个组件,我想你已经等不及将它加入到游戏中了。
实体管理
在这一节中,你将创建一个工具类来管理你将要添加到游戏中的实体。这个工具将会保存所有游戏中的实体到一个列表中,并提供一些非常实用的方法,如添加和删除实体。
右键Entities组,在其下创建一个NSObject子类,名为EntityManager。
打开EntityManager.h文件,添加以下代码:
//1
@property (strong, nonatomic) NSMutableSet *entities;
@property (strong, nonatomic) SKScene *scene;

//2
- (instancetype)initWithScene:(SKScene*) scene;

//3
- (void)addEntity:(GKEntity*) entity;//4- (void)removeEntity:(GKEntity*) entity;
打开EntityManager.m文件,添加以下代码:
- (NSMutableSet *)entities {
    if (!_entities) {
        _entities = [NSMutableSet set];
    }

    return _entities;
}

- (instancetype)initWithScene:(SKScene *)scene {
    if (self = [super init]) {
        self.scene = scene;
    }

    return self;
}

- (void)addEntity:(GKEntity *)entity {
    [self.entities addObject:entity];

    SKSpriteNode *spriteNode = [(SpriteComponent*)[entity componentForClass:[SpriteComponent class]] node];
    if (spriteNode) {
        [self.scene addChild:spriteNode];
    }
}

- (void)removeEntity:(GKEntity *)entity {
    SKSpriteNode *spriteNode = [(SpriteComponent*)[entity componentForClass:[SpriteComponent class]] node];
    if (spriteNode) {
        [spriteNode removeFromParent];
    }

    [self.entities removeObject:entity];
}
让我们看看这章节代码的含义:
1.这里声明了一个实体集合,并包含了场景。
2.这是个简单的初始化方法,并代入一个场景来初始化scene属性。
3.这个工具方法实现了添加实体到游戏中的功能,它将实体添加到集合中,然后检查这个实体是否包含一个SpriteComponent组件,如果有,则将它的节点加入到场景中。
4.当你要从游戏中删除实体时,调用这个工具方法,与addEntity:方法相反,如果实体包含了SpriteComponent组件,将其节点从场景中删除,并从集合中移除该实体。
在以后,你会添加更多的方法到这个工具类中,现在不正是一个好的开始吗?我们来显示些东西到场景中吧!
添加城堡
打开GameScene.m文件,在@interface下方添加一个新的属性:
@property (strong, nonatomic) EntityManager *entityManager;
这里用来存放你刚刚创建的工具类实例。
接下来咱们先将entityManager懒加载,以方便之后调用:
- (EntityManager *)entityManager {
    if (!_entityManager) {
        _entityManager = [[EntityManager alloc]initWithScene:self];
    }

    return _entityManager;
}
然后我们创建一个城堡初始化的方法,来进行城堡添加:
- (void)setupCastle {
    //1
    Castle *humanCastle = [[Castle alloc]initWithImageName:@"castle1_atk"];
    SpriteComponent *spriteComponent1 = (SpriteComponent*)[humanCastle componentForClass:[SpriteComponent class]];
    if (spriteComponent1) {
        spriteComponent1.node.position = CGPointMake(spriteComponent1.node.size.width / 2, self.size.height / 2);
    }

    [self.entityManager addEntity:humanCastle];

    //2
    Castle *aiCastle = [[Castle alloc]initWithImageName:@"castle2_atk"];
    SpriteComponent *spriteComponent2 = (SpriteComponent*)[aiCastle componentForClass:[SpriteComponent class]];
    if (spriteComponent2) {
        spriteComponent2.node.position = CGPointMake(self.size.width - spriteComponent2.node.size.width / 2, self.size.height / 2);
    }

    [self.entityManager addEntity:aiCastle];
}
最后,我们将setupCastle方法在didMoveToView:方法中调用。
接下来,看一下代码:
1.创建一个城堡实体来代表我们的人类玩家,在完成实体创建后会进行节点的检查,如果有节点就将它放置到场景左侧,当然,在最后我们还要将它放置到我们的实体管理工具中。
2.跟上面的代码类似,不过这里我们创建的是基于AI的城堡。
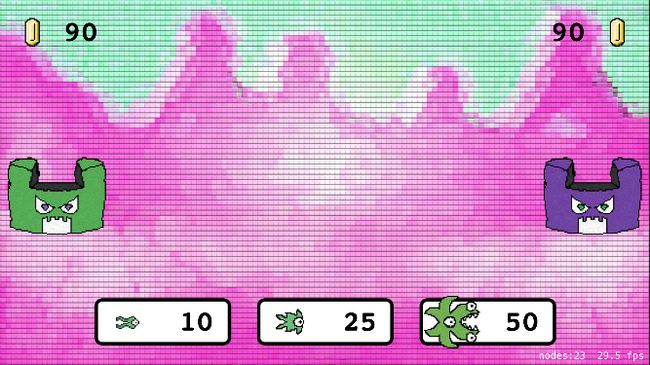
完成这些,咱们可以赶紧build运行以下项目:
第二个组件
当你开发一个基于实体组件系统的游戏时,游戏对象所需的所有数据必须存放在某些组件中。
在游戏中所要跟踪的一个数据是对象属于哪个队伍:一队还是二队。由于该信息并不属于你的节点组件,所以你可能希望拥有一个既不是一队也不是二队的实体。我们赶紧为此功能创建一个新组件吧!
右键Components组,在其下创建一个GKComponent子类,名为TeamComponent。
打开TeamComponent.h文件,添加以下代码:
//1
typedef NS_ENUM(NSInteger, Team) {
    Team1 = 1,
    Team2 = 2,
};

...

//2
@property (assign, nonatomic) Team team;

- (instancetype)initWithTeam:(Team) team;
- (Team)oppsiteTeam:(Team) team;
打开TeamComponent.m文件,添加以下代码:
- (instancetype)initWithTeam:(Team)team {
    if (self = [super init]) {
        self.team = team;
    }

    return self;
}

- (Team)oppsiteTeam:(Team)team {
    switch (team) {
        case Team1:
            return Team2;
            break;
        case Team2:
            return Team1;
            break;
        default:
            break;
    }
}
这是个相当简单的文件,我只想指出两点:
1.这是来跟踪判断哪个队伍的枚举:Team1和Team2,下面还有一个来返回对方队伍的方法,以后会用到。
2.这是个非常简单的组件,只是用来跟踪该实体属于哪个队伍。
现在,你有了一个新组件,让我们更新一下城堡实体代码,打开Castle.h文件修改初始化方法,添加一个参数:
- (instancetype)initWithImageName:(NSString*) imageName Team:(Team) team;
打开Castle.m文件修改初始化方法:
- (instancetype)initWithImageName:(NSString *)imageName Team:(Team)team{
    if (self = [super init]) {
        //2
        SpriteComponent *spriteComponent = [[SpriteComponent alloc]initWithTexture:[SKTexture textureWithImageNamed:imageName]];
        [self addComponent:spriteComponent];
        [self addComponent:[[TeamComponent alloc] initWithTeam:team]];
    }

    return self;
}
最后,在GameScene.m中将我们的城堡添加上队伍:
Castle *humanCastle = [[Castle alloc]initWithImageName:@"castle1_atk" Team:Team1];

...

Castle *aiCastle = [[Castle alloc]initWithImageName:@"castle2_atk" Team:Team2];
build运行游戏,你应该看不到任何变化,但其实你已经将一组数据成功与实体绑定,以后将会派上用场:
第三个组件
你需要跟踪的另一条数据则是每个玩家目前的金币数量。在这个游戏中,由于每边都有一座城堡,你可以把城堡想象成是每位玩家的指挥官,所以城堡将是存储这个信息的最好地方。
右键Components组,创建GKComponent子类,取名为CastleComponent。
打开CastleComponent.h,代入以下代码:
//1
@property (assign, nonatomic) NSInteger coins;
打开CastleComponent.m,代入以下代码:
@interface CastleComponent ()

//1
@property (assign, nonatomic) NSTimeInterval lastCoinDrop;

@end

@implementation CastleComponent

- (instancetype)init {
    if (self = [super init]) {
        self.coins = 0;
        self.lastCoinDrop = 0;
    }

    return self;
}

//2
- (void)updateWithDeltaTime:(NSTimeInterval)seconds {
    [super updateWithDeltaTime:seconds];

    //3
    NSTimeInterval coinDropInterval = 0.5;
    NSInteger coinsPerInterval = 10;

    if (CACurrentMediaTime() - self.lastCoinDrop > coinDropInterval) {
        self.lastCoinDrop = CACurrentMediaTime();
        self.coins += coinsPerInterval;
    }
}
这个组件与之前的有些许不同,所以需要更详细地进行代码解释:
1.这里有两个属性,一个是公开的存储城堡金钱数量的coins属性,另一个是非公开的上一次赚取金钱时间的lastCoinDrop属性。
2.在游戏中每帧进行更新的,SpriteKit调用的updateWithDeltaTime:方法,注意,SpriteKit不会自动调用这个方法,你需要一点设置来实现它,你马上会学到。
3.这里的代码就是定期获得金钱的方法。
打开Castle.m文件,将以下代码添加到initWithImageName:Team:方法中:
[self addComponent:[CastleComponent new]];
接下来所添加的代码即是我之前所提到的需要进行调用updateWithDeltaTime:的方法。为此,我们需要切换到EntityManager.h并添加一个新的属性。
@property (strong, nonatomic) NSMutableArray * componentSystems;
EntityManager.m中实现:
- (NSMutableArray *)componentSystems {
    if (!_componentSystems) {
        _componentSystems = [NSMutableArray array];
        GKComponentSystem *castleSystem = [[GKComponentSystem alloc]initWithComponentClass:[CastleComponent class]];
        [_componentSystems addObject:castleSystem];
    }

    return _componentSystems;
}
GKComponentSystem是一个存储组件集合的类。在这里,我们创建一个拥有GKComponentSystem的数组,其中就能获取一个专门来跟踪你游戏中所有CastleComponent实例的GKComponentSystem。
现在这个数组中可能只会用到CastleComponent的GKComponentSystem,但是以后可能会有更多其他的类型。
然后将这个属性运用到addEntity:方法中:
for (GKComponentSystem *componentSystem in self.componentSystems) {
        [componentSystem addComponentWithEntity:entity];
    }
当你添加一个新实体的时候,都会将这个实体的相对应组件添加到componentSystems数组的GKComponentSystem中(现如今这个数组只包含Castle的ComponentSystem的)。不用担心性能问题,因为你的实体不包含CastleComponent,就不会发生任何事情。
在EntityManager.h中添加一个新属性:
@property (strong, nonatomic) NSMutableSet *toRemove;
EntityManager.m中懒加载toRemove属性,并在removeEntity:中添加此方法:
- (NSMutableSet *)toRemove {
    if (!_toRemove) {
        _toRemove = [NSMutableSet set];
    }

    return _toRemove;
}

- (void)removeEntity:(GKEntity *)entity {
...
[self.toRemove addObject:entity];
}
你应该注意到,我们并不会直接从组件系统直接删除实体,而是将实体添加到toRemove中,以便以后删除。这样做的目的就在于我们在componentSystem迭代时更好地删除其中的组件,然后再删除实体,不然我们直接删除实体之后无法进行组件系统中的组件删除。
在EntityManager.h中继续添加方法:
- (void)updateWithDeltaTime:(CFTimeInterval) deltaTime;
在EntityManager.m中方法:
- (void)updateWithDeltaTime:(CFTimeInterval)deltaTime {
    //1
    for (GKComponentSystem *componentSystem in self.componentSystems) {
        [componentSystem updateWithDeltaTime:deltaTime];
    }

    //2
    for (GKEntity *entity in self.toRemove) {
        for (GKComponentSystem *componentSystem in self.componentSystems) {
            [componentSystem removeComponentWithEntity:entity];
        }
    }

    [self.toRemove removeAllObjects];
}
让我们来看看这一节代码:
1.在这里我们首先遍历了所有组件系统,并调用每个组件系统的updateWithDeltaTime:方法,这样每个组件系统都会依次调用其updateWithDeltaTime:方法。
这实际上就表明了使用GKComponentSystem的好处及目的,这样的设置方法,组件系统更新一次,其下组件就会进行更新,在游戏中,对每个系统(物理引擎,渲染)的处理顺序就能进行精确控制,这很方便。
2.这里我们循环获取将要删除的实体,然后将其在组件系统中的组件删除,最后再将实体删除。
这里还有最后一个方法需要加入到这个类中,打开EntityManager.h文件,添加新方法:
- (GKEntity*)castleForTeam:(Team) team;
EntityManager.m中实现:
- (GKEntity *)castleForTeam:(Team)team {
    for (GKEntity *entity in self.entities) {
        TeamComponent *teamComponent = (TeamComponent*)[entity componentForClass:[TeamComponent class]];
        CastleComponent *castleComponent = (CastleComponent*)[entity componentForClass:[CastleComponent class]];
        if (teamComponent) {
            if (teamComponent.team == team && castleComponent) {
                return entity;
            }
        }
    }

    return nil;
}
这是一个很方便的方法来获取一个指定队伍的城堡。在这里我们遍历所有实体,并检查其team组件,如果其组件相应的队伍和传入的队伍相同,且拥有城堡组件则返回对应的城堡实体。
注意:这样做的另一种方法是在创建城堡实体时,保留对城堡实体的引用。 但是像这样动态地查找东西的优点在于你的游戏更加灵活。 虽然在这种情况下你可能不需要灵活性,但我想向你展示是因为在许多游戏中,这种灵活性非常方便。 实体组件系统架构的主要优点在于灵活性。
现在我们将其挂载到游戏中,打开GameScene.m文件,在update:方法中添加代码:
CFTimeInterval deltaTime = currentTime - _lastUpdateTimeInterval;
    _lastUpdateTimeInterval = currentTime;

    [self.entityManager updateWithDeltaTime:deltaTime];

    GKEntity *human = [self.entityManager castleForTeam:Team1];
    if (human) {
        CastleComponent *humanCastle = (CastleComponent*)[human componentForClass:[CastleComponent class]];
        self.coin1Label.text = [NSString stringWithFormat:@"%ld", humanCastle.coins];
    }

    GKEntity *ai = [self.entityManager castleForTeam:Team2];
    if (ai) {
        CastleComponent *aiCastle = (CastleComponent*)[ai componentForClass:[CastleComponent class]];
        self.coin2Label.text = [NSString stringWithFormat:@"%ld", aiCastle.coins];
    }
在这里你调用了实体管理工具的updateWithDeltaTime:方法,然后你将为每一个队伍找到其城堡(或城堡组件),然后更新每一个队伍上方的金钱显示Label。
build并运行,就能看到队伍双方的金钱不断上涨。
生产单位
现在,这个游戏已经准备好出现一些单位了。让我们修改游戏以便生成Quirk单位。
右键Entities组,创建GKEntity子类,取名为Quirk。
打开Quirk.h文件,添加以下代码:
- (instancetype)initWithTeam:(Team) team;
打开Quirk.m文件,添加以下代码:
- (instancetype)initWithTeam:(Team)team {
    if (self = [super init]) {
        SKTexture *texture = [SKTexture textureWithImageNamed:[NSString stringWithFormat:@"quirk%ld", team]];
        SpriteComponent *spriteComponent = [[SpriteComponent alloc]initWithTexture:texture];
        [self addComponent:spriteComponent];
        [self addComponent:[[TeamComponent alloc] initWithTeam:team]];
    }

    return self;
}
上面的代码与设置城堡实体非常相似,在这里,咱们通过队伍进行纹理设置,并将sprite组件添加到实体中。此外,我们还添加了team组件来完成这个实体的所有需求。
现在是创建Quirk实体的实例的时候了。上一次,你直接在GameScene中创建了城堡实体,但是这一次,我们要将这个产生Quirk单位的代码放到EntityManager中。
我们打开EntityManager.h文件添加方法:
- (void)spawnQuirkWithTeam:(Team) team;
在EntityManager.m文件中实现方法:
- (void)spawnQuirkWithTeam:(Team)team {
    //1
    GKEntity *teamEntity = [self castleForTeam:team];
    CastleComponent *teamCastleComponent = (CastleComponent*)[teamEntity componentForClass:[CastleComponent class]];
    SpriteComponent *teamSpriteComponent = (SpriteComponent*)[teamEntity componentForClass:[SpriteComponent class]];

    if (!teamEntity || !teamCastleComponent || !teamSpriteComponent) {
        return;
    }

    //2
    if (teamCastleComponent.coins < costQuirk) {
        return;
    }

    teamCastleComponent.coins -= costQuirk;
    [self.scene runAction:[SingleSoundManager soundSpawn]];

    //3
    Quirk *monster = [[Quirk alloc]initWithTeam:team];
    SpriteComponent *spriteComponent = (SpriteComponent*)[monster componentForClass:[SpriteComponent class]];
    if (spriteComponent) {
        spriteComponent.node.position = CGPointMake(teamSpriteComponent.node.position.x, [MyUtils randomFloatWithMin:self.scene.size.height * 0.25 Max:self.scene.size.height * 0.75]);
        spriteComponent.node.zPosition = 2;
    }

    [self addEntity:monster];
}
解读一下这节代码:
1.哪个城堡的单位就应该在该城堡附近产生,为了做到这一点,我们需要获得城堡的精灵,所以这些代码是动态获取这些信息的。
2.这是用来检查城堡是否拥有足够的金钱购买单位,如果足够,那就减去相应的费用,并播放生产的音效。
3.这是创建一个Quirk实体并将其放置在城堡附近(以随机y值)的代码。
最后,在GameScene.m中的quirkPressed方法中添加生产单位的方法:
- (void)quirkPressed {
    ...

    [self.entityManager spawnQuirkWithTeam:Team1];
}
运行一下,点击Quirk的按钮,只要你拥有足够的金钱,就能生产Quirk单位了!
代理,目标和行为
到目前为止,Quirk单位只是待在那里一动不动,这个游戏需要运动!
幸运的是,GameplayKit有一个叫做”代理,目标和行为“的组合,它们可以让你在游戏中非常复杂的行为变得超级简单,这里使它们的工作方式:
- GKAgent2D是GKComponent的子类,它用来处理游戏中的移动对象,你可以设置它不同属性如最大速度,加速度等等,以及使用GKBehavior。
- GKBehavior类中包含了一组GKGoal,这些用来表示你想要让你的对象如何移动。
- GKGoal代表了你的一个代理移动的目标-比方说向另一个代理移动。
所以通常你设置这些对象,然后将GKAgent组件添加到你的类中,GameplayKit会移动一切你想移动的对象。
注意:这里有个说明:GKAgent2D不会直接移动你的精灵,它只是适时地更新自己的位置,所以你需要写一些精灵与GKAgent位置相关联的代码来进行移动处理。
我们首先从行为和目标开始,右键Components组,创建GKBehavior子类,名为MoveBehavior。
打开MoveBehavior.h文件,添加以下代码:
- (instancetype)initWithTargetSpeed:(CGFloat) targetSpeed Seek:(GKAgent*) seek Avoid:(NSArray*) avoid;
打开MoveBehavior.m文件,实现方法:
- (instancetype)initWithTargetSpeed:(CGFloat)targetSpeed Seek:(GKAgent *)seek Avoid:(NSArray *)avoid {
    if (self = [super init]) {
        //1
        if (targetSpeed > 0) {
            //2
            [self setWeight:0.1 forGoal:[GKGoal goalToReachTargetSpeed:targetSpeed]];
            //3
            [self setWeight:0.5 forGoal:[GKGoal goalToSeekAgent:seek]];
            //4
            [self setWeight:1.0 forGoal:[GKGoal goalToAvoidAgents:avoid maxPredictionTime:1.0]];
        }
    }

    return self;
}
这里有很多新东西,让我们一个个看:
1.如果速度小于了0,就不需要添加任何目标来移动。
2.要为行为添加目标,则请使用setWeight:forGoal:方法,它允许你指定一个目标,通过权重来判断重要性-权重越大越优先。在这个实例中,我们设定了一个小的优先级目标来让代理达到目标速度。
3.在这里设置了一个中等优先级的目标,这个目标让代理向另一个代理移动,这样你的单位会向最接近的敌人靠近。
4.在这里我们设置了一个高优先级的目标来让代理避免与其他的一组代理发生冲突。这样可以让你的单位完美地避开盟友,让它们更好地散开来。
现在,我们已经创建了行为和目标,我们就可以设置代理了。右键Components组,创建一个GKAgent2D子类,取名为MoveComponent。
打开MoveComponent.h文件,添加协议GKAgentDelegate并添加以下代码:
//1
@property (strong, nonatomic) EntityManager *entityManager;

- (instancetype)initWithMaxSpeed:(CGFloat) maxSpeed MaxAcceleration:(CGFloat) maxAcceleration Radius:(CGFloat) radius EntityManager:(EntityManager*) entityManager;
打开MoveComponent.m文件,添加以下代码:
//2
- (instancetype)initWithMaxSpeed:(CGFloat)maxSpeed MaxAcceleration:(CGFloat)maxAcceleration Radius:(CGFloat)radius EntityManager:(EntityManager *)entityManager {
    if (self = [super init]) {
        self.entityManager = entityManager;

        self.delegate = self;
        self.maxSpeed = maxSpeed;
        self.maxAcceleration = maxAcceleration;
        self.radius = radius;
        self.mass = 0.01;
    }

    return self;
}
//3
- (void)agentWillUpdate:(GKAgent *)agent {
    SpriteComponent *spriteComponent = (SpriteComponent*)[self.entity componentForClass:[SpriteComponent class]];
    if (!spriteComponent) {
        return;
    }

    self.position = [MyUtils initFloat2WithPoint:spriteComponent.node.position];
}
//4
- (void)agentDidUpdate:(GKAgent *)agent {
    SpriteComponent *spriteComponent = (SpriteComponent*)[self.entity componentForClass:[SpriteComponent class]];
    if (!spriteComponent) {
        return;
    }

    spriteComponent.node.position = CGPointMake(self.position.x, self.position.y);
}
这里也有很多新玩意儿,我们逐一介绍:
1.我们需要引用entityManger以便访问其他游戏中的实体。比方说,你需要知道最接近的敌人(所以你能寻找它)和你的盟友列表(所以你要分开它们)。
2.GKAgent2D具有最大速度,最大加速度等等,所以在这里传参来配置初始化。顺便也将自己的代理设置为了自己,并将它的质量设置的很小,这样它的转向就会更方便。
3.在代理更新其位置之前,先将代理的位置设置为sprite组件的位置,这样代理就会被定位在正确的位置。注意这里有一些恶心的转换-GameplayKit使用float2而不是CGPoint,十分恶心。
4.同样的,当代理更新完它的位置调用agentDidUpdate:方法时,你需要将精灵的位置更新以匹配代理的位置。
在这里,你仍然还有许多事情要做,但首先,让我们添加一些辅助方法。打开EntityManager.h文件:
@class MoveComponent;

...

- (NSArray*)entitiesForTeam:(Team) team;
- (NSArray*)moveComponentsForTeam:(Team) team;
在EntityManager.m文件中:
- (NSArray *)entitiesForTeam:(Team)team {
    NSMutableArray *arr = [NSMutableArray array];
    for (GKEntity *entity in self.entityManager.entities) {
        TeamComponent *teamComponent = (TeamComponent*)[entity componentForClass:[TeamComponent class]];
        if (teamComponent && teamComponent.team == team) {
            [arr addObject:entity];
        }
    }

    return arr;
}
- (NSArray *)moveComponentsForTeam:(Team)team {
    NSArray *entitiesToMove = [self entitiesForTeam:team];
    NSMutableArray *moveComponents = [NSMutableArray array];
    for (GKEntity *entity in entitiesToMove) {
        MoveComponent *moveComponent = (MoveComponent*)[entity componentForClass:[MoveComponent class]];
        if (moveComponent) {
            [moveComponents addObject:moveComponent];
        }
    }

    return moveComponents;
}
entitiesForTeam:方法返回了指定队伍的所有实体,moveComponentsForTeam:则返回了指定队伍的所有move组件,你很快就会用到它们。
我们继续在MoveComponent.h文件添加新方法:
- (GKAgent2D*)closestMoveComponentForTeam:(Team) team;
在MoveComponent.m文件实现:
- (GKAgent2D *)closestMoveComponentForTeam:(Team)team {
    MoveComponent *closestMoveComponent = nil;
    CGFloat closestDistance = 0;
    NSArray *enemyMoveComponents = [self.entityManager moveComponentsForTeam:team];

    for (MoveComponent *enemyMoveComponent in enemyMoveComponents) {
        CGPoint point1 = CGPointMake(enemyMoveComponent.position.x, enemyMoveComponent.position.y);
        CGPoint point2 = CGPointMake(self.position.x, self.position.y);

        CGFloat distance = [MyUtils lengthWithPoint:[MyUtils minusPointWithPoint1:point1 Point2:point2]];
        if (closestMoveComponent == nil || distance < closestDistance) {
            closestMoveComponent = enemyMoveComponent;
            closestDistance = distance;
        }
    }

    return closestMoveComponent;
}
这些代码用来寻找当前move组件相对于指定队伍中最接近的move组件,你现在可以用这个方法找到最接近的敌人了。
将这个方法添加到该类的最底端:
- (void)updateWithDeltaTime:(NSTimeInterval)seconds {
    [super updateWithDeltaTime:seconds];

    //1
    GKEntity *entity = self.entity;
    TeamComponent *teamComponent = (TeamComponent*)[entity componentForClass:[TeamComponent class]];
    if (!teamComponent) {
        return;
    }

    //2
    GKAgent2D *enemyMoveComponent = [self closestMoveComponentForTeam:[teamComponent oppsiteTeam:teamComponent.team]];
    if (!enemyMoveComponent) {
        return;
    }

    //3
    NSArray *alliedMoveComponents = [self.entityManager moveComponentsForTeam:teamComponent.team];

    //4
    self.behavior = [[MoveBehavior alloc]initWithTargetSpeed:self.maxSpeed Seek:enemyMoveComponent Avoid:alliedMoveComponents];
}
这里有个update方法将所有相关联的联系在一起:
1.寻找到当前实体的team组件。
2.使用辅助方法找到最近的敌人信息。
3.使用辅助方法获取所有盟友的move组件。
4.最后,将最新的行为设置到当前行为上。
几乎要完成了,但还有几个代码需要清理,打开EntityManager.m文件,更新componentSystems属性:
- (NSMutableArray *)componentSystems {
    if (!_componentSystems) {
        _componentSystems = [NSMutableArray array];
        GKComponentSystem *castleSystem = [[GKComponentSystem alloc]initWithComponentClass:[CastleComponent class]];
        [_componentSystems addObject:castleSystem];

        GKComponentSystem *moveSystem = [[GKComponentSystem alloc]initWithComponentClass:[MoveComponent class]];
        [_componentSystems addObject:moveSystem];
    }

    return _componentSystems;
}
记住,这是必须的,这样才能使updateWithDeltaTime:方法在MoveComponent中调用。
接下来打开Quirk.h文件,修改它的初始化方法,加入entityManager作为参数:
- (instancetype)initWithTeam:(Team) team EntityManager:(EntityManager*) entityManager;
Quirk.m中:
- (instancetype)initWithTeam:(Team)team EntityManager:(EntityManager *)entityManager{

...

        [self addComponent:[[MoveComponent alloc] initWithMaxSpeed:150 MaxAcceleration:5 Radius:texture.size.width * 0.3 EntityManager:entityManager]];

...
}
这里设置了一些move组件的值,用来工作于Quirk单位。
你还需要一个move组件给城堡-让它成为最大敌人。为了实现这个,打开Castle.h,修改其初始化方法,加入entityManager参数:
- (instancetype)initWithImageName:(NSString*) imageName Team:(Team) team EntityManager:(EntityManager*) entityManager;
Castle.m中修改:
- (instancetype)initWithImageName:(NSString *)imageName Team:(Team)team EntityManager:(EntityManager *)entityManager{

...

        [self addComponent:[[MoveComponent alloc] initWithMaxSpeed:0 MaxAcceleration:0 Radius:spriteComponent.node.size.width / 2 EntityManager:entityManager]];

...

}
最后,移步到EntityManager.m中,修改spawnQuirkWithTeam:方法:
Quirk *monster = [[Quirk alloc]initWithTeam:team EntityManager:self];
同样的,打开GameScene.m文件,修改setupCastle方法:
Castle *humanCastle = [[Castle alloc]initWithImageName:@"castle1_atk" Team:Team1 EntityManager:self.entityManager];

...

Castle *aiCastle = [[Castle alloc]initWithImageName:@"castle2_atk" Team:Team2 EntityManager:self.entityManager];
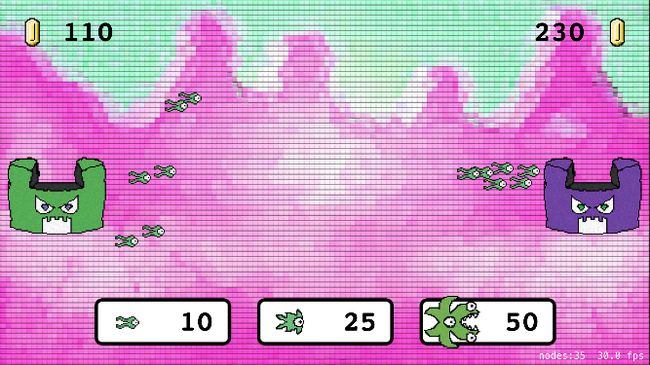
现在运行起来看看,赶紧欣赏一下你的移动单位吧:
祝贺你,完成到这里,你应该对实体组件系统和代理,目标和行为组合有了一定的了解,愿你在以后的开发道路上越走越远。
这里是OC版本的 完整Demo。
