目录
1.Dart语法
2.Flutter工程目录
3.Widget简介
4.常用Widget介绍
5.实战
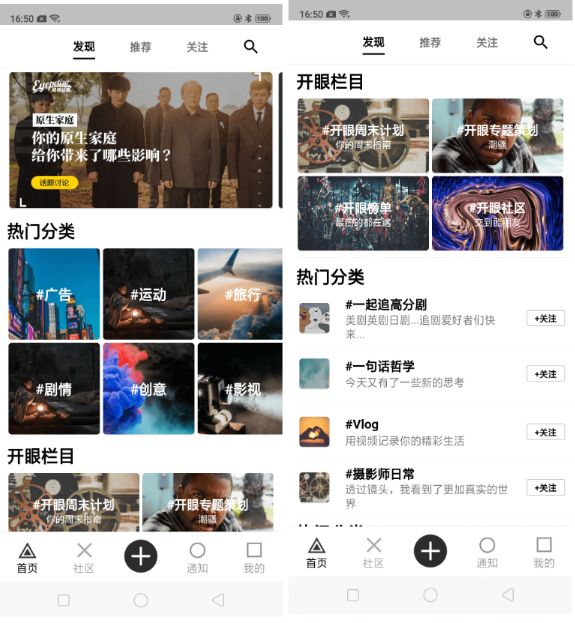
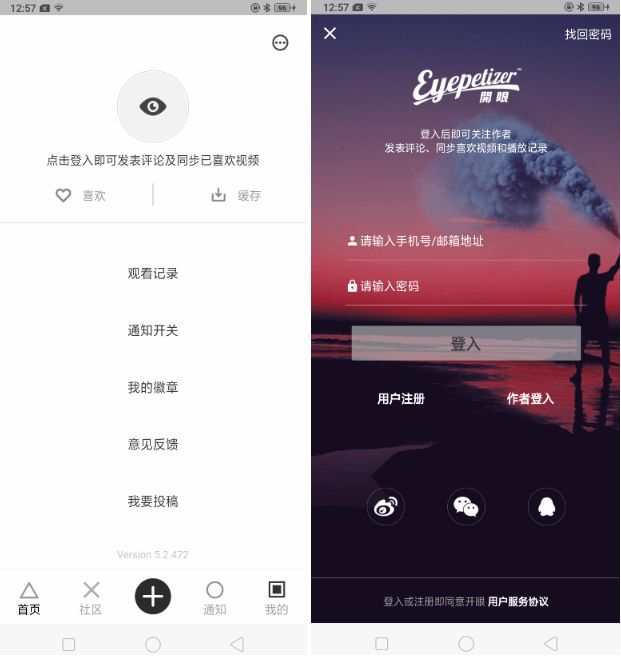
先看一下最终实现的效果:
代码
简介
Flutter是Google发布的一个用于创建跨平台、高性能移动应用的框架。它没有使用原生控件,而是实现了一个自绘引擎,使用自身的布局、绘制系统。开发Flutter应用使用的是Dart语言。
一.Dart语法
Dart语言跟Java或者Kotlin的语法使用上差不多,下面就快速介绍一下Flutter开发中常用到的不同之处:
变量
在Dart声明基本类型的变量可以使用var来接收任意类型的变量,一旦赋值类型就不能改变,也可以使用具体的类型来声明。
var i = 10; //一旦赋值类型就确定了,以后的类型就不能改变了。
int j = 10;
使用dynamic或Object来声明任意类型的对象类型。
函数
1.函数简写:
void main() => runApp(MyApp());
等价于
void main(){
  runApp(MyApp());
}
如果函数体只有一个表达式,可以使用=>来代替{}。
2.可选命名参数
使用{param1, param2, …},用于指定命名参数。
//定义
void setData(int id,{String name,int count}){
    ......
}
//使用
setData(1);
setData(1,name: "慕涵盛华");
setData(1,name: "慕涵盛华",count: 2)
可选命名参数在Flutter中使用非常多。
修饰符
在Dart里没有private/protected/public等权限修饰符,但是要实现private,只需要将需要修饰的字段或者方法,加上:"_"。
//前缀带_的变量或者方法表示是类私有的变量或者方法。
int _count = 0;
void _setCount(int count){
   _count  = count;
}
//使用
_setData(1);
异步支持
Dart类库有非常多的返回Future或者Stream对象的函数。 这些函数被称为异步函数:它们只会在设置好一些耗时操作之后返回,比如像 IO操作。而不是等到这个操作完成。
使用关键字async和await来异步编程。
//异步方法
void _getData() async {
    //等待返回结果
    final response = await http.get(URL_HOME_FIND_DETAIL_LIST);
    debugPrint("获取的数据为:${response.body}");
};
以上介绍这些语法都是在Flutter开发中经常使用的,其他语法的用法跟Java或者Kotlin基本一样了。
二.Flutter工程目录
创建类型
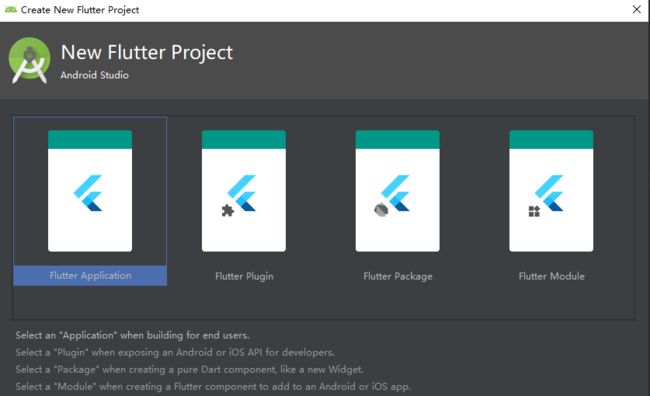
从上图中我们可以看出使用AndroidStudio创建Flutter项目是有4中类型,每一种类型的用处下面都给出了说明。这里说一下Flutter Application和Flutter Module,这两种工程目录下都包含Android和Ios工程目录,但是Flutter Module;类型下的这两个工程目录是隐藏式的。
目录结构
具体看一下pubspec.yaml文件的内容:
name: flutter_eyepetizer
description: A new Flutter module.
#应用或包的版本号
version: 1.0.0+1

environment:
  sdk: ">=2.1.0 <3.0.0"

#Flutter应用依赖
dependencies:
  flutter:
    sdk: flutter
  cupertino_icons: ^0.1.2
  dio: ^2.1.0
  http: ^0.12.0
  video_player: 0.10.0+2

#开发环境依赖的工具包
dev_dependencies:
  flutter_test:
    sdk: flutter

#flutter相关的配置选项
flutter:
  uses-material-design: true
  #配置本地图片
  assets:
    - images/ic_action_search.png
    - images/ic_tab_strip_icon_category.png
    - images/ic_tab_strip_icon_category_selected.png
    - images/ic_tab_strip_icon_feed.png
    - images/ic_tab_strip_icon_feed_selected.png
    - images/ic_tab_strip_icon_follow.png
    - images/ic_tab_strip_icon_follow_selected.png
    - images/ic_tab_strip_icon_profile.png
    - images/ic_tab_strip_icon_profile_selected.png
    - images/ic_home_public.png

  module:
    androidPackage: com.gfd.flutter_eyepetizer
    iosBundleIdentifier: com.gfd.flutterEyepetizer
Flutter的依赖使用的是pub仓库。
三.Widget简介
Flutter中几乎所有的对象都是一个Widget,与原生开发中“控件”不同的是,Flutter中的widget的概念更广泛,它不仅可以表示UI元素,也可以表示一些功能性的组件如:用于手势检测的 GestureDetector widget、用于应用主题数据传递的Theme等等。而原生开发中的控件通常只是指UI元素。
Widget的功能是“描述一个UI元素的配置数据,它就是说,Widget其实并不是表示最终绘制在设备屏幕上的显示元素,而只是显示元素的一个配置数据。实际上,Flutter中真正代表屏幕上显示元素的类是Element,也就是说Widget只是描述Element的一个配置。并且一个Widget可以对应多个Element,这是因为同一个Widget对象可以被添加到UI树的不同部分,而真正渲染时,UI树的每一个Widget节点都会对应一个Element对象。
四.常用Widget介绍
1.布局类
线性布局Row和Column
Row相当于Android中LinearLayout设置为android:orientation="horizontal"。
Column相当于Android中LinearLayout设置为android:orientation="vertical"。
Row(
    //对于Row来说:主轴为水平方向,纵轴的垂直方向
    mainAxisAlignment: MainAxisAlignment.center,//主轴的对其方式
    crossAxisAlignment: CrossAxisAlignment.center,//纵轴的对其方式
    textDirection: TextDirection.ltr,//水平方向上的布局顺序:从left to right
    verticalDirection: VerticalDirection.down,//垂直方向上的对齐方式 :从上到下
    children: [
        Text("子控件1"),
        Text("子控件2")
    ],
);
弹性布局
弹性布局允许子widget按照一定比例来分配父容器空间,类似Android中的android:layout_weight。Flutter中的弹性布局主要通过Flex和Expanded来配合实现。
//Row和Column都继承自Flex,参数基本相同,所以能使用Flex的地方一定可以使用Row或Column。
Flex(
    direction: Axis.horizontal,
    children: [
    Expanded(
        flex: 1, //比例 相当于LinearLayout中的android:layout_weight = 1
        child: Container(height: 32.0, color: Colors.blue)),
    Expanded(
        flex: 2,

        child: Container(height: 32.0, color: Colors.green))
    ],
)
Spacer是对Expanded的一个包装,功能是占用指定比例的空间。
Spacer(
    flex: 1,
),
//Spacer内部实现
new Expanded(
  flex: flex,
  child: const SizedBox(
    height: 0.0,
    width: 0.0,
  ),
);
流式布局
在使用Row或者Colum时,如果子Widget超出屏幕范围,则会报溢出错误:
上图表示的是右边溢出部分报错。这是因为Row默认只有一行,如果超出屏幕不会折行。而流式布局在超出屏幕显示范围会自动换行。Flutter中通过Wrap和Flow来支持流式布局。类似Android中的FlexboxLayout.
Wrap:
Wrap(
    //主轴方向
    direction: Axis.horizontal,
    //主轴方向间距
    spacing: 8.0,
    //纵轴方向间距
    runSpacing: 4.0,
    //沿主轴方向靠左对齐
    alignment: WrapAlignment.start,
    children: [
    Chip(
        label: Text("慕涵盛华"),
        avatar: CircleAvatar(
            backgroundColor: Colors.blue, child: Text("A"))),
    Chip(
        label: Text("慕涵盛华"),
        avatar: CircleAvatar(
            backgroundColor: Colors.blue, child: Text("B"))),
    Chip(
        label: Text("慕涵盛华"),
        avatar: CircleAvatar(
            backgroundColor: Colors.blue, child: Text("C"))),
    Chip(
        label: Text("慕涵盛华"),
        avatar: CircleAvatar(
            backgroundColor: Colors.blue, child: Text("D"))),
    Chip(
        label: Text("慕涵盛华"),
        avatar: CircleAvatar(
            backgroundColor: Colors.blue, child: Text("E"))),
    ],
);
Flow
一般很少会使用Flow,因为其过于复杂,需要自己实现子Widget的位置转换,Flow主要用于一些需要自定义布局策略或性能要求较高的场景。
层叠布局
层叠布局和Android中的帧布局:FrameLayout类似。Flutter中使用Stack和Positioned来实现层叠布局,Stack允许子Widget堆叠,而Positioned可以给子Widget定位(根据Stack的四个角)。
////通过ConstrainedBox来确保Stack占满屏幕
ConstrainedBox(
  constraints: BoxConstraints.expand(),
  child: Stack(
    //决定没有定位的子Widget如何去适应Stack的大小。
    // StackFit.loose:使用子widget的大小,StackFit.expand:扩伸到Stack的大小。
    fit: StackFit.loose,
    alignment:Alignment.center,//指定未定位widget的对齐方式
    children: [
      Container(
        width: 32.0,
        height: 32.0,
        color: Colors.blue,
      ),
      Positioned(
        top: 10,
        left: 10,
        child: Text("慕涵盛华"))
    ],
  ),
));
2.容器类
容器类Widget和布局类Widget都作用于其子Widget,不同的是:
- 布局类Widget一般都需要接收一个Widget数组(children),而容器类Widget一般只需要接受一个子Widget(child)
- 布局类Widget是按照一定的排列方式来对其子Widget进行排列,而容器类Widget一般只是包装其子Widget,对其添加一些修饰或限制。
Padding
Padding可以给其子Widget添加内间距,类似Android布局属性中的android:layout_paddingXXX。
Padding(
    //only:指定方向上的间距
    padding: EdgeInsets.only(left: 10,top: 10),
    //padding: EdgeInsets.all(10), 四个方向的间距
    //padding: EdgeInsets.fromLTRB(10, 10, 5, 8), 一次为 l t r b
    //padding: EdgeInsets.symmetric(horizontal: 8), 左右的距离
    child: Text("慕涵盛华"),
)
布局限制类容器:ConstrainedBox和SizedBox
ConstrainedBox:对子widget添加额外的约束
ConstrainedBox(
    //constraints:约束
    constraints: BoxConstraints(
        minWidth: double.infinity, //宽度尽可能大
        maxHeight: 50.0 //最大高度为50像素
        ),
    child: Container(
      color: Colors.blue,
    )
);
SizedBox:用于给子Widget指定固定的宽高
SizedBox(
    width: 50,
    height: 50,
    //child属性可以不设置,可以用来设置间距
    child: Container(
      color: Colors.blue,
    ),
);
装饰容器:DecoratedBox
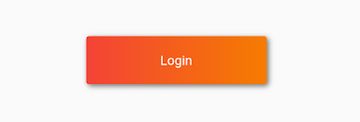
可以在其子Widget绘制前后绘制一个装饰如背景、边框、渐变等。
DecoratedBox(
    //decoration:装饰
    decoration: BoxDecoration(
        borderRadius: BorderRadius.circular(4.0), //圆角
        gradient: LinearGradient(//背景渐变
            colors: [Colors.red, Colors.orange[700]]),
        boxShadow: [ //阴影
          BoxShadow(
              color: Colors.black54,
              offset: Offset(2.0, 2.0),
              blurRadius: 4.0)
        ]),
    child: Padding(
        padding: EdgeInsets.symmetric(vertical: 18, horizontal: 80),
        child: Text("Login",style: TextStyle(color: Colors.white))
);
变换:Transform
Transform可以在其子Widget绘制时对其应用一个矩阵变换,实现平移、缩放、旋转等效果。
Container(
    color: Colors.black,
    child: new Transform(
    alignment: Alignment.topRight, //相对于坐标系原点的对齐方式
     // Transform.translate(offset: Offset(-20.0, -5.0) : 平移
     //Transform.rotate 旋转
    transform: new Matrix4.skewY(0.3), //矩阵变换:沿Y轴倾斜0.3弧度
    child: new Container(
      padding: const EdgeInsets.all(8.0),
      color: Colors.deepOrange,
      child: const Text('慕涵盛华'),
    ),
    ),
);
Container
Container通过组合多种Widget来实现复杂强大的功能。
Container({
  this.alignment,
  this.padding, //容器内补白,属于decoration的装饰范围
  Color color, // 背景色
  Decoration decoration, // 背景装饰
  Decoration foregroundDecoration, //前景装饰
  double width,//容器的宽度
  double height, //容器的高度
  BoxConstraints constraints, //容器大小的限制条件
  this.margin,//容器外补白,不属于decoration的装饰范围
  this.transform, //变换
  this.child,
})
3.Material Design风格Widget
在大多数应用首页中顶部包含一个标题栏,底部包含一个底部导航等。Flutter Material库提供了一个Scaffold Widget,它是一个路由页的骨架,可以非常容易的拼装出一个完整的页面。类似下面这种页面:
Scaffold:
Scaffold({
    Key key,
    this.appBar, : AppBar 类似Android中的ActionBar
    this.body,
    this.floatingActionButton,
    this.floatingActionButtonLocation,
    this.floatingActionButtonAnimator,
    this.persistentFooterButtons,
    this.drawer,  ://Drawer:抽屉菜单
    this.endDrawer,
    this.bottomNavigationBar, :页面底部导航栏
    this.bottomSheet,
    this.backgroundColor,
    this.resizeToAvoidBottomPadding,
    this.resizeToAvoidBottomInset,
    this.primary = true,
    this.drawerDragStartBehavior = DragStartBehavior.start,
    this.extendBody = false,
  })
使用示例:
//TabBar必须有一个TabController
DefaultTabController(
  length: 4,//tab数量
  child: Scaffold(
    backgroundColor: Colors.white,
    appBar: AppBar(
      title: Text("图片列表"),
      elevation: 0.0,
      //左侧图标
      leading: IconButton(
          icon: Icon(Icons.menu), onPressed: () => debugPrint("按钮点击")),
      //右侧图标(可以指定多个)
      actions: [
        IconButton(
            icon: Icon(Icons.search),
            tooltip: "搜索按钮",
            onPressed: () => debugPrint("搜索按钮被点击")),
        IconButton(
            icon: Icon(Icons.more_horiz),
            tooltip: "搜索按钮",
            onPressed: () => debugPrint("更多按钮被点击")),
      ],
      //顶部导航Tab 具体显示的内容与TabBarView对应
      bottom: TabBar(
          indicatorColor: Colors.white,
          indicatorSize: TabBarIndicatorSize.tab,
          indicatorWeight: 2.0,
          tabs: [
            Tab(icon: Icon(Icons.local_florist)),
            Tab(icon: Icon(Icons.change_history)),
            Tab(icon: Icon(Icons.directions_bike)),
            Tab(icon: Icon(Icons.call_missed))
          ]),
    ),
    body: TabBarView(children: [
      NavigationDemo(),
      SliverDemo(),
      GridViewDemo(),
      PageViewDemo2()
    ]),
    drawer: DrawerDemo(),
    bottomNavigationBar: BottomNavigationBarDemo(),
  ),
)
4.可滑动Widget
SingleChildScrollView
类似于Android中的ScrollView。
SingleChildScrollView({
  this.scrollDirection = Axis.vertical, //滚动方向,默认是垂直方向
  this.reverse = false,  //是否反向滑动
  this.padding,
  bool primary,  //是够使用默认的ScrollController
  this.physics,
  this.controller, //ScrollController
  this.child,
})
ListView和GirdView
类似Android中的列表控件。
CustomScrollView,Sliver
类似Android中的CoordinatorLayout + AppBarLayout + CollapsingToolbarLayout
五.实战
效果图:
