这篇文章翻译自ModDota论坛,源地址
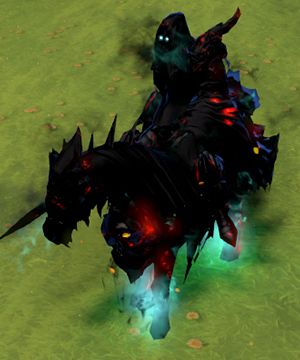
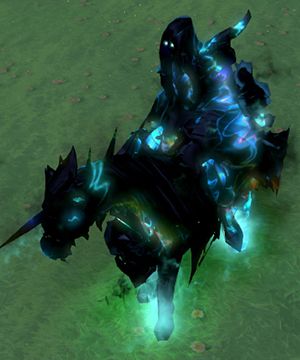
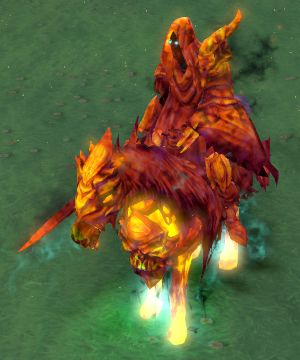
这篇教程将会说救命如何创建及修改状态特效,状态特效的效果如下。


一、基础
在粒子特效编辑器里面创建一个粒子特效并保存,你需要确认你在View标签里面打开了"View as DOTA Status Effect",这样你才能明白下面这些function是什么意思。
我们需要使用以下这些操作函数来生成一个状态特效。
Renderers:
- Render status effect
Operators: - Lifespan endcap timed decay
Initializers: - 9x Scalar random
- 8x Vector component random
- 2x Color random
二、操作步骤
首先一定要明白一点,你的特效不会在粒子特效编辑器中显示出来,你需要进游戏去查看。
1. 基础属性
在Base Orioertues设置基础的粒子特效,将最大粒子数量max particles设置为1,其他的保持默认。
2. 渲染状态特效
Render status effect这个函数对于渲染一个状态特效是最重要的,他需要选择一个材质vtex, vmat,在V社的状态特效中,这些材质是通过多个Vector component random来定义的,这个就会比较复杂了,如果我们自己使用,那么就使用Render Status Effect最好了,这样会比较容易处理及理解。

这里面最重要的是 Color warp材质和detail 2 材质。
Color Warp材质
A 3D texture that applies a color transformation like hue shift or contrast adjusments to the original colors. Click on the magnifying glass and type colowarp in the searchbar to see all the color warp textures.Note: Only colowarp textures will work for this.
Detail 2 texture
Overrides the detail map. You can basically use any texture for this. Make sure you select an appropriate blend mode for your texture withD_DETAIL_2 (will be covered later on).
Diffuse warp texture
Determines where diffuse reflections occur.
Fresnel color warp texture
Applies a colortransfromation around the edges of the model. Use color warp textures for this.
Fresnel warp texture
Determines where the fresnel color warp is apllied.
Specular warp texture
Determines where the specular reflection occurs.
Environment map texture
I’m not sure what this does. It doesn’t seem to have much impact.
Scalar random
In the properties window you can set what the scalar random function should do. The output field defines what parameter should be changed and the min and max values(which should be most of the time equal) set how much it is changed.
For our 9 Scalar random we need:
Note: In this guide min and max will always be equal. If you don’t know what does what just play around with the values and observe the changes ingame.
ColorWarpBlendFactorDefines how much the Color Warp Texture is blended in.
Values: 1 = Fully blended in, 0 = Fully Opaque.
D_DETAIL_2Blend method of the detail 2 texture.
Values: 0 to 5 in whole numbers.
Detail2TexCoordScaleSets the coordinate scale of the Detail2 Textue.
Values: The larger the number the smaller the Detail2 Texture and the more often it needs to be placed on the model. Typical Values: 2-5.
Detail2BlendFactorDefines how much the Detail2 Texture is blended in.
Values: 1 = Fully blended in, 0 = Fully Opaque, can also be >1.
CubeMapScalarSets how strong the Cube Map is blended in? You don't need to know what this does exaclty since it doesen’t have much impact.
Values: Try anything from 0 to 1.
AmbientScaleSets how strong the Ambient Texture is apllied.
Values: Larger Values will make the Ambient Texture appear stronger.
RimLightScaleSets how strong the Rim Light is apllied. Rim Light is the highlighting around the edges of the model.
Values: Larger Values will make the Rim Light appear stronger.
NONE($RIMLIGHTBLENDTOFULL)Defines how much the Rim Light is blended in.(I‘m not sure on this)
Values: Try something between 0 and 1.
NONE($FRESNELCOLORWARPBLENDTOFULL)Defines how much the Fresnel Colorwarp Texture is blended in. (I‘m not sure on this)
Values: Try something between 0 and 1.
Vector component random
Here the functionallity is defined through the output field and the component field. The output field selects a set of three different parameters (as you can see some of them can be NONE and are just placeholders). The component field chooses what exact parameter from that set should be changed. X Component selects the first, Y Component the second and Z Component the third. Like in Scalar random min and max define how much the parameter is changed.
For our 8 Vector component random we need:
Note: Again just play around with the values to see yourself what is changed.
2x SpecularScale +NONE+DiffuseWarpBlendToFull
SpecularScaleSets how strong the Specular Reflection is visible.
Values: Larger Values result in stronger Specular Reflection.
DiffuseWarpBlendToFullDefines how much the Diffuse Warp Texture is blended in.
Values: 1 = Fully blended in, 0 = Fully Opaque.
3x SpecularExponent+SpecularExponentBlendToFull+SpecularBlendToFull
SpecularExponentSets the size of the Specular Highlight Spot.
Values: Typically 5 to 20.
SpecularExponentBlendToFullDefines how much the Specular Exponent is blended in.
Values: 1 = Fully blended in, 0 = Fully Opaque.
SpecularBlendToFullDefines how much the Specular is blended in.
Values: 1 = Fully blended in, 0 = Fully Opaque.
3x ReflectionsTintBaseBlendToNone+MetalnessBlendToFull+SelfIllumBlendToFull
ReflectionsTintBaseBlendToNoneI’m not certain on this but it has something to do with Specular Reflection.
Values: Larger Values will make the Specular Reflection appear stronger.
MetalnessBlendToFullDetermines how metallic the Status Effect appears.
Values: Larger Values will make it look more metallic and shiny.
SelfIllumBlendToFullSets How much self illumination the status effect will have.
Values: 0 = no self Illumination, 1 = full self Illumination.
Color random
With the Color random function we can define the Rim Light Color and the Specular Color. The only options we need from the properties window are color 1, color 2 and output field. The output field again sets what will be changed and color 1 and 2 set to what color it will be changed.
For our 2 Color random we need:
Note: Color 1 and 2 don’t need to be the same but in most cases they should be.
RimLightColorSets the Rim Light Color.
SpecularColorSets the Specular Color.
Hope this helps. Feel free to ask questions or give me feedback.