实验一:实现keepalived企业级高可用基于LVS-DR模式的应用实战
一、环境准备:两台centos系统做DR、一主一从,两台实现过基于LNMP的电子商务网站
准备四台主机:都是仅主机模式
一台Director-master,DIP:192.168.159.151 VIP:192.168.159.110
一台Director-backup,DIP:192.168.159.129 VIP:192.168.159.110
一台后台服务器,RIP:192.168.159.120 VIP:192.168.159.110
一台后台服务器,RIP:192.168.159.121 VIP:192.168.159.110
二、安装步骤:
使用yum方式安装keepalived服务
Director-master上操作:
安装keepalived服务:yum install keepalived
Director-backup上操作:
安装keepalived服务:yum install keepalived
iptables -F && setenforing 清空防火墙策略,关闭selinux
三、配置基于DR模式的LVS负载均衡集群:
修改keepalived主(Director-master)配置文件实现virtual_instance(vim /etc/keepalived/keepalived.conf)
! Configuration File for keepalived
global_defs {
notification_email {
root@localhost 邮件接收者
}
notification_email_from [email protected] 发件人
smtp_server 127.0.0.1 发邮件的服务器
smtp_connect_timeout 2 连接超时时间
router_id LVS_DEVEL 路由器的标识
}
vrrp_instance VI_1 { 配置虚拟路由器
state MASTER 初始状态
interface eth0 所用端口
virtual_router_id 51 虚拟路由的ID号
priority 100 优先级
advert_int 1 VRRP通告间隔
authentication { 认证机制
auth_type PASS
auth_pass magedu
}
nopreempt 非抢占式,当多个BACKUP时,其中有个BACKUP的优先级高但是为非抢占式,那么它就不去抢VIP。
virtual_ipaddress {
168.159.110
}
}
virtual_server 192.168.159.110 80 { 虚拟服务
delay_loop 6 服务轮询的时间间隔
ld_algo wrr LVS调度算法
lb_kind DR LVS集群模式
protocol TCP
real_server 192.168.159.120 80 { 后端真实节点主机
weight 1 权重
TCP_CHECK {
connect_timeout 3
}
}
real_server 192.168.159.121 80 {
weight 1
TCP_CHECK {
connect_timeout 3 连接超时时间
}
}
}
systemctl start keepalived
修改keepalived从Director-backup)配置文件实现virtual_instance
vrrp_instance VI_1 {
state BACKUP
interface eth0
virtual_router_id 51
priority 99
advert_int 1
authentication {
auth_type PASS
auth_pass grr02
}
virtual_ipaddress {
168.159.110
}
}
virtual_server 192.168.159.110 80 {
delay_loop 6
ld_algo rr
lb_kind DR
protocol TCP
real_server 192.168.159.120 80 {
weight 1
TCP_CHECK {
connect_timeout 3
}
}
real_server 192.168.159.121 80 {
weight 1
TCP_CHECK {
connect_timeout 3
}
rs01,rs02:配置回环网卡
①配置回环网卡:
ifconfig lo:0 192.168.159.110 broadcast 192.168.159.110 netmask 255.255.255.255 up
route add -host 192.168.159.110 lo:0
删除:route del -net 169.254.0.0/16 dev eth0
②忽略ip与mac不匹配的问题:
echo "1" >/proc/sys/net/ipv4/conf/lo/arp_ignore
echo "2" >/proc/sys/net/ipv4/conf/lo/arp_announce
echo "1" >/proc/sys/net/ipv4/conf/all/arp_ignore
echo "2" >/proc/sys/net/ipv4/conf/all/arp_announce
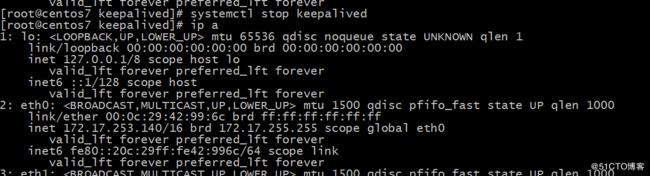
四、测试:刚启动服务查看ip是在MASTER上,当关闭MASTER上的keepalived服务,那么ip就被BACKUP拿走了
实验二:实现keepalived主主架构 (基于DR集群工作模式)
一、环境准备:两台centos系统做DR、一主一从,两台实现过基于LNMP的电子商务网站
准备四台主机:都是仅主机模式
一台Director-master,DIP:192.168.159.151 VIP:192.168.159.110
一台Director-backup,DIP:192.168.159.129 VIP:192.168.159.110
一台后台服务器,RIP:192.168.159.120 VIP:192.168.159.110
一台后台服务器,RIP:192.168.159.121 VIP:192.168.159.110
二、安装步骤:
使用yum方式安装keepalived服务
Director-master1上操作:
安装keepalived服务:yum install keepalived
Director-backup上操作:
安装keepalived服务:yum install keepalived
iptables -F && setenforing 清空防火墙策略,关闭selinux
三、配置基于DR模式的LVS负载均衡集群:
Director-master1上操作:
修改keepalived主(Director-master)配置文件实现virtual_instance(vim /etc/keepalived/keepalived.conf)
! Configuration File for keepalived
global_defs {
notification_email {
root@localhost 邮件接收者
}
notification_email_from [email protected] 发件人
smtp_server 127.0.0.1 发邮件的服务器
smtp_connect_timeout 2 连接超时时间
router_id LVS_DEVEL 路由器的标识
}
vrrp_instance VI_1 { 配置虚拟路由器
state MASTER 初始状态
interface eth0 所用端口
virtual_router_id 51 虚拟路由的ID号
priority 100 优先级
advert_int 1 VRRP通告间隔
authentication { 认证机制
auth_type PASS
auth_pass magedu
}
*# nopreempt 非抢占式,当多个BACKUP时,其中有个BACKUP的优先级高但是为非抢占式,那么它就不去抢VIP。****
virtual_ipaddress {
168.159.110
}
}
virtual_server 192.168.159.110 80 { 虚拟服务
delay_loop 6 服务轮询的时间间隔
ld_algo wrr LVS调度算法
lb_kind DR LVS集群模式
protocol TCP
real_server 192.168.159.120 80 { 后端真实节点主机
weight 1 权重
TCP_CHECK {
connect_timeout 3
}
}
real_server 192.168.159.121 80 {
weight 1
TCP_CHECK {
connect_timeout 3 连接超时时间
}
}
vrrp_instance VI_2 {
state BACKUP
interface eth0
virtual_router_id 51
priority 99
advert_int 1
authentication {
auth_type PASS
auth_pass grr02
}
virtual_ipaddress {
168.159.122
}
}
virtual_server 192.168.159.122 80{
delay_loop 6
ld_algo rr
lb_kind DR
protocol TCP
real_server 192.168.159.120 80 {
weight 1
TCP_CHECK {
connect_timeout 3
}
}
real_server 192.168.159.121 80 {
weight 1
TCP_CHECK {
connect_timeout 3
}
启动服务:systemctl start keepalived
Director-master2上操作:(vim /etc/keepalived/keepalived.conf)
! Configuration File for keepalived
global_defs {
notification_email {
root@localhost 邮件接收者
}
notification_email_from [email protected] 发件人
smtp_server 127.0.0.1 发邮件的服务器
smtp_connect_timeout 2 连接超时时间
router_id LVS_DEVEL 路由器的标识
}
vrrp_instance VI_1 { 配置虚拟路由器
state BACKUP 初始状态
interface eth0 所用端口
virtual_router_id 51 虚拟路由的ID号
priority 98 优先级
advert_int 1 VRRP通告间隔
authentication { 认证机制
auth_type PASS
auth_pass magedu
}
*# nopreempt 非抢占式,当多个BACKUP时,其中有个BACKUP的优先级高但是为非抢占式,那么它就不去抢VIP。**
virtual_ipaddress {
168.159.110
}
}
virtual_server 192.168.159.110 443 { 虚拟服务
delay_loop 6 服务轮询的时间间隔
ld_algo wrr LVS调度算法
lb_kind DR LVS集群模式
protocol TCP
real_server 192.168.159.120 443 { 后端真实节点主机
weight 1 权重
TCP_CHECK {
connect_timeout 3
}
}
real_server 192.168.159.121 443 {
weight 1
TCP_CHECK {
connect_timeout 3 连接超时时间
}
}
vrrp_instance VI_2 {
state MASTER
interface eth0
virtual_router_id 51
priority 100
advert_int 1
authentication {
auth_type PASS
auth_pass grr02
}
virtual_ipaddress {
168.159.122
}
}
virtual_server 192.168.159.122 443{
delay_loop 6
ld_algo rr
lb_kind DR
protocol TCP
real_server 192.168.159.120 443 {
weight 1
TCP_CHECK {
connect_timeout 3
}
}
real_server 192.168.159.121 443 {
weight 1
TCP_CHECK {
connect_timeout 3
}
启动服务:systemctl start keepalived
rs01,rs02:配置回环网卡
①配置回环网卡:
ifconfig lo:0 192.168.159.110 broadcast 192.168.159.110 netmask 255.255.255.255 up
ifconfig lo:1 192.168.159.122 broadcast 192.168.159.122 netmask 255.255.255.255 up
route add -host 192.168.159.110 lo:0
route add -host 192.168.159.122 lo:1
删除:route del -net 169.254.0.0/16 dev eth0
route del default gw 192.168.159.110 dev eth1
②忽略ip与mac不匹配的问题:
echo "1" >/proc/sys/net/ipv4/conf/lo/arp_ignore
echo "2" >/proc/sys/net/ipv4/conf/lo/arp_announce
echo "1" >/proc/sys/net/ipv4/conf/all/arp_ignore
echo "2" >/proc/sys/net/ipv4/conf/all/arp_announce
四、测试:刚启动服务时MASTER1主机上有192.168.159.110无192.168.159.122
MASTER2主机上有192.168.159.122无192.168.159.110

当关闭MASTER2主机时,两个VIP都会在MASTER1主机上,而MASTER2主机上无VIP
实验三、实现keepalived的NAT模型
一、环境准备:两台centos系统做NAT、一主一从,两台实现过基于LNMP的电子商务网站
准备四台主机:
一台Director-master,DIP:192.168.159.151 VIP:192.168.159.110(作为可漂移的DIP),172.17.253.115 (桥接与仅主机)
一台Director-backup,DIP:192.168.159.129 VIP:192.168.159.110,172.17.253.115
一台后台服务器,RIP:192.168.159.120 VIP:192.168.159.110(仅主机模式)可实现网站访问
一台后台服务器,RIP:192.168.159.121 VIP:192.168.159.110(仅主机模式)
二、安装步骤:
使用yum方式安装keepalived服务
Director-master1上操作:
安装keepalived服务:yum install keepalived
Director-backup上操作:
安装keepalived服务:yum install keepalived
iptables -F && setenforing 清空防火墙策略,关闭selinux
开启路由转发 vim /etc/sysctl.conf
net.ipv4.ip_forward=1
sysctl -p
三、配置基于DR模式的LVS负载均衡集群:
Director-master1上操作:
! Configuration File for keepalived
global_defs {
notification_email {
root@localhost
}
notification_email_from [email protected]
smtp_server 127.0.0.1
smtp_connect_timeout 5
router_id LVS_DEVEL
}
vrrp_instance VI_1 {
state MASTER
interface eth0
virtual_router_id 23
priority 100
advert_int 1
authentication {
auth_type PASS
auth_pass riqi
}
virtual_ipaddress {
17.253.115
168.159.110
}
}
virtual_server 172.17.253.115 80 {
delay_loop 6
lb_algo wrr
lb_kind NAT
protocol TCP
real_server 192.168.159.121 80 {
weight 1
TCP_CHECK {
connect_timeout 3
}
}
real_server 192.168.159.120 80 {
weight 1
TCP_CHECK {
connect_timeout 3
}
}
}
Director-master2上操作:
! Configuration File for keepalived
global_defs {
notification_email {
root@localhost
}
notification_email_from [email protected]
smtp_server 127.0.0.1
smtp_connect_timeout 5
router_id LVS_DEVEL
}
vrrp_instance VI_1 {
state BACKUP
interface eth0
virtual_router_id 23
priority 91
advert_int 1
authentication {
auth_type PASS
auth_pass riqi
}
virtual_ipaddress {
17.253.115
168.159.110
}
}
virtual_server 172.17.253.115 80 {
delay_loop 6
lb_algo wrr
lb_kind NAT
protocol TCP
real_server 192.168.159.121 80 {
weight 1
TCP_CHECK {
connect_timeout 3
}
}
real_server 192.168.159.120 80 {
weight 1
TCP_CHECK {
connect_timeout 3
}
}
}
启动服务:systemctl start keepalived
rs01,rs02:配置网关
route add default gw 192.168.159.110 dev eth1
删除:route del -net 169.254.0.0/16 dev eth0
四、测试:刚启动服务时MASTER1主机上有192.168.159.110和172.17.253.115
MASTER2主机上无192.168.159.110和172.17.253.115.
当关闭MASTER1上的keepalived,MASTER2有192.168.159.110和172.17.253.115
访问172.17.253.115
以上是做的实验,还望各位多多赐教!