InstantRun
不得不说 InstantRun 真是个好东西。目前主流的热修复框架都有或多或少的参考 InstantRun 的某些技术点 。
我们知道,InstantRun 对应三种更新机制:
- 冷插拔,我们称之为重启更新机制
- 温插拔,我们称之为重启Activity更新机制
- 热插拔,我们称之为热更新机制
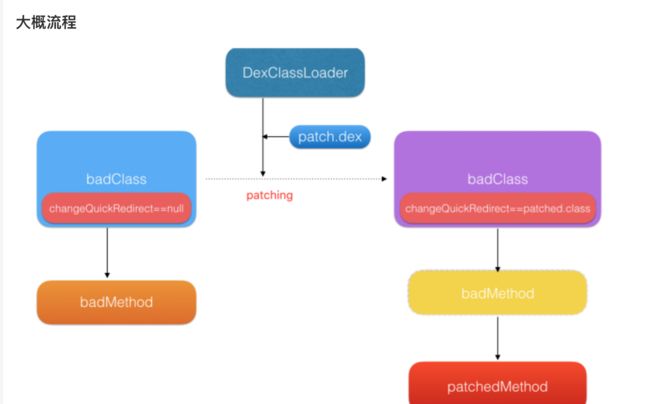
Robust ,其热修复的关键技术点就是采用了 InstantRun 中的热更新机制,对应于多 ClassLoader 的动态加载方案,即一个 dex 文件对应一个新建 ClassLoader 。
优势
- 支持Android2.3-7.X版本
- 高兼容性、高稳定性,修复成功率高达三个九
- 补丁下发立即生效,不需要重新启动
- 支持方法级别的修复,包括静态方法
- 支持增加方法和类
- 支持ProGuard的混淆、内联、优化等操作
大概流程
集成方法
- 在App的build.gradle,加入如下依赖
apply plugin: 'com.android.application'
//制作补丁时将这个打开,auto-patch-plugin紧跟着com.android.application
//apply plugin: 'auto-patch-plugin'
apply plugin: 'robust'
compile 'com.meituan.robust:robust:0.4.2'
- 在整个项目的build.gradle加入classpath
buildscript {
    repositories {
        jcenter()
    }
    dependencies {
         classpath 'com.meituan.robust:gradle-plugin:0.4.2'
         classpath 'com.meituan.robust:auto-patch-plugin:0.4.2'
   }
}
- 项目发release版本,把签名文件在gradle中写好
   signingConfigs {
        debug {
            storeFile file("../robust.jks")
            storePassword "123456"
            keyAlias "robust"
            keyPassword "123456"
        }

        release {
            storeFile file("../robust.jks")
            storePassword "123456"
            keyAlias "robust"
            keyPassword "123456"
        }
    }
4.开启proguard混淆开关,robust做了混淆文件和代码的映射。
5.将robust项目源码中的app/src/robust.xml拷贝到自己项目下的app/src路径下
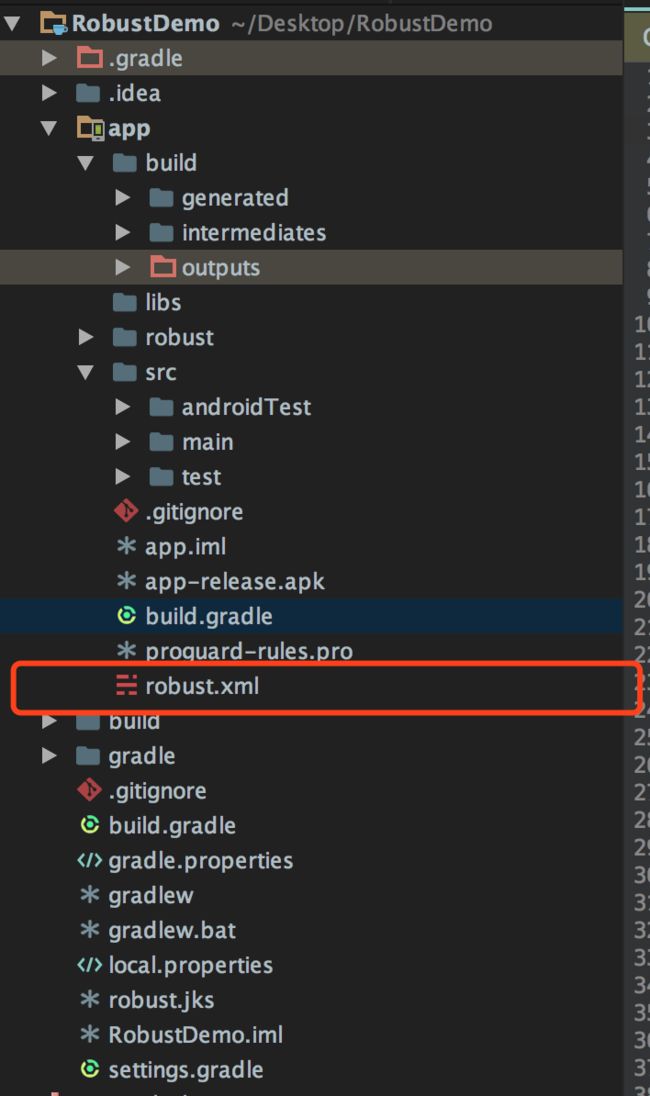
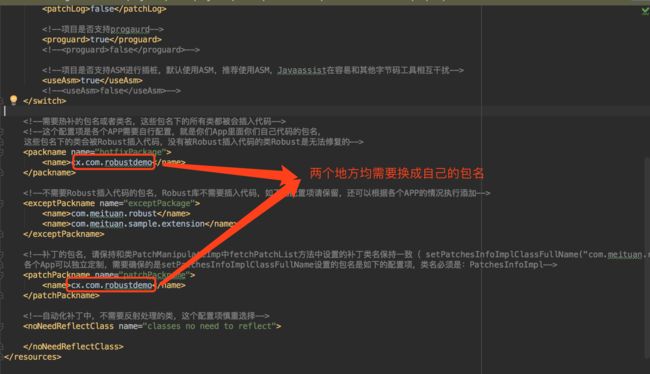
打开robust.xml修改两个地方
6.执行命令
./gradlew clean assembleRelease --stacktrace --no-daemon
7.app/build/outputs文件夹下会生成mapping.txt,methodsMap.robust文件,将他们拷贝到app/robust文件夹中保存.
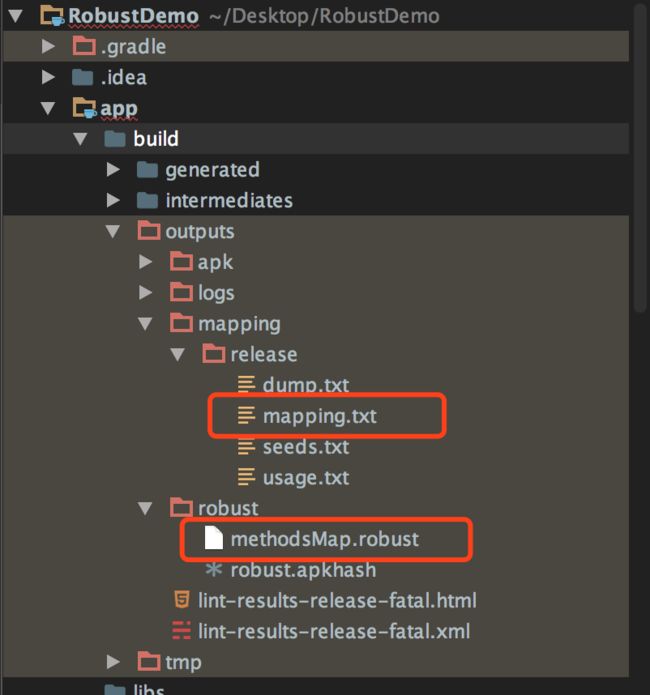
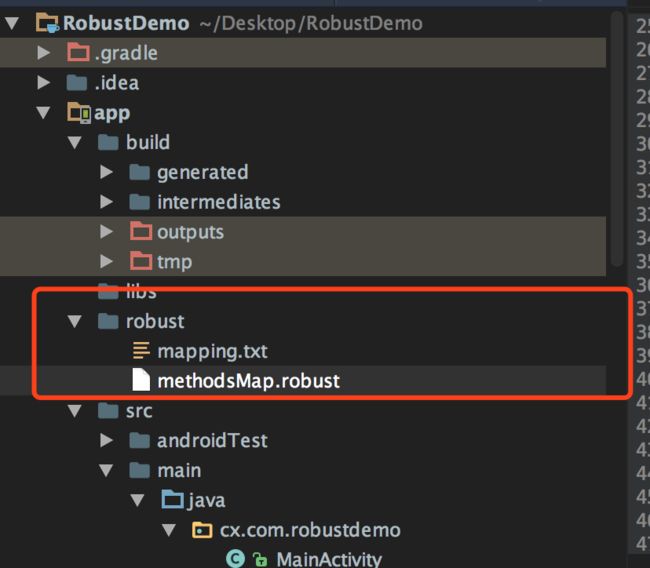
methodMap.robust,该文件在打补丁的时候用来区别到底哪些方法需要被修复,所以有它才能打补丁。而上文所说的还有 mapping.txt 文件,该文件列出了原始的类,方法和字段名与混淆后代码间的映射。
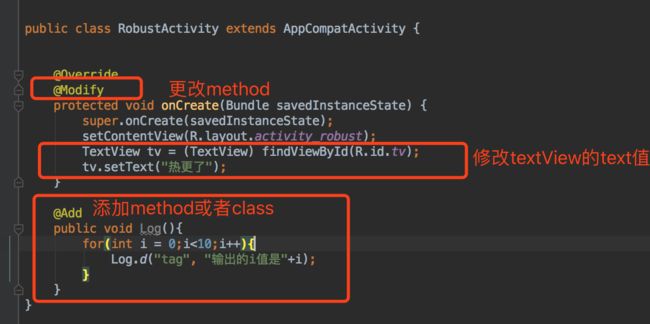
写代码
基本的配置就已经配置好了,写点简单的代码,先看效果图
功能很简单,第二个按钮跳转到第二个Activity。第一个按钮加载一会儿生成的patch文件。跳转代码如下
  findViewById(R.id.loaddPatch).setOnClickListener(new View.OnClickListener() {
            @Override
            public void onClick(View v) {
                //关键是第二个参数
                new PatchExecutor(getApplicationContext(), new PatchManipulateImp(), new Callback()).start();
            }
        });

        findViewById(R.id.jump).setOnClickListener(new View.OnClickListener() {
            @Override
            public void onClick(View v) {
                startActivity(new Intent(MainActivity.this,RobustActivity.class));
            }
        });
看下类PatchManipulateImp的代码,代码是从官方拷贝过来的,很简单。大致看一下
public class PatchManipulateImp extends PatchManipulate {
    /***
     * connect to the network ,get the latest patches
     * l联网获取最新的补丁
     * @param context
     *
     * @return
     */
    @Override
    protected List fetchPatchList(Context context) {
        //将app自己的robustApkHash上报给服务端,服务端根据robustApkHash来区分每一次apk build来给app下发补丁
        //apkhash is the unique identifier for  apk,so you cannnot patch wrong apk.
        //String robustApkHash = RobustApkHashUtils.readRobustApkHash(context);
        //connect to network to get patch list on servers
        //在这里去联网获取补丁列表
        Patch patch = new Patch();
        patch.setName("123");
        //we recommend LocalPath store the origin patch.jar which may be encrypted,while TempPath is the true runnable jar
        //LocalPath是存储原始的补丁文件,这个文件应该是加密过的,TempPath是加密之后的,TempPath下的补丁加载完毕就删除,保证安全性
        //这里面需要设置一些补丁的信息,主要是联网的获取的补丁信息。重要的如MD5,进行原始补丁文件的简单校验,以及补丁存储的位置,这边推荐把补丁的储存位置放置到应用的私有目录下,保证安全性
        patch.setLocalPath(Environment.getExternalStorageDirectory().getPath()+ File.separator+"robust"+File.separator + "patch");

        //setPatchesInfoImplClassFullName 设置项各个App可以独立定制,需要确保的是setPatchesInfoImplClassFullName设置的包名是和xml配置项patchPackname保持一致,而且类名必须是:PatchesInfoImpl
        //请注意这里的设置
        patch.setPatchesInfoImplClassFullName("cx.com.robustdemo.PatchesInfoImpl");
        List  patches = new ArrayList();
        patches.add(patch);
        return patches;
    }

    /**
     *
     * @param context
     * @param patch
     * @return
     *
     * you can verify your patches here
     */
    @Override

    protected boolean verifyPatch(Context context, Patch patch) {
        //do your verification, put the real patch to patch
        //放到app的私有目录,拷贝到自己的目录下。执行。
        patch.setTempPath(context.getCacheDir()+ File.separator+"robust"+File.separator + "patch");
        //in the sample we just copy the file
        try {
            copy(patch.getLocalPath(), patch.getTempPath());
        }catch (Exception e){
            e.printStackTrace();
            throw new RuntimeException("copy source patch to local patch error, no patch execute in path "+patch.getTempPath());
        }

        return true;
    }
    public void copy(String srcPath,String dstPath) throws IOException {
        File src=new File(srcPath);
        if(!src.exists()){
            throw new RuntimeException("source patch does not exist ");
        }
        File dst=new File(dstPath);
        if(!dst.getParentFile().exists()){
            dst.getParentFile().mkdirs();
        }
        InputStream in = new FileInputStream(src);
        try {
            OutputStream out = new FileOutputStream(dst);
            try {
                // Transfer bytes from in to out
                byte[] buf = new byte[1024];
                int len;
                while ((len = in.read(buf)) > 0) {
                    out.write(buf, 0, len);
                }
            } finally {
                out.close();
            }
        } finally {
            in.close();
        }
    }
    /**
     *
     * @param patch
     * @return
     *
     * you may download your patches here, you can check whether patch is in the phone
     */
    @Override
    protected boolean ensurePatchExist(Patch patch) {
        return true;
    }
}
这里一定要注意
//后缀必须是PatchesInfoImpl  ,前面的要和robust.xml中节点下的包名对应
  patch.setPatchesInfoImplClassFullName("cx.com.robustdemo.PatchesInfoImpl");
继承了PatchManipulate,有3个方法。
@Override
fetchPatchList() 方法主要是设置patch的路径等配置信息,然后返回
@Override
verifyPatch() //放到app的私有目录,是加载的真正的路径
@Override
protected boolean ensurePatchExist(Patch patch):
生成patch包
小小修改下第二个Activity的代码!

执行刚才的打包命令
./gradlew clean assembleRelease --stacktrace --no-daemon
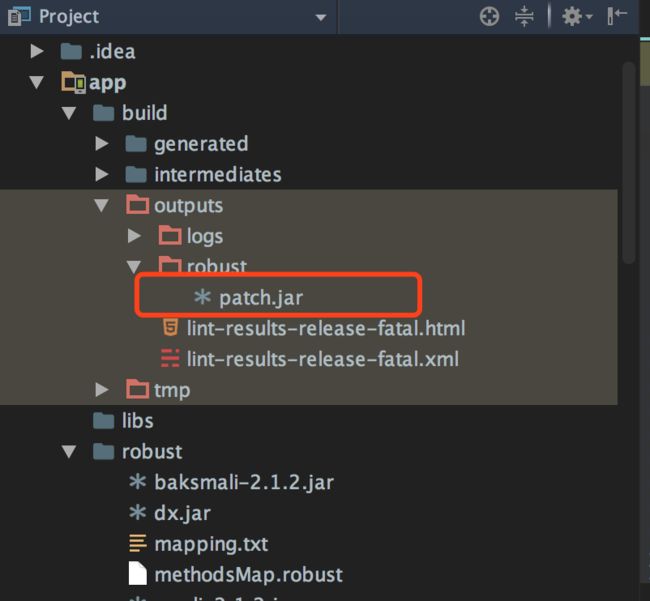
命令跑到中间会错,如下图,但是看到patch包已经生成了。
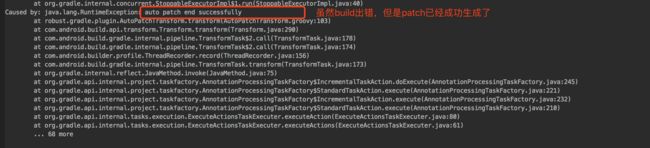
生成路径如下图
执行命令
adb push app/build/outputs/robust/patch.jar /sdcard/robust
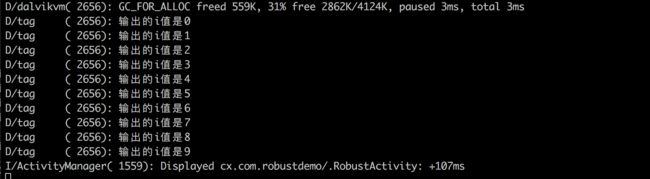
最后一步,点击第一个按钮,再点击跳转到第二个按钮。先看效果,会发下hello robust 变为热更了。
点击加载patch文件按钮

刚刚增加的代码打出的log,热更新成功了。
项目代码
不足
- 每次都要手动拷贝map文件,每次的都要替换插件来生成patch包。