1、 Widget 基本概念
1、flutter中一切皆是Widget,不只是构建页面的UI,还有如布局类、事件处理类、容器类、动画类都是Widget
2、分为 StatefulWidget 和 StatelessWidget 两类,StatefulWidget 是 UI 可以变化的 Widget,创建完后 UI 还可以在更改,StatelessWidget 是 UI 不可以变化的 Widget,创建完后 UI 就不可以在更改(可通过重绘实现更改)
3、MaterialApp 与 Scaffold,MaterialApp 大部分情况下要作为 Flutter 的 根Widget,并且 MaterrialApp 经常和 Scaffold 搭配一起使用。Scaffold 实现了主布局,如 AppBar、Drawer、SnackBar
4、要实现 StatefulWidget,需要实现StatefulWidget类及其State类:
class MyApp extends StatefulWidget{
       String title
       MyApp(this.title)
      @override
      State createState(){
          return  MyAppState('Hello Flutter')
      }
}

class MyAppState extends State{
       @override
        Widget build(BuildContext:context){
             return ...
        }
}
5、StatefulWidget主要作用是创建State,State的主要作用是创建界面以及用 setState 更新界面。
6、setState() 可以刷新UI的原理是,setState() 会触发 StatefulWidget 强制重建,重建的时候会重新创建 Widget 和绑定数据,从而实现了刷新 UI。所以只要 MyApp 是 StatefulWidget,那么它的子类在 setState() 的作用下都可以被强制刷新。
7、State的成员变量:widget,context,mounted
widget 可以访问 StatefulWidget 中的成员变量,如 widget.title
context 是构建上下文,较为复杂
mounted 是 bool 类型,表示当前 State 是否加载到树里,setState() 只有在 mounted 为 true 的时候才能用,当 moundted 为 false 时调用会抛异常
// mounted 一般这么用
if(mounted){
    setState((){
        ...
    })
}
8、有状态组件重建时,重建的部分就是 StatefulWidget,不会重建的部分就是 State
9、StatefulWidget 生命周期,未包含 didChangeAppLifecycleState(监听APP前后台切换)
[图片上传失败...(image-d5d836-1559900244628)]
10、StatelessWidget 生命周期
只有一个build 函数
class MyApp extends StatelessWidget {
  // This widget is the root of your application.
  final String content;

  MyApp(this.content);

  @override
  Widget build(BuildContext context) {
    print("build"); //StatelessWidget -- build
    ....
  }
}
11、一个 Flutter App 的 基本结构就是:Root Widget 是 MaterialApp ,然后 MaterialApp 的 子Widget 就是 Scaffold,然后我们在 Scaffolfd 的 子Widget 里写UI
12、MaterialApp常用属性:home(进入程序后显示的第一个页面,必须是 Scaffold),theme(设置 Flutter App 的主题,比如颜色、字体等)
13、Scaffolfd常用属性:appBar(顶部的标题栏,不设置的话就不会显示),backgroundColor(背景颜色),body(要显示的主要内容)
import 'package:flutter/cupertino.dart';
import 'package:flutter/material.dart';

void main() => runApp(MyApp());

class MyApp extends StatelessWidget {
  // This widget is the root of your application.
  @override
  Widget build(BuildContext context) {
    // TODO: implement build
    return MaterialApp(
      home: Scaffold(
        body: Center(
          child: Text("Hello World!"),
        ),
      ),
    );
  }
}
2、常用 5 类 Widget
分别是:基础类Widget、布局类Widget、容器类Widget、可滚动类Widget以及手势识别类Widget
2.1、基础类Widget
- Text/RichText
Text(
    "Hello Flutter",
    style: TextStyle(
        color: Colors.red,
        fontSize: 20.0,
        background: new Paint()..color = Colors.yellow,
        ),
    )
RichText 要传入 TextSpan 数组,每个 TextSpan 是一个独立的文本,可以定义自己的 Style
RichText(
    text: TextSpan(children: [
      TextSpan(text: "Hello", style: TextStyle(color: Colors.blue)),
      TextSpan(text: "Flutter", style: TextStyle(color: Colors.red))
    ]),
  )
- Image/Icon
Image.asset 使用本地图片。
要使用本地图片,需要更改 flutter 配置文件
flutter:
  uses-material-design: true

  assets:
    - images/

// 使用时直接
Image.asset("images/flutter.png",fit: BoxFit.cover,)
Image.network 使用网络图片
Image.network("https://timgsa.baidu.com/timg?image&quality=80&size=b9999_10000&sec=1557781801455&di=17f9f2fc3ded4efb7214d2d8314e8426&imgtype=0&src=http%3A%2F%2Fimg2.mukewang.com%2F5b4c075b000198c216000586.jpg",fit: BoxFit.cover,)
Image.file 从本地加载图片
常用的配置:fit填充图片,alignment对其图片,repeat重复图片
Icon基本使用
Icon(
  Icons.android,
  size: 50.0,
  color: Colors.green,
)
- TextField / Form
TextField(
    onChanged: (String data) {
      //实时获取
      print(data);
    },
  )
常用属性:keyboardType弹出什么类型的键盘,如数字、文本等,textInputAction弹出的键盘右下角按钮类型,如 搜索、提交等
Form 使用
import 'package:flutter/material.dart';

void main() => runApp(FormWidget());

class FormWidget extends StatefulWidget {
  @override
  State createState() {
    // TODO: implement createState
    return FormWidgetState();
  }
}

class FormWidgetState extends State {
  final GlobalKey _formKey = GlobalKey();

  String _userGender = '男';
  String _userName;
  String _userPassword;

  @override
  Widget build(BuildContext context) {
    return MaterialApp(
      title: "Flutter Demo",
      theme: ThemeData(
        primaryColor: Colors.blue,
      ),
      home: Scaffold(
          appBar: AppBar(title: Text("Flutter UI基础Widget -- Form")),
          body: Form(
            key: _formKey,
            child: Column(
              children: [
                DropdownButtonFormField(
                  value: _userGender,
                  items: ['男', '女']
                      .map((label) => DropdownMenuItem(
                            child: Text(label),
                            value: label,
                          ))
                      .toList(),
                  onChanged: (value){
                    setState(() {
                      _userGender = value;
                    });
                  },
                  onSaved: (value){
                    _userGender = value;
                  },
                ),
                TextFormField(
                  decoration: InputDecoration(hintText: '用户名'),
                  validator: (value) { //
                    if (value?.length <= 5) {
                      return '用户名必须大于 5 个字符';
                    }
                  },
                  onSaved: (value) {
                    _userName = value;
                  },
                ),
                TextFormField(
                  decoration: InputDecoration(hintText: '密码'),
                  obscureText: true,
                  validator: (value) {
                    if (value?.length <= 8) {
                      return '密码必须大于 8 个字符';
                    }
                  },
                  onSaved: (value) {
                    _userPassword = value;
                  },
                ),
                RaisedButton(
                  child: Text('注册'),
                  onPressed: () {
                    if (_formKey.currentState.validate()) {
                      _formKey.currentState.save();
                      print(_userGender);
                      print(_userName);
                      print(_userPassword);
                    }
                  },
                )
              ],
            ),
          )),
    );
  }
}
- SnackBar 轻量级提示组件,需要使用Builder封装,以保证context是Scaffold,而不是MyApp
home: Scaffold(
    appBar: AppBar(title: Text("Flutter UI Widget -- SnackBar 及 Builder")),
    body: Builder(
      builder: (context) => RaisedButton(
        child: Text('Show SnackBar'),
        onPressed: () {
          Scaffold.of(context).showSnackBar(SnackBar(
              content: Text('SnackBar'),
              duration: Duration(seconds: 5)));
        },
      ),
    ),
),
- 对话框 showAboutDialog() & showDialog(),上下文必须是 MaterialApp
Builder(
    builder: (context) => RaisedButton(
        onPressed: () {
            showAboutDialog(
                context: context,
                applicationName: 'lutter UI Widget -- 对话框',
                applicationVersion: '1.0.0');
            },
        child: Text('RaisedButton'))
    )

// SimpleDialog
                 showDialog(
                    context: context,
                    builder: (context) => SimpleDialog(
                      title: Text('SimpleDialog Demo'),
                      children: [
                        SimpleDialogOption(
                          child: Text('OK'),
                          onPressed: () {
                            Navigator.of(context).pop();
                          },
                        ),
                        SimpleDialogOption(
                          child: Text('CANCEL'),
                          onPressed: () {
                            Navigator.of(context).pop();
                          },
                        )
                      ],
                    ));
// AlertDialog
AlertDialog(
    title: Text('AlertDialog'),
    content: SingleChildScrollView(
      child: ListBody(
        children: [
          Text('This is an alert dialog'),
          Text('add two options.'),
        ],
      ),
    ),
    actions: [
      FlatButton(
        child: Text('Ok'),
        onPressed: () {
          Navigator.of(context).pop();
        },
      ),
      FlatButton(
        child: Text('Cancel'),
        onPressed: () {
          Navigator.of(context).pop();
        },
      )
    ],
  )
// CupertinoAlertDialog
- 底部弹出菜单 showBottomSheet & showModalBottomSheet
- 菜单按钮 PopupMenuButton
PopupMenuButton2.2 手势识别 Widget
GestureDetector 是用于检测手势的 Widget
home: Scaffold(
        appBar: AppBar(title: Text("Flutter 手势识别Widget")),
        body: GestureDetector(
          child: Text('手势识别'),
          onTap: (){
            print('点击');
          },
          onDoubleTap: (){
            print('双击');
          },
          onLongPress:  (){
            print('长按');
          },
          onHorizontalDragStart: (DragStartDetails details){
            print('水平滑动');
          },
        ),
      ),
2.3 布局 Widget
- 布局模型
Flutter 的布局模型是 BoxConstraint(盒约束)布局模型
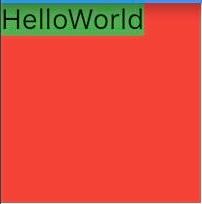
1、Tightly Constraints(严格约束)
父级大小固定
body: Container(
    constraints: BoxConstraints.tight(Size(100, 100)), //添加 Tightly Constraints
    color: Colors.red,
    child: Text(
      "HelloWorld",
      style: TextStyle(background: paint),
    ))));
2、 Loose Constraints(松散约束)
父级大小随子元素,只要子元素不超过父级大小。此外如果父级没有子元素,则父级显示最大大小
body: Container(
        constraints: BoxConstraints.loose(Size(100, 100)), //添加 Loose Constraints
        color: Colors.red,
        child: Text(
          "HelloWorld",
          style: TextStyle(background: paint),
        ))));
3、 Bounded Constraints(有界约束)
必须制定四个值,当父级有子元素时,子元素宽度小于最小宽度,父级会以最小宽度展示;无子元素时,父级会以最大宽高显示
body: Container(
    constraints: BoxConstraints(minWidth: 100,maxWidth: 300,minHeight: 0,maxHeight: 300), //添加 Bounded Constraints
    color: Colors.red,)));
4、Unbounded Constraints(无界约束)
同理
5、Infinite Constraints(无限约束)
父级永远占满全屏
body: Container(
    constraints: BoxConstraints.expand(), //添加 Infinite Constraints
    color: Colors.red,
    child: Text(
      "HelloWorld",
      style: TextStyle(background: paint),
    ))));
- 布局 Widget
1、弹性布局 Flex
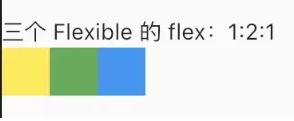
和CSS中的flex布局非常相似,Flexible 和 Expanded 可以赋予子 Widget 伸缩的能力,当 子Widget 要超过主轴的大小时,会自动换行,当还有剩余空间时,Expanded 会占满剩余的所有空间,而 Flexible 只会占用自身大小的空间。
Flex(
    direction: Axis.horizontal,
    mainAxisAlignment: MainAxisAlignment.start,
    children: [
      Flexible(
        flex: 1,
        child: Container(
          height: 30.0,
          width: 30.0,
          color: Colors.yellow,
        ),
      ),
      Flexible(
        flex: 2,
        child: Container(
          height: 30.0,
          width: 30.0,
          color: Colors.green,
        ),
      ),
      Flexible(
        flex: 1,
        child: Container(
          height: 30.0,
          width: 30.0,
          color: Colors.blue,
        ),
      ),
    ],
  ),
Flex(
    direction: Axis.horizontal,
    mainAxisAlignment: MainAxisAlignment.start,
    children: [
      Expanded(
        flex: 1,
        child: Container(
          height: 30.0,
          width: 30.0,
          color: Colors.yellow,
        ),
      ),
      Expanded(
        flex: 2,
        child: Container(
          height: 30.0,
          width: 30.0,
          color: Colors.green,
        ),
      ),
      Expanded(
        flex: 1,
        child: Container(
          height: 30.0,
          width: 30.0,
          color: Colors.blue,
        ),
      ),
    ],
  ),
2、线性布局 Row & Column
Row & Column 都继承自弹性布局 Flex,其实就是确定了主轴方向的 Flex,其余的用法和 Flex 一致。
// Row
Row(
  children: [
    Text("Hello Flutter"),
    Image.asset(
      "images/flutter.png",
      width: 200,
    )
  ],
)

// Column
Column(
  children: [
    Text("Hello Flutter"),
    Image.asset(
      "images/flutter.png",
      width: 200,
    )
  ],
)
3、流式布局 Wrap
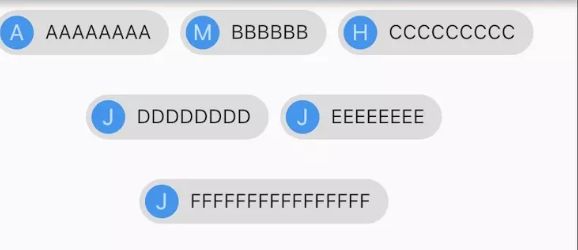
页面元素的宽度可以按照屏幕分辨率进行适配调整,但整体布局不变。Wrap 会把超出屏幕显示范围的 Widget 自动换行,所以称为流式布局
body: Wrap(
              direction: Axis.horizontal,
              spacing: 8.0, // 主轴 方向间距
              runSpacing: 12.0, // 交叉轴 方向间距
              alignment: WrapAlignment.center,
              runAlignment: WrapAlignment.start,
              children: [
                new Chip(
                  avatar: new CircleAvatar(
                      backgroundColor: Colors.blue, child: Text('A')),
                  label: new Text('AAAAAAAA'),
                ),
                new Chip(
                  avatar: new CircleAvatar(
                      backgroundColor: Colors.blue, child: Text('M')),
                  label: new Text('BBBBBB'),
                ),
                new Chip(
                  avatar: new CircleAvatar(
                      backgroundColor: Colors.blue, child: Text('H')),
                  label: new Text('CCCCCCCCC'),
                ),
                new Chip(
                  avatar: new CircleAvatar(
                      backgroundColor: Colors.blue, child: Text('J')),
                  label: new Text('DDDDDDDD'),
                ),
                new Chip(
                  avatar: new CircleAvatar(
                      backgroundColor: Colors.blue, child: Text('J')),
                  label: new Text('EEEEEEEE'),
                ),
                new Chip(
                  avatar: new CircleAvatar(
                      backgroundColor: Colors.blue, child: Text('J')),
                  label: new Text('FFFFFFFFFFFFFFFF'),
                ),
              ],
            )));
4、层叠布局 Stack
层叠布局允许 子Widget 堆叠(按照代码中声明的顺序),同时 子Widget 可以根据到父容器四个边的位置来确定本身的位置
Stack(
  children: [
    Image.asset(
      "images/flutter.png",
       width: 200,
       fit: BoxFit.cover,
    ),
    Text('Hello Flutter',style: TextStyle(fontSize: 50.0),),
  ],
)
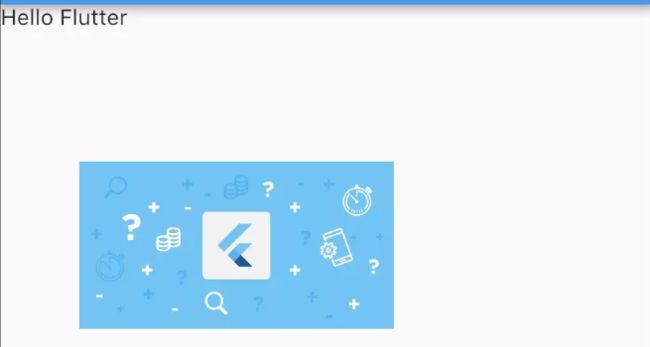
为了确定 子Widget 到父容器四个角的位置,Stack 将 子Widget 分为两类: Positioned 和 non-positioned
home: Scaffold(
        appBar: AppBar(title: Text("Flutter布局Widget -- 层叠布局")),
        body: Stack(
          fit: StackFit.expand,
          children: [
            Positioned(
              left: 50,
              top: 100,
              child: Image.asset(
                "images/flutter.png",
                width: 200,
                fit: BoxFit.cover,
              ),
            ),
            Text('Hello Flutter'),
          ],
        ),
      ),
2.4、容器类 Widget
大部分 UI Widget 都不能指定宽高、设置内边距和外边距,这时候就需要使用 容器类Widget 了
1、Padding
body: Padding(
              padding: EdgeInsets.all(100),
              child: Text('Hello Flutter'),
            )));
2、Align
Align(
  alignment: Alignment.topRight,
  child: Text(
    'Hello Flutter',
    style: TextStyle(color: Colors.red, fontSize: 50),
  ),
 )
3、Center
Center(
  child: Text(
    'Hello Flutter',
    style: TextStyle(color: Colors.red, fontSize: 50),
  ),
)
4、Container
body: Container(
              margin: EdgeInsets.only(top: 50.0, left: 120.0), //容器外补白
              constraints:
                  BoxConstraints.tightFor(width: 200.0, height: 150.0), //卡片大小
              decoration: BoxDecoration(
                  //背景装饰
                  gradient: RadialGradient(
                      //背景径向渐变
                      colors: [Colors.green, Colors.blue],
                      center: Alignment.topLeft,
                      radius: .98),
                  boxShadow: [
                    //卡片阴影
                    BoxShadow(
                        color: Colors.black54,
                        offset: Offset(2.0, 2.0),
                        blurRadius: 4.0)
                  ]),
              transform: Matrix4.rotationZ(.2), //卡片倾斜变换
              alignment: Alignment.center, //卡片内文字居中
              child: Text(
                //卡片文字
                "Hello Flutter",
                style: TextStyle(color: Colors.white, fontSize: 40.0),
              ),
            )));
2.5、滚动类 Widget
三大类:ListView & GridView & PageView
- ListView
与 ListView 相似的还有 SingleChildScrollView & CustomScrollView,从功能性上来看:
CustomScrollView >ListView >SingleChildScrollView ,大多数时使用ListView,当有特殊交互,如吸顶等时可以使用 CustomScrollView,对于一些设置页,里面有很多设置项,超过一屏时可以使用SingleChildScrollView
// ListView 常见用法
import 'package:flutter/material.dart';

void main() => runApp(ListViewSeparatedWidget(
      items: List.generate(10000, (i) => "Item $i"),
    ));

class ListViewSeparatedWidget extends StatelessWidget {
  final List items;

  ListViewSeparatedWidget({Key key, @required this.items}) : super(key: key);

  @override
  Widget build(BuildContext context) {
    return MaterialApp(
      title: 'Test',
      home: Scaffold(
        appBar: AppBar(title: new Text('Flutter 可滚动Widget -- ListView')),
        body: ListView.separated(
          itemCount: items.length,
          itemBuilder: (context, index) {
            return ListTile(
              title: Text('${items[index]}'),
            );
          },
          separatorBuilder: (context, index) {
            return Container(
              constraints: BoxConstraints.tightFor(height: 10),
              color: Colors.orange,
            );
          },
        ),
      ),
    );
  }
}
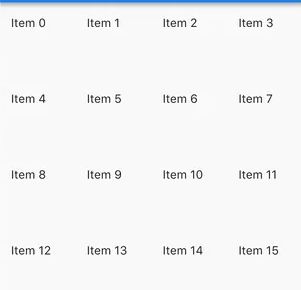
- GridView
GridView 是一个可以构建二维网格列表的 可滚动Widget
import 'package:flutter/material.dart';

void main() => runApp(GridViewBuilderWidget(
      items: List.generate(10000, (i) => "Item $i"),
    ));

class GridViewBuilderWidget extends StatelessWidget {
  final List items;

  GridViewBuilderWidget({Key key, @required this.items}) : super(key: key);

  @override
  Widget build(BuildContext context) {
    return MaterialApp(
      title: 'Test',
      home: Scaffold(
        appBar: AppBar(title: new Text('Flutter 可滚动Widget -- GridView')),
        body: GridView.builder(
          gridDelegate:
              SliverGridDelegateWithFixedCrossAxisCount(crossAxisCount: 4),
          itemCount: items.length,
          itemBuilder: (context, index) {
            return ListTile(
              title: Text('${items[index]}'),
            );
          },
        ),
      ),
    );
  }
}
- PageView
PageView 是可以一页一页滑动的 可滚动Widet。其 子Widget 会占据当前屏幕的所有可见区域。适合做启动屏的引导页
import 'package:flutter/material.dart';

void main() => runApp(PageViewBuilderWidget(
      items: List.generate(10000, (i) => "Item $i"),
    ));

class PageViewBuilderWidget extends StatelessWidget {
  final List items;

  PageViewBuilderWidget({Key key, @required this.items}) : super(key: key);

  @override
  Widget build(BuildContext context) {
    return MaterialApp(
      title: 'Test',
      home: Scaffold(
        appBar: AppBar(title: new Text('Flutter 可滚动Widget -- PageView')),
        body: PageView.builder(
          onPageChanged: (index) {
            print('current page $index ');
          },
          itemCount: items.length,
          itemBuilder: (context, index) {
            return ListTile(
              title: Text('${items[index]}'),
            );
          },
        ),
      ),
    );
  }
}
3、功能类 Widget
这类Widget 跟布局没什么关系,如 Theme,MediaQuery,Navigator,InheritedWidget
Theme.of(context)  // 返回的类型是 ThemeData ,Theme 的所有数据都存储在 ThemeData 里
MediaQuery.of(context) // 返回的类型是 MediaQueryData,一般关心 Size 和 devicePixelRatio 两个参数
// 路由管理
Navigator.push()
Navigator.pop()
// InheritedWidget 可以高效的将数据在 Widget树 中向下传递,通常用来共享数据
以下主要谈下路由的处理:
- 页面跳转
1、简单方式直接跳转
Navigator.push(
  context, MaterialPageRoute(builder: (context) => SecondPage()));
Navigator.pop(context);
2、使用路由表跳转
return MaterialApp(
        title: "Flutter Demo",
        theme: ThemeData(
          primaryColor: Colors.blue,
        ),
        initialRoute: '/First',
        routes: {
          '/First': (context) => FirstPage(),
          "/Second": (context) => SecondPage()
        },
        home: FirstPage());

// Navigator.pushNamed 跳转
Navigator.pushNamed(context, '/Second');
Navigator.pop(context);
- 页面传参
// 方式1
Navigator.push(
   context,
   MaterialPageRoute(
    builder: (context) => SecondPage(),
    settings: RouteSettings(
        arguments:
            PassArgumnets('Data from FirstPage Navigator.push()'))),
);
// 方式2
Navigator.pushNamed(context, '/Second',arguments: PassArgumnets('Data from FirstPage Navigator.pushNamed()'));

// 接受参数
final PassArgumnets passArgumnets =ModalRoute.of(context).settings.arguments;
- 页面关闭时返回给上级页面参数
Navigator.pop(context,PassArgumnets('Return Data from SecondPage'));

var passArgumnets = await Navigator.pushNamed(context, '/Second',
        arguments: PassArgumnets('Data from FirstPage Navigator.pushNamed()'));
    print(passArgumnets.content);
4、数据请求 & 本地数据读取
- 数据请求
可以使用第三方工具库 http
// 添加依赖
dependencies:
  flutter:
    sdk: flutter
  cupertino_icons: ^0.1.2
  http: ^0.12.0+2

// 获取依赖
flutter packages get

// 发get请求
var response = await http.get(
        'https://api.douban.com/v2/movie/in_theaters?apikey=0b2bdeda43b5688921839c8ecb20399b&city=%E6%B7%B1%E5%9C%B3&start=0&count=10');
    //成功获取数据
    if (response.statusCode == 200) {
      print(json.decode(response.body)); // 转成 json 格式
    }
// 发 post 请求
var client = new http.Client();
try {
  var uriResponse = await client.post('http://example.com/whatsit/create',
      body: {'name': 'doodle', 'color': 'blue'});
  print(await client.get(uriResponse.bodyFields['uri']));
} finally {
  client.close();
}
也可以自己封装一个请求类:
class UserAgentClient extends http.BaseClient {
  final String userAgent;
  final http.Client _inner;

  UserAgentClient(this.userAgent, this._inner);

  Future send(BaseRequest request) {
    request.headers['user-agent'] = userAgent;
    return _inner.send(request);
  }
}
- 本地数据读取
使用 shared_preferences 第三方库
import 'package:flutter/material.dart';
import 'package:shared_preferences/shared_preferences.dart';

void main() {
  runApp(MaterialApp(
    home: Scaffold(
      body: Center(
      child: RaisedButton(
        onPressed: _incrementCounter,
        child: Text('Increment Counter'),
        ),
      ),
    ),
  ));
}

_incrementCounter() async {
  SharedPreferences prefs = await SharedPreferences.getInstance();
  int counter = (prefs.getInt('counter') ?? 0) + 1;
  print('Pressed $counter times.');
  await prefs.setInt('counter', counter);
}
5、状态管理
- InheritedWidget
1、创建
class ShareDataInheritedWidget extends InheritedWidget{
  // 共享的数据
  String curCity ;
  // 构造函数
  ShareDataInheritedWidget(this.curCity,{Widget child}):super(child:child);
  // updateShouldNotify 需不需要通知依赖 InheritedWidget 数据的子 Widget
  @override
  bool updateShouldNotify(InheritedWidget oldWidget) {
    // TODO: implement updateShouldNotify
    return (oldWidget as ShareDataInheritedWidget).curCity != curCity;
  }
  //定义一个便捷方法,方便子树中的 Widget 获取 ShareDataInheritedWidget 实例
  static ShareDataInheritedWidget of(BuildContext context) {
    return context.inheritFromWidgetOfExactType(ShareDataInheritedWidget);
  }
}
2、初始化
class _MyHomePageState extends State {
  ...

  @override
  Widget build(BuildContext context) {
    return Scaffold(
      body: ShareDataInheritedWidget(
        '深圳',
        child: _widgetItems[_selectedIndex],
      ), //选中不同的选项显示不同的界面,
      ...
    );
  }
  ...
}
3、子 Widget 获取和更新数据
ShareDataInheritedWidget.of(context).curCity;
ShareDataInheritedWidget.of(context).curCity = selectCity;
- Redux
1、添加并获取依赖
dependencies:
  ...
  flutter_redux: ^0.5.3
2、创建一个Action
class InitCityAction {
  String city;

  InitCityAction(this.city);
}
3、创建一个 reducer
CityState changeCityReducer(CityState state, dynamic action) {
  if(action is InitCityAction){
    return CityState(action.city);
  }
  return state;
}
4、创建一个 MiddleWare
void readCityFromDisk(
    Store store, dynamic action, NextDispatcher next) async {
  if (action is InitCityAction) {
    String city = await initCity();
    next(InitCityAction(city));
    return;
  }

  next(action);
}

Future initCity() async {
  final prefs = await SharedPreferences.getInstance(); //获取 prefs

  String city = prefs.getString('curCity'); //获取 key 为 curCity 的值

  if (city == null || city.isEmpty) {
    //如果 city 为空,则使用默认值
    city = '深圳';
  }
  return city;
}
5、创建 store
class _MyHomePageState extends State {
  ...

  final _cityStore = Store(
    changeCityReducer,
    initialState: CityState(null),
    middleware: [readCityFromDisk]
  );
  ...
}
6、使用 StoreProvider 将 store 传给子元素
class _MyHomePageState extends State {
  ...
  @override
  Widget build(BuildContext context) {
    return Scaffold(
      body: StoreProvider(
        store: _cityStore,
        child: _widgetItems[_selectedIndex], //选中不同的选项显示不同的界面,,
      ),
      ....
    );
  }
  ...
}
7、使用 StoreConnector让子 widget 获取 store 中的数据
class HotWidgetState extends State {
  ...

  @override
  Widget build(BuildContext context) {
    // TODO: implement build
    print('HotWidgetState build');
    return StoreConnector(
      converter: (store) {
        String curCity = store.state.curCity;
        if (curCity == null) {
          //如果 curCity 为 null,说明没有初始化,则触发初始化
          store.dispatch(InitCityAction(null));
        }
        return curCity;
      },
      builder: (context, curCity) {
        if (curCity != null && curCity.isNotEmpty) {
          //如果 curCity 不为空
          return ...
        } else {
          //如果 curCity 为空
          return ...
        }
      },
    );
  }
8、发送 action 更新 State
floatingActionButton: new StoreConnector(
            converter: (store) {
              // Return a `VoidCallback`, which is a fancy name for a function
              // with no parameters. It only dispatches an Increment action.
              return () => store.dispatch(Actions.Increment);
            },
            builder: (context, callback) {
              return new FloatingActionButton(
                onPressed: callback,
                tooltip: 'Increment',
                child: new Icon(Icons.add),
              );
            },
          ),
