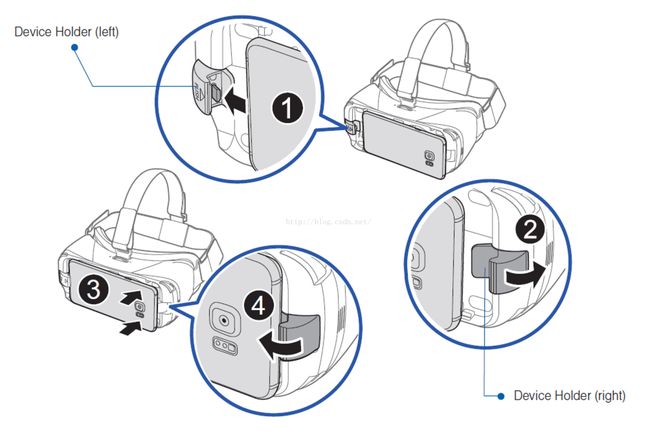
首先简单介绍下Gear VR头盔上的功能按键:
Gear VR 第一代 的功能按键全部位于头盔右侧,分别如下:
两个音量增减键,用来调节手机的音量,功能和手机本身的音量键完全一样
一个返回键,类似android手机上的返回键,在VR游戏中可以用来实现,返回主菜单,或者退出游戏之类的操作
触控区域,可以通过该区域识别玩家的点击,按下,松开,双击,长按,以及滑动操作,这将是玩家在游戏内的主要操作方式(还有一个就是头部的转动)。当然从个人体验来讲,因为该区域位于头部侧方,不同于手机屏幕,不适合让玩家通过滑动来完成太复杂的操作,超过上下左右四方向以外的滑动识别,体验都不是很好。
通过图片和按键讲解可以看到,gearVR 与暴风魔镜之流的设备的区别就是,它通过USB口连接手机,然后玩家可以通过头戴设备的输入完成一些相对完善的操作。
Unity是如何映射这些功能按键的:
用Unity创建一个空项目,GearVRTest_1_2,然后打开InputManager:通过Edit-> Project Settings ->Input
点开第一个Fire1:可以看到这个名称对应的按键是Left Ctrl(键盘上的左Ctrl键),以及mouse 0(鼠标左键,同时也是触屏手机的单点触屏操作,也是GearVR touchpad的点击操作)
点开第二个Fire1:可以看到对应的是joystick button 0 (也就是手柄上第二排第一个按键)
点开唯一的一个Cancel:可以看到对应的是escape(键盘左上角的esc键和安卓手机和GearVR的返回键),以及joystick button 1(手柄上的第二个按键)
通过这些按键映射可以看到,我们可以通过合理的按键映射,可以使我们的VR游戏做到手机,头显和蓝牙手柄公用一套按键逻辑(VR头显bing)
通过代码获取玩家操作:
我们要实现的是一个获取玩家输入的脚本,而不处理具体逻辑,行为逻辑代码通过委托的方式从该脚本获取玩家的操作
[csharp]view plaincopy
usingUnityEngine;
usingSystem.Collections;
usingSystem;
namespacecom.bt.gearVR
{
publicclassVRInput : MonoBehaviour
{
publicenumSwipeDirection
{
NONE,
UP,
DOWN,
LEFT,
RIGHT,
};
publiceventAction OnSwipe;//在touchPad上滑动
publiceventAction OnClick;//点击touchPad
publiceventAction OnDown;//按下
publiceventAction OnUp;//抬起
publiceventAction OnDoubleClick;//双击
publiceventAction OnCancel;//点击touchPad的返回键
[SerializeField]privatefloatm_DoubleClickTime=0.3f;//有效双击的最大时间间隔
[SerializeField]privatefloatm_SwipeWidth=0.3f;//有效滑动的最小位移
privateVector2 m_MouseDownPosition;//记录手指按下的位置
privateVector2 m_MouseUpPosition;//记录手指抬起的位置
privatefloatm_LastMouseUpTime;//上一次手指抬起的时间,用来检测双击
privatefloatm_LastHorizontalValue;
privatefloatm_LastVerticalValue;
publicfloatDoubleClickTime {get{returnm_DoubleClickTime; } }
// Use this for initialization
voidStart()
{
}
// Update is called once per frame
privatevoidUpdate()
{
CheckInput();
}
privatevoidCheckInput()
{
SwipeDirection swipe = SwipeDirection.NONE;
if(Input.GetButtonDown("Fire1"))//手指触碰到touchPad
{
m_MouseDownPosition =newVector2(Input.mousePosition.x, Input.mousePosition.y);
if(OnDown!=null)
{
OnDown();
}
}
if(Input.GetButtonUp("Fire1"))//手指离开touchPad
{
m_MouseUpPosition =newVector2(Input.mousePosition.x, Input.mousePosition.y);
swipe = DetectSwipe();//
}
if(swipe==SwipeDirection.NONE)
{
swipe = DetectKeyboardEmulatedSwipe();
}
if(OnSwipe!=null)
{
OnSwipe(swipe);
}
if(Input.GetButtonUp("Fire1"))
{
if(OnUp!=null)
{
OnUp();
}
if(Time.time-m_LastMouseUpTime
{
if(OnDoubleClick!=null)
{
OnDoubleClick();
}
}
else
{
if(OnClick!=null)
{
OnClick();
}
}
m_LastMouseUpTime = Time.time;
}
if(Input.GetButtonDown("Cancel"))//点击头显上的返回键
{
if(OnCancel!=null)
{
OnCancel();
}
}
}
///
/// 检测滑动方向
///
/// 滑动方向,上下左右
privateSwipeDirection DetectSwipe()
{
Vector2 swipeData = (m_MouseUpPosition - m_MouseDownPosition).normalized;
boolswipeIsVertical = Mathf.Abs(swipeData.x) < m_SwipeWidth;
boolswipeIsHorizontal = Mathf.Abs(swipeData.y) < m_SwipeWidth;
if(swipeData.y>0f && swipeIsVertical)
{
returnSwipeDirection.UP;
}
if(swipeData.y<0 && swipeIsVertical)
{
returnSwipeDirection.DOWN;
}
if(swipeData.x>0 && swipeIsHorizontal)
{
returnSwipeDirection.RIGHT;
}
if(swipeData.x<0&& swipeIsHorizontal)
{
returnSwipeDirection.LEFT;
}
returnSwipeDirection.NONE;
}
//检测键盘或者手柄模拟的晃动方向
privateSwipeDirection DetectKeyboardEmulatedSwipe()
{
floathorizontal = Input.GetAxis("Horizontal");
floatvertical = Input.GetAxis("Vertical");
boolnoHorizontalInputPreviously = Mathf.Abs(m_LastHorizontalValue)
boolnoVerticalInputPreviously = Mathf.Abs(m_LastVerticalValue)
m_LastHorizontalValue = horizontal;
m_LastVerticalValue = vertical;
if(vertical > 0f && noVerticalInputPreviously)
returnSwipeDirection.UP;
if(vertical < 0f && noVerticalInputPreviously)
returnSwipeDirection.DOWN;
if(horizontal > 0f && noHorizontalInputPreviously)
returnSwipeDirection.RIGHT;
if(horizontal < 0f && noHorizontalInputPreviously)
returnSwipeDirection.LEFT;
returnSwipeDirection.NONE;
}
privatevoidOnDestroy()
{
OnSwipe =null;
OnClick =null;
OnDoubleClick =null;
OnDown =null;
OnUp =null;
}
}
}
然后是测试代码,后面会上传项目路径,会有一个控制玩家移动的脚本,这里不再贴出
[csharp]view plaincopy
usingUnityEngine;
usingSystem.Collections;
namespacecom.bt.gearVR
{
publicclassVRInputTest : MonoBehaviour
{
[SerializeField]privateVRInput m_VRInput;
//该脚本激活时,注册对玩家操作的监听
voidOnEnable()
{
m_VRInput.OnCancel += OnCalcel;
m_VRInput.OnClick += OnClick;
m_VRInput.OnDown += OnDown;
m_VRInput.OnUp += OnUp;
m_VRInput.OnDoubleClick += OnDoubleClick;
m_VRInput.OnSwipe += OnSwip;
}
voidOnSwip(VRInput.SwipeDirection swipeDirection)
{
if(swipeDirection!=VRInput.SwipeDirection.NONE)
{
Debug.Log("Unity+OnSwipe"+ swipeDirection);
}
}
//取消对玩家输入的监听
voidOnDisable()
{
m_VRInput.OnCancel -= OnCalcel;
m_VRInput.OnClick -= OnClick;
m_VRInput.OnDown -= OnDown;
m_VRInput.OnUp -= OnUp;
m_VRInput.OnDoubleClick -= OnDoubleClick;
m_VRInput.OnSwipe -= OnSwip;
}
voidOnCalcel()
{
Debug.Log("Unity+OnCancel");
}
voidOnClick()
{
Debug.Log("Unity+OnClick");
}
voidOnDown()
{
Debug.Log("Unity+OnDown");
}
voidOnUp()
{
Debug.Log("Unity+OnUp");
}
voidOnDoubleClick()
{
Debug.Log("Unity+OnDoubleClick");
}
// Use this for initialization
voidStart()
{
}
}
}
注1:GearVR第二代又新加了一个Home键,功能类似于手机上的Home键,游戏内用不到这里不再列出
注2:玩家在游戏内移动时,不可以直接移动摄像机本身,因为GearVR限制了摄像机的移动,但是可以把摄像机挂到一个父节点下,通过移动父节点来移动摄像机
注3:本教程中的部分代码和图片来源于Unity官方的教程,VRSamples,感兴趣的读者可以去AssetsStore下载
Demo下载地址:https://git.coding.net/bt_coder/GearVRTurorial_1_2.git


