Maven + SSM
之前Maven+SSM都是照着搭建的,自己想写点什么的时候发现搭建的过程不清楚。
于是花了时间边整理思路边搭建,并把搭建过程记录下来。
视频看来终觉浅,还是需要自己动手实践,捋顺思路记忆才会深刻。
构建Maven相关工程和模块
- 首先创建一个父工程,选择Maven Project选项。

- 勾选上Create a simple project,然后点击next

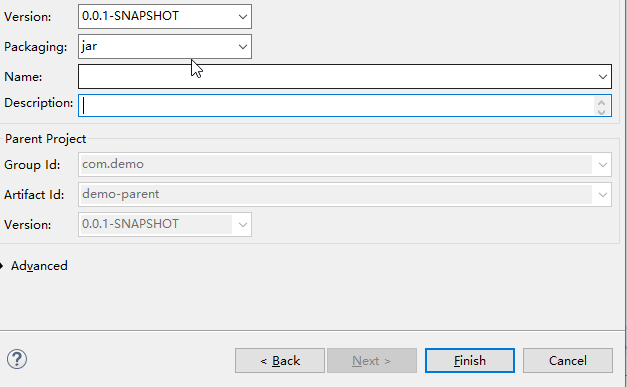
- 注意父工程打包方式为pom

- 点击finish,父工程创建完成。
![]()
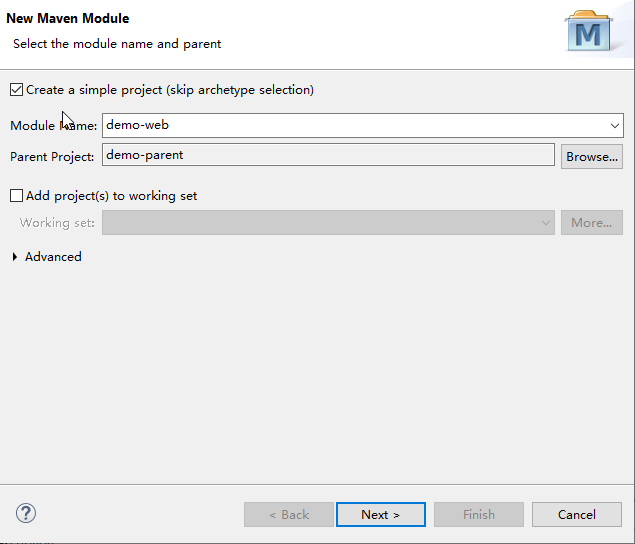
将鼠标移动到之前创建好的demo-parent,点击鼠标右键,选择Maven->New Maven Module Project.
(也可直接创建Maven Module然后指定parent。)

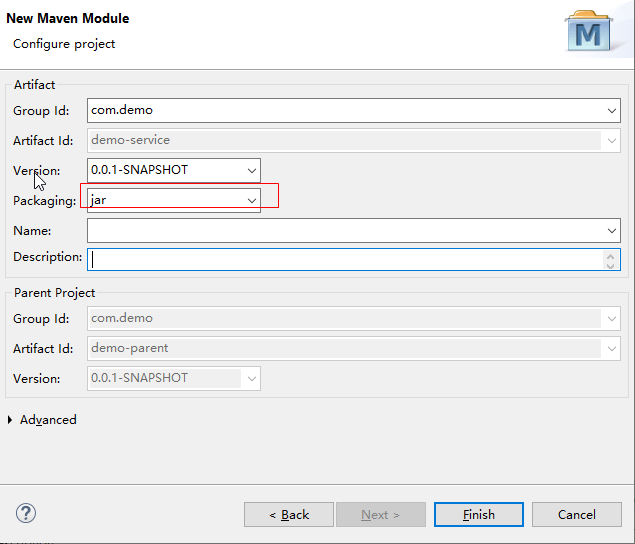
- 模块名为demo-dao,Parent Project为demo-parent.

- 注意打包方式为jar,点击finish即可,demo-dao模块就创建完成了。
![]()
- 按照相同的方法创建Service模块,注意打包方式也为jar。
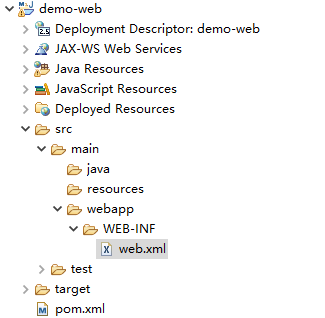
- 接下来创建demo-web
- 此处注意打包方式为war

创建完demo-web后会发现,报错这时因为打包为war,因为标准的web程序结构,
而我们目录结构的webapp下缺少WEB-INF文件夹和web.xml文件。

- 接下来我们创建一个WEB-INF文件夹,然后在其中创建一个空的web.xml文件。
web.xml内容如下所示:
  demo-web

    index.html
    index.htm
    index.jsp
    default.html
    default.htm
    default.jsp
- 接下来创建demo-pojo,存放所有pojo. (也要选择create a simple project)

- 打包方式同样为jar

依赖项
- 首先编辑demo-parent中的pom.xml
pom.xml
  4.0.0
  com.demo
  demo-parent
  0.0.1-SNAPSHOT
  pom

    demo-dao
    demo-service
    demo-web
    demo-pojo


        4.12
        4.2.4.RELEASE
        4.0.0
        2.5
        3.2.8
        1.2.2
        1.2.15
        8.0.11
        1.0.15


                org.springframework
                spring-core
                ${spring.version}


                org.springframework
                spring-context
                ${spring.version}


                org.springframework
                spring-beans
                ${spring.version}


                org.springframework
                spring-webmvc
                ${spring.version}


                org.springframework
                spring-jdbc
                ${spring.version}


                org.springframework
                spring-aspects
                ${spring.version}


                org.springframework
                spring-jms
                ${spring.version}


                org.springframework
                spring-context-support
                ${spring.version}


                org.springframework
                spring-test
                ${spring.version}


                org.springframework
                spring-tx
                ${spring.version}


                org.springframework
                spring-web
                ${spring.version}


                org.mybatis
                mybatis
                ${mybatis.version}


                org.mybatis
                mybatis-spring
                ${mybatis.spring.version}


                com.github.miemiedev
                mybatis-paginator
                ${mybatis.paginator.version}


                mysql
                mysql-connector-java
                ${mysql.version}


                com.alibaba
                druid
                ${druid.version}


                org.csource.fastdfs
                fastdfs
                1.2


                org.apache.maven.plugins
                maven-compiler-plugin
                3.2

                    1.8
                    1.8
                    UTF-8
Dao
- 在demo-dao下面的src/main/java和src/main/resoures下创建com.demo.mapper包。

- 编辑demo-dao的pom.xml
  4.0.0

    com.demo
    demo-parent
    0.0.1-SNAPSHOT

  demo-dao


        com.github.pagehelper
        pagehelper
        4.0.0


        org.mybatis
        mybatis


        org.mybatis
        mybatis-spring


        com.github.miemiedev
        mybatis-paginator


        mysql
        mysql-connector-java


        com.alibaba
        druid


        org.springframework
        spring-core


        org.springframework
        spring-beans


        org.springframework
        spring-context


        org.springframework
        spring-jdbc


        org.springframework
        spring-tx


        org.springframework
        spring-web


        org.springframework
        spring-webmvc


        org.springframework
        spring-test


        junit
        junit
        test


        com.demo
        demo-pojo
        0.0.1-SNAPSHOT
dao需要使用到pojo所以要依赖pojo.
- 在数据库中创建一个名为demo的数据库,并创建一张tb_user表

CREATE TABLE `tb_user` (
  `id` int(10) unsigned NOT NULL AUTO_INCREMENT,
  `name` varchar(255) DEFAULT NULL,
  `password` varchar(255) DEFAULT NULL,
  `createtime` datetime DEFAULT NULL,
  `verification` char(1) CHARACTER SET utf8 COLLATE utf8_general_ci DEFAULT '0' COMMENT '0代表未验证,1代表已验证。',
  PRIMARY KEY (`id`)
) ENGINE=InnoDB AUTO_INCREMENT=11 DEFAULT CHARSET=utf8;- 接下来创建pojo类,在demo-pojo下创建一个com.demo.pojo包,并根据表结构创建User类。
package com.demo.pojo;

import java.util.Date;

/**
 * @author 依风
 *
 */
public class User {
    //id主键自增,故无set方法,且不传入构造器。
    private Integer id;
    //用户名及密码
    private String userName;
    private String password;
    //创建时间
    private Date createTime;
    //是否验证,未验证为"0",验证为"1"
    private String verification;

    public User() {
        super();
        // TODO Auto-generated constructor stub
    }

    public User(String userName, String password, Date createTime, String verification) {
        super();
        this.userName = userName;
        this.password = password;
        this.createTime = createTime;
        this.verification = verification;
    }

    public Integer getId() {
        return id;
    }

    public String getUserName() {
        return userName;
    }

    public void setUserName(String userName) {
        this.userName = userName;
    }

    public String getPassword() {
        return password;
    }

    public void setPassword(String password) {
        this.password = password;
    }

    public Date getCreateTime() {
        return createTime;
    }

    public void setCreateTime(Date createTime) {
        this.createTime = createTime;
    }

    public String getVerification() {
        return verification;
    }

    public void setVerification(String verification) {
        this.verification = verification;
    }
}
接下来我们在demo-dao中编辑接口与文件和对应的xml文件。
结构如下图所示:

TbUserMapper.java
package com.demo.mapper;

import com.demo.pojo.User;

/**
 * @author 依风
 * tb_user表的dao操作
 */
public interface TbUserMapper {

    /** 向tb_user表中插入一条记录
     * @param user 插入记录
     * @return 受影响的行数
     */
    int insertUser(User user);
}
TbUserMapper.xml
        INSERT INTO tb_user(name,password,createtime,verification)
        VALUES (#{userName}, #{password}, #{createTime},#{verification})
- 接下来我们要在demo-dao中创建几个文件夹,并创建对应文件:
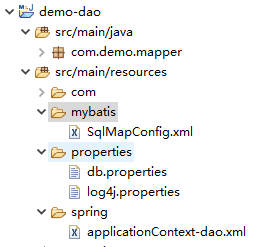
db.properties存放数据库的驱动信息,连接地址,用户名密码等。
jdbc.driver=com.mysql.cj.jdbc.Driver
jdbc.url=jdbc\:mysql\://localhost\:3306/demo?characterEncoding=utf-8
jdbc.username=xxxx
jdbc.password=xxxx
此处注意jdbc.driver=com.mysql.cj.jdbc.Driver,不同版本的写法不一致,较老版本没有cj。
用户名和密码填写自己的密码就可以了。
paalicationContext-dao.xml配置srping与数据库的相关信息。
SqlMapConfig.xml配置了一个分页工具。
接下来我们测试下dao有没有问题
在demo-dao中的src/test/java下创建一个com.demo.dao.test.并创建一个类DaoTest.java

DaoTest.java
package com.demo.dao.test;

import java.util.Date;

import org.junit.Test;
import org.junit.runner.RunWith;
import org.springframework.beans.factory.annotation.Autowired;
import org.springframework.test.context.ContextConfiguration;
import org.springframework.test.context.junit4.SpringJUnit4ClassRunner;

import com.demo.mapper.TbUserMapper;
import com.demo.pojo.User;

@RunWith(SpringJUnit4ClassRunner.class)
//加载classpath路径下(即src/main/resource目录下)
//srping文件夹中所有已application开头的文件,*代表任意字符。
@ContextConfiguration(locations="classpath:spring/application*.xml")
public class DaoTest {

    @Autowired
    private TbUserMapper tbUserMapper;

    @Test
    public void insertUserTest() {
        tbUserMapper.insertUser(new User("hcf","123",new Date(),"0"));
    }

}
@ContextConfiguration(locations="classpath:spring/application*.xml")加载指定的xml文件,xml文件中主要有
配置数据源,将接口文件和映射文件匹配起来。由于该模块打包方法为jar,所以测试是需要加载xml文件。
如果是war,则在tomcat中启动,并在web.xml中配置加载指定文件即可(tomcat会自动加载web.xml)。
然后将鼠标点击insertUserTest方法名,鼠标右键选择Run as->JUnit Test即可。
不出意外应该运行成功的,如果不成功根据错误信息找下bug。
运行成功后数据库中就会出现一条记录。


Service
Dao没有问题后,我们来构建Service.
首先编辑demo-service中的pom.xml
  4.0.0

    com.demo
    demo-parent
    0.0.1-SNAPSHOT

  demo-service


        org.springframework
        spring-core


        org.springframework
        spring-beans


        org.springframework
        spring-context


        org.springframework
        spring-jdbc


        org.springframework
        spring-tx


        org.springframework
        spring-web


        org.springframework
        spring-webmvc


        org.springframework
        spring-test


        junit
        junit


        com.demo
        demo-dao
        0.0.1-SNAPSHOT
上面主要就是Spring相关依赖,注意一点Service需要引用Dao,所以需要依赖Dao。
- 接下来我们在demo-service下创建一个com.demo.service包,并编写UserService类。
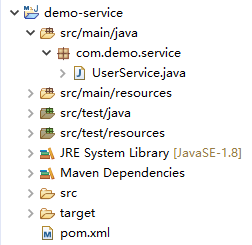
UserService.java
package com.demo.service;

import org.springframework.beans.factory.annotation.Autowired;
import org.springframework.stereotype.Service;

import com.demo.mapper.TbUserMapper;
import com.demo.pojo.User;

@Service
public class UserService {

    @Autowired
    private TbUserMapper tbUserMapper;

    //插入一条数据
    public void insert(User user) {
        tbUserMapper.insertUser(user);
    }
}
接下来我们需要在src/main/resources目录下创建一个spring文件夹。
在里面需要有两个文件。

一个是applicationContext-dao.xml,一个是applicationContext.xml
applicationContext-dao.xml与demo-dao中的applicationContext-dao.xml相同,直接复制即可。
我们来看下applicationContext.xml
可以看大家里面只有一个包扫描配置,扫描所有以com.demo开头的包,*代表任意。
配置这个主要是位置扫描指定包中的注解,例如扫描UserServcie.java中的@Autowired,@Service注解。
- 接下来测试下Service
在src/test/java中创建一个com.demo.service.test包,然后创建UserServiceTest.java类。
package com.demo.service.test;

import java.util.Date;

import org.junit.Test;
import org.junit.runner.RunWith;
import org.springframework.beans.factory.annotation.Autowired;
import org.springframework.test.context.ContextConfiguration;
import org.springframework.test.context.junit4.SpringJUnit4ClassRunner;

import com.demo.pojo.User;
import com.demo.service.UserService;

@RunWith(SpringJUnit4ClassRunner.class)
@ContextConfiguration(locations="classpath:spring/application*.xml")
public class UserServiceTest {

    @Autowired
    private UserService userService;

    @Test
    public void insertUser() {
        userService.insert(new User("hcf","321",new Date(),"0"));
    }
}
注意看locations="classpath:spring/application*.xml",Service调用Dao,所以Dao也需要加载,加载完的Dao
被Service中的@Autowired注入到Servcie中,Service再调用Dao。Dao并不会自己自动加载,需要外部指定加载。
然后将鼠标放在方法名上,右击Run as->JUnit Test.
然后运行成功,数据库中又会多一条记录。
![]()
Controller
Dao和Servcie完成后就剩下最后的Conttroller了。Controller需要引用Servcie,而Servcie会引用Dao,Controller也会间接引用Dao。
首先来看demo-web中的pom.xml
  4.0.0

    com.demo
    demo-parent
    0.0.1-SNAPSHOT

  controller
  war


        org.springframework
        spring-core


        org.springframework
        spring-beans


        org.springframework
        spring-context


        org.springframework
        spring-jdbc


        org.springframework
        spring-tx


        org.springframework
        spring-web


        org.springframework
        spring-webmvc


        org.springframework
        spring-test


        org.springframework
        spring-context


        org.springframework
        spring-beans


        org.springframework
        spring-webmvc


        org.springframework
        spring-jdbc


        org.springframework
        spring-aspects


        org.springframework
        spring-context-support


        org.springframework
        spring-test


        junit
        junit


        com.alibaba
        fastjson
        1.2.28


        javassist
        javassist
        3.11.0.GA


        commons-codec
        commons-codec
        1.10


        javax.servlet
        servlet-api
        2.5
        provided


        com.demo
        demo-service
        0.0.1-SNAPSHOT


                org.apache.tomcat.maven
                tomcat7-maven-plugin
                2.2


                    8080

                    /
pom.xml中最后配置一个tomcat插件,后续运行这个插件即可,就相当于将web程序运行在tomcat中了。
- 在src/main/java下创建一个com.demo.controller的包,然后创建UserController类。
UserController
package com.demo.controller;

import java.util.Date;

import org.springframework.beans.factory.annotation.Autowired;
import org.springframework.web.bind.annotation.RequestMapping;
import org.springframework.web.bind.annotation.RestController;

import com.demo.pojo.User;
import com.demo.service.UserService;

/** 用户注册,登录控制类
 * @author 依风
 *
 */
//Controller+ReponseBody = RestController
@RestController
public class UserController {
    @Autowired
    private UserService userServcie;

    @RequestMapping("/insertUser")
    public String insertUser() {
        userServcie.insert(new User("controller","321",new Date(),"0"));
        return "insert success";
    }
}
然后我们在src/main/resources下创建两个文件夹,srping和config

config下的application.properties是一个空文件夹,有就可以暂时不需要,只是先将基本的架子搭好。
spring文件夹下的applicationContext-dao.xml和applicationContext.xml和demo-servcie中的一样,直接复制即可。
我们看下applicationContext-mvc.xml中的内容。
              WriteMapNullValue
              WriteDateUseDateFormat
这里面主要配置了fastjson,它将controller类返回的数据转换为json字符串。
我们来看下demo-web中WEB-INF目录下的web.xml
    CharacterEncodingFilter
    org.springframework.web.filter.CharacterEncodingFilter

      encoding
      utf-8


      forceEncoding
      true


    CharacterEncodingFilter
    /*


    springmvc
    org.springframework.web.servlet.DispatcherServlet

      contextConfigLocation

      classpath:spring/application*.xml


    springmvc
    *.do
当tomcat启动时会加载web.xml,而在web.xml中配置了Spring MVC拦截请求进行处理交由前端控制器(DispatcherServlet)处理,同时会加载指定的配置文件。
鼠标右击demo-web,Run as -> Maven build。
然后弹出如下页面,并在Goals栏输入tomcat7:run

这样就调用了demo-web下pom.xml中配置的tomca插件,此时demo-web就运行在tomcat中了。
然后我们来测试下,在地址栏输入http://localhost:8080/insertUser.do
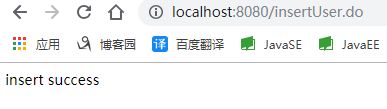
![]()