一:创建矩阵:
# Create test matrix
test = matrix(rnorm(200), 20, 10)
test[1:10, seq(1, 10, 2)] = test[1:10, seq(1, 10, 2)] + 3
test[11:20, seq(2, 10, 2)] = test[11:20, seq(2, 10, 2)] + 2
test[15:20, seq(2, 10, 2)] = test[15:20, seq(2, 10, 2)] + 4
colnames(test) = paste("Test", 1:10, sep = "")
rownames(test) = paste("Gene", 1:20, sep = "")
二:画pheatmap图
# Draw heatmaps
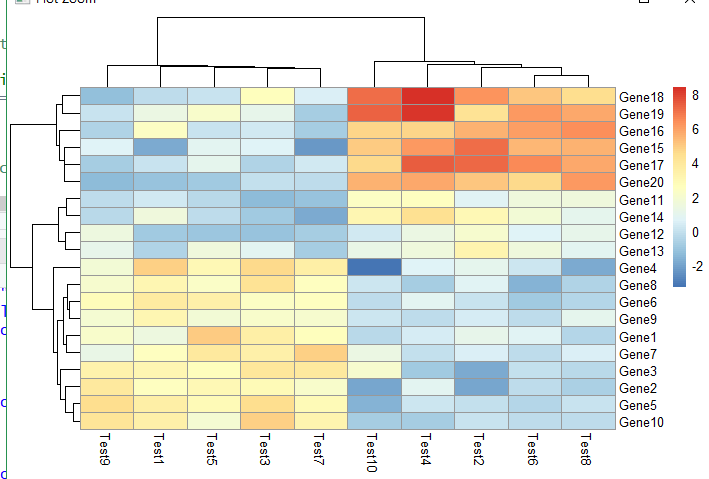
图:1:pheatmap(test) ##啥都不加
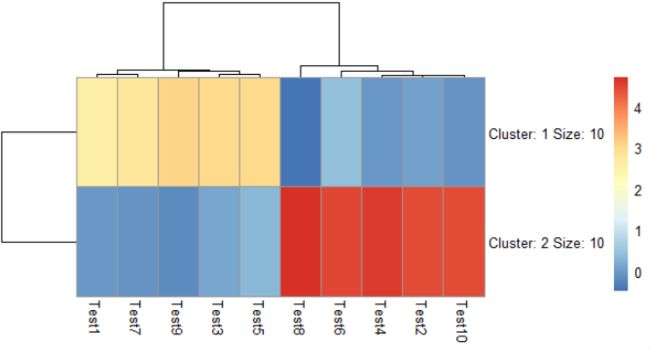
图2:pheatmap(test, kmeans_k = 2) ##分成2x的图
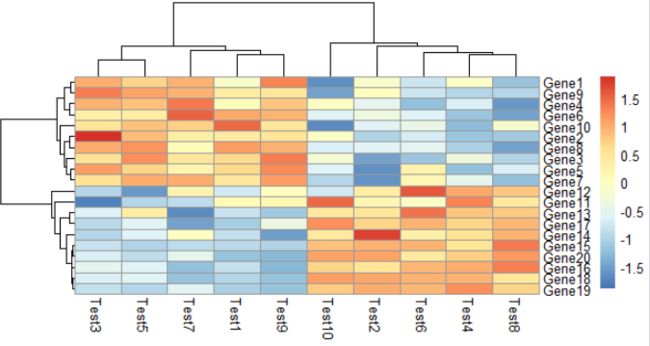
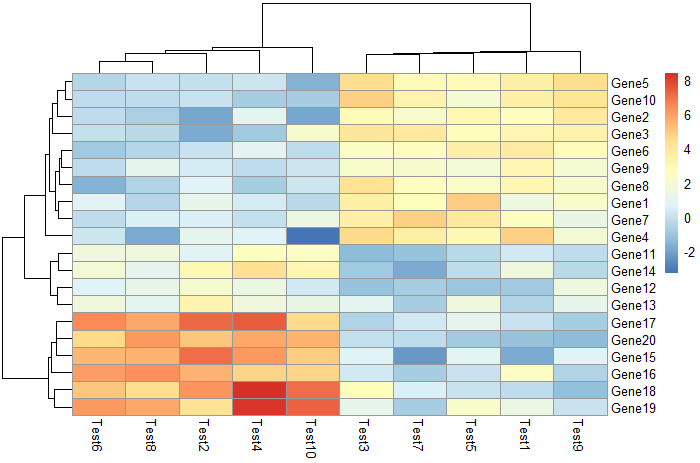
图3:pheatmap(test, scale = "row", clustering_distance_rows = "correlation") ##clustering_distance_row表示行距离度量的方法 #表示行聚类使用皮尔森相关系数聚类。
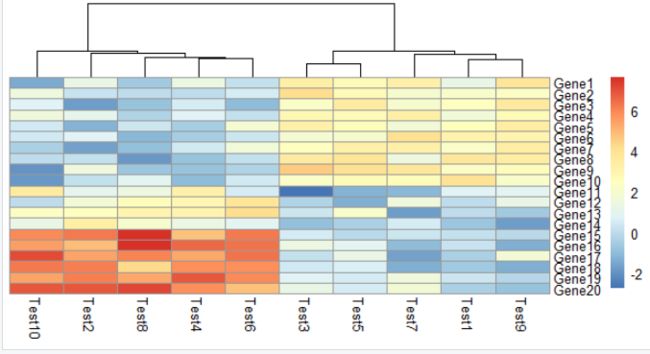
图4:pheatmap(test,color = colorRampPalette(c("navy", "white", "firebrick3"))(50)) ##赋值渐变颜色调色板colorRampPalette属性,选择“ 深蓝色,砖红色,”渐变,50就是将这三种颜色设置为50个梯度一般看到的这三个"green","black","red")
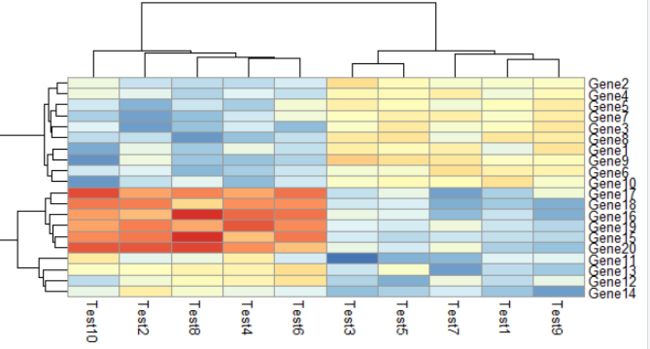
图5:pheatmap(test, cluster_row = FALSE) ##我们不应该对行进行聚类 (##列的顺序是时间序列,我们不应该对列进行聚类)
图6:pheatmap(test,legend = FALSE) ##是否显示图例
三:显示单元格内容
# Show text within cells
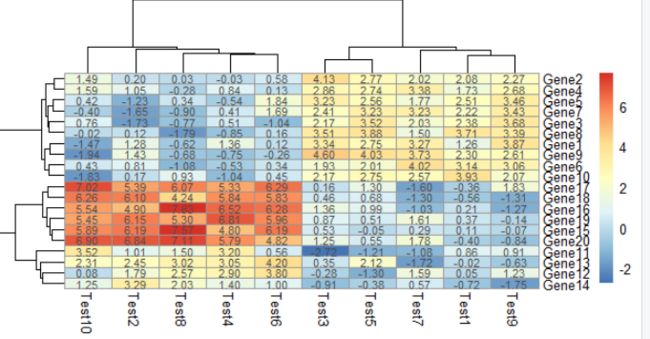
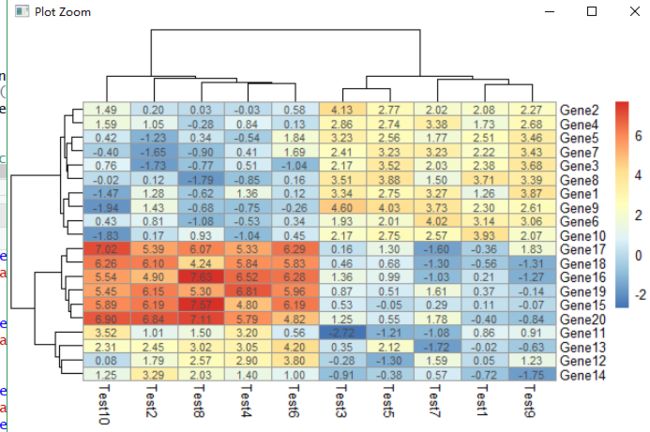
pheatmap(test, display_numbers = TRUE)
图7:pheatmap(test, display_numbers = TRUE, number_format = "%.2f")##number_format设置数值的格式,较常用的有"%.2f"(保留小数点后两位,1f,暴力小数点后1位),"%.1e"(科学计数法显示,保留小数点后一位)
图8:pheatmap(test, display_numbers = matrix(ifelse(test > 5, "*", ""), nrow(test)))##test的没一行中大于5的用*标出来
图9:pheatmap(test, cluster_row = FALSE, legend_breaks = -1:4, legend_labels = c("0", "1e-4", "1e-3", "1e-2", "1e-1", "1"))##在legend上的-1~4的位置显示'0', '1e-4', '1e-3', '1e-2', '1e-1', '1'
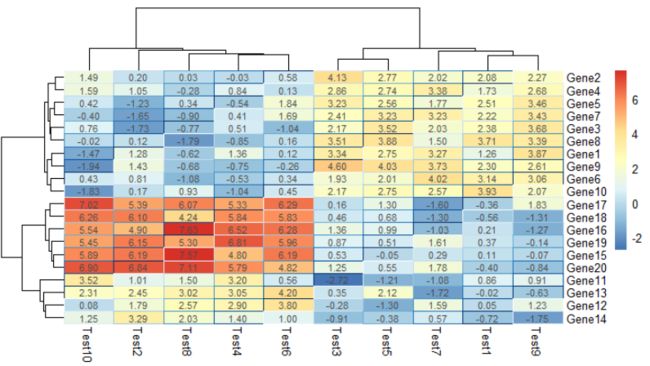
图10:pheatmap(test, border_color = blues9, display_numbers = TRUE)##热图的每个小块之间以灰色隔开(参数border_color,如果不想要border可以设置为blues9,当然也可以设置成其它颜色)
四:修正单元格大小,并将其保存到具有正确大小的文件中
# Fix cell sizes and save to file with correct size
图11:pheatmap(test, cellwidth = 15, cellheight = 12, main = "Example heatmap") #main可设置热图的标题
图12:pheatmap(test, cellwidth = 15, cellheight = 12,fontsize = 8, filename = "test.pdf") #fontsize设置字体大小,filename可直接将热图存出,支持格式png, pdf, tiff, bmp, jpeg,并且可以通过width(宽), height(高)设置图片的 大小;
五:为行和列生成注释并显示显示行和颜色注释
# Generate annotations for rows and columns
annotation_col = data.frame(CellType = factor(rep(c("CT1", "CT2"), 5)), Time = 1:5)
rownames(annotation_col) = paste("Test", 1:10, sep = "")
annotation_row = data.frame(GeneClass = factor(rep(c("Path1", "Path2", "Path3"), c(10, 4, 6))))
rownames(annotation_row) = paste("Gene", 1:20, sep = "")
#Display row and color annotations
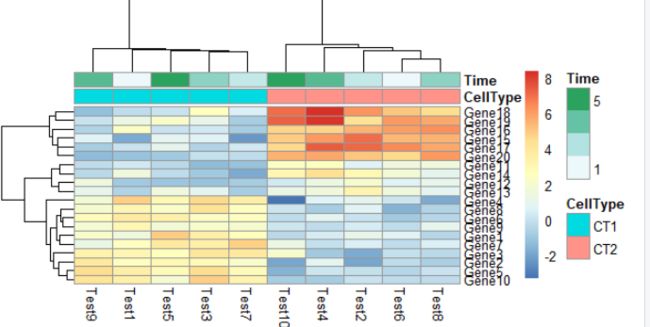
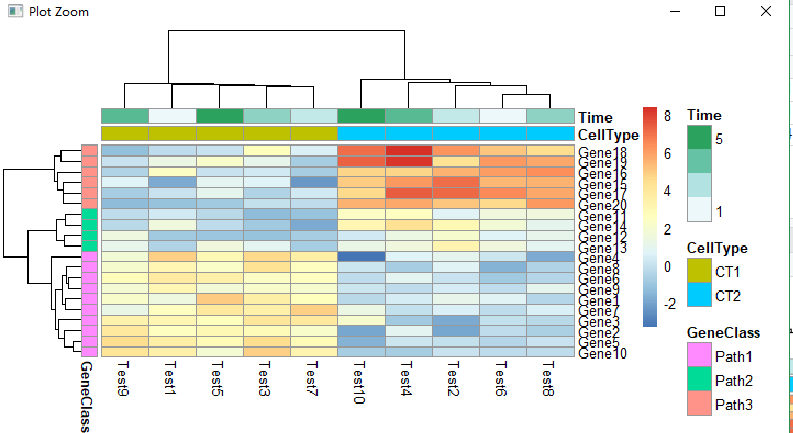
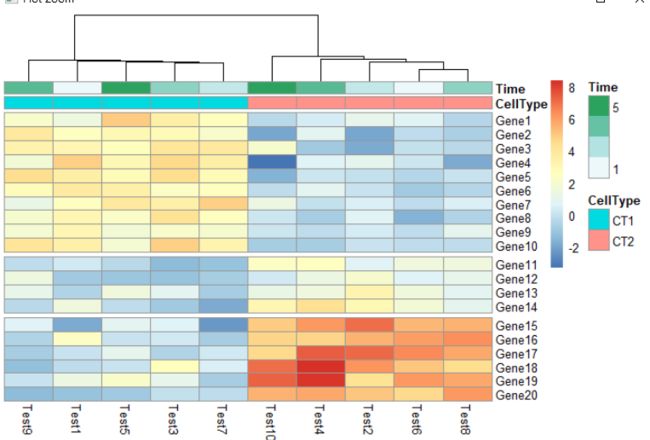
图13:pheatmap(test,annotation_col = annotation_col) ##显示行列注释
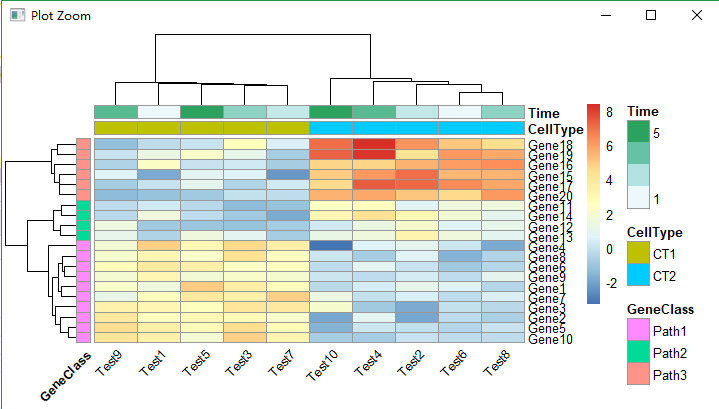
图14:pheatmap(test, annotation_col = annotation_col, annotation_row = annotation_row) ##行与列的注释分开
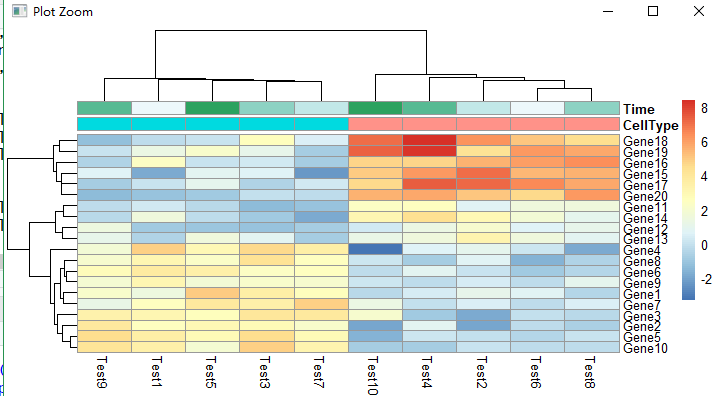
图15:pheatmap(test, annotation_col = annotation_col,annotation_legend = FALSE)##右上角注释图例不现实
六:更改列中文本的角度
#Change angle of text in the columns
图16:pheatmap(test, annotation_col = annotation_col, annotation_row = annotation_row,angle_col = "45")##列下面的注释角度为45度('arg' should be one of “270”, “0”, “45”, “90”, “315”)
图17:pheatmap(test, annotation_col = annotation_col,angle_col = "0") ##列下面的注释角度为0度
七:指定颜色
# Specify colors
ann_colors= list(
Time = c("white", "firebrick"),
CellType = c(CT1 = "#1B9E77", CT2 = "#D95F02"),
GeneClass = c(Path1 = "#7570B3", Path2 = "#E7298A", Path3 = "#66A61E"))##注意ann_colors是列表
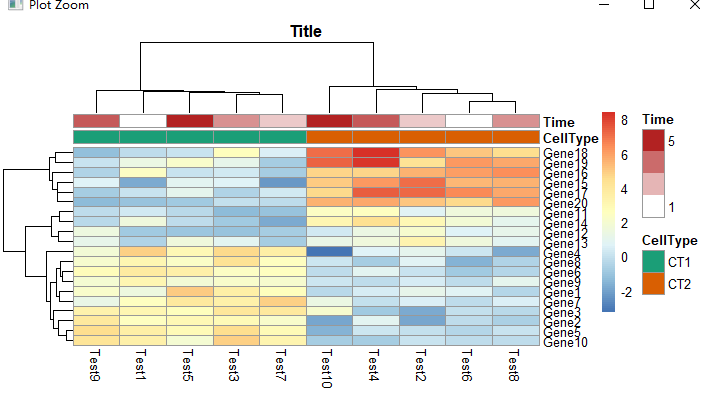
图18:pheatmap(test, annotation_col = annotation_col, annotation_colors = ann_colors, main = "Title")
图19:pheatmap(test, annotation_col = annotation_col, annotation_row = annotation_row, annotation_colors = ann_colors)
图20:pheatmap(test, annotation_col = annotation_col, annotation_colors =ann_colors[2]) 2可以改变得
图21:pheatmap(test, annotation_col = annotation_col, annotation_colors =ann_colors[4])
八:生成有gap的热图
#Gaps in heatmaps
图22:pheatmap(test, annotation_col = annotation_col, cluster_rows = FALSE, gaps_row = c(10, 14))
图23:pheatmap(test, annotation_col = annotation_col, cluster_rows = FALSE, gaps_row = c(10, 14), cutree_col = 2) #cutree_rows, cutree_cols可以根据行列的聚类数将热图分隔开
九:显示自定义字符串作为行/列名称
#Show custom strings as row/col names
labels_row = c("", "", "", "", "", "", "", "", "", "", "", "", "", "", "","", "","Il10", "Il15", "Il1b")##这里相当于是给表达量最高 的三个命名了
图24:pheatmap(test, annotation_col = annotation_col, labels_row = labels_row)
labels_row = c("1", "2", "3", "4", "5", "6", "7", "8", "9", "10", "11", "12", "13", "14", "15",
"16", "17", "18", "19", "20") ##可以给所有的20行都命名(如第三幅图)
图25:pheatmap(test, annotation_col = annotation_col, labels_row = labels_row)
十:从距离矩阵指定聚类
# Specifying clustering from distance matrix
drows = dist(test, method = "minkowski") #表示行聚类除了使用皮尔森相关系数聚类,也可以自定义为这种minkowski
dcols = dist(t(test), method = "minkowski")
图26:pheatmap(test, clustering_distance_rows = drows, clustering_distance_cols = dcols)
十一:使用群集回调选项修改群集的顺序
#Modify ordering of the clusters using clustering callback option
callback = function(hc, mat){
sv = svd(t(mat))$v[,1]
dend = reorder(as.dendrogram(hc), wts = sv)
as.hclust(dend)
}
图27:pheatmap(test, clustering_callback = callback)
十二:十一这一步可以用dendsort包画画
library(dendsort)
callback = function(hc, ...){dendsort(hc)}
图28:pheatmap(test, clustering_callback = callback)
搞定!

