转载请注明出处:http://www.jianshu.com/p/3b880a09f754
本文出自Shawpoo的
我的博客:CSDN博客
1、Firebase系列之---初探Firebase
2、Firebase系列之---Cloud Messaging/Notifications(云消息,推送)的使用
3、Firebase系列之—Realtime Database(实时数据库)的使用
Cloud Messaging
Firebase Cloud Messaging (FCM) 是一种跨平台消息传递解决方案,开发者可以使用它免费且可靠地传递消息和通知。
使用 FCM,可以通知客户端应用存在可以同步的新电子邮件或其他数据。 您可以发送通知来重新吸引用户和促进用户留存。 对于即时通讯等用例,一条消息可以将最大 4KB 的负载传送至客户端应用。
1、准备工作和连接Firebase
点击查看Firebase系列之---初探Firebase
2、引用SDK和编写代码
-
- 引用Firebase Cloud Message SDK
在app的build.gradle文件中添加:
- 引用Firebase Cloud Message SDK
dependencies {
   compile 'com.google.firebase:firebase-messaging:9.6.1'
}
-
- 接收和处理通知的两种情况
下表来自官方文档:
| 应用状态 | 通知 | 数据 | 通知且携带数据 |
|---|---|---|---|
| 前台 | onMessageReceived | onMessageReceived | onMessageReceived |
| 后台 | 系统托盘 | onMessageReceived | 通知:系统托盘数据:Intent 的 extra 中 |
由上表可以得出,通知分为两种:
当应用处于前台时通知会回调onMessageReceived方法,如果想通知的话需要手动通知,并取到携带的数据。
当应用处于后台时,Firebase sdk会自动在系统托盘中通知,如果携带数据的话会回调onMessageReceived,如果点击通知栏的话取数据需要通过Intent获取。
-
- 添加通知所需Service和AndroidManifest.xml的配置
1.新建MyFirebaseMessagingService 继承FirebaseMessagingService
public class MyFirebaseMessagingService extends FirebaseMessagingService {

    private static final String TAG = "MyFirebaseMsgService";

    /**
     * Called when message is received.
     *
     * @param remoteMessage Object representing the message received from Firebase Cloud Messaging.
     */
    // [START receive_message]
    @Override
    public void onMessageReceived(RemoteMessage remoteMessage) {
        // [START_EXCLUDE]
        // There are two types of messages data messages and notification messages. Data messages are handled
        // here in onMessageReceived whether the app is in the foreground or background. Data messages are the type
        // traditionally used with GCM. Notification messages are only received here in onMessageReceived when the app
        // is in the foreground. When the app is in the background an automatically generated notification is displayed.
        // When the user taps on the notification they are returned to the app. Messages containing both notification
        // and data payloads are treated as notification messages. The Firebase console always sends notification
        // messages. For more see: https://firebase.google.com/docs/cloud-messaging/concept-options
        // [END_EXCLUDE]

        // TODO(developer): Handle FCM messages here.
        // Not getting messages here? See why this may be: https://goo.gl/39bRNJ
        Log.d(TAG, "From: " + remoteMessage.getFrom());

        // Check if message contains a data payload.
        if (remoteMessage.getData().size() > 0) {
            Log.d(TAG, "Message data payload: " + remoteMessage.getData());

            if (/* Check if data needs to be processed by long running job */ true) {
                // For long-running tasks (10 seconds or more) use Firebase Job Dispatcher.
                scheduleJob();
            } else {
                // Handle message within 10 seconds
                handleNow();
            }

        }

        // Check if message contains a notification payload.
        if (remoteMessage.getNotification() != null) {
            Log.d(TAG, "Message Notification Body: " + remoteMessage.getNotification().getBody());
            sendNotification(remoteMessage.getNotification().getBody());
        }

        // Also if you intend on generating your own notifications as a result of a received FCM
        // message, here is where that should be initiated. See sendNotification method below.
    }
    // [END receive_message]

    /**
     * Schedule a job using FirebaseJobDispatcher.
     */
    private void scheduleJob() {
        // [START dispatch_job]
        FirebaseJobDispatcher dispatcher = new FirebaseJobDispatcher(new GooglePlayDriver(this));
        Job myJob = dispatcher.newJobBuilder()
                .setService(MyJobService.class)
                .setTag("my-job-tag")
                .build();
        dispatcher.schedule(myJob);
        // [END dispatch_job]
    }

    /**
     * Handle time allotted to BroadcastReceivers.
     */
    private void handleNow() {
        Log.d(TAG, "Short lived task is done.");
    }

    /**
     * Create and show a simple notification containing the received FCM message.
     *
     * @param messageBody FCM message body received.
     */
    private void sendNotification(String messageBody) {
        Intent intent = new Intent(this, CloudMessagingActivity.class);
        intent.addFlags(Intent.FLAG_ACTIVITY_CLEAR_TOP);
        PendingIntent pendingIntent = PendingIntent.getActivity(this, 0 /* Request code */, intent,
                PendingIntent.FLAG_ONE_SHOT);

        Uri defaultSoundUri= RingtoneManager.getDefaultUri(RingtoneManager.TYPE_NOTIFICATION);
        NotificationCompat.Builder notificationBuilder = new NotificationCompat.Builder(this)
                .setSmallIcon(R.mipmap.ic_stat_ic_notification)
                .setContentTitle("FCM Message")
                .setContentText(messageBody)
                .setAutoCancel(true)
                .setSound(defaultSoundUri)
                .setContentIntent(pendingIntent);

        NotificationManager notificationManager =
                (NotificationManager) getSystemService(Context.NOTIFICATION_SERVICE);

        notificationManager.notify(0 /* ID of notification */, notificationBuilder.build());
    }
}
2、新建MyJobService继承JobService
public class MyJobService extends JobService {

    private static final String TAG = "MyJobService";

    @Override
    public boolean onStartJob(JobParameters jobParameters) {
        Log.d(TAG, "Performing long running task in scheduled job");
        // TODO(developer): add long running task here.
        return false;
    }

    @Override
    public boolean onStopJob(JobParameters jobParameters) {
        return false;
    }

}
3、在AndroidManifest.xml中配置:
//...
如果点击通知栏的话为了避免重复打开Activity的话,需要设置Activity的启动模式为singleTask,意思为在当前栈中如果存在此Activity实例就不会重新创建,且此时会回调onNewIntent()方法。配置如下:
//设置启动模式
- 4)编写Activity和layout便于测试
Activity代码:
public class CloudMessagingActivity extends BaseAppCompatActivity {

    private TextView mMessageText;

    @Override
    protected void onCreate(Bundle savedInstanceState) {
        super.onCreate(savedInstanceState);
        setContentView(R.layout.activity_cloud_message);

        mMessageText = (TextView) findViewById(R.id.tv_message);
    }


    @Override
    protected void onNewIntent(Intent intent) {
        super.onNewIntent(intent);
        StringBuilder builder = new StringBuilder();
        if (intent.getExtras() != null) {
            for (String key : intent.getExtras().keySet()) {
                Object value = intent.getExtras().get(key);
                builder.append("键:" + key + "-值:" + value + "\n");
            }
            mMessageText.setText(builder.toString());
        }
    }
}
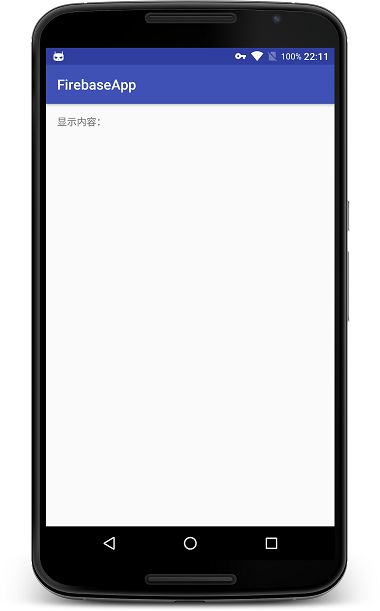
activity_cloud_message很简单就一个TextView用于显示接收到的值:
运行效果如下:
3、通过Firebase控制台发送消息并测试
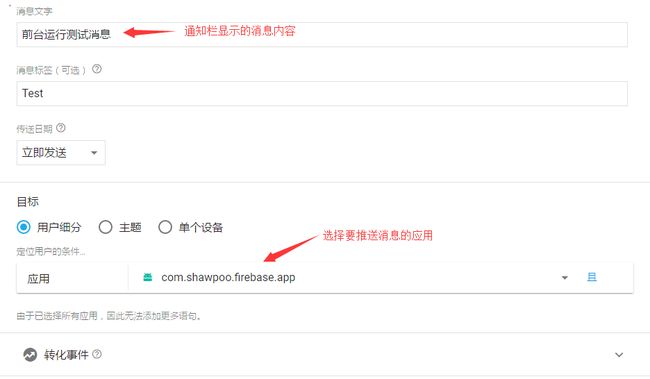
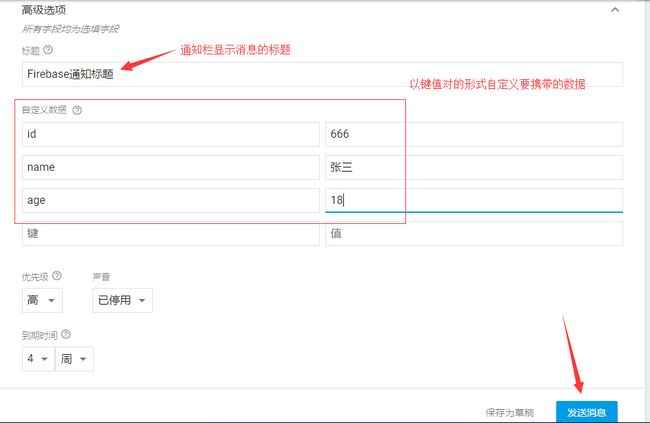
这里我们测试一下当应用在后台运行时,控制台发送消息并携带值的情况:
1、在Firebase控制台填写信息并发送:
2、手机执行效果
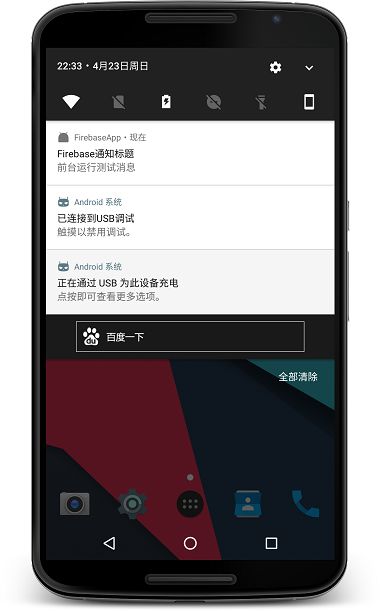
可以看到手机已经收到控制台发送的消息:
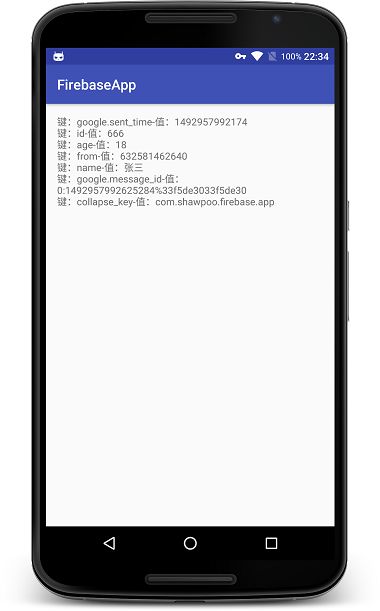
当点击通知栏的话会将在控制台填写的自定义数据获取到并显示(也有firebase默认的key-value):
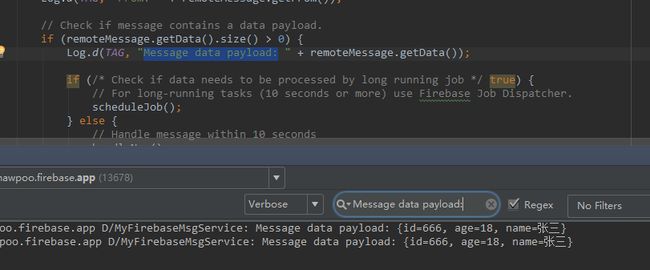
顺便我也测试了当APP在前台运行时也可以接收到携带的数据,如果需要的话对数据进行处理即可:
Firebase的Cloud Message功能就是这样,本文只是此功能的一个测试用例,如要完成项目业务,可以自行扩展。如果错误或建议,请多多指教。
