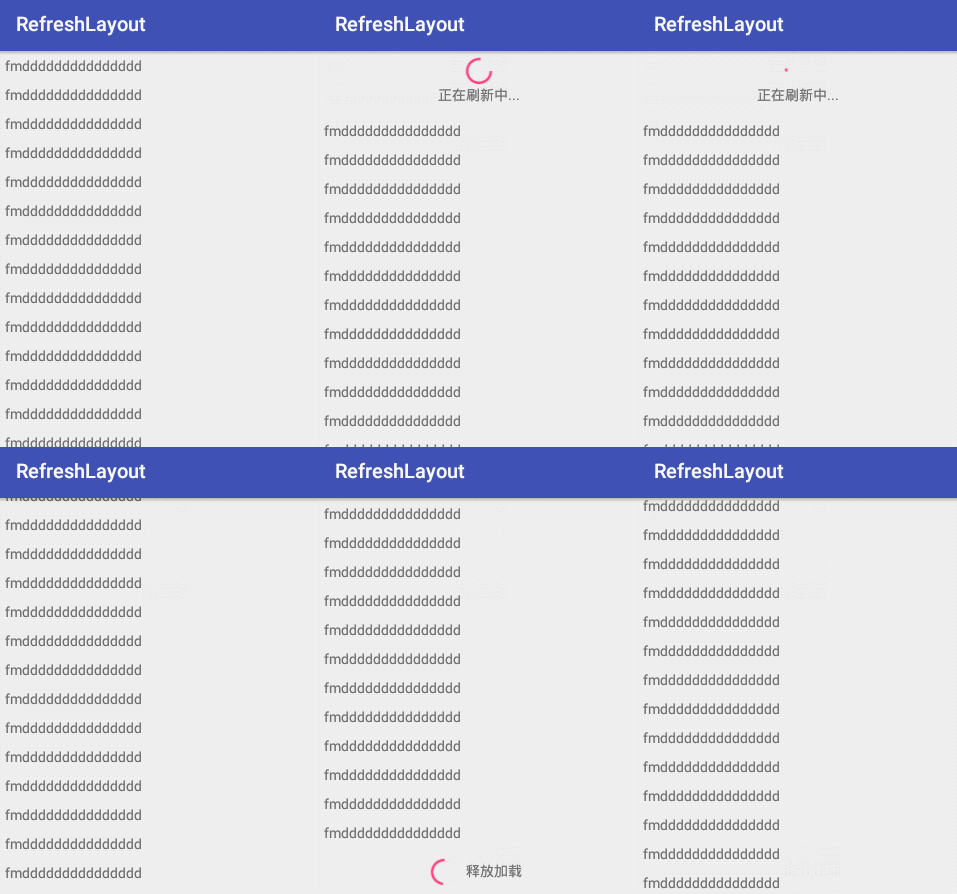
新版本
Refreshlayout Adapter Statelayout
github地址
Refreshlayout
由于是继续nestedscrolling ,只支持像recycleview nestedscrollview等子view
刷新库部分包含以下功能:
1.普通上拉刷新,下拉加载
2.类似小米系统的橡皮泥模式 elastic_overscroll
3.overscroll类似iphone的橡皮泥模式 overscroll
4.估值模式,只提供上下拉过程中的数值,可监听设置listener做你想要的事情 evaluate
5.估值模式下的内刷新,与普通刷新相比,它是控制adapter最前面一个和最后面一个的高度来显示刷新头尾(有些是互斥的不要都配置)
多类型Adapter使用
adpter包含以下主要功能:
1.多类型item的支持 通过addtype
2.不同模式下列宽的控制
3.只设置position 的,估值模式
4.增量更新集成
5.复杂数据根据泛型自动匹配类型,也可重写istype自定义什么情况下是该类型
6.移除了状态布局的支持
[图片上传失败...(image-e1beda-1518149122575)]
默认根据itemholder的泛型确定相应position的类型
[图片上传失败...(image-a5035a-1518149122575)]
状态布局的封装
原adapter的状态布局单独做成一个statlayout,以增加对非recyclerview的支持,用法与之前一样
[图片上传失败...(image-120154-1518149122575)]
更多功能
itemholder 重写相应方法可达到gridlayoutManager staggled设置列宽
public abstract class ItemHolder {
private int layout;
/**
* StaggeredLayoutManager重写此方法
*
* @return 是否占据一个
*/
public boolean isfull() {
return false;
}
/**
* GrideLayoutManager重写此方法
*
* @param position
* @return 占的个数
*/
public int gridSpanSize(T item, int position) {
return 1;
}
/**
* onBind时调用
*
* @param holder
* @param item
* @param position
*/
public abstract void onBind(Holder holder, T item, int position);
/**
* 是否是这种Type的view
*
* @param item
* @param position
* @return
*/
public boolean istype(Object item, int position){
return true;
}
public int getLayout() {
return layout;
}
public ItemHolder setLayout(int layout) {
this.layout = layout;
return this;
}
}
---
------------------------------------下面过时-------------------------------------------------
#### 基于NestScroll机制实现下拉刷新 overScroll 等
# [最新库说明传送门](http://www.jianshu.com/p/88795dff987c)
# [最新库 github传送门](https://github.com/While1true/NestPullView)
[GitHub传送门](https://github.com/While1true/-NestedScrolling-overScroll-.git)
[AppSample](http://pan.baidu.com/s/1gfxM40N)
---
前言:为什么网上这种轮子这么多了,还要造轮子呢?
产品经理:能不能想ios那样,不要滑到低了就划不动了? 需要OverScroll
产品经理:能不能在顶部时往下拉 头部变大 需要视差效果 就是我下面说的估值模式
产品经理: 在顶部时下拉头部变大,底部时,上拉加载
产品经理:上拉加载体验不好,能不能预加载,还没滑到底部时就开始加载,这样感觉很流畅
> 网上轮子虽多,但不是自己造的改起来特麻烦,也不能需要一个功能就去集成一个库吧,
---
看看如何造一个轮子满足以上要求
先看看实际项目效果


---
1.实现的View(只支持竖直的方向):
- SRecyclerview:对Recyclerview的包装
- SScrollView:对ScrollView的包装
- SAllView: 理论支持,所有实现了NestScrollChild的View daemo 以NestScrollWebView为例
###### xml配置
- SRecyclerView
android:id="@+id/srecyclerview"
android:layout_height="match_parent"
android:layout_width="match_parent">
- SScrollView 同ScrollView
- SAllView  NestedScrollWebView为例
android:layout_width="match_parent"
android:layout_height="match_parent">
android:layout_width="match_parent"
android:layout_height="match_parent"/>
##### 1.我是如何使用
参数说明
srecyclerview //默认头尾布局
.addDefaultHeaderFooter()
//添加自定义头部
.addHeader(header, 100)
//添加自定义尾部
.addFooter(footer, 50)
//张力比例 默认为3
.setPullRate(3)
//若需要预加载,就是距离倒数第几个item开始加载
.setPreLoadingCount(3)
//set Layoutmanage Adapter
.setAdapter(new GridLayoutManager(this, 2), adapter)
//是否可下拉 是否可上拉 是否要调用下拉加载 是否要调用上拉加载
//boolean head, boolean foot, boolean canLoadingHeader, boolean canloadingFooter
.setRefreshMode(true, true, false, false)
//估值模式:是否真实移动 头部 尾部 false下只提供估值 .setActrullyScrollMode(false, false)
.setRefreshingListener(new SRecyclerView.OnRefreshListener() {
//下拉值 值是负数
@Override
public void pullDown(int height) {
super.pullDown(height);
ic.getLayoutParams().height = ic_origin_height - height;
ic.requestLayout();
}
//上拉值 正数
@Override
public void pullUp(int height) {
super.pullUp(height);
}
//上拉刷新时调用
@Override
public void Loading() {
super.Loading();
}
//预加载时调用
@Override
public void PreLoading() {
super.PreLoading();
}
//下拉刷新时调用
@Override
public void Refreshing() {
                        }
                    });
#### 2.如何集成到你的项目,该如何弄
> 头布局和尾布局换成你的就行了,为什么不集成各种默认的头布局,封装?一是懒,二是实际项目中封装再多也不一定有你要的,没必要做那么多无用
1. 先看看我的默认实现

1.  纯代码写的,android的代码中确实不好写布局
 也有单独代码调用的 addheader addFooter方法

--当然你可以写在xml中写,然后用LayoutInfinite来加载头部尾部View
1. 然后headLayout.add你的头布局  this.headerHeight=头布局高度 --headerHeight有用来作为加载停留的位置
然后headLayout.getlayotparams.topMargin = -headerHeight;将头布局隐藏
1. footLayout.add你的尾布局 this.footerHeight=尾布局高度
1. 动画的实现:请参考代码中默认的headerprogress;headTitle的实现
public SRecyclerView addDefaultHeaderFooter() {
    isusingDefault = true;
    this.headerHeight = dp2px(65);
    RelativeLayout relativeLayout = new RelativeLayout(getContext());
    RelativeLayout.LayoutParams params1 = new RelativeLayout.LayoutParams(ViewGroup.LayoutParams.MATCH_PARENT, ViewGroup.LayoutParams.WRAP_CONTENT);
    params1.addRule(RelativeLayout.CENTER_IN_PARENT);
    relativeLayout.setLayoutParams(params1);
    ImageView imageView = new ImageView(getContext());
    imageView.setImageResource(R.drawable.ptr_background);
// imageView.setImageBitmap(BitmapFactory.decodeByteArray(bg, 0, bg.length));
imageView.setScaleType(ImageView.ScaleType.CENTER_INSIDE);
RelativeLayout.LayoutParams paramsimageView = new RelativeLayout.LayoutParams(ViewGroup.LayoutParams.MATCH_PARENT, ViewGroup.LayoutParams.WRAP_CONTENT);
paramsimageView.addRule(RelativeLayout.CENTER_HORIZONTAL);
imageView.setId(12);
imageView.setPadding(0, dp2px(12), 0, 0);
imageView.setLayoutParams(paramsimageView);
relativeLayout.addView(imageView);
    LinearLayout linearLayout1 = new LinearLayout(getContext());
    RelativeLayout.LayoutParams linearLayout1params1 = new RelativeLayout.LayoutParams(ViewGroup.LayoutParams.WRAP_CONTENT, ViewGroup.LayoutParams.WRAP_CONTENT);
    linearLayout1params1.addRule(RelativeLayout.BELOW, 12);
    linearLayout1params1.addRule(RelativeLayout.CENTER_HORIZONTAL);
    linearLayout1.setLayoutParams(linearLayout1params1);


    headerprogress = new ImageView(getContext());
// headerprogress.setImageBitmap(BitmapFactory.decodeByteArray(pro, 0, pro.length));
headerprogress.setImageResource(R.drawable.ptr_loading);
    headTitle = new TextView(getContext());
    headTitle.setText("下拉刷新");
    LayoutParams headTitleparams = new LayoutParams(ViewGroup.LayoutParams.WRAP_CONTENT, ViewGroup.LayoutParams.WRAP_CONTENT);
    headTitleparams.gravity = Gravity.CENTER_VERTICAL;
    headTitle.setPadding(dp2px(5), 0, 0, 0);
    headTitle.setLayoutParams(headTitleparams);

    linearLayout1.addView(headerprogress);
    linearLayout1.addView(headTitle);

    relativeLayout.addView(linearLayout1);

    headLayout.removeAllViews();
    LayoutParams params2 = new LayoutParams(ViewGroup.LayoutParams.MATCH_PARENT, headerHeight);
    params2.gravity = Gravity.CENTER_VERTICAL;
    headLayout.setOrientation(HORIZONTAL);
    params2.topMargin = -headerHeight;
    headLayout.setLayoutParams(params2);
    headLayout.addView(relativeLayout);


    this.footHeight = dp2px(45);
    footLayout.removeAllViews();
    LinearLayout linearLayout2 = new LinearLayout(getContext());
    linearLayout2.setOrientation(HORIZONTAL);
    LayoutParams layoutParams2 = new LayoutParams(ViewGroup.LayoutParams.WRAP_CONTENT, footHeight);
    layoutParams2.gravity = Gravity.CENTER_VERTICAL;
    linearLayout2.setLayoutParams(layoutParams2);
    ProgressBar progressBar = new ProgressBar(getContext());
    LayoutParams params3 = new LayoutParams(dp2px(30), dp2px(30));
    params3.gravity = Gravity.CENTER_VERTICAL;
    progressBar.setLayoutParams(params3);
    Drawable drawable = getResources().getDrawable(R.drawable.ptr_loading);
    drawable.setBounds(0, 0, dp2px(30), dp2px(30));
    progressBar.setProgressDrawable(drawable);

    TextView footText = new TextView(getContext());
    footText.setText("正在加载...");
    LayoutParams params4 = new LayoutParams(ViewGroup.LayoutParams.WRAP_CONTENT, ViewGroup.LayoutParams.WRAP_CONTENT);
    params4.gravity = Gravity.CENTER_VERTICAL;
    footText.setLayoutParams(params4);

    linearLayout2.addView(progressBar);
    linearLayout2.addView(footText);
    footLayout.addView(linearLayout2);
    LayoutParams layoutParams = new LayoutParams(ViewGroup.LayoutParams.WRAP_CONTENT, footHeight);
    layoutParams.gravity = Gravity.CENTER_HORIZONTAL;
    footLayout.setLayoutParams(layoutParams);

    return this;
}
#### 3.原理 NestedScrolling机制
[思路来源参考自马云飞博客打造独一无二的下拉刷新](http://blog.csdn.net/sw950729)
根据他的做了自己的实现,大家可以去查看详细的原理说明。

overscroll的实现:就是空的头尾布局,并去掉加载停留阶段

预加载:大家不想要我这个View的也可单独把这段拿去自己的RecyclerView上用

更多细节使用请参考demo
myRecyclerView.addOnScrollListener(new RecyclerView.OnScrollListener() {
@Override
public void onScrolled(RecyclerView recyclerView, int dx, int dy) {
super.onScrolled(recyclerView, dx, dy);
                RefreshLoading(recyclerView, count);
        }
    });
//count:倒数几个开始加载
private void RefreshLoading(RecyclerView recyclerView, int count) {
if (isLoading || prenomore) {
return;
}
int lastPosition = -1;
    RecyclerView.LayoutManager layoutManager = recyclerView.getLayoutManager();
    if (layoutManager instanceof StaggeredGridLayoutManager) {
        //因为StaggeredGridLayoutManager的特殊性可能导致最后显示的item存在多个,所以这里取到的是一个数组
        //得到这个数组后再取到数组中position值最大的那个就是最后显示的position值了
        int[] lastPositions = new int[((StaggeredGridLayoutManager) layoutManager).getSpanCount()];
        ((StaggeredGridLayoutManager) layoutManager).findLastVisibleItemPositions(lastPositions);
        lastPosition = findMax(lastPositions);
    } else if (layoutManager instanceof LinearLayoutManager) {
        lastPosition = ((LinearLayoutManager) layoutManager).findLastVisibleItemPosition();
    } else if (layoutManager instanceof GridLayoutManager) {
        //通过LayoutManager找到当前显示的最后的item的position
        lastPosition = ((GridLayoutManager) layoutManager).findLastVisibleItemPosition();
    }

    //内容数量很少无需要预加载
    if (recyclerView.getLayoutManager().getItemCount() - count < 0) {
        return;
    }
    if (lastPosition >= recyclerView.getLayoutManager().getItemCount() - count) {
        if (!isLoading) {
            isLoading = true;
            listener.PreLoading();
        }
    }

}

//找到数组中的最大值
private int findMax(int[] lastPositions) {
    int max = lastPositions[0];
    for (int value : lastPositions) {
        if (value > max) {
            max = value;
        }
    }
    return max;
}
#### 4.其他
大家也看到demo中少了 2 和4两个选项。本来还有个Fling的实现,由于有少许bug,临时删掉了。但在SScrollview中有保留
大家感兴趣的可以查看。其他用法基本和SRecyclerview一样
sscrollview.setRefreshMode(true,true,false,false)
//fling 头部是否出来 尾部是否出来 是否加载
//boolean overscrollhead, boolean overscrollfoot, boolean overloadingheader, boolean overloadingfooter
.setOverScrollEnable(true,true,true,true);
####总结
> 我们做了什么:
1.RecyclerVire ScrollView,WebView或者任何NestedScrollingChild的OverScroll 下拉加载 ,估值模式下根据数值做任何你想做的,可参看上面实际项目的图片,[以及DEMO](http://pan.baidu.com/s/1gfxM40N)  ——————— [ githu代码](https://github.com/While1true/JSSample/tree/master)Sample3目录下
# [ 最新库说明传送门](http://www.jianshu.com/p/88795dff987c)
# [最新库 github传送门](https://github.com/While1true/NestPullView)


[累了来听首歌--咏梅](https://changba.com/s/VxmBhNm_g7_SohfNT4TsMQ?&code=RkvQSz26kloiq37EELKi5jfO_iIrZXqjqcgQ1_FoPj_bUJnu-s0jIMTHc3rAO8C9RRlOS2KAxvm13fMb5yk6GGraA4Xc7RJTcZEMgiGcARc)


——
aa

