上次分析了一下CircleImageView,这次来看一下它的父类ImageView是如何加载图片出来的。
经过上次的自定义View分析,应该知道一个View的大概流程是怎样的。现在我们套路一下ImageView是如何的;
构造函数

因为是ImageView就直接截图了,源码是22的版本。还是从构造函数开始,在xml布局文件

就这样设置ImageView,系统会调用两个参数的构造函数,看看两个参数的构造函数做了什么。就调用三个参数的,而三个参数就调用四个参数的构造函数。我们直接看四个参数的那么。
 public ImageView(Context context, AttributeSet attrs, int defStyleAttr, int defStyleRes) {
        super(context, attrs, defStyleAttr, defStyleRes);

        initImageView();

        final TypedArray a = context.obtainStyledAttributes(
                attrs, com.android.internal.R.styleable.ImageView, defStyleAttr, defStyleRes);

        Drawable d = a.getDrawable(com.android.internal.R.styleable.ImageView_src);
        if (d != null) {
            setImageDrawable(d);
        }

        mBaselineAlignBottom = a.getBoolean(
                com.android.internal.R.styleable.ImageView_baselineAlignBottom, false);

        mBaseline = a.getDimensionPixelSize(
                com.android.internal.R.styleable.ImageView_baseline, -1);

        setAdjustViewBounds(
            a.getBoolean(com.android.internal.R.styleable.ImageView_adjustViewBounds,
            false));

        setMaxWidth(a.getDimensionPixelSize(
                com.android.internal.R.styleable.ImageView_maxWidth, Integer.MAX_VALUE));

        setMaxHeight(a.getDimensionPixelSize(
                com.android.internal.R.styleable.ImageView_maxHeight, Integer.MAX_VALUE));

        final int index = a.getInt(com.android.internal.R.styleable.ImageView_scaleType, -1);
        if (index >= 0) {
            setScaleType(sScaleTypeArray[index]);
        }

        if (a.hasValue(R.styleable.ImageView_tint)) {
            mDrawableTintList = a.getColorStateList(R.styleable.ImageView_tint);
            mHasDrawableTint = true;

            // Prior to L, this attribute would always set a color filter with
            // blending mode SRC_ATOP. Preserve that default behavior.
            mDrawableTintMode = PorterDuff.Mode.SRC_ATOP;
            mHasDrawableTintMode = true;
        }

        if (a.hasValue(R.styleable.ImageView_tintMode)) {
            mDrawableTintMode = Drawable.parseTintMode(a.getInt(
                    R.styleable.ImageView_tintMode, -1), mDrawableTintMode);
            mHasDrawableTintMode = true;
        }

        applyImageTint();

        final int alpha = a.getInt(com.android.internal.R.styleable.ImageView_drawableAlpha, 255);
        if (alpha != 255) {
            setAlpha(alpha);
        }

        mCropToPadding = a.getBoolean(
                com.android.internal.R.styleable.ImageView_cropToPadding, false);

        a.recycle();

        //need inflate syntax/reader for matrix
    }
代码有点长就直接黏过来了。先说说大概的整个流程:
initImageView()方法的调用 ---> 获取ImageVIew的属性TypedArray属性数组 ---> 通过xml布局文件的src属性获取Drawable ----> 调用setImageDrawable设置Drawable(这个是一个核心方法) --->
获取是否对齐的底部的基准线 mBaselineAlignBottom ;mBaseline的值,这个不是这篇文章的重点就不关注了。 ---> 调用setAdjustViewBounds()是否调整ImageView边界 ---> 设定MaxWidth和MaxHeight 当然这个是基于xml布局文件是否有写,没有就是Integer的最大值。 ----> 获取scaleType值设置缩放比例
---> 获取tint值这个是5.0后新增的不是这篇文章关注的 ---> 最后就是获取剪切的内边距 mCropToPadding的值。该构造函数就是做了这些工作。然后我们细致看每一个方法;
initImageView方法
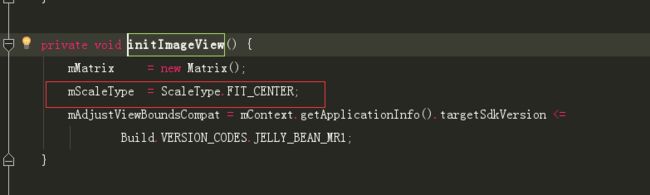
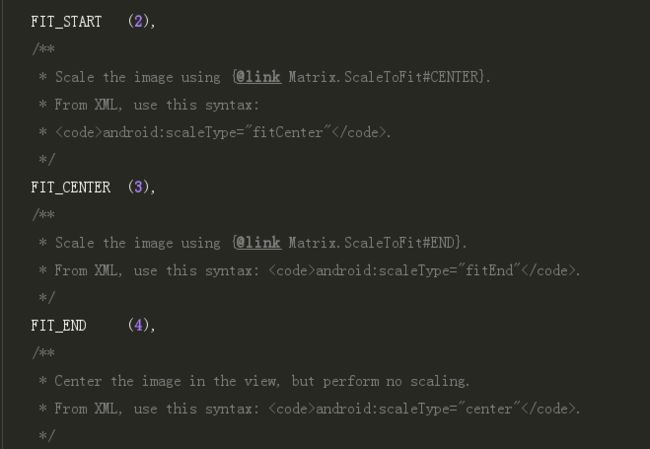
该方法要做的事情其实很简单就是设置一个默认的scaleType,当我们的xml布局文件没有设置scaleType属性就是默认的FIT_CENTER,后面再看看FIT_CENTER到底是怎么样的。还有作了一个版本判断,对于17的版本作一个分界线;
setImageDrawable(d)方法

该方法在CircleImageView也重写过该方法,主要是因为需要获取图片的宽高,我们看看在ImageView是干了什么:
大概就是获取图片的宽高,如果宽高不是原来的宽高就requestLayout()要求重新测量布局绘制ImageView。
看看setImageDrawable里面的updateDrawable()
updateDrawable()方法
private void updateDrawable(Drawable d) {
        if (mDrawable != null) {
            mDrawable.setCallback(null);
            unscheduleDrawable(mDrawable);
        }

        mDrawable = d;

        if (d != null) {
            d.setCallback(this);
            d.setLayoutDirection(getLayoutDirection());
            if (d.isStateful()) {
                d.setState(getDrawableState());
            }
            d.setVisible(getVisibility() == VISIBLE, true);
            d.setLevel(mLevel);
            mDrawableWidth = d.getIntrinsicWidth();
            mDrawableHeight = d.getIntrinsicHeight();
            applyImageTint();
            applyColorMod();

            configureBounds();
        } else {
            mDrawableWidth = mDrawableHeight = -1;
        }
    }
第一个判断就不说了就是一个mDrawable非空判断设置回调方法;因为第一次mDrawable是空的所以不会调用里面的方法;
将图片d赋值给mDrawable,设置回调,设置布局垂直还是水平方向,设置ImageView可见,获取d图片的宽高赋值给mDrawableWidth和mDrawableHeight,设置ImageTint和ColorMod,这两个方法是设置ImageVIew颜色方面的;最后就是核心代码configureBounds()看英文大概知道什么意思,就是设置ImageView的边界。
configureBounds()
private void configureBounds() {
        if (mDrawable == null || !mHaveFrame) {
            return;
        }

        int dwidth = mDrawableWidth;
        int dheight = mDrawableHeight;

        int vwidth = getWidth() - mPaddingLeft - mPaddingRight;
        int vheight = getHeight() - mPaddingTop - mPaddingBottom;

        boolean fits = (dwidth < 0 || vwidth == dwidth) &&
                       (dheight < 0 || vheight == dheight);

        if (dwidth <= 0 || dheight <= 0 || ScaleType.FIT_XY == mScaleType) {
            /* If the drawable has no intrinsic size, or we're told to
                scaletofit, then we just fill our entire view.
            */
            mDrawable.setBounds(0, 0, vwidth, vheight);
            mDrawMatrix = null;
        } else {
            // We need to do the scaling ourself, so have the drawable
            // use its native size.
            mDrawable.setBounds(0, 0, dwidth, dheight);

            if (ScaleType.MATRIX == mScaleType) {
                // Use the specified matrix as-is.
                if (mMatrix.isIdentity()) {
                    mDrawMatrix = null;
                } else {
                    mDrawMatrix = mMatrix;
                }
            } else if (fits) {
                // The bitmap fits exactly, no transform needed.
                mDrawMatrix = null;
            } else if (ScaleType.CENTER == mScaleType) {
                // Center bitmap in view, no scaling.
                mDrawMatrix = mMatrix;
                mDrawMatrix.setTranslate((int) ((vwidth - dwidth) * 0.5f + 0.5f),
                                         (int) ((vheight - dheight) * 0.5f + 0.5f));
            } else if (ScaleType.CENTER_CROP == mScaleType) {
                mDrawMatrix = mMatrix;

                float scale;
                float dx = 0, dy = 0;

                if (dwidth * vheight > vwidth * dheight) {
                    scale = (float) vheight / (float) dheight;
                    dx = (vwidth - dwidth * scale) * 0.5f;
                } else {
                    scale = (float) vwidth / (float) dwidth;
                    dy = (vheight - dheight * scale) * 0.5f;
                }

                mDrawMatrix.setScale(scale, scale);
                mDrawMatrix.postTranslate((int) (dx + 0.5f), (int) (dy + 0.5f));
            } else if (ScaleType.CENTER_INSIDE == mScaleType) {
                mDrawMatrix = mMatrix;
                float scale;
                float dx;
                float dy;

                if (dwidth <= vwidth && dheight <= vheight) {
                    scale = 1.0f;
                } else {
                    scale = Math.min((float) vwidth / (float) dwidth,
                            (float) vheight / (float) dheight);
                }

                dx = (int) ((vwidth - dwidth * scale) * 0.5f + 0.5f);
                dy = (int) ((vheight - dheight * scale) * 0.5f + 0.5f);

                mDrawMatrix.setScale(scale, scale);
                mDrawMatrix.postTranslate(dx, dy);
            } else {
                // Generate the required transform.
                mTempSrc.set(0, 0, dwidth, dheight);
                mTempDst.set(0, 0, vwidth, vheight);

                mDrawMatrix = mMatrix;
                mDrawMatrix.setRectToRect(mTempSrc, mTempDst, scaleTypeToScaleToFit(mScaleType));
            }
        }
    }
代码很多,但都是ImageView的核心,说这个方法之前看看关于ScaleType属性设置的一张图:

该图来源于http://blog.csdn.net/llew2011/article/details/50855655
该博客分析了ImageView中ScaleType8个属性的情况,挺详细的。
下面看看该方法:
这里有个判断:mDrawable是非null,但mHaveFrame是为false的,所以从updateDrawable()方法进来就在第一个判断的时候给返回了。
那么在哪里再次调用configureBounds()呢?
被返回后,系统调用onMeasure方法,测量完宽高后,会调用setFrame()方法,而setFrame()方法是在onLayout()方法里面被调用的。先看看这个方法干什么的:

它就是将mHaveFrame变量设置为true后再次调用了configureBounds();
再看回configureBounds()方法:
dwidth = mDrawableWidth;
dheight = mDrawableHeight;
d宽高记录图片的宽高;
int vwidth = getWidth() - mPaddingLeft - mPaddingRight;
int vheight = getHeight() - mPaddingTop - mPaddingBottom;
获取ImageView可以给图片存放的宽高就称ImageView的真实宽高v;
因为已经调用过onMeasure方法,所以能获取到ImageView的宽高值;
fits的boolean值用于记录当获取不到图片宽高时或者图片宽高与ImageVIew相等时;
下面是一系列判断:
**当ScaleType.FIT_XY == mScaleType时,drawable的显示边界就是ImageVIew的宽高。
**
**
当ScaleType.MATRIX == mScaleType时,给mDrawMatrix设置null或mMatrix;这里如果fits标记为true(即获取不到图片宽高时或者图片宽高与ImageVIew相等),mDrawMatrix设置null
**
**
当ScaleType.CENTER == mScaleType时,给mDrawMatrix设mMatrix;
mDrawMatrix平移,让图片的中心点移动到ImageView的中心点
**
**
当ScaleType.CENTER_CROP == mScaleType时,这个在CircleImageVIew就是用该缩放策略。主要就是将图片设置到ImageView中间,设置缩放比,与CENTER不同就是该属性是有缩放的,而CENTER是没有缩放,多余部分去掉。
**
**
ScaleType.CENTER_INSIDE == mScaleType,其实就两种情况:ImageVIew的宽高大于图片宽高时候,不进行缩放;而ImageView宽高小于图片宽高时,取较小的宽高比,作为缩放比,图片也是平移到ImageView中间。
**
**
剩余情况:mScaleType为FIT_CENTER,FIT_START,FIT_END的统一处理。设置源矩形边界和目标矩形边界(mTempSrc、mTempDst),调用mDrawMatrix的mDrawMatrix.setRectToRect(mTempSrc, mTempDst, scaleTypeToScaleToFit(mScaleType))方法来对图片进行放缩和移动操作;
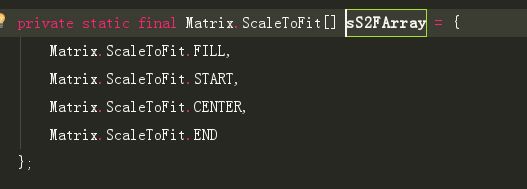
scaleTypeToScaleToFit里面的值是与ScaleType枚举是对应的
**
整个构造函数讲完再到onMeasure,onDraw方法,由于是View非ViewGroup所以ImageView没有重写onLayout方法
onMeasure()方法
@Override
    protected void onMeasure(int widthMeasureSpec, int heightMeasureSpec) {
        resolveUri();
        int w;
        int h;

        // Desired aspect ratio of the view's contents (not including padding)
        float desiredAspect = 0.0f;

        // We are allowed to change the view's width
        boolean resizeWidth = false;

        // We are allowed to change the view's height
        boolean resizeHeight = false;

        final int widthSpecMode = MeasureSpec.getMode(widthMeasureSpec);
        final int heightSpecMode = MeasureSpec.getMode(heightMeasureSpec);

        if (mDrawable == null) {
            // If no drawable, its intrinsic size is 0.
            mDrawableWidth = -1;
            mDrawableHeight = -1;
            w = h = 0;
        } else {
            w = mDrawableWidth;
            h = mDrawableHeight;
            if (w <= 0) w = 1;
            if (h <= 0) h = 1;

            // We are supposed to adjust view bounds to match the aspect
            // ratio of our drawable. See if that is possible.
            if (mAdjustViewBounds) {
                resizeWidth = widthSpecMode != MeasureSpec.EXACTLY;
                resizeHeight = heightSpecMode != MeasureSpec.EXACTLY;

                desiredAspect = (float) w / (float) h;
            }
        }

        int pleft = mPaddingLeft;
        int pright = mPaddingRight;
        int ptop = mPaddingTop;
        int pbottom = mPaddingBottom;

        int widthSize;
        int heightSize;

        if (resizeWidth || resizeHeight) {
            /* If we get here, it means we want to resize to match the
                drawables aspect ratio, and we have the freedom to change at
                least one dimension.
            */

            // Get the max possible width given our constraints
            widthSize = resolveAdjustedSize(w + pleft + pright, mMaxWidth, widthMeasureSpec);

            // Get the max possible height given our constraints
            heightSize = resolveAdjustedSize(h + ptop + pbottom, mMaxHeight, heightMeasureSpec);

            if (desiredAspect != 0.0f) {
                // See what our actual aspect ratio is
                float actualAspect = (float)(widthSize - pleft - pright) /
                                        (heightSize - ptop - pbottom);

                if (Math.abs(actualAspect - desiredAspect) > 0.0000001) {

                    boolean done = false;

                    // Try adjusting width to be proportional to height
                    if (resizeWidth) {
                        int newWidth = (int)(desiredAspect * (heightSize - ptop - pbottom)) +
                                pleft + pright;

                        // Allow the width to outgrow its original estimate if height is fixed.
                        if (!resizeHeight && !mAdjustViewBoundsCompat) {
                            widthSize = resolveAdjustedSize(newWidth, mMaxWidth, widthMeasureSpec);
                        }

                        if (newWidth <= widthSize) {
                            widthSize = newWidth;
                            done = true;
                        }
                    }

                    // Try adjusting height to be proportional to width
                    if (!done && resizeHeight) {
                        int newHeight = (int)((widthSize - pleft - pright) / desiredAspect) +
                                ptop + pbottom;

                        // Allow the height to outgrow its original estimate if width is fixed.
                        if (!resizeWidth && !mAdjustViewBoundsCompat) {
                            heightSize = resolveAdjustedSize(newHeight, mMaxHeight,
                                    heightMeasureSpec);
                        }

                        if (newHeight <= heightSize) {
                            heightSize = newHeight;
                        }
                    }
                }
            }
        } else {
            /* We are either don't want to preserve the drawables aspect ratio,
               or we are not allowed to change view dimensions. Just measure in
               the normal way.
            */
            w += pleft + pright;
            h += ptop + pbottom;

            w = Math.max(w, getSuggestedMinimumWidth());
            h = Math.max(h, getSuggestedMinimumHeight());

            widthSize = resolveSizeAndState(w, widthMeasureSpec, 0);
            heightSize = resolveSizeAndState(h, heightMeasureSpec, 0);
        }

        setMeasuredDimension(widthSize, heightSize);
    }
方法很长其实关于测量宽高的方法不在这里,而在resolveSizeAndState()方法里面,不过我们也看看onMeasure里面的逻辑。
resolveUri()方法就是通过其他途径获取图片资源的方法。
final int widthSpecMode = MeasureSpec.getMode(widthMeasureSpec);
final int heightSpecMode = MeasureSpec.getMode(heightMeasureSpec);
获取宽高模式用于测量宽高;
w = mDrawableWidth;
h = mDrawableHeight;
将图片的宽高赋值给w,h
mAdjustViewBounds该值意思是是否调整ImageView的边界;
resizeWidth和resizeHeight默认值是false,所以不看if里面看else的:
else里面的代码不多;
w += pleft + pright;
h += ptop + pbottom;
w = Math.max(w, getSuggestedMinimumWidth());
h = Math.max(h, getSuggestedMinimumHeight());
就是获取ImageView的宽高,getSuggestedMinimumHeight方法就是取最小值为宽高。因为ImageView属性有minHeight和minWidth;
关键看resolveSizeAndState()方法
resolveSizeAndState()方法
该方法是父类即View提供的,其实我们写继承View的自定义View都可以抄这里的代码;
就是通过不同的MeasureSpec模式获取宽高,默认情况MeasureSpec.EXACTLY都是获取MeasureSpec.getSize(measureSpec);的值,只是当getMode等于MeasureSpec.AT_MOST,就需要计算,而ImageView就是获取图片的宽高为ImageView的宽高。看看源码:
 public static int resolveSizeAndState(int size, int measureSpec, int childMeasuredState) {
        final int specMode = MeasureSpec.getMode(measureSpec);
        final int specSize = MeasureSpec.getSize(measureSpec);
        final int result;
        switch (specMode) {
            case MeasureSpec.AT_MOST:
                if (specSize < size) {
                    result = specSize | MEASURED_STATE_TOO_SMALL;
                } else {
                    result = size;
                }
                break;
            case MeasureSpec.EXACTLY:
                result = specSize;
                break;
            case MeasureSpec.UNSPECIFIED:
            default:
                result = size;
        }
        return result | (childMeasuredState & MEASURED_STATE_MASK);
这里主要看
case MeasureSpec.AT_MOST:
                if (specSize < size) {
                    result = specSize | MEASURED_STATE_TOO_SMALL;
                } else {
                    result = size;
                }
                break;
这部分。这部分意思就是:
当specMode为AT_MOST,并且父控件指定的尺寸specSize小于View自己想要的尺寸时,我们就会用MEASURED_STATE_TOO_SMALL标记加入尺寸太小作为标记这样其父ViewGroup就可以通过该标记其给子View的尺寸大小了,然后可能分配更大一点的尺寸给子View
因为MEASURED_STATE_TOO_SMALL实际数是:0x01000000
它在高位的第二位记1作为一个标记位,因为对于measureSpec,高两位的后面才是记录size的所以MEASURED_STATE_TOO_SMALL放在高位第二位不影响specSize值的变化
onDraw方法
onDraw方法其实做的事情很少就是将drawable即图片画进ImageView中,这里看看核心代码
if (mDrawMatrix == null && mPaddingTop == 0 && mPaddingLeft == 0) {
           mDrawable.draw(canvas);
       } else {
           int saveCount = canvas.getSaveCount();
           canvas.save();

           if (mCropToPadding) {
               final int scrollX = mScrollX;
               final int scrollY = mScrollY;
               canvas.clipRect(scrollX + mPaddingLeft, scrollY + mPaddingTop,
                       scrollX + mRight - mLeft - mPaddingRight,
                       scrollY + mBottom - mTop - mPaddingBottom);
           }

           canvas.translate(mPaddingLeft, mPaddingTop);

           if (mDrawMatrix != null) {
               canvas.concat(mDrawMatrix);
           }
           mDrawable.draw(canvas);
           canvas.restoreToCount(saveCount);
       }
基本上就这样。整个ImageView核心的代码,当然里面还有很多方法没有讲到。以后有机会用到再总结一下。上面最最最核心的就是对于8个ScaleType属性的处理。