一、合并脚本
最终使用的jsmpeg.min.js其实就是源码src目录下的所有js合并而成。可以自行修改,然后使用以下脚本合并运行。前几个系列已经学习了视频解码部分,音频部分使用了mp2+webaudio,暂时不作分析。现在再把剩余的几个类简单看一下。
var gulp = require('gulp');
var concat = require("gulp-concat");
var uglify = require('gulp-uglify');
gulp.task('concat', function() {
    gulp.src(['src/jsmpeg.js',
    'src/video-element.js',
    'src/player.js',
    'src/buffer.js',
    'src/ajax.js',
    'src/ajax-progressive.js',
    'src/websocket.js',
    'src/ts.js',
    'src/decoder.js',
    'src/mpeg1.js',
    'src/mp2.js',
    'src/webgl.js',
    'src/canvas2d.js',
    'src/webaudio.js'
    ])
    .pipe(concat('jsmpeg.min3.js'))
    //.pipe(uglify())
    .pipe(gulp.dest(''));
});

gulp.task('default', ['concat']);
二、jsmpeg.js
这里封装了命名空间及子空间,入口指向了JSMpeg.CreateVideoElements
    CreateVideoElements: function() {
        var elements = document.querySelectorAll('.jsmpeg');
        for (var i = 0; i < elements.length; i++) {
            new JSMpeg.VideoElement(elements[i]);
        }
    }
三、video-element.js
    // A Video Element wraps the Player, shows HTML controls to start/pause
    // the video and handles Audio unlocking on iOS. VideoElements can be
    // created directly in HTML using the  tag.
最终指向了这里
    // Create the player instance
    this.player = new JSMpeg.Player(url, options);
    element.playerInstance = this.player;
四、readme里的参数说明
The url argument accepts a URL to an MPEG .ts file or a WebSocket server (ws://...).
The options argument supports the following properties:
-
canvas– the HTML Canvas elment to use for video rendering. If none is given, the renderer will create its own Canvas element. -
loop– whether to loop the video (static files only). Defaulttrue. -
autoplay- whether to start playing immediately (static files only). Defaultfalse. -
audio- whether to decode audio. Defaulttrue. -
video- whether to decode video. Defaulttrue. -
poster– URL to an image to use as the poster to show before the video plays. -
pauseWhenHidden– whether to pause playback when the tab is inactive. Defaulttrue. Note that browsers usually throttle JS in inactive tabs anyway. -
disableGl- whether to disable WebGL and always use the Canvas2D renderer. Defaultfalse. -
preserveDrawingBuffer– whether the WebGL context is created withpreserveDrawingBuffer- necessary for "screenshots" viacanvas.toDataURL(). Defaultfalse. -
progressive- whether to load data in chunks (static files only). When enabled, playback can begin before the whole source has been completely loaded. Defaulttrue.边下边播 -
throttled- when usingprogressive, whether to defer loading chunks when they're not needed for playback yet. Defaulttrue. -
chunkSize- when usingprogressive, the chunk size in bytes to load at a time. Default1024*1024(1mb). -
decodeFirstFrame- whether to decode and display the first frame of the video. Useful to set up the Canvas size and use the frame as the "poster" image. This has no effect when usingautoplayor streaming sources. Defaulttrue. -
maxAudioLag– when streaming, the maximum enqueued audio length in seconds. -
videoBufferSize– when streaming, size in bytes for the video decode buffer. Default 512*1024 (512kb). You may have to increase this for very high bitrates. -
audioBufferSize– when streaming, size in bytes for the audio decode buffer. Default 128*1024 (128kb). You may have to increase this for very high bitrates.
All options except from canvas can also be used with the HTML Element through data- attributes. E.g. to specify looping and autoplay in JavaScript:
var player = new JSMpeg.Player('video.ts' {loop: true, autoplay: true});
or HTML
Note that camelCased options have to be hyphenated when used as data attributes. E.g. decodeFirstFrame: true becomes data-decode-first-frame="true" for the HTML element.
五、搭建测试环境
1.README.md
JSMpeg is a Video Player written in JavaScript. It consists of an MPEG-TS demuxer, MPEG1 video & MP2 audio decoders, WebGL & Canvas2D renderers and WebAudio sound output. JSMpeg can load static videos via Ajax and allows low latency streaming (~50ms) via WebSockets.
JSMpeg can decode 720p Video at 30fps on an iPhone 5S, works in any modern browser (Chrome, Firefox, Safari, Edge) and comes in at just 20kb gzipped.
Using it can be as simple as this:
Some more info and demos: jsmpeg.com
2.jsmpeg.com的例子
查看html的element,然后下载这个示例的Ts文件
发现本地直接打开这个html是播放不了的,需要部署到服务器上。这下可以播放本地文件了,可以参照readme加上data-loop="true" data-autoplay="true"这些控制属性。
这里把div换成canvas,或者把TS本地文件变成mpg文件,都播放不了。
3.使用script代码来播放
options参数参见readme.md
4.不支持 B-Frames,视频宽度必须是 2 的倍数
JSMpeg only supports playback of MPEG-TS containers with the MPEG1 Video Codec and the MP2 Audio Codec. The Video Decoder does not handle B-Frames correctly (though no modern encoder seems to use these by default anyway) and the width of the video has to be a multiple of 2.
You can encode a suitable video using ffmpeg like this:
ffmpeg -i in.mp4 -f mpegts -codec:v mpeg1video -codec:a mp2 -b 0 out.ts
5.使用websocket(nginx)
这里我先尝试用nginx搭建websocket,参考配置 Nginx 反向代理 WebSocket,先用node.js的ws模块启动了ws://localhost:8010,可以连接成功。但是,后面使用niinx配置反向代理失败了,连接ws://ws.repo/一直失败,原因不明,配置文件如下:
worker_processes 1;
error_log logs/error.log debug;
events {
worker_connections 1024;
}
http{
map $http_upgrade $connection_upgrade {
default upgrade;
'' close;
}
upstream ws_server {
#ip_hash;
server localhost:8010;
}
# 以下配置是在server上下文中添加,location指用于websocket连接的path。
server {
listen 80;
server_name ws.repo;
access_log /var/log/nginx/yourdomain.log;
location / {
proxy_pass http://192.168.198.102:8010;
#proxy_pass http://ws_server/;
proxy_redirect off;
proxy_http_version 1.1;
proxy_set_header Upgrade $http_upgrade;
proxy_set_header Connection $connection_upgrade;
}
}
}
6.参考jsmpeg官方文档(这里,官网也在使用node.js来操作websocket-relay.js)
这里先npm init ws -D,然后node websocket-relay ququ 9091 9092
Listening for incomming MPEG-TS Stream on http://127.0.0.1:9091/
Awaiting WebSocket connections on ws://127.0.0.1:9092/
注意看,推流要推到上面那个9091端口;而播放视频则要用下面那个WS的9092端口。现在我们拿在线测试websocket工具已经可以连接9092了
然后就是推流操作,这里参考HTML5 视频直播(二)是看不到的,原因就是那个-f mpeg1video:
ffmpeg -re -i bjork-all-is-full-of-love.ts -codec copy
-f mpeg1video http://127.0.0.1:9091/ququ
需要把-f mpeg1video改成-f mpegts,因为我们用的是ts后缀的文件啊。这也是参照官网readme才发现的,另外就是demo传的url就是ws的字符串。
六、其它
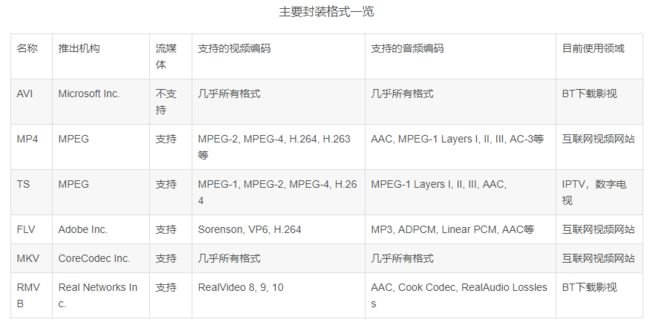
1.ffmpeg是有声音的,虽然 HTML5 视频直播(二)的作者写着没有声音。估计是代码库版本有变化。另外 mpg格式也不支持,现在是TS格式。参考[总结]视音频编解码技术零基础学习方法
还有视音频编解码学习工程:TS封装格式分析器
2.对比Broadway,ffmpeg是从零写出的,可读性好很多。
Broadway 是一个 H.264 解码器,使用 Emscripten 工具从 Android 的 H.264 解码器转化而成,它还针对 WebGL 做了一些优化。
这个解码器支持 mp4 后缀的视频文件,有一些限制:不支持 weighted prediction for P-frames 和 CABAC entropy encoding。例如 iPhone 拍摄的视频它就不支持,可以用 FFmpeg 转一下:
ffmpeg -i in.mp4 -vcodec libx264 -pass 1 -coder 0 -bf 0 -flags -loop -wpredp 0 out.mp4
下面是 H.264 解码示例,视频来自于我的 iPhone 拍摄。用阅读器的同学请点到原文查看。
这里还有一个长一点的 Demo,点击查看(加载完 6M 多的 mp4 文件才开始播放,请耐心等待,流量党慎入)。
3.HTML5直播技术探究
传统直播技术,大多使用RTMP通过Flash进行传输。随着HTML5的逐渐实现,
目前的HTML5直播思路有以下几种。
一是使用js调用WebGL渲染视频,用websocket/XHR传输,比如jsmpeg项目, 实现了一个MPEG1的js解析器,该项目存在很多bug(今天凌晨刚刚收到jsmpeg作者的github信息,说他已经修复了好几个我提过的bug,并且重写了代码),另外由于MPEG1的效能极低(比GIF好不了多少),传输的视频 质量较差,而且js解析消耗很高CPU,这种方案不是很理想。
二是使用Native的解码方案,使用MediaSourceExtension。比如B站开源的flv.js
4.我想在egret里面 引入第三方jsmpg库
这里有回复提供了jsmpeg的d.ts文件
