创建Xcode项目
打开Xcode 6以上的版本并创建一个新项目。
工程命名可以根据个人喜好命名,这里的工程命名为Keyboard。以其为主项目,还需要对项目添加扩展。
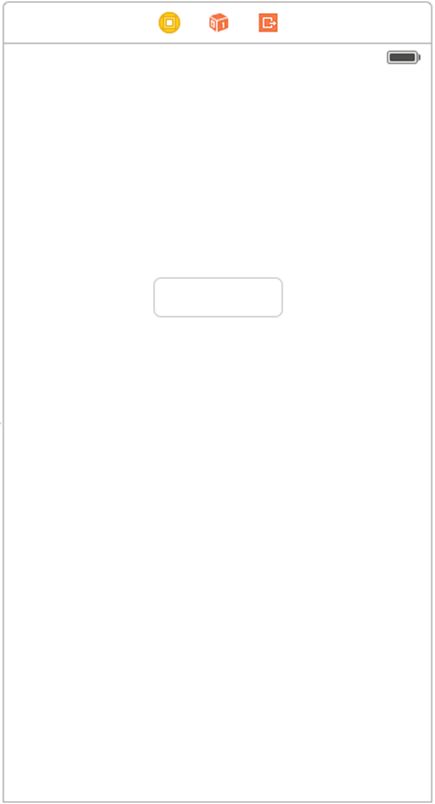
添加一个Text Field,用于弹出自定义键盘。在项目中,打开Main.Storyboard文件,然后在屏幕上的默认的视图控制器上拖放一个UITextField控件,最好拖放在视图的上方,以防弹出的键盘将TextField遮挡了,无法查看输入效果。
添加扩展
点击File-> New -> Target,选择在iOS/Application
Extension列表中的自定义输入法(Custom Keyboard)。给该扩展命名为CustomKeyboard并选择Object-C编程语言。
新建出来的文件夹中有.h/.m文件,我们自定义键盘就在这两个扩展文件上进行。
此时可以直接在模拟器上运行了,在测试前,首先要对系统键盘进行设置,在模拟器中跳转到主界面,打开设置并转到通用->键盘->键盘。点击“添加新键盘”,然后选择CustomKeyboard,这里的键盘名字为你的工程名。
但是运行的结果是什么都没有的,在键盘的左下角显示“Next Keyboard”按钮,相当于系统默认键盘上的地球按钮,点击切换输入法。
添加按钮
打开文件.h文件。在这个文件中,你会看到一个类继承自UIInputViewController。这是管理视图的键盘类。往该视图上添加按钮,所添加的按钮就会在键盘中显示出来。
创建一个添加按钮的方法createButtonWithTitle,在此方法中新建UIButton,并根据个人喜欢对button进行设置。参数title就是各个按钮上面显示的字母,稍后通过数组对title进行传值。
Button可以使用xib进行创建,为了节省时间,这里使用方法来进行创建
这个项目的开发思路是,将整个键盘划分为4行,每一行的按钮分别添加到一个视图中,即有4个存放按钮的视图,最后将4个视图添加到Keyboard视图上。
- (UIButton )createButtonWithTitle:(NSString)title{
 UIButton*button = [UIButton buttonWithType:(UIButtonTypeSystem)];
 button.frame = CGRectMake(0, 0, 20, 30);
 [button setTitle:title forState:(UIControlStateNormal)];
 [button sizeToFit];
 button.titleLabel.font = [UIFont systemFontOfSize:15];
 [button setTranslatesAutoresizingMaskIntoConstraints:false];
 button.backgroundColor = [UIColor clearColor];
 [button setTitleColor:[UIColor darkGrayColor] forState:(UIControlStateNormal)];
 [button addTarget:self action:@selector(didTapButton:) forControlEvents:(UIControlEventTouchUpInside)];
 returnbutton;
 }
上述代码中,button添加一个方法didTapButton,此方法用于点击button时,获取button对应输入的文本内容。
触发按钮方法
这里需要获取用户点击哪个button,根据不同的按钮执行不同的操作。如24个字母键就显示文本内容,shift键切换大小写。
同时也对字母按钮与功能按钮进行区分,可以使用UIInputViewController的属性textDocumentProxy的一些方法。如insertText就是将内容显示到TextField中,deleteBackward相当于退格按钮。
此处功能键上的显示使用英文代替,自己开发的使用可以使用图片代替。因此切换大小写会是全部功能键的改变。
//获取点击按钮的title
- (void)didTapButton:(UIButton)sender{
NSStringtitle = [sender titleForState:(UIControlStateNormal)];
//响应触摸事件的文本内容
if([title isEqualToString:@"cp"] || [title isEqualToString:@"CP"]){
self.isPressShiftKey = !self.isPressShiftKey;
//大小写转换
[self changeUpOrDown:sender];
}
elseif ([title isEqualToString:@"dp"] || [title isEqualToString:@"DP"]){
[self.textDocumentProxy deleteBackward];
}
elseif ([title isEqualToString:@"Space"]){
[self.textDocumentProxy insertText:@" "];
}
elseif ([title isEqualToString:@"return"]){
[self.textDocumentProxy insertText:@"\n"];
}
elseif ([title isEqualToString:@"next"]){
[self advanceToNextInputMode];
}
else{
[self.textDocumentProxy insertText:title];
}
}
添加按钮约束
一个全键盘样式的键盘上有24个字母,外加一些特殊的功能键,为了对按钮进行布局,可以使用auto layout,VFL布局还有万能公式布局。虽然auto layout可以采用界面添加约束,但是这么多个按钮同时添加约束,要求添加约束的思路非常清晰,同时添加约束的界面可能非常卡顿。所以这里使用万能公式布局,对按钮进行一次性的添加约束。
按钮布局代码比较多,只要理清思路就没问题了,注意每一个按钮之间的关系。
//button约束
 -(void)addButtonLayoutConstraint:(NSMutableArray)buttonsandView:(UIView)keyboardView{
 for(UIButton *button in buttons) {
 //边距
 NSInteger space = 0;
 NSInteger index = [buttons indexOfObject:button];
 //关闭button自动翻译约束的功能
 button.translatesAutoresizingMaskIntoConstraints = NO;
 //万能代码约束
 //顶部约束
 NSLayoutConstraint *topConstraint = [NSLayoutConstraint constraintWithItem:buttonattribute:NSLayoutAttributeTop relatedBy:NSLayoutRelationEqual toItem:keyboardViewattribute:NSLayoutAttributeTop multiplier:1.0 constant:space];
 //底部约束
 NSLayoutConstraint *buttomConstraint = [NSLayoutConstraint constraintWithItem:buttonattribute:NSLayoutAttributeBottom relatedBy:NSLayoutRelationEqual toItem:keyboardViewattribute:NSLayoutAttributeBottom multiplier:1.0 constant:-space];
 //右边约束
 NSLayoutConstraint *rightConstraint = nil;
 //右边约束
 NSLayoutConstraint *leftConstraint = nil;
 //判读最后一个button
 if (index == buttons.count - 1) {
 rightConstraint = [NSLayoutConstraint constraintWithItem:button attribute:NSLayoutAttributeRightrelatedBy:NSLayoutRelationEqual toItem:keyboardView attribute:NSLayoutAttributeRightmultiplier:1.0 constant:-space];
 }
else{
//当前button的下一个button的右约束
UIButton *nextButton = buttons[index + 1];
rightConstraint = [NSLayoutConstraint constraintWithItem:button attribute:NSLayoutAttributeRightrelatedBy:NSLayoutRelationEqual toItem:nextButton attribute:NSLayoutAttributeLeftmultiplier:1.0 constant:-space];
}
//左约束
if (index == 0) {
leftConstraint = [NSLayoutConstraint constraintWithItem:button attribute:NSLayoutAttributeLeftrelatedBy:NSLayoutRelationEqual toItem:keyboardView attribute:NSLayoutAttributeLeftmultiplier:1.0 constant:space];
}
else{
UIButton *prevtButton = buttons[index - 1];
leftConstraint = [NSLayoutConstraint constraintWithItem:button attribute:NSLayoutAttributeLeftrelatedBy:NSLayoutRelationEqual toItem:prevtButton attribute:NSLayoutAttributeRightmultiplier:1.0 constant:space];
}
//等宽
UIButton *firstButton = buttons[0];
NSLayoutConstraint *widthConstraint = [NSLayoutConstraint constraintWithItem:firstButtonattribute:NSLayoutAttributeWidth relatedBy:NSLayoutRelationEqual toItem:button attribute:NSLayoutAttributeWidthmultiplier:1.0 constant:0];
[keyboardView addConstraint:widthConstraint];
[keyboardView addConstraints:@[topConstraint,buttomConstraint,rightConstraint,leftConstraint]];
}
}
添加每一列约束
方法addRowsLayoutConstraint对每一行存储按钮的视图添加约束,这里要注意的是当前行、上一行与下一行之间的关系,其实与为button添加约束类似。
//row约束
 -(void)addRowsLayoutConstraint:(NSArray)rowsandView:(UIView)inputView{
 for(UIView *rowView in rows) {
 NSInteger space = 0;
 NSInteger index = [rows indexOfObject:rowView];
 rowView.translatesAutoresizingMaskIntoConstraints = NO;
 NSLayoutConstraint *rightConstraint = [NSLayoutConstraint constraintWithItem:rowViewattribute:NSLayoutAttributeRight relatedBy:NSLayoutRelationEqual toItem:inputViewattribute:NSLayoutAttributeRight multiplier:1.0 constant:-space];
 NSLayoutConstraint *leftConstraint = [NSLayoutConstraint constraintWithItem:rowViewattribute:NSLayoutAttributeLeft relatedBy:NSLayoutRelationEqual toItem:inputViewattribute:NSLayoutAttributeLeft multiplier:1.0 constant:space];
//顶部约束
NSLayoutConstraint *topConstraint = nil;
if (index == 0) {
topConstraint = [NSLayoutConstraint constraintWithItem:rowView attribute:NSLayoutAttributeToprelatedBy:NSLayoutRelationEqual toItem:inputView attribute:NSLayoutAttributeTopmultiplier:1.0 constant:0];
}
else{
UIView *prevtRow = rows[index - 1];
topConstraint = [NSLayoutConstraint constraintWithItem:rowView attribute:NSLayoutAttributeToprelatedBy:NSLayoutRelationEqual toItem:prevtRow attribute:NSLayoutAttributeBottommultiplier:1.0 constant:0];
}
//底部约束
NSLayoutConstraint *buttomConstraint = nil;
if (index == rows.count - 1) {
buttomConstraint = [NSLayoutConstraint constraintWithItem:rowView attribute:NSLayoutAttributeBottomrelatedBy:NSLayoutRelationEqual toItem:inputView attribute:NSLayoutAttributeBottommultiplier:1.0 constant:0];
}
else{
UIView *nextRow = rows[index + 1];
buttomConstraint = [NSLayoutConstraint constraintWithItem:rowView attribute:NSLayoutAttributeBottomrelatedBy:NSLayoutRelationEqual toItem:nextRow attribute:NSLayoutAttributeTop multiplier:1.0constant:0];
}
//等高约束
UIView *firstRow = rows[0];
NSLayoutConstraint *heightConstraint = [NSLayoutConstraint constraintWithItem:firstRowattribute:NSLayoutAttributeHeight relatedBy:NSLayoutRelationEqual toItem:rowViewattribute:NSLayoutAttributeHeight multiplier:1.0 constant:0];
[inputView addConstraint:heightConstraint];
[inputView addConstraints:@[leftConstraint,rightConstraint,topConstraint,buttomConstraint]];
}
}
按钮添加对应的字符或者功能
对数组参数上的buttonTitles进行遍历,即按钮上显示的字符,数组中字符串个数来创建按钮。
使用一个带参的方法createRowOfButtons,将已经存储在数组里面的字母或符号添加到按钮上,这里的数组分别是根据每一行的内容存储的,即有4个存储字母或符号的数组。同时也创建一个存放按钮的视图,并且对按钮与视图之间的约束进行设置。使用数组将全部的键存储起来,一行一个数组。最后将数组buttons存放在一个总的数组allButtons中,用于之后遍历键盘上的所有按钮,进行大小写转换。
//创建一行button
- (UIView )createRowOfButtons:(NSArray)buttonTitles{
NSMutableArraybuttons = [NSMutableArray array];
//行视图宽高
UIViewkeyBoardRowView = [[UIView alloc]initWithFrame:CGRectMake(0, 0, 320, 50)];
//遍历button
for(NSString *title in buttonTitles) {
//调用createButtonWithTitle
UIButton *button = [self createButtonWithTitle:title];
//将button添加到数组中
[buttons addObject:button];
[keyBoardRowView addSubview:button];
}
[self.allButtonsaddObject:buttons];
//调用约束
[selfaddButtonLayoutConstraint:buttons andView:keyBoardRowView];
returnkeyBoardRowView;
}
显示
最后在viewDidLoad上,将显示字符数组添加到按钮上,并将每一行视图添加到Keyboard视图上,对每一行添加约束。
- (void)viewDidLoad {
 [superviewDidLoad];
 self.allButtons= [NSMutableArray array];
 self.isPressShiftKey= NO;
 self.firstButtonRow= [NSMutableArray arrayWithObjects:@"q",@"w",@"e",@"r",@"t",@"y",@"u",@"i",@"o",@"p",nil];
 self.secondButtonRow= [NSMutableArray arrayWithObjects:@"a",@"s",@"d",@"f",@"g",@"h",@"j",@"k",@"l",nil];
 self.thirdButtonRow= [NSMutableArray arrayWithObjects:@"cp",@"z",@"x",@"c",@"v",@"b",@"n",@"m",@"dp",nil];
 self.forthButtonRow= [NSMutableArray arrayWithObjects:@"123",@"next",@"Space",@"ch/en",@"return",nil];
 UIViewFirstRow = [self createRowOfButtons:self.firstButtonRow];
 UIViewSecndRow = [self createRowOfButtons:self.secondButtonRow];
 UIViewThirdRow = [self createRowOfButtons:self.thirdButtonRow];
 UIViewforthRow = [self createRowOfButtons:self.forthButtonRow];
 NSArray*rows = @[FirstRow,SecndRow,ThirdRow,forthRow];
 [self.viewaddSubview:FirstRow];
 [self.viewaddSubview:SecndRow];
 [self.viewaddSubview:ThirdRow];
 [self.viewaddSubview:forthRow];
 [selfaddRowsLayoutConstraint:rows andView:self.view];
 }
大小写切换
点击大小写按钮,触发changeUpOrDown方法,大小写转换就要用到上面说的allButtons数组了,遍历全部的按钮,获取按钮上的title,并判断按钮当前是出于什么状态(大写或小写),在对title进行字符串大小写转换,最后为按钮设置title。
//大小写转换
- (void)changeUpOrDown:(UIButton*)shiftKey{
 for(NSArray * buttons in self.allButtons) {
 for (UIButton *button in buttons) {
 NSString *title = [button titleForState:UIControlStateNormal];
 if (self.isPressShiftKey) {
 title = [title uppercaseString];
 }
else{
title = [title lowercaseString];
}
[button setTitle:title forState:(UIControlStateNormal)];
}
}
}
最后再说两句
这个教程只能实现简单的功能,同时代码中存在一些不完善的地方,只供参考,还是需要大家的努力。
完整代码的下载地址:vancef/CustomKeyboard · GitHub

