要想了解UI适配,首先需要了解android中的布局类。
android中有六大布局
1.LinearLayout
2.RelativeLayout
3.FrameLayout
4.GridLayout
5.TableLayout
6.AbsoluteLayout
1.LinearLayout
package android.widget;
public class LinearLayout extends ViewGroup

2.RelativeLayout
package android.widget;
public class RelativeLayout extends ViewGroup

3.FrameLayout
package android.widget;
public class FrameLayout extends ViewGroup

4.GridLayout
package android.widget;
public class GridLayout extends ViewGroup

5.TableLayout
package android.widget;
public class TableLayout extends LinearLayout

6.AbsoluteLayout
在api3中废弃。
package android.widget;
public class AbsoluteLayout extends ViewGroup
6个类都在package android.widget下,其中5个继承自ViewGroup ,TableLayout 继承自LinearLayout 。
还有一个新的布局类ConstraintLayout。这个是目前为止比较新的,android studio新建的项目一般都默认生成ConstraintLayout。这个放到最后。
布局定义用户界面的视觉结构,如Activity或应用小部件的 UI。您可以通过两种方式声明布局:
- 在 XML 中声明 UI 元素。Android 提供了对应于 View 类及其子类的简明 XML 词汇,如用于小部件和布局的词汇;
- 运行时实例化布局元素。您的应用可以通过编程创建 View 对象和 ViewGroup 对象(并操纵其属性)。
首先,来看看常见布局LinearLayout和RelativeLayout。
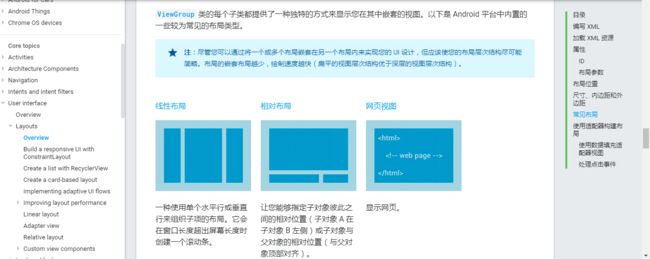
常见布局有以下两种(网页视图先忽略不计)。
线性布局
一种使用单个水平行或垂直行来组织子项的布局。它会在窗口长度超出屏幕长度时创建一个滚动条。

相对布局
让您能够指定子对象彼此之间的相对位置(子对象 A 在子对象 B 左侧)或子对象与父对象的相对位置(与父对象顶部对齐)。
简单来说,界面中控件数量少,相对位置没有那么复杂的就是要线性布局,布局相对复杂的需要使用相对布局,因为复杂的情况下如果用线性布局的话需要嵌套更多。
以下面2个xml布局文件为例,简单看一下LinearLayout 和 RelativeLayout之间的差异。
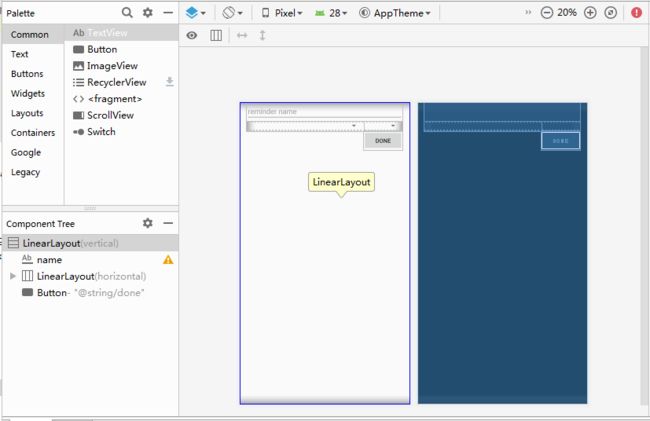
如果xml布局使用LinearLayout。
预览图如下
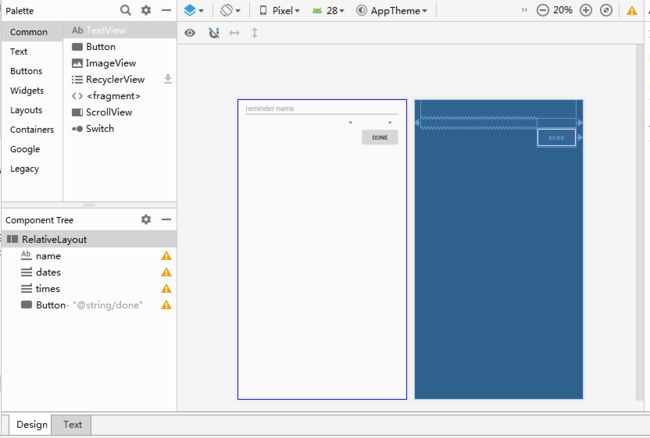
如果xml布局使用RelativeLayout。
预览图如下
由于LinearLayout和RelativeLayout属性不一样,具体写法略有差异,具体属性如果不熟悉不必纠结,先记着就行用多了就会,看一两次也很难记下来,并且component tree不一样,使用RelativeLayout的情况下嵌套了一层,使用LinearLayout的情况下最多嵌套了2层。
以下为官方文档推荐。
尽管您可以通过将一个或多个布局嵌套在另一个布局内来实现您的 UI 设计,但应该使您的布局层次结构尽可能简略。布局的嵌套布局越少,绘制速度越快(扁平的视图层次结构优于深层的视图层次结构)。
至此,对 在XML 中声明 UI 元素的方式有了一定的了解,现在来看运行时实例化布局元素这种方式。
以下文字出处: android编程权威指南

通常是通过布局文件创建视图的,其实也可以在代码里创建视图。
实际上,可以完全不用创建布局文件,以代码的方式创建布局。

以代码的方式创建视图很简单:调用视图类的构造方法,并传入Context参数。不创建任何布局文件,用代码就能创建完整的视图层级机构。
将代码改为如下所示。
public class MainActivity extends AppCompatActivity {
    private static final String TAG = "MainActivity";

    @Override
    protected void onCreate(Bundle savedInstanceState) {
        super.onCreate(savedInstanceState);
     //   setContentView(R.layout.activity_main);
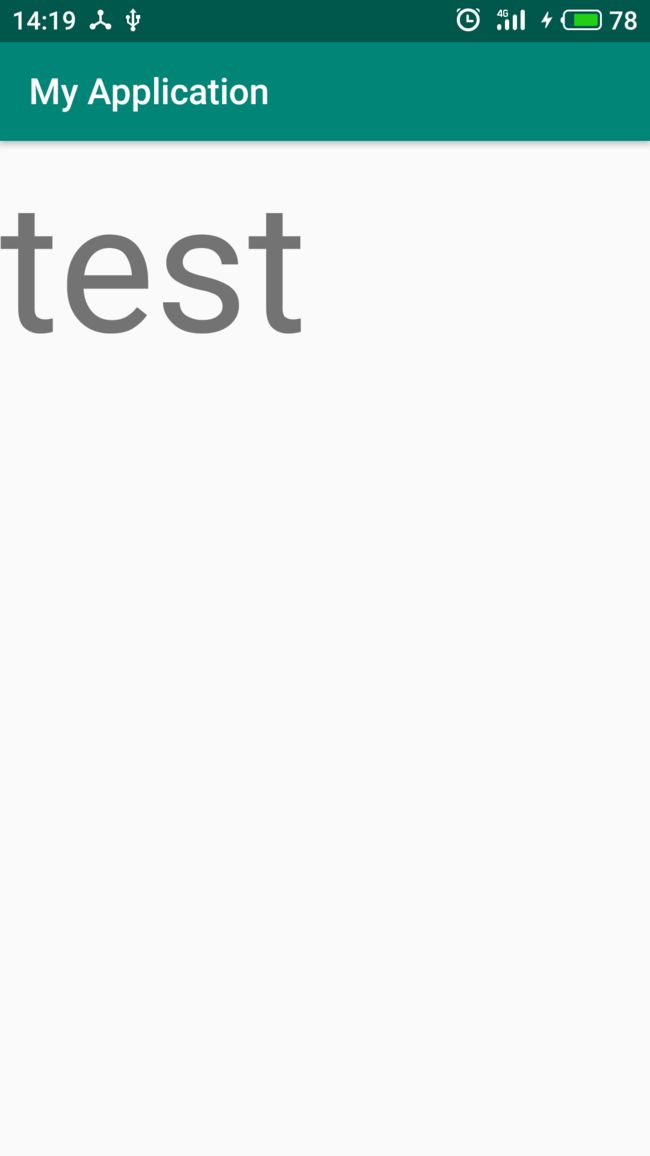
        TextView textView = new TextView(this);
        textView.setText("test");
        textView.setTextSize(100);
        setContentView(textView);
    }
}
运行结果如下所示。
以上只是简单示例,实际使用中,可以xml+代码 2种方式结合使用。
至此,对LinearLayout、RelativeLayout以及声明布局的两种方式都有了一定的了解,接着来看android中的六大布局中的其余4个。
下面来看FrameLayout。
FrameLayout是最简单的ViewGroup组件,它不以特定方式安排其子视图的位置。FrameLayout子视图的位置排列取决于它们各自的android:layout_gravity属性。
官方定义:
FrameLayout is designed to block out an area on the screen to display a single item. Generally, FrameLayout should be used to hold a single child view, because it can be difficult to organize child views in a way that's scalable to different screen sizes without the children overlapping each other. You can, however, add multiple children to a FrameLayout and control their position within the FrameLayout by assigning gravity to each child, using the android:layout_gravity attribute.
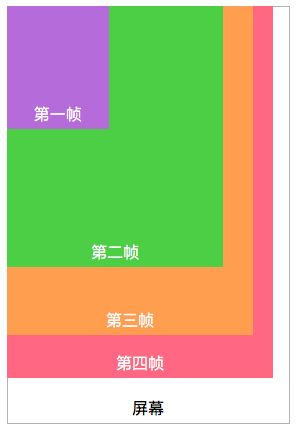
Android FrameLayout (帧布局) 直接在屏幕上开辟出一块空白的区域,当我们往里面添加控件的时候,会默认把它们放到这块区域的左上角
FrameLayout (帧布局) 有点类似于把零散的大小不一的纸按左上角对齐的方式定成一本书一样。
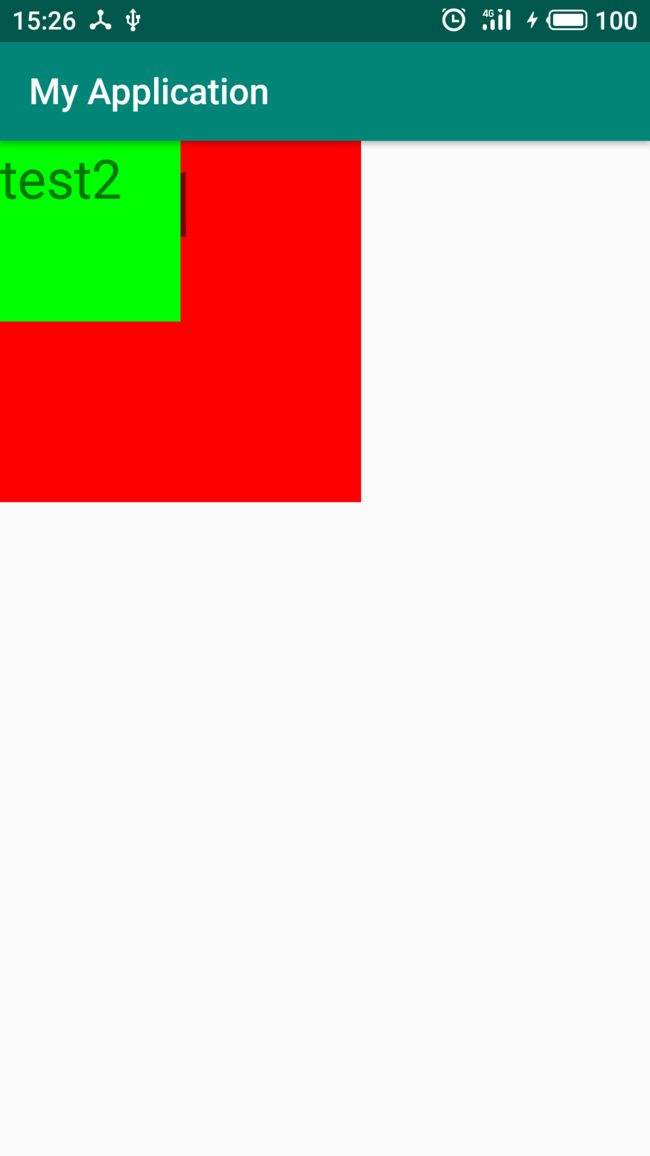
定义如下所示xml。
运行结果如下所示。
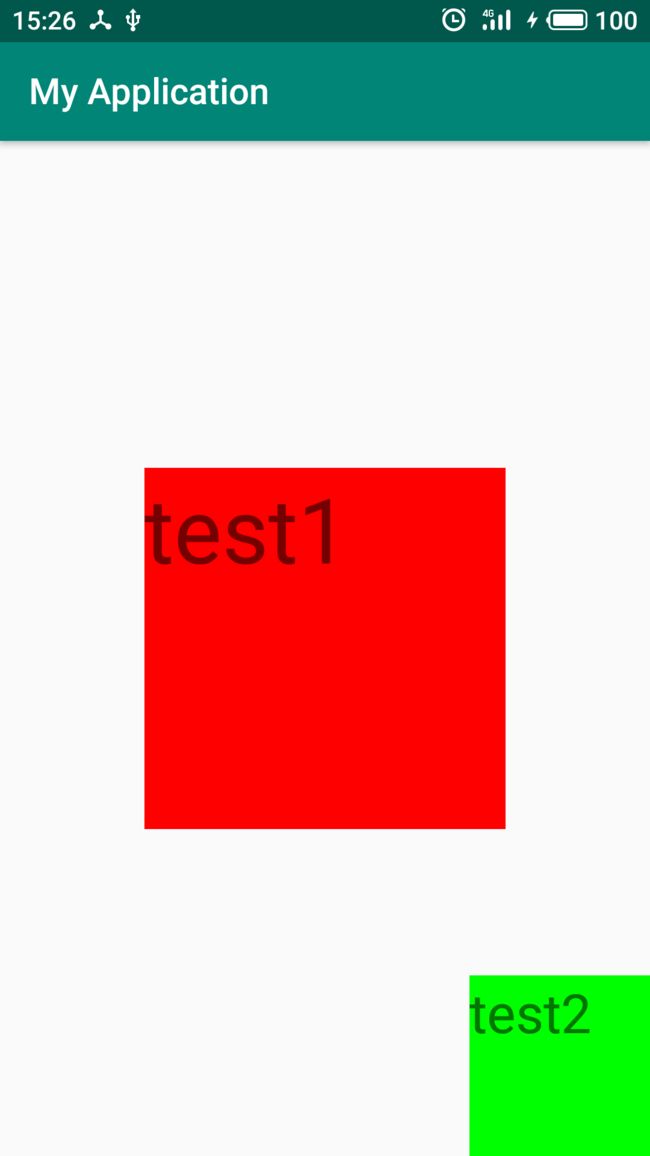
由于FrameLayout的子视图仅仅取决于它们各自的android:layout_gravity属性。,因此修改布局文件中的android:layout_gravity属性。
修改后运行结果如下所示。
至于FrameLayout应用场景,常见的就是fragment。
通用的布局定义文件activity_fragment.xml.该布局提供了一个用来放置fragment的FrameLayout容器视图。
接下来就是GridLayout了。
基本概念
GridLayout把页面分成m行和n列,使用m+1条线和n+1条线,把页面共分成n*m个Cell。指定位置时行坐标是从0到m,列坐标是从0到n。每一个子View占一个或多个Cell。比如(0, 0)到(0, 1)就是占第一个Cell的区域。(0, 0), (0, 2)就是占第一行的2个Cell的区域(横向拉伸).
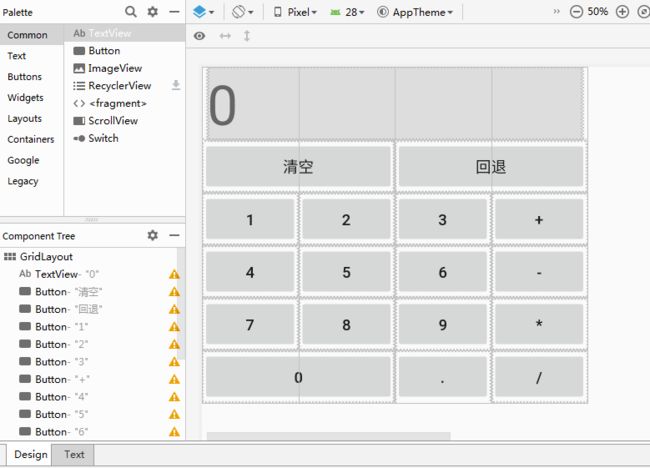
下面以GridLayout 布局经典计算器为例,看看基本使用,不做深入。
实际上,GridLayout布局的关键点在于GridLayout中的android:columnCount="4" 和 android:rowCount="6" 设置好网格的最大行数和列数以及子视图的android:layout_columnSpan以及android:layout_gravity属性。
下面来看看TableLayout。
TableLayout 是一种可以制作表格的布局,它和 GridLayout 的区别是 GridLayout 只能制定每一列宽度一样的表格布局,而 TableLayout 能够制定各列宽度不一样的表格布局。
来看看TableLayout 3个常用属性。
1.android:collapseColumns:设置需要被隐藏的列的序号
2.android:stretchColumns:设置运行被拉伸的列的列序号
3.android:shrinkColumns:设置允许被收缩的列的列序号
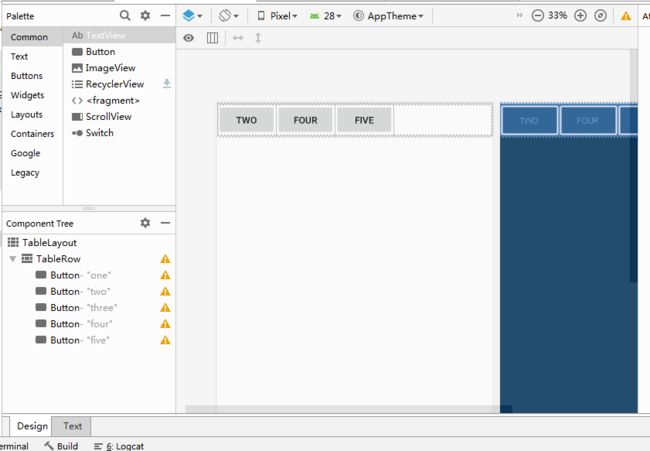
1.TableLayout中添加以下属性: android:collapseColumns = "0,2",就是隐藏第一与第三列。
预览图如下。
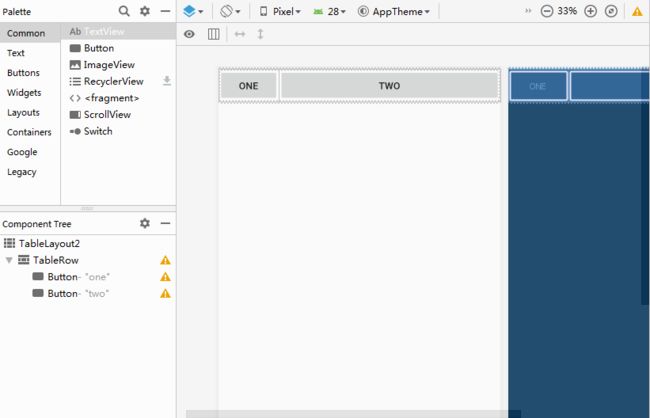
2.TableLayout中添加以下属性: android:stretchColumns = "1"设置第二列为可拉伸列,让该列填满这一行所有的剩余空间。
预览图如下。
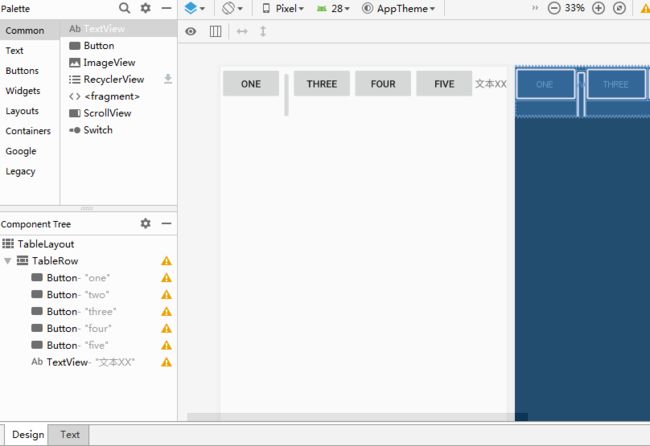
3.TableLayout中添加以下属性: android:shrinkColumns = "1"设置第二个列为可收缩列。
预览图如下。
使用场景可以看这篇大致了解一下
Tablayout使用全解,一篇就够了
https://www.jianshu.com/p/fde38f367019
Tablayout与GridLayout 相比,优点是更灵活,稍微有点类似RelativeLayout和LinearLayout之间的关系。一个可调整性高,一个写起来简单。
现在就剩下六大布局中的最后一个AbsoluteLayout。
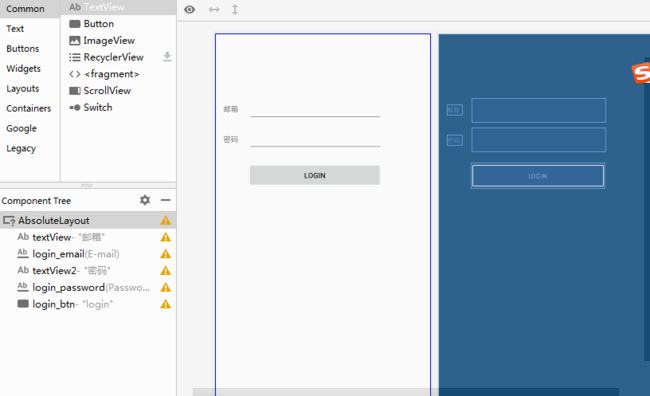
由于android中已经将这个api废弃,因此不推荐使用,但是还是简单通过一个xml文件了解一下。
预览图如下。
简单看完AbsoluteLayout,下面来看ConstraintLayout 。
ConstraintLayout
package android.support.constraint;
public class ConstraintLayout extends ViewGroup
ConstraintLayout 与其他布局类不同的是,ConstraintLayout是属于android.support.constraint下的。
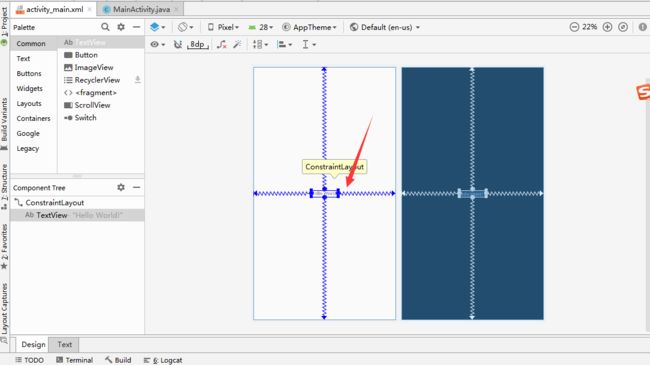
现在使用android studio新建一个project默认就会生成ConstraintLayout 的文件。
如下所示。
切到design后选中textview后,可进行拖动,从而修改ui。
通过ConstraintLayout去定义ui,就像在纸上画画一样,而其他的LinearLayout、RelativeLayout等都是通过手动修改xml文件去定义ui。
更多详细部分学习可以看这篇。
哲♂学三幻神带你学习ConstraintLayout(约束布局)
https://www.jianshu.com/p/639fa7377cc0
android六大布局的知识点就到此为止,接下来的问题就是android ui如何适配。
后续看这里。
android UI适配简单记录三
https://www.jianshu.com/p/39dd0adfddc8
参考链接:
Android LinearLayout 线性布局
https://www.twle.cn/l/yufei/android/android-basic-linearlayout.html
布局
https://developer.android.com/guide/topics/ui/declaring-layout?hl=zh-CN
线性布局
https://developer.android.com/guide/topics/ui/layout/linear.html?hl=zh-CN
Android动态创建布局常用方法
https://blog.csdn.net/cpcpcp123/article/details/81747935
Android布局之 FrameLayout
http://wangkuiwu.github.io/2014/03/03/FrameLayout/
Android FrameLayout ( 帧布局 )
https://www.twle.cn/l/yufei/android/android-basic-framelayout.html
Android技巧:学习使用GridLayout
http://toughcoder.net/blog/2015/11/25/android-tricks-introduct-to-gridlayout/
Android GridLayout ( 网格布局 )
https://www.twle.cn/l/yufei/android/android-basic-gridlayout.html
TableLayout ( 表格布局 )
https://www.twle.cn/l/yufei/android/android-basic-tablelayout.html
TableLayout(表格布局)
https://www.runoob.com/w3cnote/android-tutorial-tablelayout.html
