1:根据官方的命令步骤,安装vue,项目名称自己定,我的项目名称是51seller,安装的过程中,把vue-router 也安装上
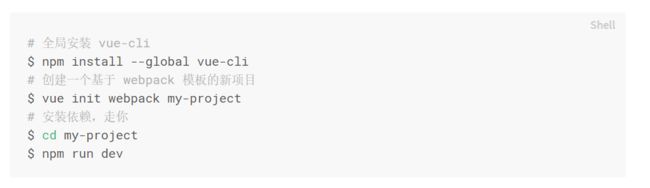
vue安装
2:安装vux
npm install vux --save
npm install vux-loader --save-dev
npm install less less-loader --save-dev
3步就安装好了vux。
安装好之后,找到build文件夹下webpack.base.conf.js 文件,修改该配置文件,配置完整代码如下,直接copy就可以
'use strict'
const path = require('path')
const utils = require('./utils')
const config = require('../config')
const vueLoaderConfig = require('./vue-loader.conf')
const vuxLoader = require('vux-loader')

function resolve (dir) {
  return path.join(__dirname, '..', dir)
}


const originalConfig  = {
  context: path.resolve(__dirname, '../'),
  entry: {
    app: './src/main.js'
  },
  output: {
    path: config.build.assetsRoot,
    filename: '[name].js',
    publicPath: process.env.NODE_ENV === 'production'
      ? config.build.assetsPublicPath
      : config.dev.assetsPublicPath
  },
  resolve: {
    extensions: ['.js', '.vue', '.json','.less'],
    alias: {
      'vue$': 'vue/dist/vue.esm.js',
      '@': resolve('src'),
    }
  },
  module: {
    rules: [
      {
        test: /\.vue$/,
        loader: 'vue-loader',
        options: vueLoaderConfig
      },
      {
        test: /\.js$/,
        loader: 'babel-loader',
        include: [resolve('src'), resolve('test'), resolve('node_modules/webpack-dev-server/client')]
      },
      {
        test: /\.(png|jpe?g|gif|svg)(\?.*)?$/,
        loader: 'url-loader',
        options: {
          limit: 10000,
          name: utils.assetsPath('img/[name].[hash:7].[ext]')
        }
      },
      {
        test: /\.(mp4|webm|ogg|mp3|wav|flac|aac)(\?.*)?$/,
        loader: 'url-loader',
        options: {
          limit: 10000,
          name: utils.assetsPath('media/[name].[hash:7].[ext]')
        }
      },
      {
        test: /\.(woff2?|eot|ttf|otf)(\?.*)?$/,
        loader: 'url-loader',
        options: {
          limit: 10000,
          name: utils.assetsPath('fonts/[name].[hash:7].[ext]')
        }
      }
    ]
  },
  node: {
    // prevent webpack from injecting useless setImmediate polyfill because Vue
    // source contains it (although only uses it if it's native).
    setImmediate: false,
    // prevent webpack from injecting mocks to Node native modules
    // that does not make sense for the client
    dgram: 'empty',
    fs: 'empty',
    net: 'empty',
    tls: 'empty',
    child_process: 'empty'
  }
}

const webpackConfig = originalConfig

module.exports = vuxLoader.merge(webpackConfig, {
  plugins: ['vux-ui']
})
3:开始使用vux组件
在src下面新建views目录,在该目录下面新建test.vue
配置路由
import Vue from 'vue'
import Router from 'vue-router'
import HelloWorld from '@/components/HelloWorld'
import Test from '@/views/test'

Vue.use(Router)

export default new Router({
  routes: [
    {
      path: '/',
      name: 'HelloWorld',
      component: HelloWorld
    },
    {
      path: '/test',
      name: 'test',
      component: Test
    }
  ]
})
npm run dev,打开浏览器如下,搭建成功,没有报错

demo截图
P.S.
之前折腾了好几天,报错
$t is not a function
再网上找说需要配i18n,但是配置了之后,vux会显示英文,其实如果你的应用是中文的,完全不需要配置i18n,也不需要因为vux,去配置vuex
我报错这个原因,是因为配置vux的时候,我用的cnpm,后来我用npm,按照上面的步骤重新来了一遍,结果不再报错,基本的配置就是这些,不用加其他的