三种自动完成文本框分别是AutoCompleteTextView、AppCompatAutoCompleteTextView、MultiAutoCompleteTextView
(1)目的
目的是为了输入前几个字符会自动弹出已补全的字符,节省输入字符所花费的时间。
(2)继承结构图
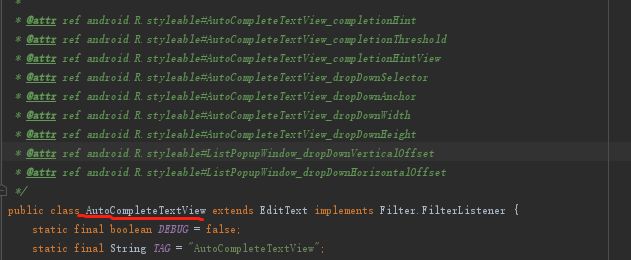
继承结构图中,AutoCompleteTextView有两个子类AppCompatAutoCompleteTextView、MultiAutoCompleteTextView。
(3)自定义Adapter详解
AutoCompleteTextView的数据需要setAdapter适配数据,先看下源码
/**
 * Changes the list of data used for auto completion. The provided list
 * must be a filterable list adapter.
 *
 * The caller is still responsible for managing any resources used by the adapter.
 * Notably, when the AutoCompleteTextView is closed or released, the adapter is not notified.
 * A common case is the use of {@link android.widget.CursorAdapter}, which
 * contains a {@link android.database.Cursor} that must be closed.  This can be done
 * automatically (see
 * {@link android.app.Activity#startManagingCursor(android.database.Cursor)
 * startManagingCursor()}),
 * or by manually closing the cursor when the AutoCompleteTextView is dismissed.
 *
 * @param adapter the adapter holding the auto completion data
 *
 * @see #getAdapter()
 * @see android.widget.Filterable
 * @see android.widget.ListAdapter
 */
public  void setAdapter(T adapter) {
    if (mObserver == null) {
        mObserver = new PopupDataSetObserver(this);
    } else if (mAdapter != null) {
        mAdapter.unregisterDataSetObserver(mObserver);
    }
    mAdapter = adapter;
    if (mAdapter != null) {
        //noinspection unchecked
        mFilter = ((Filterable) mAdapter).getFilter();
        adapter.registerDataSetObserver(mObserver);
    } else {
        mFilter = null;
    }

    mPopup.setAdapter(mAdapter);
}
这里着重看一下泛型T,T继承ListAdapter & Filterable,而ListAdapter和Filterable是接口,也就是说,当我们自定义Adapter时必须实现这两个接口,自定义Adapter代码如下:
public class MyAdapter extends BaseAdapter implements Filterable {

    private List dataList;
    private ArrayList mOriginalValues;
    private Context mContext;
    private MyFilter mFilter;
    private final Object mLock = new Object();

    public MyAdapter(Context mContext, List list){
        this.mContext = mContext;
        dataList = list;
    }


    @Override
    public View getView(int position, View convertView, ViewGroup parent) {
        LayoutInflater layoutInflater = (LayoutInflater) mContext.getSystemService(Context.LAYOUT_INFLATER_SERVICE);
        View view = layoutInflater.inflate(R.layout.layout_autocomplete, parent, false);
        TextView textView = view.findViewById(R.id.textview);
        ImageView imageView = view.findViewById(R.id.imageview);
        imageView.setImageResource(dataList.get(position).getIcon());
        textView.setText(dataList.get(position).getName());
        return view;
    }

    @Override
    public int getCount() {
        return dataList == null ? 0 : dataList.size();
    }

    @Override
    public DataBean getItem(int position) {
        return dataList.get(position);
    }

    @Override
    public long getItemId(int position) {
        return position;
    }

    @Override
    public Filter getFilter() {
        if (mFilter == null) {
            mFilter = new MyFilter();
        }
        return mFilter;
    }

    private class MyFilter extends Filter {
        @Override
        protected FilterResults performFiltering(CharSequence prefix) {
            final FilterResults results = new FilterResults();

            if (mOriginalValues == null) {
                synchronized (mLock) {
                    mOriginalValues = new ArrayList<>(dataList);
                }
            }

            if (prefix == null || prefix.length() == 0) {
                final ArrayList list;
                synchronized (mLock) {
                    list = new ArrayList<>(mOriginalValues);
                }
                results.values = list;
                results.count = list.size();
            } else {
                final String prefixString = prefix.toString().toLowerCase();

                final ArrayList values;
                synchronized (mLock) {
                    values = new ArrayList<>(mOriginalValues);
                }

                final int count = values.size();
                final ArrayList newValues = new ArrayList<>();

                for (int i = 0; i < count; i++) {
                    final DataBean value = values.get(i);
                    final String valueText = value.getName().toLowerCase();

                    // First match against the whole, non-splitted value
                    if (valueText.startsWith(prefixString)) {
                        newValues.add(value);
                    } else {
                        final String[] words = valueText.split(" ");
                        for (String word : words) {
                            if (word.startsWith(prefixString)) {
                                newValues.add(value);
                                break;
                            }
                        }
                    }
                }
                results.values = newValues;
                results.count = newValues.size();
            }

            return results;
        }

        @Override
        protected void publishResults(CharSequence constraint, FilterResults results) {
            //noinspection unchecked
            dataList = (List) results.values;
            if (results.count > 0) {
                notifyDataSetChanged();
            } else {
                notifyDataSetInvalidated();
            }
        }
    }
}
以上Adapter是我已经写好的,其中BaseAdapter已经实现了ListAdapter接口,如图:
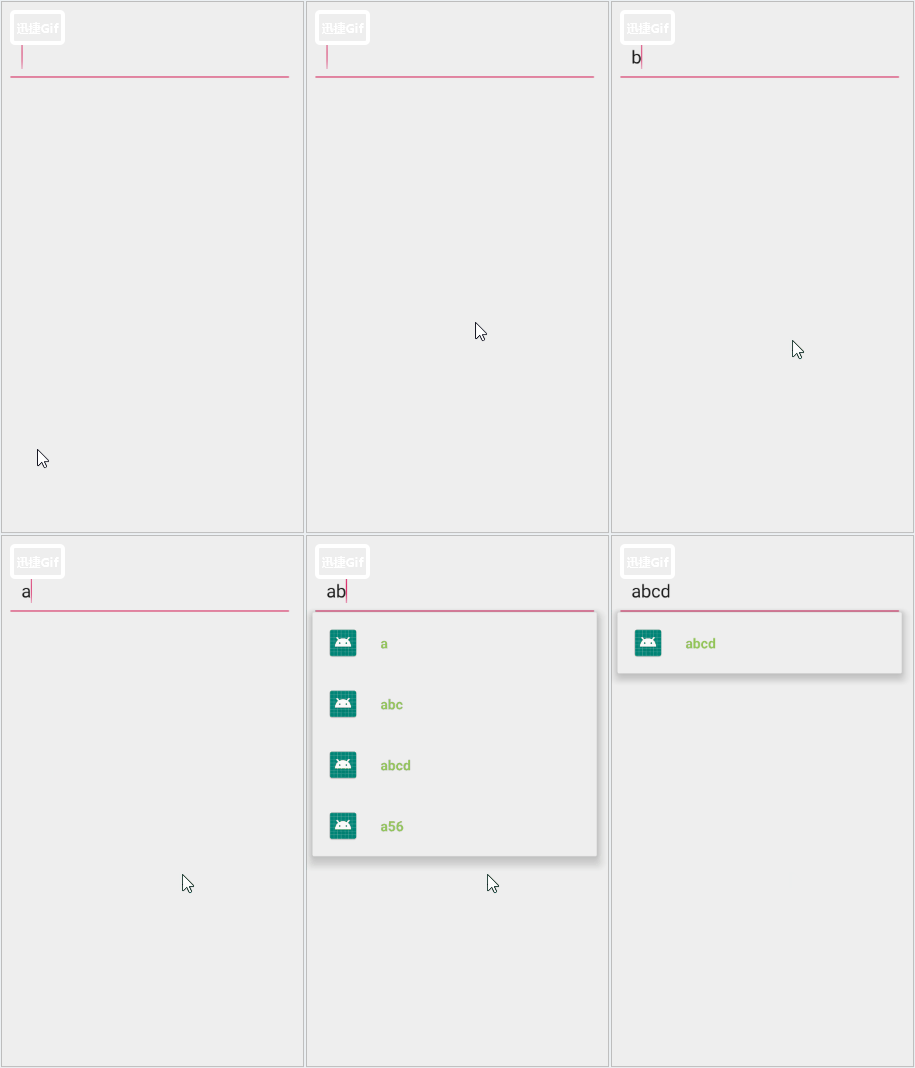
效果如下图:
BaseAdapter为我们自定义Adapter提供了便捷,大大减少了代码的编辑量。另外,自定义Adapter还必须实现Filterable接口,以便重写getFilter方法,getFilter的返回值是一个Filter对象,即搜索过滤, 如果搜索过滤对象为null,就不会弹出类似popupwindow的数据列表,自定义Filter对象需要实现两个方法,这两个方法分别是:performFiltering和publishResults方法,performFiltering方法的目的是返回已经过滤之后的数据,假如输入字母‘a’,那么,performFiltering方法的返回值就是所有以‘a’为开头的字母,publishResults方法的目的是为了刷新列表数据,列表的展示本质上就是一个ListView。
接下来贴出剩余代码:
    dataList.add(new DataBean(R.mipmap.icon_1, "a"));
    dataList.add(new DataBean(R.mipmap.icon_2, "abc"));
    dataList.add(new DataBean(R.mipmap.icon_3, "abcd"));
    dataList.add(new DataBean(R.mipmap.icon_4, "a56"));
    dataList.add(new DataBean(R.mipmap.icon_5, "b66"));
    dataList.add(new DataBean(R.mipmap.icon_6, "b9h"));
    dataList.add(new DataBean(R.mipmap.icon_7, "bhb"));
    dataList.add(new DataBean(R.mipmap.icon_8, "cy"));
    dataList.add(new DataBean(R.mipmap.icon_9, "changee"));
    autoCompleteTextView.setAdapter(new MyAdapter(this, dataList));
    autoCompleteTextView.setOnItemClickListener(new AdapterView.OnItemClickListener() {
        @Override
        public void onItemClick(AdapterView parent, View view, int position, long id) {
            String name = ((DataBean)((ListView)parent).getItemAtPosition(position)).getName();
            if(!TextUtils.isEmpty(name)){
                autoCompleteTextView.setText(name);
                autoCompleteTextView.setSelection(name.length());
            }
        }
    });
layout_autocomplete.xml
自定义Adapter说明:
有关源码分析,很多细节都没有详细说明,这里郑重说明,想要编写自定义Adapter需要阅读源码,详细分析每个细节。
(4)ArrayAdapter使用
除了自定义Adapter之外,官方还提供了ArrayAdapter类,这个Adapter只支持文本数据列表,也就是String数组列表。它的使用也比较简单,不需要麻烦的手写Adapter。
代码如下:
    final String[] datas = {"a", "abc", "abcd", "a56", "b66", "b9h", "bhb", "cy", "changee"};

    autoCompleteTextView.setAdapter(new ArrayAdapter(MainActivity.this, R.layout.completetextview, datas));
completetextview.xml
ArrayAdapter还有一些构造方法,这里不再举例了。
(5)SimpleAdapter使用
SimpleAdapter的使用方法超级简单,SimpleAdapter只有一个构造方法,只要按照参数要求传值即可。
其构造方法源码如下:
/**
 * Constructor
 *
 * @param context The context where the View associated with this SimpleAdapter is running
 * @param data A List of Maps. Each entry in the List corresponds to one row in the list. The
 *        Maps contain the data for each row, and should include all the entries specified in
 *        "from"
 * @param resource Resource identifier of a view layout that defines the views for this list
 *        item. The layout file should include at least those named views defined in "to"
 * @param from A list of column names that will be added to the Map associated with each
 *        item.
 * @param to The views that should display column in the "from" parameter. These should all be
 *        TextViews. The first N views in this list are given the values of the first N columns
 *        in the from parameter.
 */
public SimpleAdapter(Context context, List> data,
        @LayoutRes int resource, String[] from, @IdRes int[] to) {
    mData = data;
    mResource = mDropDownResource = resource;
    mFrom = from;
    mTo = to;
    mInflater = (LayoutInflater) context.getSystemService(Context.LAYOUT_INFLATER_SERVICE);
}
根据构造方法,可以很轻松的知道怎么去使用SimpleAdapter,代码如下:
    List> list = new ArrayList<>();
    HashMap hashMap = new HashMap<>();
    hashMap.put("text", "a");
    list.add(hashMap);
    hashMap = (HashMap) hashMap.clone();
    hashMap.put("text", "abc");
    list.add(hashMap);
    hashMap = (HashMap) hashMap.clone();
    hashMap.put("text", "abcd");
    list.add(hashMap);
    hashMap = (HashMap) hashMap.clone();
    hashMap.put("text", "a56");
    list.add(hashMap);
    hashMap = (HashMap) hashMap.clone();
    hashMap.put("text", "b66");
    list.add(hashMap);
    hashMap = (HashMap) hashMap.clone();
    hashMap.put("text", "b9h");
    list.add(hashMap);
    hashMap = (HashMap) hashMap.clone();
    hashMap.put("text", "bhb");
    list.add(hashMap);
    hashMap = (HashMap) hashMap.clone();
    hashMap.put("text", "cy");
    list.add(hashMap);
    hashMap = (HashMap) hashMap.clone();
    hashMap.put("text", "changee");
    list.add(hashMap);
    autoCompleteTextView.setAdapter(new SimpleAdapter(MainActivity.this, list, R.layout.layout_autocomplete, new String[]{"text"}, new int[]{R.id.textview}));
layout_autocomplete.xml
效果如下:
SimpleAdapter不仅可以传递文本数据,而且还可以传递其它类型的数据,比如图片。
代码如下:
    List> list = new ArrayList<>();
    HashMap hashMap = new HashMap<>();
    hashMap.put("text", "a");
    hashMap.put("image", R.mipmap.icon_1);
    list.add(hashMap);
    hashMap = (HashMap) hashMap.clone();
    hashMap.put("text", "abc");
    hashMap.put("image", R.mipmap.icon_2);
    list.add(hashMap);
    hashMap = (HashMap) hashMap.clone();
    hashMap.put("text", "abcd");
    hashMap.put("image", R.mipmap.icon_3);
    list.add(hashMap);
    hashMap = (HashMap) hashMap.clone();
    hashMap.put("text", "a56");
    hashMap.put("image", R.mipmap.icon_4);
    list.add(hashMap);
    hashMap = (HashMap) hashMap.clone();
    hashMap.put("text", "b66");
    hashMap.put("image", R.mipmap.icon_5);
    list.add(hashMap);
    hashMap = (HashMap) hashMap.clone();
    hashMap.put("text", "b9h");
    hashMap.put("image", R.mipmap.icon_6);
    list.add(hashMap);
    hashMap = (HashMap) hashMap.clone();
    hashMap.put("text", "bhb");
    hashMap.put("image", R.mipmap.icon_7);
    list.add(hashMap);
    hashMap = (HashMap) hashMap.clone();
    hashMap.put("text", "cy");
    hashMap.put("image", R.mipmap.icon_8);
    list.add(hashMap);
    hashMap = (HashMap) hashMap.clone();
    hashMap.put("text", "changee");
    hashMap.put("image", R.mipmap.icon_9);
    list.add(hashMap);
    autoCompleteTextView.setAdapter(new MySimpleAdapter(MainActivity.this, list, R.layout.layout_autocomplete, new String[]{"image", "text"}, new int[]{R.id.imageview, R.id.textview}));
以上新增了图片数据,那么AutoCompleteTextView是否就可以显示图片了呢?答案是否定的。这样不仅不显示图片,而且连数据列表都无法显示了。
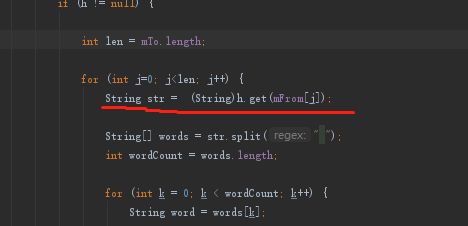
我们在SimpleAdapter源码中的performFiltering方法中可以找到答案:
以上代码,遍历数据中的所有数据,将所有数据和关键字比较,最终将数据中的数据转成String类型,但是以上传递的数据图片是Integer类型,是不可以强转的,这个地方必然会抛出异常,然而一旦抛出异常,代码就立即终止,这样也就执行不到publishResults方法。(publishResults的作用是通知刷新列表)
所以,可以得出一个结论,AutoCompleteTextView使用SimpleAdapter支持吃文本数据。
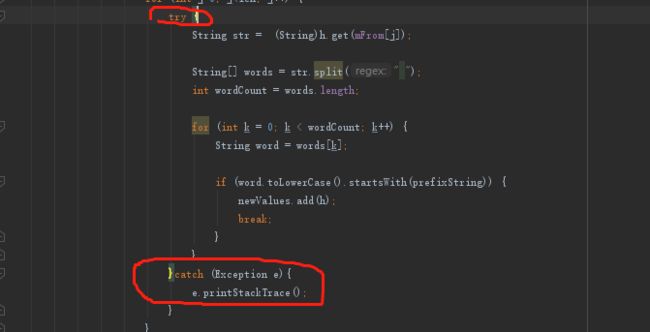
那么,如何做到既支持文本数据,也支持图片数据呢?我们只需要自定义SimpleAdapter,重写performFiltering并且捕获强转异常,如图:
这样就可以正常显示图片了。它的效果和文章开头讲到的自定义Adapter一样。
(6)常用属性
源码中已经为我们定义好常用属性
下面开始一一讲解那些属性
- completionHint
自动提示框底部的文字,如图:
- completionHintView
定义提示视图中显示下拉菜单
- completionThreshold
它的值决定了你在AutoCompleteTextView至少输入几个字符,它才会具有自动提示的功能
- dropDownAnchor
设置下拉菜单的定位"锚点"组件,如果没有指定改属性, 将使用该TextView作为定位"锚点"组件
- dropDownHeight
设置下拉菜单的高度
- dropDownWidth
设置下拉菜单的宽度
- dropDownHorizontalOffset
指定下拉菜单与文本之间的水平间距
- dropDownVerticalOffset
指定下拉菜单与文本之间的竖直间距
- dropDownSelector
设置下拉菜单点击效果
- popupBackground
设置下拉菜单的背景
(7)MultiAutoCompleteTextView使用
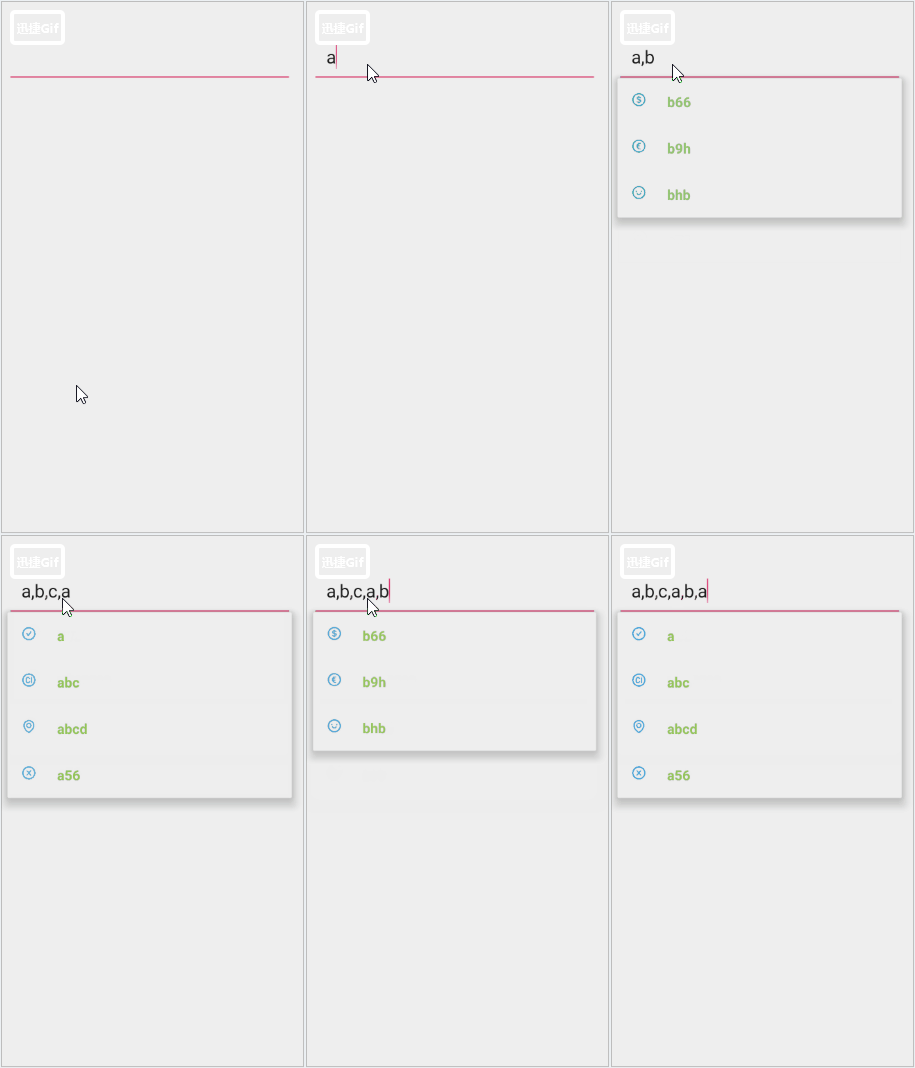
MultiAutoCompleteTextView,即多提示项的自动完成文本框,MultiAutoCompleteTextView的使用和AutoCompleteTextView基本类似,唯一不一样的地方就是MultiAutoCompleteTextView新增了多提示项的功能。
添加分词器代码:
autoCompleteTextView.setTokenizer(new MultiAutoCompleteTextView.CommaTokenizer());
MultiAutoCompleteTextView自带的分析器有且只有一个,查看源码可知,用逗号(,)隔开可以分段查询,效果如下:
(8)AppCompatAutoCompleteTextView使用
AppCompatAutoCompleteTextView和AutoCompleteTextView并无本质的区别,唯一的区别就是依赖包的区别,AppCompatAutoCompleteTextView属于support v7依赖包中的一员。它的用法和AutoCompleteTextView一致。
[本章完...]


