继续上一篇开始用Swift开发iOS 10 - 15 使用地图,这一篇通过添加一个新建Restaurant页面来介绍静态Table Views,UIImagePickerController,NSLayoutConstraint。静态Table Views就是固定cell数目的Table Views;UIImagePickerController用来从设备图片库中获取图片;NSLayoutConstraint就是约束类,用来用代码形式添加约束。
添加新的Table View Controller
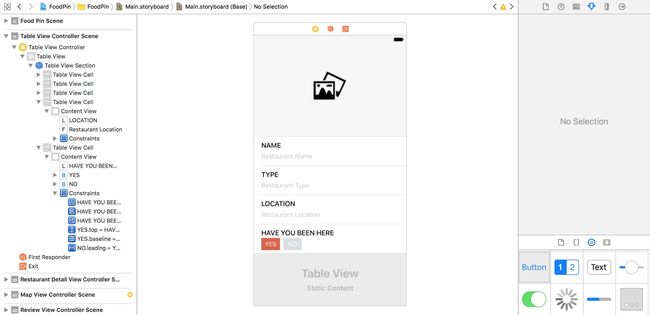
拖动一个Table View Controller到SB中。
修改成Table View的
content为static cells。选中Table View Section,修改
Rows成5。下载 [图片] (http://www.appcoda.com/resources/swift3/photoicons.zip),拖进
Assets-
修改第一个Cell高度为250。添加Image View,
image为photoalbum,大小64*64,水平和垂直居中。
第二个cell高度为72。添加一个Label文本
NAME。添加一个Text Field,placeholder为Restaurant Name,border style为none,宽度为339。添加适当约束。第三个和第四个Cell与第二个类似,Label文本分别为
TYPELOCATION,Text Field的placeholder分别为Restaurant Type,Restaurant Location。-
第五个 高度为72。 添加一个Label文本
Have You Been Here。添加两个Button,title分别为YES、NO,字体颜色都为white,背景颜色分别为red,gray。
添加segue
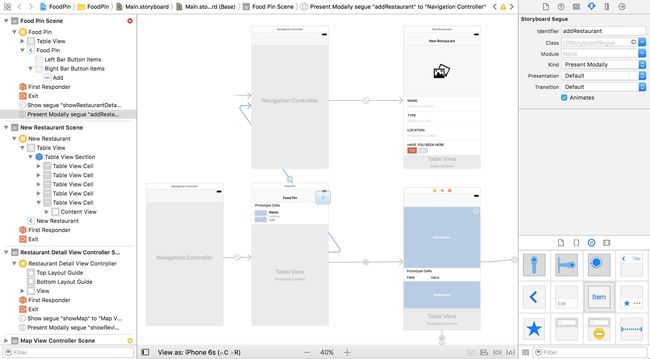
在Food Pin Controller的Navigation bar的右边添加一个bar button item,
System Item为Add。把上面新建是我table view controller内嵌在一个Navigation controller中,选中table view controller,在菜单栏中选择Editor > Embed in > Navigation Controller,设置其navigation bar的
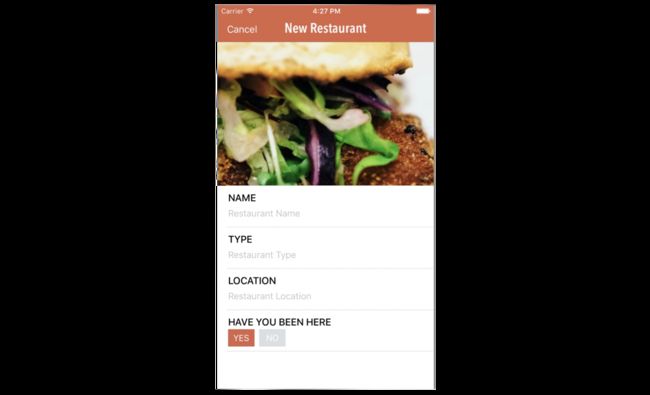
title为New Restaurant。-
关联
Add按钮和New Restaurant Controller的Navigation controller,segue类型present modally,identifier为addRestaurant。
在New Restaurant Controller的Navigation bar的左边添加一个bar button item,
System Item为Cancel,tint为white。在
RestaurantTableViewController中添加unwind segue的action。用control-drag关联。
@IBAction func unwindToHomeScreen(segue:UIStoryboardSegue) {
}
使用UIImagePickerController调用相册
- 新建
AddRestaurantController,继承至UITableViewController。关联New Restaurant Controller。 - 删除除了
viewDidLoad方法的其他方法,静态类型不需要了。 - 添加
tableView(_:didSelectRowAt:):
    override func tableView(_ tableView: UITableView, didSelectRowAt indexPath:
        IndexPath) {
        if indexPath.row == 0 {
            if UIImagePickerController.isSourceTypeAvailable(.photoLibrary) {
                let imagePicker = UIImagePickerController()
                imagePicker.allowsEditing = false
                imagePicker.sourceType = .photoLibrary
                present(imagePicker, animated: true, completion: nil)
            }
        }
    }
选择第一个cell,也就是图片,通过isSourceTypeAvailable方法判断是否有图库可用。
- 在
Info.plist中添加使用图库的请求描述,Privacy - Photo Library Usage Description->You need to grant the app access to your photo library so you can pick your favorite restaurant photo.。
实现UIImagePickerControllerDelegate协议
添加
UIImagePickerControllerDelegate和UINavigationControllerDelegate
class AddRestaurantController: UITableViewController, UIImagePickerControllerDelegate, UINavigationControllerDelegate {添加接口
@IBOutlet var photoImageView: UIImageView!,并关联。添加函数
imagePickerController(_:didFinishPickingMediaWithInfo:),当用户从图库中选择图片时调用。
    func imagePickerController(_ picker: UIImagePickerController, didFinishPickingMediaWithInfo info: [String : Any]) {

        if let selectedImage = info[UIImagePickerControllerOriginalImage] as? UIImage {
            photoImageView.image = selectedImage
            photoImageView.contentMode = .scaleAspectFill
            photoImageView.clipsToBounds = true
        }

        dismiss(animated: TUREAD, completion: nil)
    }
- 在
tableView(_:didSelectRowAt:)中的imagePicker定义后添加:
imagePicker.delegate = self
用代码的方式定义约束
之前都是通过storyboard设置约束,其实也可以通过代码的形式设置。
之前的地图的约束例子,storyboard 中的
Map View.leading = leading等价于:
let leadingConstraint = NSLayoutConstraint(item: mapView, attribute: NSLayoutAttribute.leading, relatedBy: .equal, toItem: mapView.superview, attribute: .leading, multiplier: 1, constant: 0)
leadingConstraint.isActive = true在添加
imagePickerController(_:didFinishPickingMediaWithInfo:)的dismiss(animated: true, completion: nil)之前添加4个约束代码。
let leadingConstraint = NSLayoutConstraint(item: photoImageView, attribute: .leading, relatedBy: .equal, toItem: photoImageView.superview, attribute: .leading, multiplier: 1, constant: 0)
        leadingConstraint.isActive = true

        let trailingConstrain = NSLayoutConstraint(item: photoImageView, attribute: .trailing, relatedBy: .equal, toItem: photoImageView.superview, attribute: .trailing, multiplier: 1, constant: 0)
        trailingConstrain.isActive = true

        let topConstraint = NSLayoutConstraint(item: photoImageView, attribute: .top, relatedBy: .equal, toItem: photoImageView.superview, attribute: .top, multiplier: 1, constant: 0)

        let buttomConstraint = NSLayoutConstraint(item: photoImageView, attribute: .bottom, relatedBy: .equal, toItem: photoImageView.superview, attribute: .bottom, multiplier: 1, constant: 0)
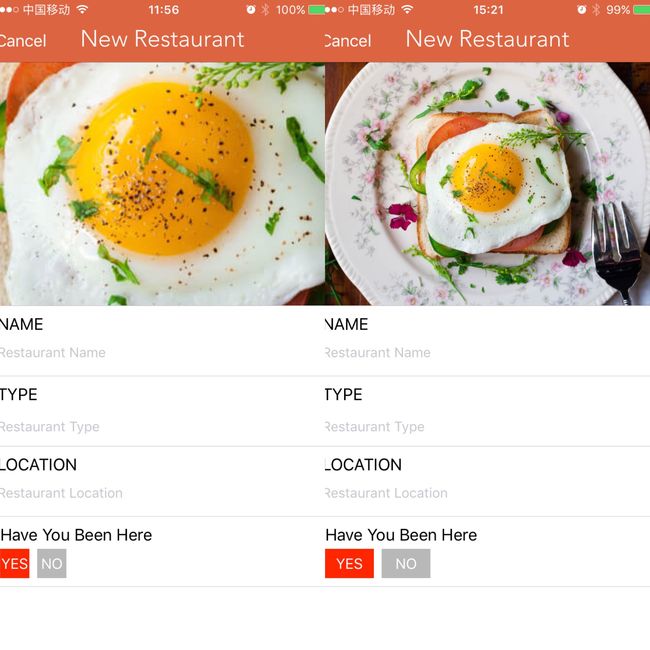
添加约束前后对比:
Exercise:验证添加数据
- 在New Restaurant Controller的Navigation controller的有右上角添加Save按钮。
- 在
AddRestaurantController中添加五个接口和一个变量,并关联。
    @IBOutlet var nameTextField:UITextField!
    @IBOutlet var typeTextField:UITextField!
    @IBOutlet var locationTextField:UITextField!
    @IBOutlet var yesButton:UIButton!
    @IBOutlet var noButton:UIButton!
     var isVisited: Bool = true
- 添加一个Action,关联save按钮。
    @IBAction func save(_ sender: Any) {

        if (nameTextField.text?.isEmpty)! || (typeTextField.text?.isEmpty)! || (locationTextField.text?.isEmpty)! {
            let alertController = UIAlertController(title: "Oops", message: "We can't proceed because one of the fields is blank....", preferredStyle: .alert)
            let alertAction = UIAlertAction(title: "OK", style: .default, handler: nil)
            alertController.addAction(alertAction)
            present(alertController, animated: true, completion: nil)

        } else {
            print(nameTextField.text, typeTextField.text, locationTextField.text, isVisited)
            dismiss(animated: true, completion: nil)
    //            performSegue(withIdentifier: "unwindToHomeScreen", sender: self)
        }
    }
去除** Add Restaurant view controller**回到主界面有两种方法,一是dismiss(animated: true, completion: nil),而是利用unwind segue。
- 添加一个Action
toggleBeenHereButton:,用于yesButton和noButton的操作。
    @IBAction func toggleBeenHereButton(sender: UIButton) {
        if sender == yesButton {
            isVisited = true
            yesButton.backgroundColor = UIColor.red
            noButton.backgroundColor = UIColor.gray
        } else {
            isVisited = false
            yesButton.backgroundColor = UIColor.gray
            noButton.backgroundColor = UIColor.red
        }
    }
代码
Beginning-iOS-Programming-with-Swift
说明
此文是学习appcode网站出的一本书 《Beginning iOS 10 Programming with Swift》 的一篇记录
系列文章目录
- 开始用Swift开发iOS 10 - 1 前言
- 开始用Swift开发iOS 10 - 2 Hello World!第一个Swift APP
- 开始用Swift开发iOS 10 - 3 介绍Auto Layout
- 开始用Swift开发iOS 10 - 4 用Stack View设计UI
- [开始用Swift开发iOS 10 - 5 原型的介绍]
- 开始用Swift开发iOS 10 - 6 创建简单的Table Based App
- 开始用Swift开发iOS 10 - 7 定制Table Views
- 开始用Swift开发iOS 10 - 8 Table View和UIAlertController的交互
- 开始用Swift开发iOS 10 - 9 Table Row的删除, UITableViewRowAction和UIActivityViewController的使用
- 开始用Swift开发iOS 10 - 10 Navigation Controller的介绍和Segue
- 开始用Swift开发iOS 10 - 11 面向对象编程介绍
- 开始用Swift开发iOS 10 - 12 丰富Detail View和定制化Navigation Bar
- 开始用Swift开发iOS 10 - 13 Self Sizing Cells and Dynamic Type
- 开始用Swift开发iOS 10 - 14 基础动画,模糊效果和Unwind Segue
- 开始用Swift开发iOS 10 - 15 使用地图


