bintary
前言
相信看到我这篇文章的人已经踩了不少坑了。新版bintray改版后,按照之前网上的教程出现了很多迷茫。很对东西对应不上。接下来我来说一下对应不上的几点。
1.Bintray账号注册
首先你的有个 bintray账号,如果没有的话注册一个(记得好像163邮箱不能注册的)
这就是新版的Bintray首页,多出了一个organization的tab和之前的有所不同,而且你的创建的仓库入口只能通过这个来创建。而不是通过本身来创建
2.创建一个属于自己的repository
首页很明显可以看到一个Add New Repository的按钮,打开之后直接输入这个repository的name,和type即可,然后直接点击create 就行了(其他的随意)。
3.创建Repository的Package
这个package主要就是来存放你的library
点击Add New Package之后需要输入一些信息
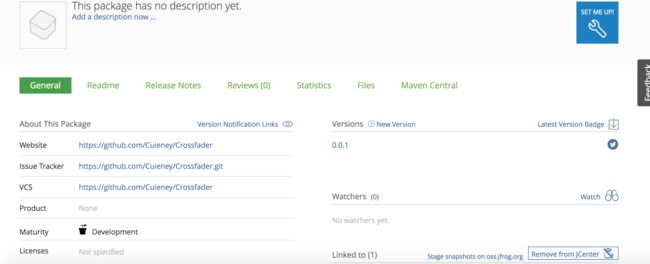
这是我的输入的一些信息,大家可以参考,website就是这个library在github上的地址,issue就是git的地址。
4.接下来就是studio的内容(很多坑就在此)
1.配置Gradle Bintray Plugin,在项目最外层的gradle里面添加
dependencies {
    classpath 'com.android.tools.build:gradle:1.2.3'
    classpath 'com.jfrog.bintray.gradle:gradle-bintray-plugin:1.2'
    classpath 'com.github.dcendents:android-maven-plugin:1.2'
}
2.接下来修改local.properties。在里面定义api key的用户名以及被创建key的密码,用于bintray的认证。之所以要把这些东西放在这个文件是因为这些信息时比较敏感的,不应该到处分享,包括版本控制里面。
下面是要添加的2行代码:
bintray.user=YOUR_BINTRAY_USERNAME
bintray.apikey=YOUR_BINTRAY_API_KEY
重点重点重点,不然你会出现各种奇葩的问题404 401等什么鬼的
首先这个bintray.user名字是你的用户名而不是organization的名字
看到了吗就是这个账号的名字,不是下面的cuieneymaster,而是上面的cuieney
好了 那接下来就是bintray.apikey在哪里获取呢。看到上面那副图了吗?点击Edit profile。
看到了把。就是这个API Key 输入用户密码就可以拿到这个key了。好了,坑1已经过去了。
我们继续studio部分
3.配置library里面的gradle内容。
打开gradle里面然后把下面两行代码添加进去
    apply plugin: 'com.github.dcendents.android-maven'
    apply plugin: 'com.jfrog.bintray'
别问为什么,按照这样操作没问题
好吧我还是把图贴上吧
哦对了,还有个version版本号,就是标记你当前提交的版本号,没什么。记得要写哦,不过下面你也可以直接写在代码里面。
那我们继续,下面还有很多重要的代码要贴的,
def siteUrl = 'https://github.com/Cuieney/Crossfader'   // 项目的主页
def gitUrl = 'https://github.com/Cuieney/Crossfader.git'   // Git仓库的url
group = "com.cuieneylibrary.crossfader"            // Maven Group ID for the artifact,
install {
      repositories.mavenInstaller {
           // This generates POM.xml with proper parameters
           pom {
               project {
                             packaging 'aar'
                             // Add your description here
                             name 'Let the music to keep up with your tempo'
                             //项目的描述 你可以多写一点
                             url siteUrl
                             // Set your license
                             licenses {
                                 license {
                                        name 'The Apache Software License, Version 2.0'
                                        url 'http://www.apache.org/licenses/LICENSE-2.0.txt'
                                  }
                             }
                             developers {
                                developer {
                                       id 'cuieney'        //填写的一些基本信息
                                       name 'cuieney'
                                       email '[email protected]'
                                }
                             }
                             scm {
                                     connection gitUrl
                                     developerConnection gitUrl
                                     url siteUrl
                             }
                          }
                     }
                }
       }
 task sourcesJar(type: Jar)
 {
    from android.sourceSets.main.java.srcDirs
    classifier = 'sources'
 }
//task javadoc(type: Javadoc){
  //options.encoding = 'UTF-8'
  //source = android.sourceSets.main.java.srcDirs
  // classpath += project.files(android.getBootClasspath().join(File.pathSeparator))
//}
//task javadocJar(type: Jar, dependsOn: javadoc) {
  //    classifier = 'javadoc'
  //    from javadoc.destinationDir
//}
artifacts {
//    archives javadocJar
     archives sourcesJar
}
Properties properties = new Properties()//读取properties的配置信息,当然直接把信息写到代码里也是可以的
properties.load(project.rootProject.file('local.properties').newDataInputStream())bintray {
         user = properties.getProperty("bintray.user")
         key = properties.getProperty("bintray.apikey")
         configurations = ['archives']
         pkg {
                userOrg="cuieneymaster"
                repo = "test"          //这个应该是传到maven的仓库的
                name = "crossfader"    //发布的项目名字
                websiteUrl = siteUrl
                vcsUrl = gitUrl
                licenses = ["Apache-2.0"]
                publish = true
}}
看到了这些代码肯定也是懵逼了。不要问直接粘贴过去,下面我会介绍其中的一些主要的字段到底干嘛的。
在gradle里面两个task被我注释掉了,主要是因为library中有中文不能生成文档,大家如果写测试的话可以释放开,其中上面很对字段需要写出自己的东西,可以改一下
重点1
group = "com.cuieneylibrary.crossfader"
这句代码改如何替换,这个代码的意思是自己maven库的地址,大家可以自己创建一个属于自己的maven库 Sonatype点击可以自己注册一个。如果有什么不明白的可以参考
http://www.trinea.cn/dev-tools/upload-java-jar-or-android-aar-to-maven-center-repository/
http://www.jcodecraeer.com/a/anzhuokaifa/androidkaifa/2015/0623/3097.html
这两篇文章。(group 这个字段应该可以随意写,因为我们只是上次到jCenter的,不防试试)
重点2
pkg {
       userOrg="cuieneymaster"
       repo = "test" //这个应该是传到maven的仓库的
       name = "crossfader" //发布的项目名字
       websiteUrl = siteUrl
       vcsUrl = gitUrl
       licenses = ["Apache-2.0"]
       publish = true
}
这个地方如果写错你肯定出现404 not found ,主要是因为新版bintray多出个organization所以这里你会看到多出一个字段userOrg,不然你上传jCenter的时候会出现各种错误。上面的userOrg repo name 可以根据我下面的截图来填写
看见了吗上面有个类似于树状图的圆圈
对的就根据这个来填写你要上面的三个信息就可以了。说了这么多,到了最后一步了那就是上传到bintray。
重点3(可忽略)
在studio 下的shell下输入
./gradlew install
./gradlew bintrayUpload
如果成功的话你的,恭喜你,你的library已经上传到网上了,全世界人都可以看到了,接下来还需要一步,那就是打开bintray主页,找到你library上传的package,然后点击add to jcenter即可,很快就会上传上去,与老版bintray相比,速度快多了。
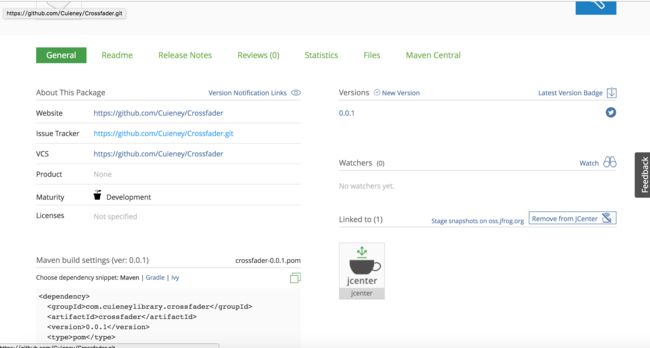
上传成功就可以看到在Linked to多出来个jcenter的杯子 。这时候你的library已经上传到了jcenter,这时候你就可以在
dependencies {
    compile 'com.google.code.gson:gson:2.3.1'
}
测试结果
一行代码导入你的库了。
在网页输入http://jcenter.bintray.com
然后拼接上面的你刚刚在gradle里面配置的group 找到属于你的下载地址即可。


