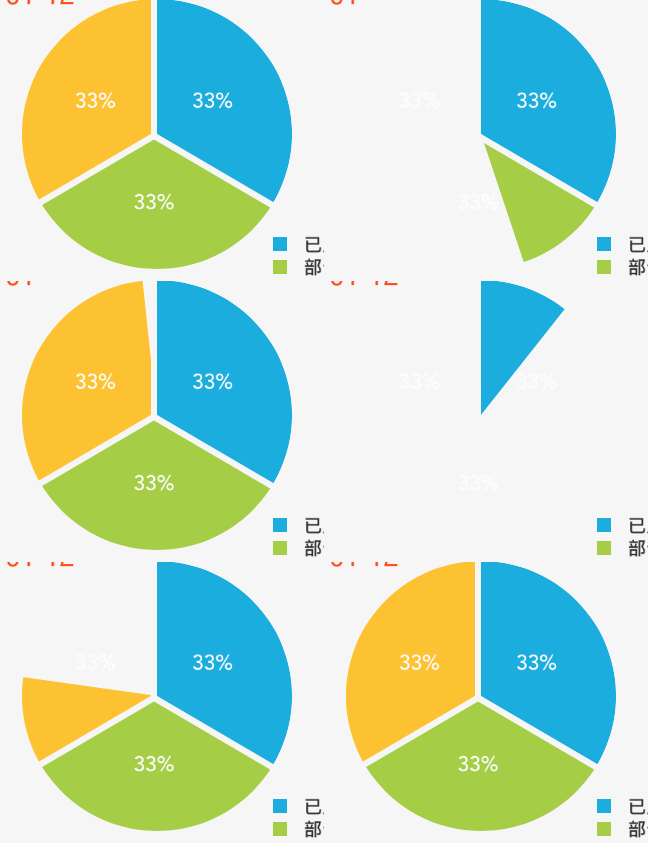
1.动态饼状图
大家都知道这是通过 CAShapeLayer 和 CABasicAnimation 结合起来实现的,可是其中还是有需要注意的地方,实现的步骤大致如下:
- 绘制一个 CAShapeLayer 不用指定大小,_pieLayer = [CAShapeLayer layer];
- 绘制三个 彩色的扇形CAShapeLayer 并加载在 _pieLayer 上。
- 绘制一个 遮盖住 这三个 CAShapeLayer 的 CAShapeLayer 并赋值给 _pieLayer.mask ,我们都知道 maskLayer的颜色是不会印象视图的显示的,视图的显示只跟maskLayer的 alpha有关。
- _pieLayer.mask 添加 CABasicAnimation 动画,使 _pieLayer.mask 动画绘制,就达到了 _pieLayer 的动态绘制,其实是无法对 _pieLayer 动态绘制,因为它是一个集合,添加了多个 CAShapeLayer,也算是一个转化思想在里面.
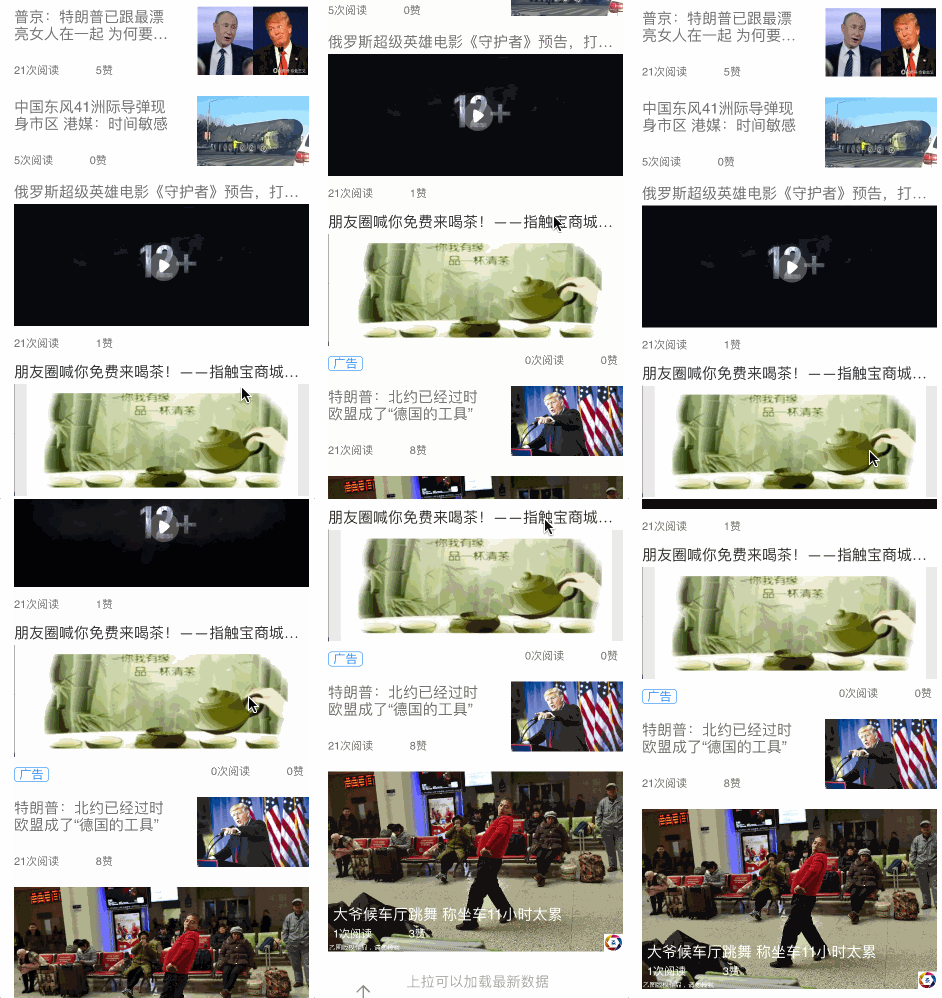
2.多种风格的Cell定制
-
数据model内的数据解析,这一步很关键。多地方复用,把数据操作剥离于ViewController
@implementation NewsModel- (void)initWithDic :(NSDictionary *)dic; { self.newsId = [[MethodTool shareTool]cleanData:dic[@"id"]]; self.newsType = [[MethodTool shareTool]cleanData:dic[@"facebook_type"]]; self.title = [[MethodTool shareTool]cleanData:dic[@"facebook_title"]]; if ([self.newsType isEqualToString:@"1"]) { self.cellHeight = Scale_Y(90); }else if ([self.newsType isEqualToString:@"2"]) { self.cellHeight = Scale_Y(200); self.dataDic = dic; }else if ([self.newsType isEqualToString:@"3"]) { self.cellHeight = Scale_Y(170); self.linkUrl = dic[@"advertising_link"]; }else{ self.cellHeight = Scale_Y(180); self.videoUrl = [[MethodTool shareTool]cleanData:dic[@"video_link"]]; } } -
cellForRowAtIndexPath 中的操作
- (UITableViewCell *)tableView:(UITableView *)tableView cellForRowAtIndexPath:(NSIndexPath *)indexPath { NewsModel *newM = dataArray[indexPath.row]; if ([newM.newsType isEqualToString:@"1"]) { NewsOneTableViewCell *cell = [tableView dequeueReusableCellWithIdentifier:cellIdentifier1]; if (!cell) { cell = [[NewsOneTableViewCell alloc] initWithStyle:UITableViewCellStyleDefault reuseIdentifier:cellIdentifier1]; cell.selectionStyle = UITableViewCellSelectionStyleGray; } cell.tag = indexPath.row; cell.cellModel = dataArray[indexPath.row]; return cell; } ........ #中间省略很多种情况 else { NewsFourTableViewCell *cell = [tableView dequeueReusableCellWithIdentifier:cellIdentifier4]; if (!cell) { cell = [[NewsFourTableViewCell alloc] initWithStyle:UITableViewCellStyleDefault reuseIdentifier:cellIdentifier4]; cell.selectionStyle = UITableViewCellSelectionStyleGray; } cell.tag = indexPath.row; cell.cellModel = dataArray[indexPath.row]; return cell; } } -
分别定制几个不同的 UITableViewVCell,并重写 CellModel 的 set方法赋值
 - (void)setCellModel:(NewsModel *)cellModel
{
  NSString *imageUrl1 = [NSString stringWithFormat:@"%@%@",imageUrl,cellModel.imgUrl];
  [self.headImage sd_setImageWithURL:[NSURL URLWithString:imageUrl1] placeholderImage:[UIImage imageNamed:@"loading"] completed:^(UIImage *image, NSError *error, SDImageCacheType cacheType, NSURL *imageURL) {
  }];
  self.title.text = cellModel.title;
  self.title.textColor = [cellModel.isread isEqualToString:@"0"]?blackC:GrayTextColor;
  self.subTitle.text = [NSString stringWithFormat:@"%@次阅读            %@赞",cellModel.ClickCount,cellModel.likeCount];
  self.subTitle.textColor = GrayTextColor;

  }
3.UIButton中文字图片对齐方式的设置。
如果在一个 UIButton 中你设置 setImage并且 setTitle 。你会发现,默认的是 图片在左边,文字在右边。并且这跟 UIButton 的Frame无关。如果想达到下面的效果,就需要改变setImageEdgeInsets、setTitleEdgeInsets设置即可。
//按钮内容完美居中的方法
# 需要注意的是 这里的图片尺寸会采用图片的原始尺寸,所以要注意把
  UIButton的尺寸设置的足够大才可以达到效果,否则会有图片文字重合的现象。

# 注意这个方法的调用要在Button的尺寸位置设置过之后才行(Frame,layout 设置后调用才有效果),否则不会生效。

-(void)setButtonContentCenter:(UIButton *) btn
{
    CGSize imgViewSize,titleSize,btnSize;
    UIEdgeInsets imageViewEdge,titleEdge;
    CGFloat heightSpace = 10.0f;

    //设置按钮内边距
    imgViewSize = btn.imageView.bounds.size;
    titleSize = btn.titleLabel.bounds.size;
    btnSize = btn.bounds.size;


    imageViewEdge = UIEdgeInsetsMake(heightSpace,btn.frame.size.width/2 -imgViewSize.width/2, btnSize.height -imgViewSize.height - heightSpace, btn.frame.size.width/2 -imgViewSize.width/2);
    [btn setImageEdgeInsets:imageViewEdge];
    titleEdge = UIEdgeInsetsMake(imgViewSize.height +heightSpace, - imgViewSize.width, 0.0, 0.0);
    [btn setTitleEdgeInsets:titleEdge];

}
UIButton 可以说是专门为 UILabel和UIImameView添加点击效果的控件,认清楚这个事实,我们运用UIButton的时候就更准确了,我们在实际的开发中这样的会遇到这样的情况,有一个小图标,但是这个图标又能点击,我们只需要把这个Button setImage 然后调整这个图标在Button中的位置即可达到效果
[self.settingButton setImageEdgeInsets:UIEdgeInsetsMake(Scale_Y(5), Scale_X(7), Scale_Y(7), Scale_X(7))];
不过值得一提的是 使用 SDWebImage为UIButtont添加的是 内容Image,而不是 BgImage,这俩个Image可以通过 currentImage 和 currentBackgroundImage 来获取。
4.使用UIAlertView做简单文本框输入
使用UIAlertView做登录输入, 默认的是 登录名、密码,我们可以修改 TF的placeholer字体来达到我们想要的效果。
 #设置UIAlertView类型
 [settingAlert setAlertViewStyle:UIAlertViewStyleLoginAndPasswordInput];
 #textFieldAtIndex  这个方法可以获取到 UIAlertView 里面的 UITextField,你可以设置它的placeholder也可以获取到里面的值。

 UITextField *nameField = [settingAlert textFieldAtIndex:0];
 nameField.placeholder = @"试点编号";
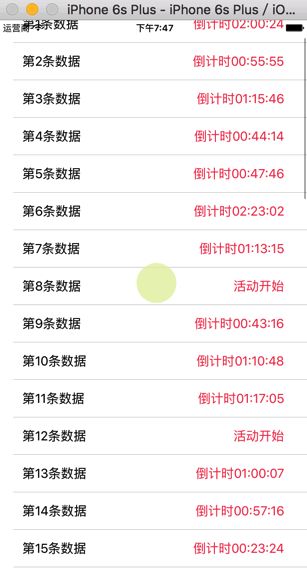
5.iOS在cell中使用倒计时的处理方法
创建多个计时器并计时确实是比较消耗系统资源的,不过由于Cell的重用机制,一般也不需要创建太多计时器,时间戳是以秒为单位,十进制的值,时间戳差1意味着俩个时间之前差一秒。我们可以利用Model的Start时间戳来实现cell中的倒计时。
不过这里是另一种实现思路,也挺不错的:iOS在cell中使用倒计时的处理方法
6.列表和网格视图的相互切换
思路不错可以借鉴,大致如下:
- 点击按钮时切换按钮的图标同时设置 全局 isGrid 数值,并刷新 CollectionView。
- 根据全局的 isGrid 设置CollectionView 每个Cell的尺寸大小 SizeForItemAtIndexPath函数
- 在自定义CollectionViewCell中设置一个 是否为网格的属性 isGrid,根据 isGrid设置 CollectionViewCell子控件的布局位置。
这样点击按钮刷新 CollectionView即可达到如上效果。
7.发光字体
加上白色阴影 就可以发光了
如果用的发光字体比较多 可以直接写个font类
 CGContextRef context = UIGraphicsGetCurrentContext();
 CGContextSaveGState(context);
 //[[UIColor colorWithRed:0x3e/255.0 green:0x45/255.0 blue:0x4e/255.0 alpha:1.0] set];
 CGContextSetShadowWithColor(context, CGSizeMake(0, 0), 5, [UIColor whiteColor].CGColor); 这样就可以发光了 字体
8.LED电子表字体、iPhone桌面时间字体
UILabel *label=[[UILabel alloc]initWithFrame:CGRectMake(10, 300, Scale_X(100), 30)];
label.textColor=[UIColor redColor];
[label setBackgroundColor:[UIColor clearColor]];
[label setFont:[UIFont fontWithName:@"DBLCDTempBlack" size:30]];
label.textAlignment = NSTextAlignmentCenter;
[self.sc addSubview:label];
int hour = 23;
int min = 59;
int sec = 59;
label.text = [NSString stringWithFormat:@"%d:%d:%02d", hour, min,sec];
%02d什么意思?
2是宽度很简单。如果整数不够2列就补上0
比如
printf("%02d" ,3);
结果就是
03
如果大于2没有影响
printf("%02d",1234);
1234
[label setFont:[UIFont fontWithName:@"HelveticaNeue-UltraLight" size:50]];
8.用表做,不用SC
9 渐渐消失的效果
iOS有私有iPA可以实现这样的效果,不过有可能被拒绝,还是使用UIKit动画比较稳
[UIView beginAnimations:nil context:nil];
[UIView setAnimationDelegate:self];
[UIView setAnimationDidStopSelector:@selector(loadingViewAnimationDone)];
[UIView setAnimationDuration:5];
appearView.alpha = 0;
[UIView commitAnimations];
 //动画结束时执行的方法
- (void)loadingViewAnimationDone{
}
10.Label的内容自适应
[label sizeToFit];
会根据label的字 改变 label 的Frame。
label.adjustsFontSizeToFitWidth = YES;
期待的效果是,设置一个Label的Frame,让字体自动调整大小,可是这个方法最大设置的字体17.
系统默认最大17,超过这个值就不会自己增大了,而是要自己设置一个更大的值
