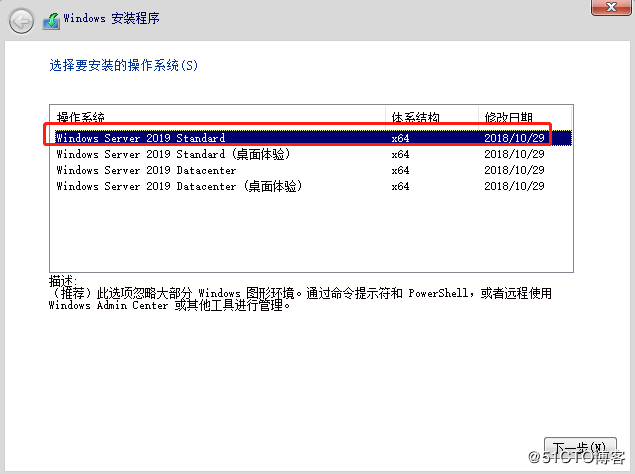
1. install win server 2019 core
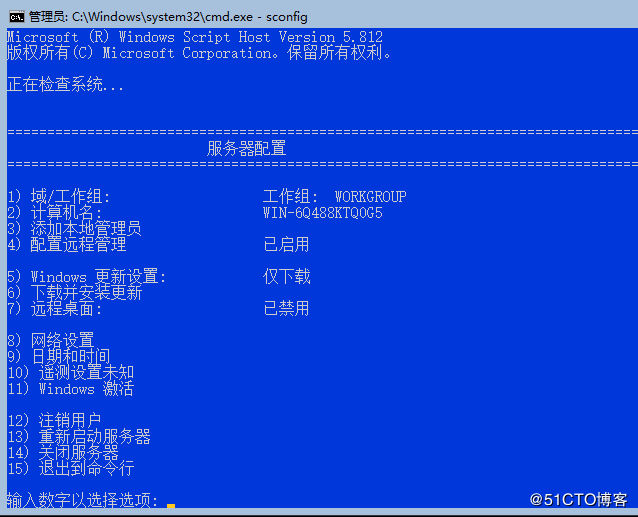
2.sconfig.exe
Get-NetFirewallRule -DisplayGroup "File and Printer Sharing" |select Name,Enabled,Direction,Action
Enable-NetFirewallRule -DisplayGroup "File and Printer Sharing"
Enable-NetFirewallRule -DisplayGroup "文件和打印机共享"
Get-NetIPAddress
New-NetIPAddress -InterfaceIndex 6 -IPAddress 192.168.222.20 -PrefixLength 24 -DefaultGateway 192.168.222.2
Set-DNSClientServerAddress -InterfaceIndex 6 -ServerAddress "192.168.222.20,192.168.222.2"
3.install AD
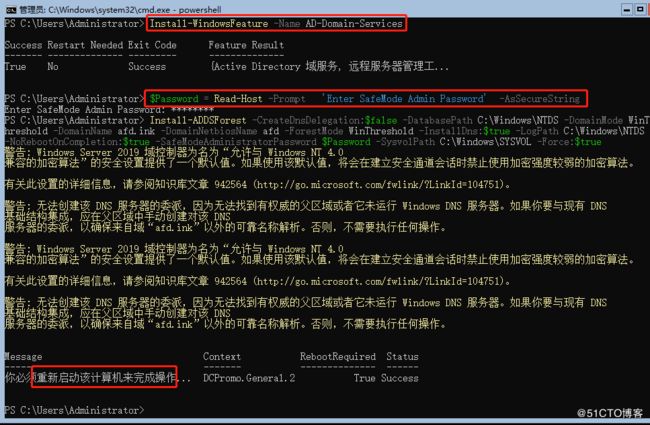
Install-WindowsFeature -Name AD-Domain-Services
$Password = Read-Host -Prompt 'Enter SafeMode Admin Password' -AsSecureString
Install-ADDSForest -CreateDnsDelegation:$false -DatabasePath C:\Windows\NTDS -DomainMode WinThreshold -DomainName afd.ink -DomainNetbiosName afd -ForestMode WinThreshold -InstallDns:$true -LogPath C:\Windows\NTDS -NoRebootOnCompletion:$true -SafeModeAdministratorPassword $Password -SysvolPath C:\Windows\SYSVOL -Force:$true
restart-computer
4. Add admin user:
Get-ADUser -Identity "Administrator" -Properties *
set-ADUser administrator -PasswordNeverExpires $true
New-ADUser -Name 'gazh' -SamAccountName 'gazh' -DisplayName 'gazh' -Enabled $True -PasswordNeverExpires $True -UserPrincipalName '[email protected]' -AccountPassword (Read-Host "Password" -AsSecureString) -PassThru
OR:
$SecurePW = Read-Host -Prompt "Enter a password" -asSecureString
New-ADUser -Name "gazh" `
-AccountPassword $SecurePW `
-SamAccountName 'gazh' `
-DisplayName 'gazh' `
-Enabled $True `
-PassThru `
-PasswordNeverExpires $True `
-UserPrincipalName '[email protected]'
$SuperUserGroups = @()
$SuperUserGroups = (Get-ADUser -Identity "Administrator" -Properties * ).MemberOf
ForEach ($Group in $SuperUserGroups ) { Add-ADGroupMember -Identity $Group -Members "gazh"}
(Get-ADUser -Identity gazh -Properties *).MemberOf
3.install AD-Certificate
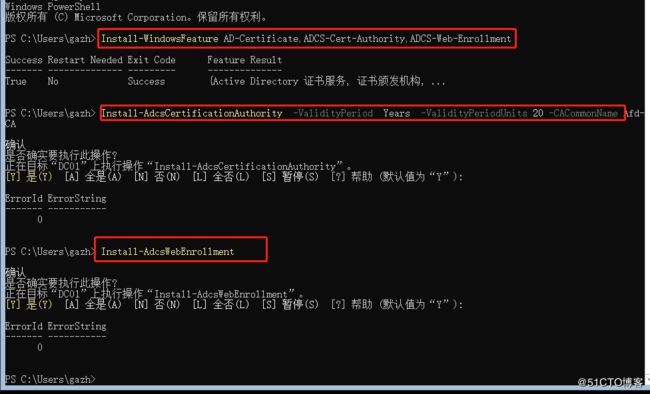
Install-WindowsFeature AD-Certificate,ADCS-Cert-Authority,ADCS-Web-Enrollment
Install-AdcsCertificationAuthority -ValidityPeriod Years -ValidityPeriodUnits 20 -CACommonName Afd-CA
配置 Certificate Authority Web Enrollment:
Install-AdcsWebEnrollment
打开浏览:http://server_ip/certsrv
就可以通过浏览器申请证书了。
4.install exchange server 2019
Enable-NetFirewallRule -DisplayGroup "文件和打印机共享"
Get-NetIPAddress
New-NetIPAddress -InterfaceIndex 6 -IPAddress 192.168.222.25 -PrefixLength 24 -DefaultGateway 192.168.222.2
Set-DNSClientServerAddress -InterfaceIndex 6 -ServerAddress 192.168.222.20
加入域并安装必要软件 :https://docs.microsoft.com/en-us/Exchange/plan-and-deploy/prerequisites?view=exchserver-2019
安装 .net 4.8
Exchange 2019 Mailbox servers on Windows Server 2019
-
Install the following software:
a. .NET Framework 4.8
b. Visual C++ Redistributable Package for Visual Studio 2012
c. Visual C++ Redistributable Package for Visual Studio 2013
Note
An overview of the latest supported versions is available at: Visual C++ Redistributable versions
Start-BitsTransfer -Source https://download.visualstudio.microsoft.com/download/pr/014120d7-d689-4305-befd-3cb711108212/0fd66638cde16859462a6243a4629a50/ndp48-x86-x64-allos-enu.exe -Destination .\Downloads\
Start-BitsTransfer -Source https://download.visualstudio.microsoft.com/download/pr/10912040/8a9bc6a378988031b4de96bf6eecbe37/vcredist_x64.exe -Destination .\Downloads\
.\Downloads\ndp48-x86-x64-allos-enu.exe /q
D:\UCMARedist\setup.exe
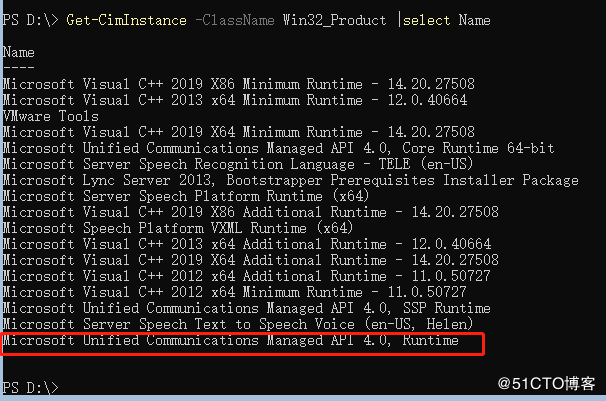
Get-CimInstance -ClassName Win32_Product |select Name
2.install windows feature
Install-WindowsFeature Server-Media-Foundation, NET-Framework-45-Features, RPC-over-HTTP-proxy, RSAT-Clustering, RSAT-Clustering-CmdInterface, RSAT-Clustering-PowerShell, WAS-Process-Model, Web-Asp-Net45, Web-Basic-Auth, Web-Client-Auth, Web-Digest-Auth, Web-Dir-Browsing, Web-Dyn-Compression, Web-Http-Errors, Web-Http-Logging, Web-Http-Redirect, Web-Http-Tracing, Web-ISAPI-Ext, Web-ISAPI-Filter, Web-Metabase, Web-Mgmt-Service, Web-Net-Ext45, Web-Request-Monitor, Web-Server, Web-Stat-Compression, Web-Static-Content, Web-Windows-Auth, Web-WMI, RSAT-ADDS
3.AD扩展:
.\Setup.exe /PrepareSchema /IAcceptExchangeServerLicenseTerms
.\Setup.exe /PrepareAD /OrganizationName:"Afd" /IAcceptExchangeServerLicenseTerms
4.安装 Exchange 2019
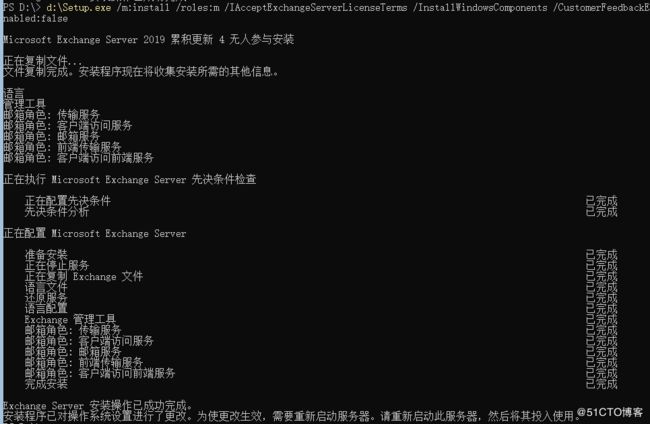
d:\Setup.exe /m:install /roles:m /IAcceptExchangeServerLicenseTerms /InstallWindowsComponents /CustomerFeedbackEnabled:false
5.Post-Installation Tasks:
Add-PSSnapin Microsoft.Exchange.Management.PowerShell.SnapIn;
Exchange Server 2019 Enterprise
YCQY7-BNTF6-R337H-69FGX-P39TY
Exchange Server 2019 Standard
G3FMN-FGW6B-MQ9VW-YVFV8-292KP
Set-ExchangeServer ex19 -ProductKey G3FMN-FGW6B-MQ9VW-YVFV8-292KP
Restart-Service MSExchangeIS
1)配置Exchange 证书:
$Data = New-ExchangeCertificate -FriendlyName "Ex19-CA" -GenerateRequest -SubjectName "c=cn,o=afd,cn=mail.afd.ink" -DomainName mail.afd.ink,autodiscover.afd.ink,ex19.afd.ink -PrivateKeyExportable $true
Set-Content -path "\\ex19\C$\Ex19-CA.req" -Value $Data
用记事本打开 \\ex19\C$\Ex19-CA.req 复制其内容到,http://CA-Server-ip/certsrv 去申请证书:
将申请到的证书下载到:\\ex19\C$\ex-ca.cer
Import-ExchangeCertificate -Server ex19 -FileData ([Byte[]]$(Get-Content -Path "\\ex19\C$\ex-ca.cer" -Encoding byte -ReadCount 0)) | Enable-ExchangeCertificate -Server ex19 -Services "IIS,POP,IMAP,SMTP"
2)Send Connector:
New-SendConnector -Name "Send To Internet" -Internet -AddressSpaces "*" -DNSRoutingEnabled:$TRUE -SourceTransportServers "ex19"
3)Receive Connector:
Get-ReceiveConnector -Server ex19 |select Identity,PermissionGroups
