一.简介
- Core Animation:核心动画。可以用在iOS和Mac OS X平台。
- Core Animation动画都是在后台操作的,不会阻塞主线程;
- Core Animation是直接作用在CALayer上的,非UIView。
核心动画使用步骤:
1.先要有CALayer
2.初始化弍CAAnimation对象,并设置动画相关属性
3.增加CAAnimation到CALayer中
常用属性
1.duration : 动画的持续时间
2.beginTime : 动画的开始时间
3.repeatCount : 动画的重复次数
4.autoreverses : 执行的动画按照原动画返回执行
5.timingFunction : 控制动画的显示节奏系统提供五种值选择,分别是
kCAMediaTimingFunctionLinear 线性动画
kCAMediaTimingFunctionEaseIn 先快后慢
kCAMediaTimingFunctionEaseOut 先慢后快
kCAMediaTimingFunctionEaseInEaseOut 先慢后快再慢
kCAMediaTimingFunctionDefault 默认,也属于中间比较快
6.delegate : 动画代理。能够检测动画的执行和结束。
@interface NSObject (CAAnimationDelegate)
 - (void)animationDidStart:(CAAnimation *)anim;
 - (void)animationDidStop:(CAAnimation *)anim finished:(BOOL)flag;
@end
7.path:关键帧动画中的执行路径
8.type:过渡动画的动画类型,系统提供了四种过渡动画。
kCATransitionFade 渐变效果
kCATransitionMoveIn 进入覆盖效果
kCATransitionPush 推出效果
kCATransitionReveal 揭露离开效果
subtype : 过渡动画的动画方向
kCATransitionFromRight 从右侧进入
kCATransitionFromLeft 从左侧进入
kCATransitionFromTop 从顶部进入
kCATransitionFromBottom 从底部进入
9.removedOnCompletion:动画完成时会自动删除动画,让不让动画被删除
10.fillMod:设置动画完成保持什么状态(默认回到原位)
二.iOS动画的调用方式
第一种:UIView 代码块调用
_demoView.frame = CGRectMake(0, SCREEN_HEIGHT/2-50, 50, 50);
[UIView animateWithDuration:1.0f animations:^{
_demoView.frame = CGRectMake(SCREEN_WIDTH, SCREEN_HEIGHT/2-50, 50, 50);
} completion:^(BOOL finished) {
_demoView.frame = CGRectMake(SCREEN_WIDTH/2-25, SCREEN_HEIGHT/2-50, 50, 50);
}];
第二种:UIView [begin commit]模式
_demoView.frame = CGRectMake(0, SCREEN_HEIGHT/2-50, 50, 50);
[UIView beginAnimations:nil context:nil];
[UIView setAnimationDuration:1.0f];
_demoView.frame = CGRectMake(SCREEN_WIDTH, SCREEN_HEIGHT/2-50, 50, 50);
[UIView commitAnimations];
第三种:使用Core Animation中的类
CABasicAnimation *anima = [CABasicAnimation animationWithKeyPath:@"position"];
anima.fromValue = [NSValue valueWithCGPoint:CGPointMake(0, SCREEN_HEIGHT/2-75)];
anima.toValue = [NSValue valueWithCGPoint:CGPointMake(SCREEN_WIDTH, SCREEN_HEIGHT/2-75)];
anima.duration = 1.0f;
[_demoView.layer addAnimation:anima forKey:@"positionAnimation"];
三.Core Animation的使用
1. 基础动画/CABasicAnimation
重要属性
fromValue:keyPath对应的初始值
toValue:keyPath对应的结束值
所有的旋转,缩放都是绕着锚点进行;
基础动画主要提供了对于CALayer对象中的可变属性进行简单动画的操作。比如:
位移:position
透明度:opacity
缩放:transform.scale
旋转:transform.rotation.z
背景色:backgroundColor
...
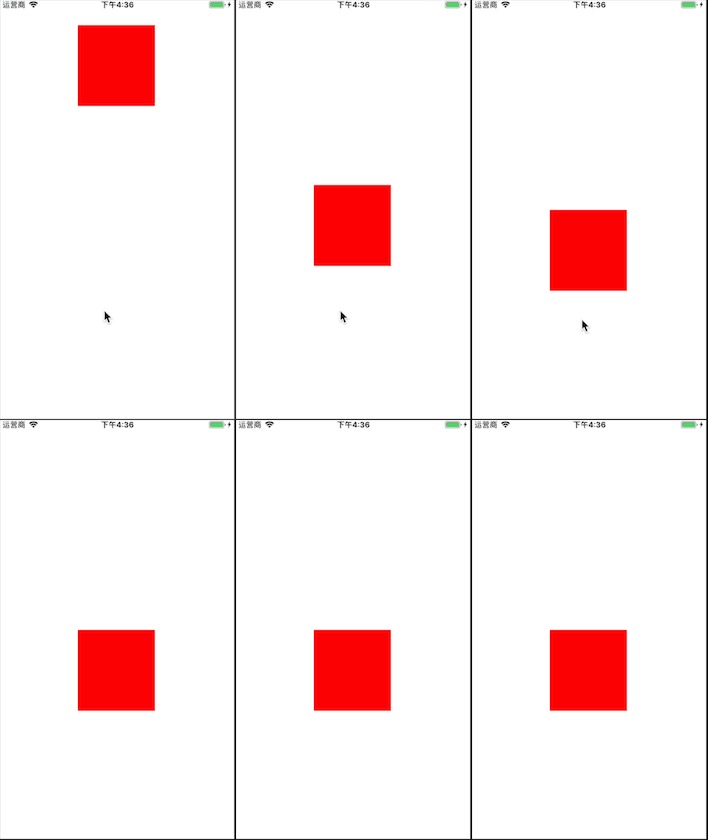
1.1位移
其他操作也是更改keyPath和formValue,toValue即可;formValue不写则默认是动画之前的值。
    //1.创建动画对象
    CABasicAnimation * anim = [CABasicAnimation animation];
    //2.设置动画属性
    anim.keyPath = @"position.y";
    anim.toValue = @(400);

    //动画完成时会自动删除动画,让动画不要被删除
    anim.removedOnCompletion = NO;
    //设置动画完成保持什么状态(默认回到原位)
    anim.fillMode = kCAFillModeForwards;

    [self.redView.layer addAnimation:anim forKey:@"anim1"];
1.2透明度
/**
 *  透明度动画
 */
-(void)opacityAniamtion{
    CABasicAnimation *anima = [CABasicAnimation animationWithKeyPath:@"opacity"];
    anima.fromValue = [NSNumber numberWithFloat:1.0f];
    anima.toValue = [NSNumber numberWithFloat:0.2f];
    anima.duration = 1.0f;
    [_demoView.layer addAnimation:anima forKey:@"opacityAniamtion"];
}
1.3缩放动画
/**
 *  缩放动画
 */
-(void)scaleAnimation{
    CABasicAnimation *anima = [CABasicAnimation animationWithKeyPath:@"transform.scale"];//同上
    anima.toValue = [NSNumber numberWithFloat:2.0f];
    anima.duration = 1.0f;
    [_demoView.layer addAnimation:anima forKey:@"scaleAnimation"];

}
1.4旋转动画
/**
 *  旋转动画
 */
-(void)rotateAnimation{
    CABasicAnimation *anima = [CABasicAnimation animationWithKeyPath:@"transform.rotation.z"];//绕着z轴为矢量,进行旋转(@"transform.rotation.z"==@@"transform.rotation")
    anima.toValue = [NSNumber numberWithFloat:M_PI];
    anima.duration = 1.0f;
    [_demoView.layer addAnimation:anima forKey:@"rotateAnimation"];

}
1.5背景色变化动画
/**
 *  背景色变化动画
 */
-(void)backgroundAnimation{
    CABasicAnimation *anima = [CABasicAnimation animationWithKeyPath:@"backgroundColor"];
    anima.toValue =(id) [UIColor greenColor].CGColor;
    anima.duration = 1.0f;
    [_demoView.layer addAnimation:anima forKey:@"backgroundAnimation"];
}
2. 关键帧动画/CAKeyframeAnimation
CAKeyframeAnimation和CABaseAnimation都属于CAPropertyAnimatin的子类。CABaseAnimation只能从一个数值(fromValue)变换成另一个数值(toValue),而CAKeyframeAnimation则会使用一个NSArray保存一组关键帧。
重要属性
values:NSArray类型。里面的元素称为”关键帧”(keyframe)。动画对象会在指定的时间(duration)内,依次显示values数组中的每一个关键帧。
path:可以设置一个CGPathRef\CGMutablePathRef,让层跟着路径移动。path只对CALayer的position和anchorPosition有用。如果你设置了path,那么values将被忽略。
keyTimes:可以为对应的关键帧指定对应的时间点,其取值范围为0到1.0,keyTimes中的每一个时间值都对应values中的每一帧.当keyTimes没有设置的时候,各个关键帧的时间是平分的。
2.1关键帧动画-values使用
-(void)touchesBegan:(NSSet *)touches withEvent:(UIEvent *)event{

    //帧动画(进行多个值之间的转换;可以根据路径做动画)
    CAKeyframeAnimation * anim = [CAKeyframeAnimation animation];
    anim.keyPath = @"transform.rotation";
    anim.values = @[@angleToRadio(-5),@angleToRadio(5),@angleToRadio(-5)];//从-5度旋转到5度,再到-5度

    anim.repeatCount = MAXFLOAT;
    anim.autoreverses = YES;//自动翻转
    anim.duration = 0.1;

    [self.imageView.layer addAnimation:anim forKey:@"anmi"];

}
2.1关键帧动画-路径使用
    //添加帧动画
    CAKeyframeAnimation * fishAni = [CAKeyframeAnimation animation];
    fishAni.keyPath = @"position";

    UIBezierPath * fishPath = [UIBezierPath bezierPath];
    [fishPath moveToPoint:CGPointMake(50, 200)];
    [fishPath addLineToPoint:CGPointMake(50, 100)];
    [fishPath addLineToPoint:CGPointMake(100, 100)];
    [fishPath addLineToPoint:CGPointMake(50, 200)];

    fishAni.path = fishPath.CGPath;
    fishAni.duration = 5;
    fishAni.repeatCount = HUGE;

    [self.fishLayer addAnimation:fishAni forKey:@"fishAni"];
3. 过渡动画/CATransition
重要属性
type:
转场动画类型,fade、moveIn、push、reveal;
私有API提供了其他很多非常炫的过渡动画,比如@"cube"、@"suckEffect"、@"oglFlip"、 @"rippleEffect"、@"pageCurl"、@"pageUnCurl"、@"cameraIrisHollowOpen"、@"cameraIrisHollowClose"等。不建议开发者们使用。因为苹果公司不提供维护,并且有可能造成你的app审核不通过。subtype:转场方向
startProgress:从哪个位置开始动画
endProgress:从哪个位置结束动画
注意:转场代码和转场动画必须在同一个方法当中
static int _imageIndex = 0;
-(void)touchesBegan:(NSSet *)touches withEvent:(UIEvent *)event{

    ///转场代码和转场动画必须在同一个方法当中
    //1.转场代码
    _imageIndex++;
    if (_imageIndex == 6) {
        _imageIndex = 0;
    }
    NSString * imageName = [NSString stringWithFormat:@"%d",_imageIndex];
    self.imageView.image = [UIImage imageNamed:imageName];

    //2.转场动画
    //添加动画
    CATransition * anim = [CATransition animation];
    //转场动画
    anim.type = @"cube";
    //转场方向
    anim.subtype = @"fromLeft";
    //从哪个位置开始动画
    anim.startProgress = 0.2;
    anim.endProgress = 0.5;
    anim.duration = 1.0;
    [self.imageView.layer addAnimation:anim forKey:@"anim"];
}
4. 动画组/CAAnimationGroup
动画组顾名思义,就把一组动画一起添加到layer上面;
重要属性
animations: 用来保存一组动画对象的NSArray
-(void)touchesBegan:(NSSet *)touches withEvent:(UIEvent *)event{

    //位移动画
    CABasicAnimation * anim = [CABasicAnimation animation];
    anim.keyPath = @"position.y";
    anim.toValue = @400;
//    anim.duration = 1.0;
//    anim.removedOnCompletion = NO;
//    anim.fillMode = kCAFillModeForwards;
//    [self.redView.layer addAnimation:anim forKey:@"anim"];

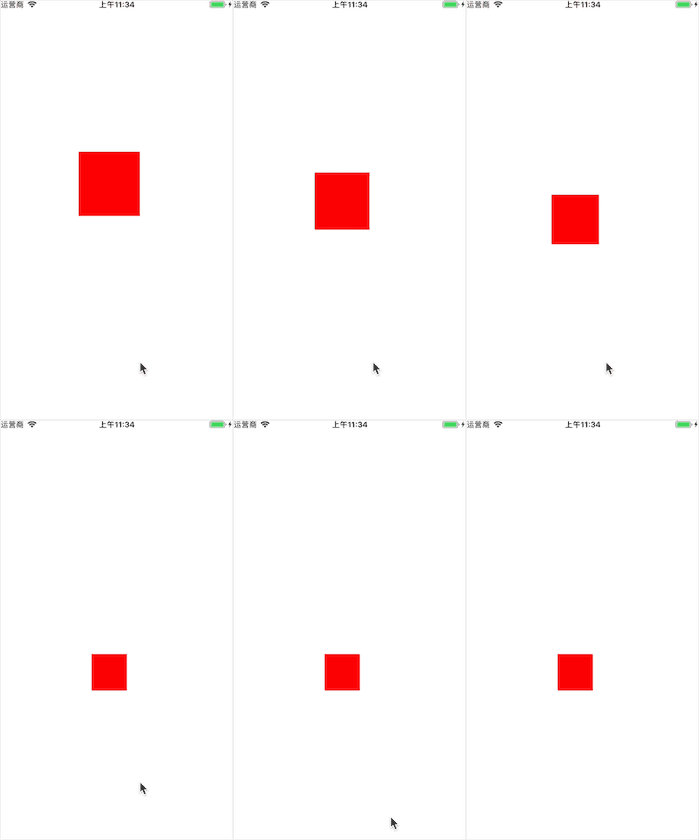
    //缩小动画
    CABasicAnimation * anim2 = [CABasicAnimation animation];
    anim2.keyPath = @"transform.scale";
    anim2.toValue = @0.5;
//    anim2.duration = 1.0;
//    anim2.removedOnCompletion = NO;
//    anim2.fillMode = kCAFillModeForwards;
//    [self.redView.layer addAnimation:anim2 forKey:@"anim2"];

    CAAnimationGroup * groupAnim = [CAAnimationGroup animation];
    groupAnim.animations = @[anim,anim2];
    //把数组当中的所有动画都添加到layer上面
    groupAnim.duration = 1.0;
    groupAnim.removedOnCompletion = NO;
    groupAnim.fillMode = kCAFillModeForwards;
    [self.redView.layer addAnimation:groupAnim forKey:nil];

}
5. 粒子动画
- CAEmitterLayer:主要控制发射源的位置、尺寸、发射模式、发射源的形状等等;
- CAEmitterCell:可以看作是单个粒子的原型(例如一个雪花),可设置属性来控制粒子的图片,颜色,方向,运动,缩放比例和生命周期。
    //1、layer
    CAEmitterLayer * emitterLayer = [CAEmitterLayer layer];
    //粒子发射的位置
    emitterLayer.emitterPosition = CGPointMake(120, 20);
    //发射源尺寸大小
    emitterLayer.emitterSize = CGSizeMake(20, 20);

    //发射模式
    emitterLayer.emitterMode = @"surface";
    //发射形状
    emitterLayer.emitterShape = @"line";

    //2、cell
    //创建粒子
    CAEmitterCell * cell = [CAEmitterCell emitterCell];
    //粒子的名字
    cell.name = @"snow";
    //粒子参数的速度乘数因子
    cell.birthRate = 1.0;
    cell.lifetime = 120.0;
    //粒子速度
    cell.velocity = 10.0;
    //粒子的速度范围
    cell.velocityRange = 10;
    //粒子y方向的加速度分量
    cell.yAcceleration = 2;
    //周围发射角度
    cell.emissionRange = 0.5 * M_PI;

    //设置粒子图片
    cell.contents = (id)[UIImage imageNamed:@"DazFlake"].CGImage;

    emitterLayer.emitterCells = @[cell];

    [self.view.layer insertSublayer:emitterLayer atIndex:0];
更多属性解释可查看:iOS动画开发----粒子系统---彩带效果
、iOS 粒子效果
6. 复制/CAReplicatorLayer
需要使用CAReplicatorLayer达到上图效果;相当于把上面的图片复制一份并旋转。
1、先在view上面添加一个imageView;view的layer层是CALayer类型,我们需要修改为CAReplicatorLayer类型。
@implementation VCView

//返回当前view内部layer的类型
+(Class)layerClass{

    //要复制图层,要把所在的图层修改为复制层CAReplicatorLayer才可以进行复制
    //原本是calyer类型,现在修改为CAReplicatorLayer类型
    return [CAReplicatorLayer class];
}

@end
2、view所在的controller里面,获取view的layer层,并进行复制。
复制是围绕着layer层的锚点进行复制的;
- (void)viewDidLoad {
    [super viewDidLoad];

    NSLog(@"%@",self.view.layer);

    CAReplicatorLayer * repLayer = (CAReplicatorLayer *)self.view.layer;
    //设置复制2份
    repLayer.instanceCount = 2;
   //绕着复制层的锚点进行旋转,即绕着view的layer层锚点进行旋转
    repLayer.instanceTransform = CATransform3DMakeRotation(M_PI, 1, 0, 0);

    //修改复制出来的颜色通道,每个色度-1,达到灰色效果
    repLayer.instanceRedOffset -=0.1;
    repLayer.instanceGreenOffset -=0.1;
    repLayer.instanceBlueOffset -=0.1;
    repLayer.instanceAlphaOffset -=0.1;

}
7. 综合效果
绘制以上效果:
1.触摸view的时候记录上这些点,把这些点绘制到路径上;
2.点击开始绘制按钮,把红色的layer使用帧动画沿着路径运动;
3.使用CAReplicatorLayer复制多个红色layer,一个个的沿着路径运动;
#import "VCView.h"

@interface VCView ()

@property(nonatomic,strong)UIBezierPath * path;

@property(nonatomic,strong)CALayer * aniLayer;

@end
@implementation VCView

-(void)awakeFromNib{

    [super awakeFromNib];

    //给view添加手势
    UIPanGestureRecognizer * pan = [[UIPanGestureRecognizer alloc] initWithTarget:self action:@selector(pan:)];
    [self addGestureRecognizer:pan];

    //创建路径
    UIBezierPath * path = [UIBezierPath bezierPath];
    self.path = path;

}
//1、根据手势创建路径
-(void)pan:(UIPanGestureRecognizer *)pan{

    //获取当前的点
    CGPoint currentP = [pan locationInView:self];
    if (pan.state == UIGestureRecognizerStateBegan) {

        //设置起点
        [self.path moveToPoint:currentP];

    }else if(pan.state == UIGestureRecognizerStateChanged){

        //添加一根线到当前点
        [self.path addLineToPoint:currentP];

        //重回(会调用drawRect)
        [self setNeedsDisplay];
    }

}
-(void)drawRect:(CGRect)rect{

    //绘制
    [self.path stroke];

}
//2、把红色的layer使用帧动画沿着路径运动
//3、使用CAReplicatorLayer复制多个红色layer,一个个的沿着路径运动;
- (IBAction)beginAnimation:(id)sender {

    CALayer * aniLayer = [CALayer layer];
    aniLayer.backgroundColor = [UIColor redColor].CGColor;
    aniLayer.frame = CGRectMake(0, 0, 10, 10);
    [self.layer addSublayer:aniLayer];
    _aniLayer = aniLayer;

    CAKeyframeAnimation * keyAnim = [CAKeyframeAnimation animation];
    keyAnim.path = self.path.CGPath;
    keyAnim.keyPath = @"position";
    keyAnim.duration = 3;
    keyAnim.repeatCount = 3;
    [_aniLayer addAnimation:keyAnim forKey:nil];

    CAReplicatorLayer * repl = (CAReplicatorLayer *)self.layer;
    repl.instanceCount = 3;
    repl.instanceDelay = 0.1;

}

+(Class)layerClass{

    return [CAReplicatorLayer class];
}


- (IBAction)endAnimation:(id)sender {

    UIBezierPath * path = [UIBezierPath bezierPath];
    self.path = path;
    [self setNeedsDisplay];

    [_aniLayer removeFromSuperlayer];
    _aniLayer = nil;
}
8. 检索一个动画
- (CAAnimation *)animationForKey:(NSString *)key;
不支持在动画运行过程中修改动画,所以这个方法主要用来检测动画的属性,或者判断它是否被添加到当前图层中。
9. 在动画过程中取消动画
为了终止一个指定的动画,你可以用如下方法把它从图层移除掉:
- (void)removeAnimationForKey:(NSString *)key;
或者移除所有动画:
- (void)removeAllAnimations;
一般说来,动画在结束之后被自动移除,除非设置removedOnCompletion为NO,如果你设置动画在结束之后不被自动移除,那么当它不需要的时候你要手动移除它;否则它会一直存在于内存中,直到图层被销毁。
UIView与核心动画的区别?
1.核心动画只作用在layer上面;
2.核心动画看到的一切都是假象,并没有修改属性的真实值;(比如UIImageView的layer进行了移动,但是UIImgeView的位置没有变)
什么时候使用核心动画,什么时候使用UIView动画?
当需要与用户交互时,必须使用UIView动画;
当根据路径做动画时,使用核心动画(核心动画里面的帧动画)
做转场动画时,使用核心动画,转场类型比较多;
参考:
iOS动画(Core Animation)总结
iOS核心动画高级技巧


