{{ item.subject }}
{{ item.description }}
首先要做的是搭建整个框架,包括如何连接数据库,如何应用model 以及Django Template Language的使用。
class ArticleList(Document):
    subject = StringField() # article subject
    author = StringField() # the author
    portrait = StringField() # a pic url of the author
    images = ListField(StringField()) # urls of images used in the article
    categories = ListField(StringField()) # tags of the article
    description = StringField() # the description of the article

    meta = {
        'collection': 'artiinfo'
    }
authorlist = ['Tilo Mitra', 'Eric Ferra', 'Reid Burke', 'Andrew Wooldridge']
portraitlist = ['img/common/tilo-avatar.png', 'img/common/ericf-avatar.png', 'img/common/reid-avatar.png', 'img/common/andrew-avatar.png']
imageslist = [[], [],['http://farm8.staticflickr.com/7382/8907351301_bd7460cffb.jpg', 'http://farm8.staticflickr.com/7448/8915936174_8d54ec76c6.jpg'], []]
categorylist = [['CSS', 'Pure'], ['JavaScript'], [], ['YUI']]
description = ['Yesterday at CSSConf, we launched Pure – a new CSS library. Phew! Here are the slides from the presentation. Although it looks pretty minimalist, we’ve been working on Pure for several months. After many iterations, we have released Pure as a set of small, responsive, CSS modules that you can use in every web project.','Lorem ipsum dolor sit amet, consectetur adipisicing elit, sed do eiusmod tempor incididunt ut labore et dolore magna aliqua. Ut enim ad minim veniam, quis nostrud exercitation ullamco laboris nisi ut aliquip ex ea commodo consequat. Duis aute irure dolor in reprehenderit in voluptate velit esse cillum dolore eu fugiat nulla pariatur.','','We are happy to announce the release of YUI 3.10.2! You can find it now on the Yahoo! CDN, download it directly, or pull it in via npm. We’ve also updated the YUI Library website with the latest documentation.']
titlelist = ['Introducing Pure', 'Everything You Need to Know About Grunt', 'Photos from CSSConf and JSConf', 'YUI 3.10.2 Released']
将上面准备好的数据插入数据表'blog.artiinfo'
from mongoengine import connect
connect('blog', host='127.0.0.1', port=27017)
Tip: model中的变量要与引用的数据表中的数据一一对应,名字也要完全相同,且一个不能多也一个不能少。切记!切记!
class ArticleList(Document):
    subject = StringField()
    author = StringField()
    portrait = StringField()
    images = ListField(StringField())
    categories = ListField(StringField())
    description = StringField()

    meta = {
        'collection': 'artiinfo'
    }
# Create your views here.
def menublog(request):
    info = ArticleList.objects
    context = {'artiinfo': info}
    return render(request, 'index.html', context)
{% load static %}
......
{% for item in artiinfo %}
![Eric Ferraiuolo's avatar]()
{{ item.subject }}
{{ item.description }}
{% endfor %}
......
第一阶段完成。
目前为止处理了文字相关的部分。作者的头像尚未加载。
除此之外,还有三个需要优化的问题:
标签的颜色与标签内容相关。
示例页面中标签'CSS'的背景色为绿色,查看网页源码发现其class="post-category post-category-design";标签'Pure'的背景色为蓝色,class="post-category post-category-pure"。'post-category-design'与'post-category-pure'这两个class在CSS中被定义为不同的背景色。
数据表中保存的标签信息并没其对应的class信息,只有文字:
categorylist = [['CSS', 'Pure'], ['JavaScript'], [], ['YUI']]
那么如何做匹配呢? 如何为各个标签指定对应的class。
四篇文章中有一篇的description是两张图片,其它都是文字描述。需要在templates中添加代码做相应的判断,是图片则显示图片,只有文字则显示文字。
示例页面中,文章分为置顶的与最近发布的两类,为了简化在第一阶段的学习中,把所有文章都加在最近发布的类别下面。 后面会为各文章添加一个字段用于标识其类别,并实现在templates中识别此标识为文章分类显示。
准备更多数据,实现分页显示。
from django.shortcuts import render
from myblog.models import ArticleList
from django.core.paginator import Paginator
# Create your views here.
def artilist(request):
      limit = 4
      arti_info = ArticleList.objects[:4]
      paginator = Paginator(arti_info, limit)
      page = request.GET.get('page',1)
      loaded = paginator.page(page)
      context = {
        'artiinfo': loaded
      }
      return render(request, 'index.html', context)
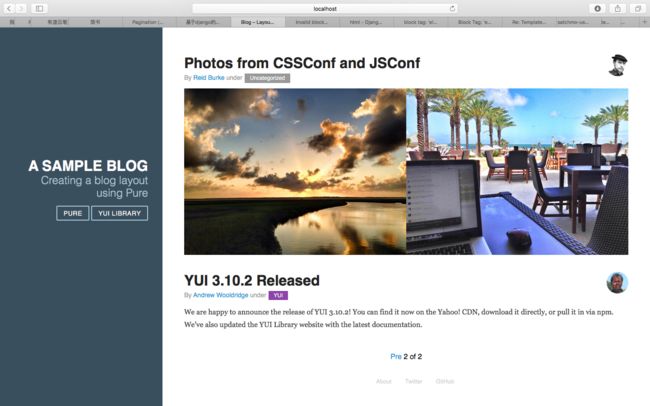
分页显示效果图
变量item.portrait中保存的是各文章作者的头像路径,且都是相对路径,相对于static。如'img/common/tilo-avatar.jpg'。
当路径是一个变量,且关联static目录时,引用方法如下
(https://docs.djangoproject.com/en/1.9/ref/templates/builtins/):
src="{% static item.portrait %}
...
{% if item.images %}
{% for img in item.images %}
{% endfor %}
{% endif %}
{{ item.description }}
...
效果图
                Pinned Post

                {% for item in artiinfo %}
                {% if item.level == 'pinned' %}

                     ......

                {% endif %}
                {% endfor %}


                Recent Posts
                {% for item in artiinfo %}
                {% if item.level != 'pinned' %}

                     ......

                {% endif %}
                {% endfor %}
思考: 这样处理带来一个问题。作为读者希望标注了'pinned'的文章始终置顶。但用上面的方法,如果'pinned'文章在数据库中id为5, 也就是第五篇文章,paginator以4篇文章为一页,这篇'pinned'文章就被划分在第二页。最终显示的效果将是浏览第一页时,'pinned post'类别下没有文章,浏览第二页时,'pinned post'下显示出了这篇'pinned'文章。
这个效果显示不够好。
理想的处理方式考虑下来是将'pinned'单独筛选出来。仅对那些没有'pinned'标注的文章应用paginator分页显示。