WPF学习
首先感谢刘铁锰先生的《深入浅出WPF》,学习WPF过程碰上很多新概念,如Data Binding、路由事件,命令、各种模板等。
WPF:编写CS端的UI技术。
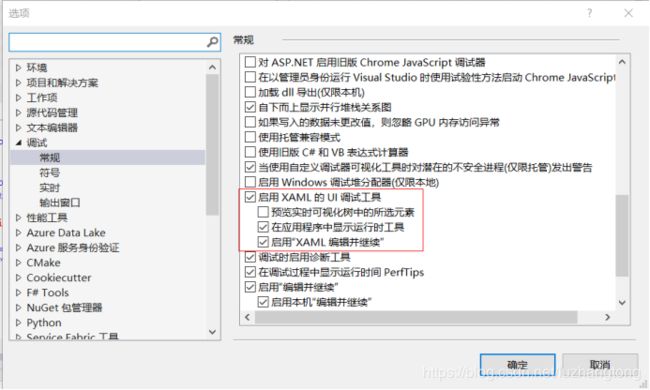
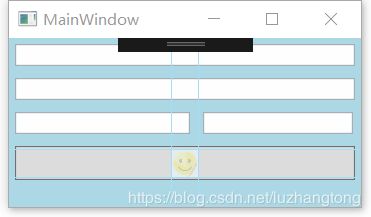
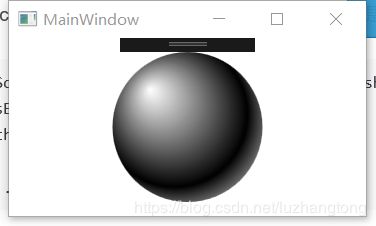
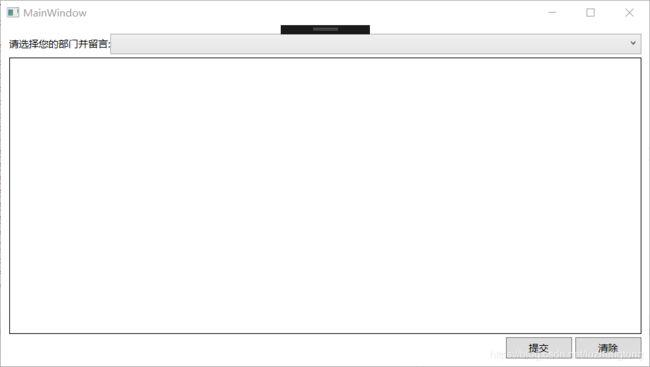
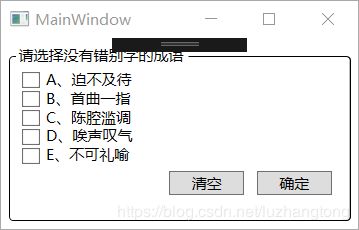
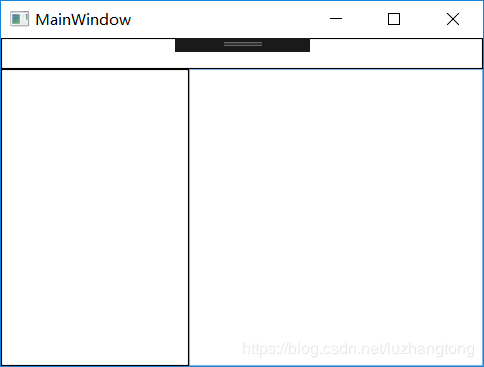
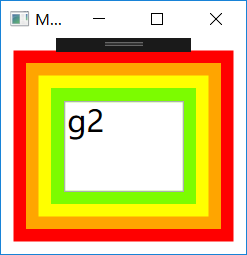
怎么去掉WPF窗体靠上多出黑色的长条?在vs界面的菜单栏点击调试-选项,把启用XAML的UI调试工具勾选去掉即可。(我自己觉得偶尔会用用这个)
1 认识WPF
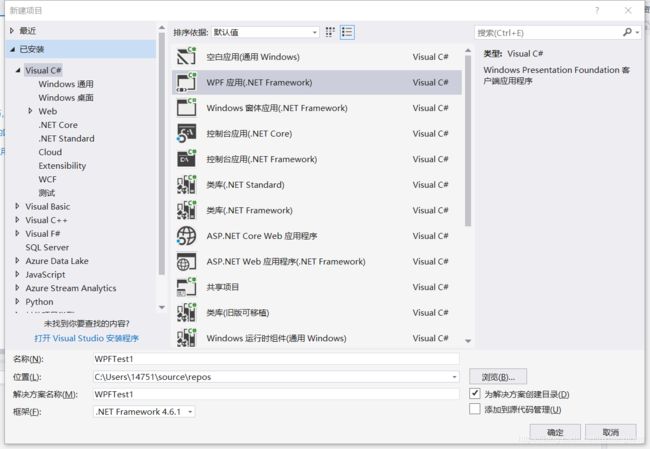
1.1 新建WPF项目
生成
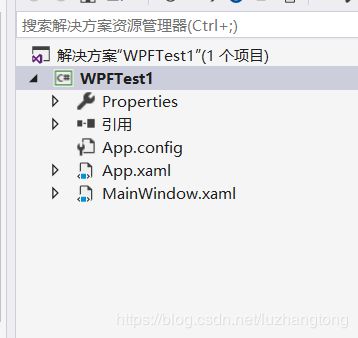
Properties:资源 引用:引用其他类库 App.xmal:程序主体(一个GUI进程需要有一个窗体,App.xmal文件的作用声明了程序的进程,同时指定程序的主窗体),点开app.xaml.cs,它是app.xaml的后台代码。MainWindow1.xmal分支:默认程序的主窗体。
1.2 最简单的XAML代码
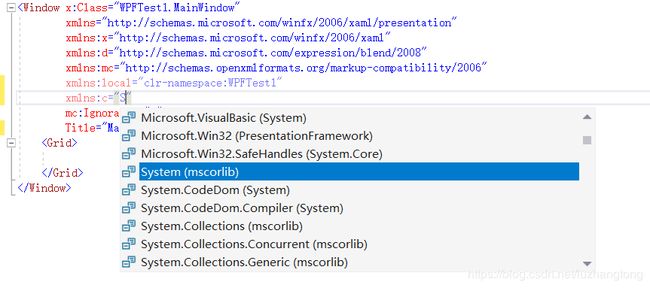
x:Class是当XAML解析器将包含它的标签的解析成C#类的类名。是来自xmlns:x的命名空间。第一行xmlns是默认命名空间。
引用第三方的类库:
xmlns:common(映射名,自定义)="clr-namespace:Common(类库中名称空间的名字);assembly=MyLibrary(类库名,比如MyLibrary.dll)"- xmlns用于在Xaml中声明名称空间的Attribute
- 冒号的映射名是可选的
- 引号的字符串确定了哪个类库以及类库哪个名称空间
1.3 XAML文档的树形结构
树形框架结构如下:
StackPanel可以把内部元素在纵向或横向上紧凑排列、形成栈式布局。也可以用Grid完成上面窗体,代码如下。
WPF的布局原理:以
1.4 使用Attribute为对象属性赋值
Rectangle类对象Fill属性的类型是Brush,Brush是个抽象类的单色画刷,实际上编译成:
SoildColorBrush sBrush=new SoildColorBrush();
sBrush.Color=Color.Blue;
this.rectangle.Fill=sBrush;

......
使用TypeConveter类将XAML标签的Attribute与对象的Property进行映射。
1.5 径向渐变画刷
由此得出简化XAML的技巧:
- Attribute=value优于属性元素
- 充分利用默认值 StartPoint="0,0" EndPoint="1.1"是默认值,可省略
- 充分利用XAML简写方式,比如LinearGradientBrush.GradientStops的数据类型GradientStopCollection
1.6 标记扩展
标记扩展也是为属性赋值,只不过依赖于其他对象的属性值。尽管很方便,只有MarkupExtension类的派生类才能使用标记扩展语法。
属性元素也可以做到,比较复杂:
1.7 事件
当一个XAML标签对应着对象时,这个标签的一部分Attribute会对应这个对象的Property。
在window. xaml.cs后面:
private void button1_Click(object sender, RoutedEventArgs e)
{

}
也可以直接在xaml写点击事件:
2 常用属性
2.1 x:classModifier
定义了XAML编译由标签编译生成的类具有的访问空指类别。internal与private等价。写internal可能编译报错,把window类的声明,把public改成internal。
2.2 x:Name
定义了控件名称,不能相同。
后台获取:
xaml代码:


------
c#代码:
string txtName=textBox.Name;
2.3 x:FieldModifier
控件的访问级别。默认是internal。
2.4 x:Key
Hello WPF!
使用String类,用xmlns:sys="clr-namespace:System;assembly=mscorlib"引用了mscorlib.dll,把System名称映射为sys名称空间。
string str=this.FindResource("myString") as string;
this.textBox1.Text=str;
2.5 x:Shared
把上面的x:Key当作资源放进资源字典后,需要设定检索的对象是同一个对象还是多个副本。
2.6 x命名空间中的标记扩展
2.6.1 x:Type
把某些对象资源放进资源字典里的数据类型。
mywindow.xaml


MyButton类
 class MyButton:Button
    {
        public Type UserWindowType { get; set; }
        protected override void OnClick()
        {
            base.OnClick();
            Window win = Activator.CreateInstance(this.UserWindowType) as Window;
            if (win != null)
            {
                win.ShowDialog();
            }
        }
    }

MainWindow.xaml
2.6.2 x:Null
显式地对一个属性赋一个空值。
下面一个例子,把一个Style放在window的资源里,并把它的x:Key和TargetType设置了Button类型,除了最后一个Button
也可以写成
2.6.3 x:Array
在WPF把包含的数据的对象称为数据源,如果把一个x:Array的实例作为数据源提供给一个ListBox。
              Tim
              Tom
              Victor
2.6.3 x:Static
x:Static是一个很常用的标记扩展。功能是在XAML文档中使用数据类型的static成员。
pubic static string WindowTitle="山高月小";

public static string  ShowText{get{return "水落石出";}}


   -----
   Title="{x:Static local:Window1.WindowTitle}"  Height="120" Width="300">
2.7 XAML指定元素
2.7.1 x:Code
可以让XAML包含一些本应放置在后置代码的C#代码。
2.7.2 x:XData
3 控件
我们把符合某类内容模型的UI元素称为一个族。以下是各种的内容模型。
3.1 ContentControl
单一内容控件。共同点:
- 派生自ContentControl
- 内容属性的名称为Content
- 只能由单一元素充当其内容
想让Button的内容既包含文字又包含图片是不行的。
| Button | ButtonBase | CheckBox | ComboBoxItem |
| ContentControl | Frame | GridViewColumnHeader | GroupItem |
| Lable | ListBoxItem | ListViewItem | NavigationWindow |
| RadioButton | RepeatButton | ScrollViewer | StatusBarItem |
| TpggleButton | ToolTip | UserControl | Window |
3.2 ItemsControl
- 均派生自ItemsControl类。
- 用于显示列表化的数据
- 内容属性为Item或ItemsSource
- 每种ItemsControl都对应有自己的条目容器(ItemContainer)
| Menu | MenuBase | ContextMenu | ComboBox |
| ItemsControl | ListBox | ListView | TabControl |
| TreeView | Selector | StatusBar |
当我们尝试着去寻找窗体或者页面中某个控件的子控件或者父控件的时候,可以用VisualTreeHelper.GetChild()和VisualTreeHelper.GetParent():
XAML:


C#:

private void buttonVictor_Click(object sender,RoutedEventArgs e)
{
    Button btn=sender as Button;
    DependencyObject level1=VisualTreeHelper.GetParent(btn);
    DependencyObject level2=VisualTreeHelper.GetParent(level1);
    DependencyObject leve13=VisualTreeHelper.GetParent(level2);
    MessageBox.Show(level3.GetType().ToString());
}
后台绑定数据时:
程序添加Employee类:
public Class Employee
{
     public int id{get;set;}
     public string Name{get;set;}
     public int Age{get;set;}
}
有一个Employee类型的集合:
List empList=new List(){
     new Employee(){Id=1,Name="Tim",Age=30},
     new Employee(){Id=2,Name="Tom",Age=26},
}
绑定控件名为listBoxEmplyee的ListBox:
this.listBoxEmplyee.DisplayMemberPath="Name";//(显示绑定对象的哪个属性)
this.listBoxEmplyee.SelectedValuePath="Id";//(SelectedValuePath属性将与其SeletedValue属性配合。当调用SeletedValue,ListBox先找到选中的Item所对应的数据对象,然后根据SelectedValuePath的值当作数据对象的属性名称并把这个属性取出来,类似键值对)
this.listBoxEmplyee.ItemsSource=empList;
DispalyMemberPath只能显示简单的字符串,更复杂的形式显示数据需要使用DataTemplate,SelectedValuePath只能返回单一值,如果想进行一些复杂的操作的,使用ListBox的SelectedItem和SelectedItems属性。
无论把什么数据集合给ListBox,它都会自动包装成ListBoxItem,ListBoxItem就是ListBox对应的ItemContainer。ComboBox对应的是ComboBoxItem,ListBox对应的时ListBoxItem,Menu对应的时MenuItem.....
3.3 HeaderedItemsControl族
除了具有ItemsControl的特性外,还能显示标题。
- 派生至HeaderedItemsControl类
- 显示列表化的数据,还可以显示标题
- 内容属性为Items、ItemsSource和Header
三个控件:MenuItem、TreeViewItem、ToolBar
3.4 Decorator元素
窗体装饰效果,比如可以用Border元素给内容加边框,用ViewBox使内容可以自由缩放。
- 派生自Decorator类
- UI装饰作用
- 内容属性为Child
- 只能由单一元素充当内容
| ButtonChrome | ClassicBorderDecorator | ListBoxChrome | SystemDropsShadowChrome |
| Border | InkPresenter | BulletDecorator | ViewBox |
| AdornerDecorator |
3.5 TextBlock和TextBox
TextBlock只能显示文本,不能编辑,TextBox能编辑。
3.6 Shape族
在UI上绘制图形。比如使用Fill属性设置填充效果,使用Stroke属性设置边线效果
- 派生自Shape类
- 2D图形绘制
- 无内容属性
3.7 Panel族
所有UI布局的元素都属于这一族。
- 派生自Panel抽象类
- 控制UI布局
- 内容属性为Children
- 内容可以为多个元素,Panel元素将控制它们布局
ItemsControl和Panel虽然内容都可以是多个元素,而前者强调的以列表形式展现数据,后者强调的是对包含的元素进行布局。
| Canval | DockPanel | Grid | TabPanel |
| ToolBarOverflowPanel | StackPanel | ToolBarPanel | UniformGrid |
| VirtualizingPanel | VistualizingStackPanel | WrapPanel |
4 布局(Layout)
WPF设计师工作量最大的两部分就是布局与动画,除了点缀性的动画外,大部分动画是布局之间转换。选择合适的布局元素,将会极大地简化编程。
4.1 布局元素
布局元素属于Panel族,内容属性为Children ,即可以接受多个控件作为自己的内容并对这些控件进行布局控制。WPF布局理念就是把一个布局元素作为ContentControl或HeaderedContentControl族控件的Contont,再在布局元素里添加要被布局的子集控件。
WPF中的布局元素:
- Grid:网格,可以自定义行和列并通过行列的数量、行高的列宽来调整控件的布局
- StackPanel:栈式面板,可以将包含的元素在竖直或水平方向上排成一条线,当移除一个元素,后面的元素会自动向前移动以填充空缺。
- Canvas:画布,内部元素可以使用以像素为单位的绝对坐标进行定位
- DockPanel:泊靠式面板,内部元素可以选择泊靠方向
- WrapPanel:自动折行面板,内部元素在拍满一行后自动折行
4.2 Grid
以网格的形式对内容元素们进行布局。
- 定义任意数量的行和列
- 行的高度和列的宽度可以使用绝对数值、相对比例或自动调整的方式进行精确设定,并可设置最大和最小值
- 内部元素可以设置自己所在的行和列,还可以设置自己跨几行,横向跨几列
- 可以设置Children元素的对齐方向
Grid适用的场景:
- UI布局的大框架设计
- 大量元素需要成行或者成列对齐的情况
- UI整体尺寸改变时,元素需要保持固有的高度和宽度比例
- UI后期可能有较大变更或扩展
4.2.1 定义Grird的行与列
Grid类具有ColumnDefinitions和RowDefinitions两个属性。表示Grid定义了多少列和多少行。
当你把鼠标指针在Grid的边缘上移动时会出现提示线,一旦你单击鼠标则会在此添加一条分隔线、创建出新的行和列。也可以在c#动态添加行和列。
private void Window_Loaded(object sender,RoutedEventArgs e)
{
   this.gridMain.ColumnDefinitions.Add(new ColumnDefinition());
   this.gridMain.ColumnDefinitions.Add(new ColumnDefinition());
   this.gridMain.ColumnDefinitions.Add(new ColumnDefinition());
   this.gridMain.ColumnDefinitions.Add(new ColumnDefinition());


   this.gridMain.RowDefinitions.Add(new RowDefinition());
   this.gridMain.RowDefinitions.Add(new RowDefinition());
   this.gridMain.RowDefinitions.Add(new RowDefinition());
   this.gridMain.ShowGridLines=true;
}
4.2.2 设置行高和列宽
计算机图形设计的标准单位时像素(Pixel),所以Grid的宽度和高度单位是像素。
对于Grid的行高和列宽,可以设置类值:
- 绝对值:double数值加单位后缀
- 比例值:double数值后加一个星号
- 自动值:字符串Auto
绝对值:一经设定就不会再改变
比例值:整体尺寸改变时,保持固有比例
自动值:行高或列宽的实际值将由行列内控件的高度和宽度决定,控件会把行列 撑到合适的宽度和高度。
例子:
- 行和列都是从0开始计数
- Grid.Row="行编号",若行编号为0,则可忽略,列同样如此
- 跨行跨列,用Grid.RowSpan="行数" 和Grid.ColumnSpan="列数"
- 如果两个元素放在Grid,则后写的元素会覆盖先写的,要前面的显示,可把后面写的visibility设置为Hidden或Collapsed,也可以把上面的元素的Opacity属性设置为0
可拖拽的分隔栏例子:
4.3 StackPanel
StackPanel可以把内部元素再纵向或横向紧凑排列,形成栈式布局。类似垒积木。适用以下场景
- 同样的元素需要紧凑排列
- 移除其中的元素能够自动补缺的布局或动画
| Orientation | Horizontal、Vertical | 决定内部元素是横向累积还是纵向累积 |
| HorizontalAlignment | Left、Center、Right、Stretch | 决定内部元素水平方向的对齐方式 |
| VerticalAlignment | Top、Center、Buttom、Stretch | 决定内部元素竖直方向的对齐方式 |
例子:
4.4 Canvas
画布,使用Canvas布局与在Windows Form窗体上布局基本一样的。当控件被放置在Canvas就会被附上Canvas.X和Canvas.Y。
4.5 DockPanel
DoclPanel内的元素会被附上DockPanel.Dock这个属性,这个属性的数据类型为Dock枚举。Dock枚举可取Left、Top、Right和Bottom四个值。例子:
4.6 WrapPanel
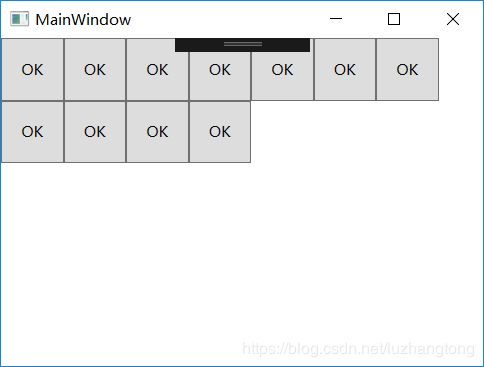
wrappanel内部采用的是流式布局。WrapPanel使用Orientation属性来控制流延伸的方向,使用HorizontalAlignment和VerticalAlignment两个属性控制内部控件的对齐。在流延伸的方向上,WrapPenl会排列尽可能多的控件。
例子:
5 DataBinding
5.1 Binding基础
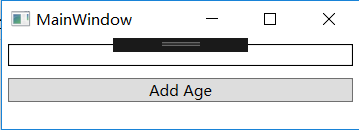
展示层与逻辑层的沟通就使用Data Binding。更新变化是通过类实现INotifyPropertyChanged接口并在属性的set语句中激发PropertyChanged事件。
例子:
MainWindow.xmal
Student.cs类
 class Student:INotifyPropertyChanged
    {
        public  event PropertyChangedEventHandler PropertyChanged;
        private string name;
        public  string Name
        {
            get { return name; }
            set
            {
                name = value;
                if (this.PropertyChanged != null)
                {
                    this.PropertyChanged.Invoke(this, new PropertyChangedEventArgs("Name"));
                }
            }
        }
  }
MainWindow.xaml.cs
    ///
    /// MainWindow.xaml 的交互逻辑
    ///
    public partial class MainWindow : Window
    {
        Student stu;
        public MainWindow()
        {
            InitializeComponent();
            //stu = new Student();
            //Binding binding = new Binding();
            //binding.Source = stu;
            //binding.Path = new PropertyPath("Name");
            //BindingOperations.SetBinding(this.textBoxName, TextBox.TextProperty, binding);
            this.textBoxName.SetBinding(TextBox.TextProperty, new Binding("Name") { Source=stu=new Student()});
        }

        private void Button_Click(object sender, RoutedEventArgs e)
        {
            stu.Name += "Name";
        }
    }
}
5.2 Binding的源与路径
Binding的源就是数据源头——对象,通过属性公开自己的数据。
5.2.1 把控件作为Binding源与Binding标记扩展
例子:
xaml实现:
与之等价的C#代码:
this.textBox1.setBinding(TextBox.TextProperty,new Binding("Value"){ElementName="slider1"});5.2.2 控制Binding的方向及数据更新
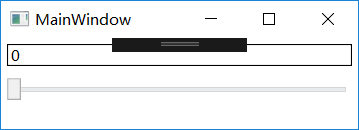
控制数据流向的属性的是Mode,BindingMode可取值为TwoWay、OneWay、OnTime、OnWayToSource和Default(根据实际情况确定,比如可编辑的(TextBox.Text)属性,采用双向模式。只读(TextBlock.Text)则单向)。
上面的例子显示的Text会跟随silder改变,输入Text失去焦点而silder也会改变。失去焦点改变的原因是Binding的属性-UpdateSourceTrigger,类型是UpdateSourceTrigger枚举,可取值为PropertChanged、LostFocus、Explict和Default。默认Default是LostFocus。改成PropertChange,输入时silder就会改变。Binding还有NotifyOnSourceUpdated和NotifyOnTarget两个Bool类型属性,当更新会触发SourceUpdate事件和TargetUpdate事件,通过监听这两个事件找出哪些数据和控件被更新了。
5.2.3 Binding的路径(Path)
Binding的Path属性指定关联对象哪个属性。前面的例子等效于:
Binding binding=new Binding(){Path=new Property("Value"),Source=this.slider1};
this.textBox1.SetBinding(TextBox.TextProperty,binding);
或者Binding构造器:
Binding binding=new Binding("Value"){Source=this.slider1};
this.textBox1.SetBinding(TextBox.TextProperty,binding);
支持多级路径,例子(一个TextBox显示另外一个TextBox长度):
等效C#代码:
this.textBox2.SetBinding(TextBox.TextPropery,new Binding("TextLength"){Source=this.textBox1,Mode=BindingMode.OnWay});例子(索引器作为Path示例):
等效于c#代码:
this.textBox2.SetBinding(TextBox.TextPropery,new Binding("Text.[3]"){Source=this.textBox1,Mode=BindingMode.OnWay});
例子(使用集合作为Binding源):
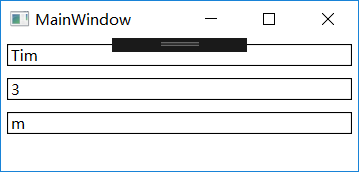
List stringList = new List() { "Tim", "Tom", "Blog" };
this.textBox1.SetBinding(TextBox.TextProperty, new Binding("/") { Source=stringList});
this.textBox2.SetBinding(TextBox.TextProperty, new Binding("/Length") { Source = stringList ,Mode=BindingMode.OneWay});
this.textBox3.SetBinding(TextBox.TextProperty, new Binding("/[2]") { Source = stringList, Mode = BindingMode.OneWay });
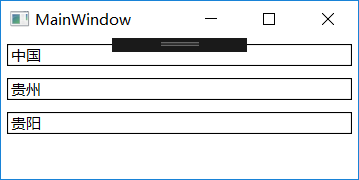
例子(使用集合的子集合作为Binding源,一路斜线下去):
List countryList = new List() {  };
Country country=new Country();
country.Name = "中国";
Province province = new Province();
province.Name = "贵州";
City city = new City();
city.Name = "贵阳";
List < City > listCity=new List();
listCity.Add(city);
province.CityList = listCity;
List listProvince = new List();
listProvince.Add(province);
country.ProvinceList = listProvince;
countryList.Add(country);
this.textBox1.SetBinding(TextBox.TextProperty, new Binding("/Name") { Source = countryList });
this.textBox2.SetBinding(TextBox.TextProperty, new Binding("/ProvinceList/Name") { Source = countryList});
this.textBox3.SetBinding(TextBox.TextProperty, new Binding("/ProvinceList/CityList/Name") { Source = countryList});
5.2.4 当path属性等于"."
Binding源就是数据且不需要Path指明,类似string、int等基本类型,他们实例就是本身数据。无法指定通过它哪个属性来范文这个数据,只需将path的值设置为"."。
例子:
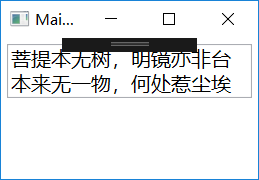
注意,得引用xmlns:sys="clr-namespace:System;assembly=mscorlib"命名空间。
                  菩提本无树,明镜亦非台
                  本来无一物,何处惹尘埃
上面的代码可以简写成:
Text="{Binding .,Source={StaticResource ResourceKey=myString}}"
或
Text="{Binding Source={StaticResource ResourceKey=myString}}"
或c#:
string myString="菩提本无树....."
this.textBlock1.SetBinding(TextBlock.TextProperty,new Binding("."){Source=myString});
5.2.5 为Binding指定的几种源数据
- 普通的CLR类型单个对象。
- 普通的CLR集合类型。比如数组、List
、ObservableCollection 等集合类型 - ADO.NET集合类型对象。比如DataTable和DataView等。
- 使用XmlDataProvider的XML数据
- 依赖对象,依赖对象的依赖属性可以作为Binding的Path
- 容器的DataContext
- 通过ElementName
- 通过Binding的RelativeSource属性
- ObjectDataProvider对象
- 使用LINQ检索的数据对象
5.2.6 DataContext-没有Source的Binding
Binding沿着UI元素树往上走寻找DataContext对象并把它作为Source。之所以向上查找,就是因为依赖属性,当没有为控件的某个依赖属性显示赋值时,控件会把自己容器的属性值“借过来”当作自己的属性值。但实际上属性值沿着UI元素树向下传递了。
例子:
 public class Student
{
        public int Id { get; set; }
        public string Name { get; set; }
        public int Age { get; set; }
}
例子,没有指定Path和Source情况下:
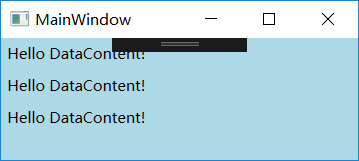
Hello DataContent!
比如最外层Grid有DataContext,内层的Button都没有设置DataContext,所以最外层的DataContext会传递到Button那里去。
private void btn_click(object sender,RoutedEventArgs e)
{
   MessageBox.Show(btn.DataContext.toString());
}
适合应用场景:
- 多个控件Binding同一个对象
- 作为Source的对象不能直接访问,比如B控件Binding A控件,但A控件是private访问级别
5.2.7 使用集合对象作为列表控件的ItemsSource
为每一个ItemsSource设置了ItemSource属性值,ItemsControl会自动更新迭代的数据元素,为每个数据元素准备一个条目容器。并使用Binding在条目容器与数据元素之间立起关联。
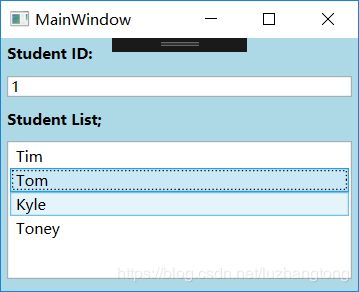
例子:
           //准备数据源
 List stuList = new List()
{
                new Student(){Id=0,Name="Tim",Age=29},
                new Student(){Id=1,Name="Tom",Age=28},
                new Student(){Id=2,Name="Kyle",Age=27},
                new Student(){Id=3,Name="Toney",Age=26}
 };
  this.listBoxStudents.ItemsSource = stuList;
  this.listBoxStudents.DisplayMemberPath = "Name";
  Binding binding = new Binding("SelectedItem.Id") { Source = this.listBoxStudents };
  this.textBoxId.SetBinding(TextBox.TextProperty, binding);
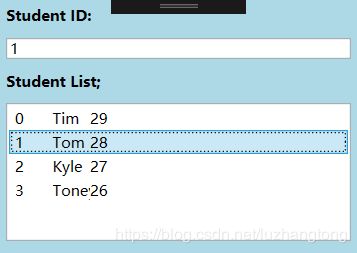
去掉DisplayMemberPath,把xaml改成:
注意:使用集合类型作为列表控件的ItemsSource一般考虑ObservableCollection
5.2.8 使用ADO.NET对象作为Binding的源
使用ADO.NET类对数控库操作,尽管在流行的软件并不把DataTable的数据直接显示UI列表控件里面而是先通过LINQ等手段把DataTable里的数据转换成恰当的用户自定义类型集合。
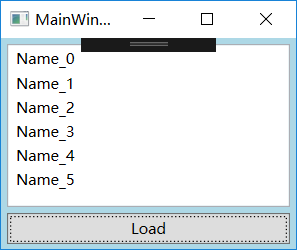
例子:
XAML:


C#
private void Button_Click(object sender,RoutedEventArgs e)
{
     DataTable dt=this.Load();
     this.listBoxStudents.DisplayMemberPath="Name";
     this.listBoxStudents.ItemsSource=dt.DefaultView;
}
DefaultView属性是DataView类型的对象,DataView类实现了IEnumerable接口,所以可以赋值给ListBox.ItemsSource属性。注意ListView.View是一个ViewBase的对象,ListView是ListBox的派生类,不能当独立控件使用,而GridView是ViewBase派生类,可以当独立控件。
C#代码:
private void Button_Click(object sender,RoutedEventArgs e)
{
     DataTable dt=this.Load();
     this.listViewStudents.ItemsSource=dt.DefaultView;//不能直接使用dt
     /**
     也可以使用:
     this.listViewStudents.DataContext=dt;
     this.listViewStudents.SetBinding(ListView.ItemsSourceProperty,new Binding());
    **/
}
GridView的内容属性是Columns,因为XAML支持对内容属性的简写,所以省略了
5.2.9 使用XML数据作为Binding的源
.NET Framework提供了两套处理XML数据的类库。
- 符合DOM标准的类库:XmlDocument、XmlElement、XmlNode、XmlAttribute等等
- LINQ为基础的类库:包括XDocument、XElement、XNode、XAttribute等等,可以使用LINQ进行查询和操作
XML的文本是树形结构,方便用于线性集合(Array,List)和树形结构数据,因为大多数据传输都基于SOAP(通过对象序列化为XML文本进行传输)相关协议。XML使用的XPath属性而不是Path指定数据来源。
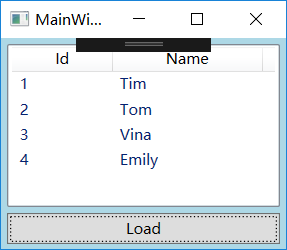
例子:
RawData.xml文档:
    Tim


    Tom


    Vina


    Emily
private void Button_Click(object sender, RoutedEventArgs e)
{
            XmlDocument doc = new XmlDocument();
            doc.Load(@"D:\文本\RawData.xml");

            XmlDataProvider xdp = new XmlDataProvider();
            xdp.Document = doc;
            xdp.XPath = @"/StudentList/Student";
            this.listViewStudents.DataContext = xdp;
            this.listViewStudents.SetBinding(ListView.ItemsSourceProperty, new Binding());
}

==
private void Button_Click(object sender, RoutedEventArgs e)
{
            XmlDataProvider xdp = new XmlDataProvider();
            xdp.Source =new Uri(@"D:\文本\RawData.xml");
            xdp.XPath = @"/StudentList/Student";
            this.listViewStudents.DataContext = xdp;
            this.listViewStudents.SetBinding(ListView.ItemsSourceProperty, new Binding());
}@Id和Name指明了关注的路径,加@符号表示的是XML元素的Attribute,不加@符号的字符串表示自己元素。
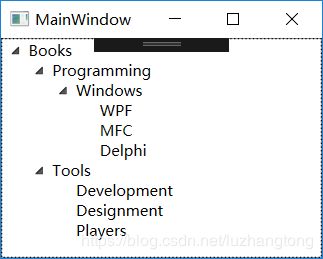
例子:使用XML作为数据源显示TreeView控件的若干层目录的文件系统(把XML数据和XmlDataProvider对象写在XAML代码)
5.2.10 使用LINQ检索结果作为Binding的源
3.0以上的.NET FrameWork开始支持LINQ。使用LINQ可以很方便操作集合对象、DataTable对象和XML对象。
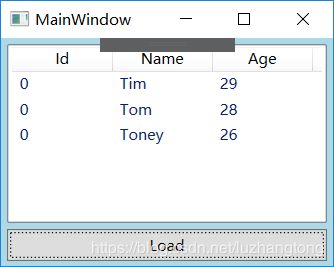
例子(存储在List集合,查找Name为'T'开头的):
private void Button_Click(object sender, RoutedEventArgs e)
{
            List stuList = new List()
            {
                new Student(){Id=0,Name="Tim",Age=29},
                new Student(){Id=0,Name="Tom",Age=28},
                new Student(){Id=0,Name="Kyle",Age=27},
                new Student(){Id=0,Name="Toney",Age=26},
                new Student(){Id=0,Name="Vina",Age=25},
                new Student(){Id=0,Name="Mike",Age=24}
            };
            this.listViewStudents.ItemsSource = from stu in stuList where stu.Name.StartsWith("T") select stu;
}
存储在DataTable:
private void Button_Click(object sender, RoutedEventArgs e)
{
            DataTable dt=this.GetDataTable();
            this.listViewStudents.ItemsSource = from row in dt.Rows.Cast() where Convert.ToString(row["Name"]).StartsWith("T") select new Student{
               Id=int.Parse(row["Id"].toString()),
               Name=row["Name"].toString(),
               Age=int.Parse(row["Age"].toString())
            };
}
存储XML(D:\RawData.xml):
 XDocument xdoc=XDocument.Load(@"D:\RawData.xml");
 this.listViewStudents.ItemsSource = from element in xdoc.Descendants("Student") where element.Attribute("Name").StartsWith("T") select new Student{
               Id=int.Parse(element.Attribute("Id").Value),
               Name=element.Attribute("Name").Value,
               Age=int.Parse(lement.Attribute("Age").Value)
  };
5.2.11 使用ObjectDataProvider作为Binding的源
有时需要方法的返回值,这时需要使用ObjectDataProvider包装Binding源的对象。ObjectDataProvider是把对象作为数据源提供给Binding,是包装一个以方法暴露数据的对象
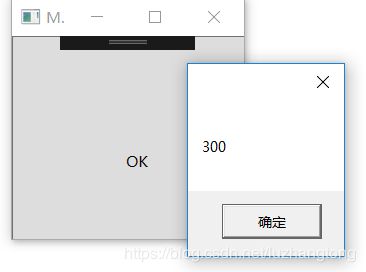
例子(加减乘除):
private void Button_Click(object sender, RoutedEventArgs e)
{
            ObjectDataProvider odp = new ObjectDataProvider();
            odp.ObjectInstance = new Calculator();
            odp.MethodName = "Add";
            odp.MethodParameters.Add("100");
            odp.MethodParameters.Add("200");
            MessageBox.Show(odp.Data.ToString());
}
例子:
 public MainWindow()
{
     InitializeComponent();
     this.SetBinding();
}
 private void SetBinding()
{
     ObjectDataProvider odp = new ObjectDataProvider();
     odp.ObjectInstance = new Calculator();
     odp.MethodName = "Add";
     odp.MethodParameters.Add("0");
     odp.MethodParameters.Add("0");
     Binding bindingToArg1 = new Binding("MethodParameters[0]")
     {
          Source = odp,
          BindsDirectlyToSource = true,
          UpdateSourceTrigger=UpdateSourceTrigger.PropertyChanged
     };
     Binding bindingToArg2= new Binding("MethodParameters[1]")
     {
          Source = odp,
          BindsDirectlyToSource = true,
          UpdateSourceTrigger = UpdateSourceTrigger.PropertyChanged
     };
     Binding bindingToResult = new Binding(".") { Source = odp };
     this.textBox1Arg1.SetBinding(TextBox.TextProperty, bindingToArg1);
     this.textBox1Arg2.SetBinding(TextBox.TextProperty, bindingToArg2);
     this.textBox1Result.SetBinding(TextBox.TextProperty, bindingToResult);
}
ObjectDataProvider对象作为Source,但使用"."作为Path,当数据源源本身代表数据就是要"."作path,也可省略。实际上三个TextBox都以ObjectDataProvider对象为数据源,只是前两个TextBox在Binding的数据流向做了限制。理由是:
- ObjectDataProvider的MethodParameters不是依赖属性,不能作为Binding的目标。
- 数据驱动的UI理念尽可能使用数据对象作为Binding的Source而把UI元素Binding的Target。
5.2.12 使用Binding的RelativeSource
控件关联自己某个数据、关联自己某级容器的数据。
例子:
RelativeSource rs = new RelativeSource(RelativeSourceMode.FindAncestor);
rs.AncestorLevel = 1;
rs.AncestorType = typeof(Grid);
Binding binding = new Binding("Name") { RelativeSource = rs };
this.textBox1.SetBinding(TextBox.TextProperty, binding);

也可以在XAML代码写:
Text="{Binding RelativeSource={RelativeSource FindAncestor,AncestorType={x:Type Grid},AncestorLevel=1},Path=Name}"
AncestorLevel属性是以Binding目标控件为起点的层级偏移量,比如d2的偏移量是1,g2是2,Ancestor属性告诉Binding寻找哪个类型的对象作为自己的源,不是这个类型的对象会被跳过。从自己的第一层向外找,找到第一个Grid类型的对象后把它当作自己的源。
TextBox关联自身的Name属性:
  RelativeSource rs = new RelativeSource();
  rs.Mode = RelativeSourceMode.Self;
  Binding binding = new Binding("Name") { RelativeSource = rs };
  this.textBox1.SetBinding(TextBox.TextProperty, binding);
RelativeSource类的Mode属性类型是枚举-PreviousData,TemplatedParent、Self和FindAncestor。实际上3个静态属性是创建一个RelativeSource实例,把实例的Mode属性设置为相应的值,返回这个实例。之所以准备三个属性是为了在XAML代码里直接获取RelativeSource实例。
5.3 Binding对数据的转换与校验
Binding作用是架在Source与Target之间桥梁。数据可以桥梁上流通,Binding也可以数据有效性进行校验(ValidationRules属性)。Binding两端要求不同的数据类型时,还可以为数据设置转换器(Converter属性)。
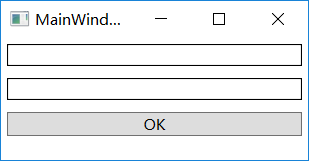
5.3.1 数据校验
Binding的ValidationRules属性类型时Collection
例子:
   Binding binding = new Binding("Value") { Source = this.slider1 };
   binding.UpdateSourceTrigger = UpdateSourceTrigger.PropertyChanged;
   RangeValidationRule rvr = new RangeValidationRule();
   binding.ValidationRules.Add(rvr);
this.textBox1.SetBinding(TextBox.TextProperty, binding);RangeValidationRule类
 class RangeValidationRule : ValidationRule
   {
        public override ValidationResult Validate(object value, CultureInfo cultureInfo)
        {
            double d = 0;
            if(double.TryParse(value.ToString(),out d))
            {
                if(d>=0 && d<=100)
                {
                    return new ValidationResult(true, null);
                }
            }
            return new ValidationResult(false, "Validation Failed");
        }
}
当输入0到100之间正常显示,超过这个区间会显示红色边框。Binding只是在Target被外部方法更新呢时校验数据,而来自Binding的Source数据更新Target时不进行校验的。要校验Source数据时需要将校验条件的ValidatesOnTargetUpdated属性设为true。
比如把上述的xaml代码改为:
在”RangeValidationRule rvr = new RangeValidationRule();”下面添加:
rvr.ValidatesOnTargetUpdated = true;也会显示校验校验失败。在创建Binding时,把binding的对象的NotifyOnValidationError属性设为true。这样数据校验失败的时候Binding会发出信号,信号以Binding对象的Target为起点在UI元素树上传播,信号到达一个结点,设有侦听器的结点会被触发处理这个信号。处理后,程序员可以选择信号继续向下传播还是就此终止——路由事件。信号在元素树上传递过程被称为路由。
在创建binding实例下面添加:
binding.NotifyOnValidationError = true;
this.textBox1.SetBinding(TextBox.TextProperty, binding);
this.textBox1.AddHandler(Validation.ErrorEvent,new RoutedEventHandler(this.ValidationError));
private void ValidationError(object sender, RoutedEventArgs e)
{
            if (Validation.GetErrors(this.textBox1).Count > 0)
            {
                this.textBox1.ToolTip = Validation.GetErrors(this.textBox1)[0].ErrorContent.ToString();
            }
 }
会出现下面的效果:
5.3.2 Binding的数据转换
Binding还有一种机制叫数据转换,当Source端的Path关联的数据与Target端目标属性数据类型不一致时,可以添加数据转换器。因为上面的Silder的Double和TextBox的String互相转换比较简单,所以WPF类库就自动做了。假设:
- Source数据是char、string、enum类型,映射到UI的CheckBx-IsChecked属性的Bool类型。
- TextBox输入时登录Button才出现,string与Visibility枚举类型或Bool类型转换。Binding的Mode将是OneWay
- Source数据可能是Male或Female,映射到UI的Image控件URI,也是OneWay。
我们需要创建一个类实现IValueConverter接口,IValueConverter接口有Convert和ConvertBack方法。当数据Binding的Source->Target。调用Convert。反之用ConvertBack。有三个参数,第一个参数为值,保证参数的重用性,第二参数为确定方法的返回类型,第三个参数把额外信息传入方法。Binding的Mode属性会影响两个方法的调用。如果Mode为TwoWay或Default行为与TwoWay一致则两个方法都有可能被调用,如果为OneWay或Default与OneWay一致只有Convert调用。
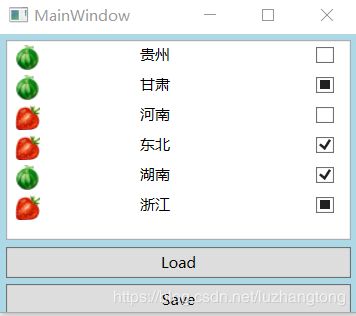
例子(向玩家显示各省水果的状态):
ShuiGuo.cs
 public class ShuiGuo
 {
        public State State { get; set; }
        public Category Category { get; set; }
        public string Name { get; set; }
    }
    public enum State
    {
        Available,
        Locked,
        Unknown
    }
    public enum Category
    {
        xigua,
        caomei
}StateToNullableBoolConverter.cs
 public class StateToNullableBoolConverter : IValueConverter
{
        //将State转换为Bool
        public object Convert(object value, Type targetType, object parameter, CultureInfo culture)
        {
            State s = (State)value;
            switch(s)
            {
                case State.Locked:
                    return false;
                case State.Available:
                    return true;
                case State.Unknown:
                default:
                    return null;
            }
       }
  public object ConvertBack(object value, Type targetType, object parameter, CultureInfo culture)
        {
            bool? nb = (bool?)value;
            switch (nb)
            {
                case true:
                    return State.Available;
                case false:
                    return State.Locked;
                case null:
                default:
                    return State.Unknown;
            }
        }
}CategoryToSourceConverter.cs
 public class CategoryToSourceConverter:IValueConverter
{
        public object Convert(object value,Type targetType,object parameter,CultureInfo culture)
        {
            Category c = (Category)value;
            switch(c)
            {
                case Category.xigua:
                    return @"\Icons\xigua.png";
                case Category.caomei:
                    return @"\Icons\caomei.png";
                default:
                    return null;
            }
        }
        public object ConvertBack(object value,Type targetType,object parameter ,CultureInfo culture)
        {
            throw new NotImplementedException();
        }
}CategoryToSourceConverter.xaml
C#
 private void buttonSave_Click(object sender, RoutedEventArgs e)
 {
            StringBuilder sb = new StringBuilder();
            foreach(ShuiGuo sg in listBoxShuiGuo.Items)
            {
                sb.AppendLine(string.Format("Category={0},Name={1},State={2}", sg.Category, sg.Name, sg.State));
            }
            File.WriteAllText(@"D:\文本\ShuiGuoList.txt",sb.ToString());
 }

private void buttonLoad_Click(object sender, RoutedEventArgs e)
{
            List shuiGuos = new List()
            {
                new ShuiGuo(){Category=Category.xigua,Name="贵州",State=State.Unknown},
                new ShuiGuo(){Category=Category.xigua,Name="甘肃",State=State.Unknown},
                new ShuiGuo(){Category=Category.caomei,Name="河南",State=State.Unknown},
                new ShuiGuo(){Category=Category.caomei,Name="东北",State=State.Unknown},
                new ShuiGuo(){Category=Category.xigua,Name="湖南",State=State.Unknown},
                new ShuiGuo(){Category=Category.caomei,Name="浙江",State=State.Unknown},
            };
            this.listBoxShuiGuo.ItemsSource = shuiGuos;
}
5.3.3 MultiBinding(多路Binding)
不止一个数据来源就用MultiBinding,能使用Binding对象的场合都能使用MuliBinding,通过MultiBinding把一组Binding对象聚合起来。处在这个集合的Binding对象可以拥有自己的校验与转换机制。汇集起来的数据决定传往MultiBinding目标的数据。
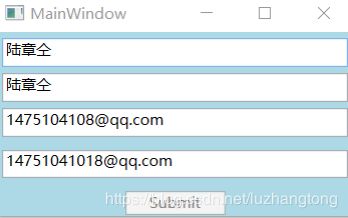
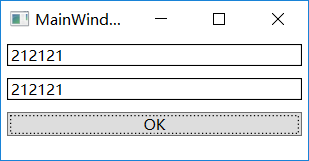
例子(要求两个用户名和邮箱内容一致):
Xmal:
C#:
 public MainWindow()
{
            InitializeComponent();
            this.SetMulitiBinding();
}
public void SetMulitiBinding()
{
            Binding b1 = new Binding("Text") { Source = this.textBox1 };
            Binding b2 = new Binding("Text") { Source = this.textBox2 };
            Binding b3= new Binding("Text") { Source = this.textBox3 };
            Binding b4= new Binding("Text") { Source = this.textBox4};

            MultiBinding mb = new MultiBinding() { Mode = BindingMode.OneWay };
            mb.Bindings.Add(b1);
            mb.Bindings.Add(b2);
            mb.Bindings.Add(b3);
            mb.Bindings.Add(b4);
            mb.Converter = new LogonMultiBindingConvert();
            this.button1.SetBinding(Button.IsEnabledProperty, mb);
}LogonMultiBindingConvert.cs
 public class LogonMultiBindingConvert : IMultiValueConverter
{
        public object Convert(object[] values, Type targetType, object parameter, CultureInfo culture)
        {
            if(!values.Cast().Any(text=>string.IsNullOrEmpty(text))&&values[0].ToString()==values[1].ToString()&&values[2].ToString()==values[3].ToString())
            {
                return true;
            }
            return false;
        }

        public object[] ConvertBack(object value, Type[] targetTypes, object parameter, CultureInfo culture)
        {
            throw new NotImplementedException();
        }
}
6 WPF的属性
6.1 属性
程序员仍然把字段标记为private但使用一对非private的方法来包装。在这对方法中,一个以Set为前缀且负责判断数据的有效性并写入数据,另一个以Get为前缀且负责把字段里的数据读取出来。
class Human
{
  public int Age;
}

//..

Human h=new Human();
h.Age=-100;
h.Age=1000;

//把类设计成这样
class Human
{
     private int age;
     public int SetAge
     {
         get{return this.age;}
         set{
             if(value>=0 &&value<=100)
             {
                this.age=value;
             }else
             {
               throw new OverflowException("Age overflow");
             }
         }
     }
}
这种.NET Framework中的属性又称为CLR属性。CLR属性并不会增加内存的负担。再多实例方法只有一个拷贝。
6.2 依赖属性
依赖属性就是一种可以自己没有值,并能通过使用Binding从数据源获得值的属性。拥有依赖属性的对象被称为“依赖对象”。
- 节省实例对内存的开销
- 属性值可以通过Binding依赖在其他对象中
6.2.1 依赖属性对内存的使用方式
而在WPF允许对象在被创建的时候并不包含用于存储数据的空间,只保留在需要用到数据时能够获得默认值、借用其他对象数据或实时分配空间的能力。在WPF系统中,依赖对象时被DependencyObject类实现。具有GetValue和SetValue方法。WPF所有的UI控件都是依赖对象。绝大多数属性已经依赖化。
6.2.2 声明和使用依赖属性
private void Button_Click(object sender, RoutedEventArgs e)
{
       Student stu = new Student();
       stu.SetValue(Student.NameProperty, this.textBox1.Text);
       textBox2.Text = (string)stu.GetValue(Student.NameProperty);
}
class Student:DependencyObject
{
        public static readonly DependencyProperty NameProperty = DependencyProperty.Register("Name", typeof(string), typeof(Student));
}
例子进阶(把textBox1和textBox2关联):
 public partial class MainWindow : Window
{
        Student stu;
        public MainWindow()
        {
            InitializeComponent();
            stu = new Student();
            stu.SetBinding(Student.NameProperty, new Binding("Text") { Source = textBox1 });
            textBox2.SetBinding(TextBox.TextProperty, new Binding("Name") { Source = stu });
        }

        private void Button_Click(object sender, RoutedEventArgs e)
        {
            Student stu = new Student();
            stu.Name = this.textBox1.Text;
            this.textBox2.Text = stu.Name;
        }
}
class Student : DependencyObject
{
public static readonly DependencyProperty NameProperty = DependencyProperty.Register("Name", typeof(string), typeof(Student));
public string Name
{
get { return (string)GetValue(NameProperty); }
set { SetValue(NameProperty,value); }
}
public BindingExpressionBase SetBinding(DependencyProperty dp,BindingBase binding)
{
return BindingOperations.SetBinding(this, dp, binding);
}WPF有一套机制存取依赖属性的值,第一步在DependencyObject派生类中声明public static修饰的DependecyProperty成员变量。并使用DependecyProperty.Regisiter方法获得DependencyProperty的实例。第二步使用DependencyObject的SetValue和GetValue方法,借助DependencyProperty实例存取值。
6.3 附加属性
附加属性是说一个属性本来不属于这个对象,但由于某种需求后来附加上。也就是把对象放入一个特定环境后对象才具有的属性称为附加属性。附加属性的作用就是将属性与数据类型解耦,让数据类型设计更加灵活。
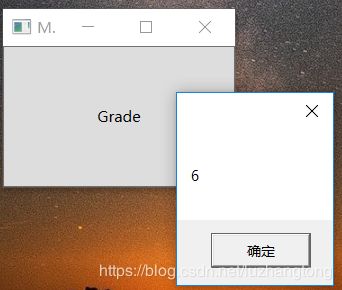
例子(Human在School环境里有Grade附加属性):
class School:DependencyObject
{
        public static int GetGrade(DependencyObject obj)
        {
            return (int)obj.GetValue(GradeProperty);
        }
        public static void SetGrade(DependencyObject obj,int value)
        {
            obj.SetValue(GradeProperty, value);
        }
        public static readonly DependencyProperty GradeProperty = DependencyProperty.RegisterAttached("Grade", typeof(int), typeof(School), new UIPropertyMetadata(0));
}
class Human:DependencyObject
{
} private void Button_Click(object sender, RoutedEventArgs e)
{
Human human = new Human();
School.SetGrade(human, 6);
int grade = School.GetGrade(human);
MessageBox.Show(grade.ToString());
}这一过程与依赖属性保存值过程并无二至——值仍然保存在Human实例的EffectiveValueEntry数组里。
例子(附加属性的Binding):
 this.rect.SetBinding(Canvas.LeftProperty,new Binding("Value") { Source=sliderX});
 this.rect.SetBinding(Canvas.TopProperty, new Binding("Value") { Source = sliderY });
7 WPF事件
WPF有两种树,一种是逻辑树,一种是可视元素树。说明CLR直接事件模型中,事件的拥有者就消息的发送者。
WinForm的Click事件处理器是直接事件模型。
只要支持事件委托与影响事件的方法签名保持一致,则一个事件可以由多个事件处理器来响应。直接事件模型是传统.NE开发中对象间相互协同、沟通信息的主要手段。当层级组件过多时,会形成事件链,而路由事件很好地解决了这个问题。
7.1 路由事件
路由事件拥有者和事件响应者之间没有显式地订阅关系,事件的拥有者只负责激发事件,事件将由谁响应它并不知道,事件的响应值则安装由事件侦听器。
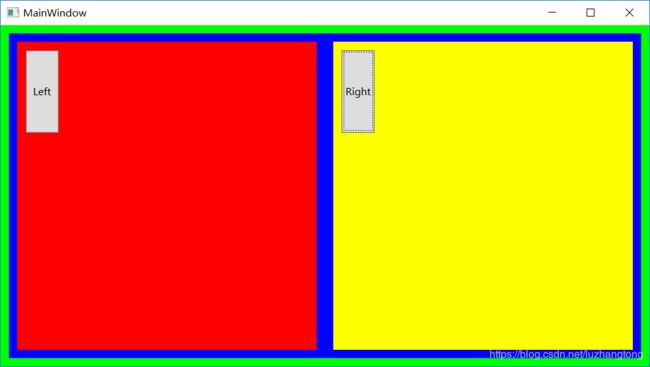
当点击buttonLeft时,Button.Click事件就会沿着buttonLeft->canvasLeft->gridA->gridRoot->Window这条路线向上传送。下面为gridRoot安装针对Button.Click事件的侦听器。
this.gridRoot.AddHandler(Button.ClickEvent, new RoutedEventHandler(this.ButtonClicked));路由事件是从内部一层一层传递出来最后到达最外层的gridRoot。查看事件的源头用e.OriginalSource,需要as/is操作符或者强制类型转换把它识别/转换成正确的类型。添加事件处理器也可以在XAML中完成。
