Android之GPS定位网上详解总结
Android可以通过多种方式获取用户位置。本文主要将GPS和NETWORK两种方式。
先简单的介绍下怎么在Android设备上获取用户位置。
- // 获取系统位置服务的引用
- LocationManager locationManager = (LocationManager) this.getSystemService(Context.LOCATION_SERVICE);
- // 定义对位置变化的监听函数
- LocationListener locationListener = new LocationListener() {
- public void onLocationChanged(Location location) {
- // Called when a new location is found by the network location provider.
- makeUseOfNewLocation(location);
- }
- public void onStatusChanged(String provider, int status, Bundle extras) {}
- public void onProviderEnabled(String provider) {}
- public void onProviderDisabled(String provider) {}
- };
- //向位置服务注册监听函数来接受位置更新
- locationManager.requestLocationUpdates(LocationManager.NETWORK_PROVIDER, 0, 0, locationListener);
首先要获取LocationManager对象,LocationManager不能直接new出来,他是系统的一项服务。
requestLocationUpdates()方法是来更新用户的位置的。第一个参数是Location Provider(位置提供者)的使用类型。(本例中使用的是基于手机信号塔和Wi_FI基站的网络位置提供者)。二个参数是通知之间的最小时间间隔(单位微秒),第三个是通知之间最小的距离变化(单位米)。将两个的值设置为零可以尽可能频繁的获取位置的通知。最后一个参数是 接受位置更新回调函数LocationListener。
为了使用GPS提供者来获取位置的更新,可以将NETWORK_PROVIDER.更改为GPS_PROVIDER。也可以通过两次调用requestLocationUpdates()(一次 NETWORK_PROVIDER ,一次GPS_PROVIDER.)来同时使用GPS和Network Location 内容提供者获取位置更新。
为了能够接受来自 NETWORK_PROVIDER或者GPS_PROVIDER的位置更新,必须在Android 的mainifest的文件中声明ACCESS_COARSE_LOCATION 或者ACCESS_FINE_LOCATION的用户权限。如果没有这些权限,会报错。NETWORK_PROVIDER需要ACCESS_COARSE_LOCATION权限(粗糙的定位权限),GPS_PROVIDER需要ACCESS_FINE_LOCATION权限(精确的定位权限)。当然,如果有ACCESS_FINE_LOCATION权限,NETWORK_PROVIDER和GPS_PROVIDER都能用。
LocationListener中的四个回调函数
onLocationChanged:当位置变化时调用
onStatusChanged:此方法在Provider的状态在可用、暂时不可用和无服务三个状态直接切换时被调用。试了一下,在位置提供者为network的前提下,联网和断网此方法会被调用
onProviderEnabled和onProviderDisabled:provider被用户开启或关闭后调用。试了一下,在位置提供者为GPS的前提下,打开和关闭GPS此方法会被调用。
Demo:
- package com.tianjf.locationgpsdemo;
- import android.app.Activity;
- import android.content.Context;
- import android.content.Intent;
- import android.location.Criteria;
- import android.location.Location;
- import android.location.LocationListener;
- import android.location.LocationManager;
- import android.os.Bundle;
- import android.provider.Settings;
- import android.widget.TextView;
- import android.widget.Toast;
- public class MainActivity extends Activity {
- TextView mTextView;
- LocationManager mLocationManager;
- @Override
- protected void onCreate(Bundle savedInstanceState) {
- super.onCreate(savedInstanceState);
- setContentView(R.layout.activity_main);
- mTextView = (TextView) findViewById(R.id.text_view);
- mLocationManager = (LocationManager) this
- .getSystemService(Context.LOCATION_SERVICE);
- openGPSSetting();
- getLocation();
- }
- private void openGPSSetting() {
- if (mLocationManager
- .isProviderEnabled(android.location.LocationManager.GPS_PROVIDER)) {
- Toast.makeText(this, "GPS模块正常", Toast.LENGTH_SHORT).show();
- return;
- }
- Toast.makeText(this, "请开启GPS!", Toast.LENGTH_SHORT).show();
- // 跳转到GPS的设置页面
- Intent intent = new Intent(Settings.ACTION_LOCATION_SOURCE_SETTINGS);
- startActivityForResult(intent, 0); // 此为设置完成后返回到获取界面
- }
- private void getLocation() {
- // android通过criteria选择合适的地理位置服务
- Criteria criteria = new Criteria();
- criteria.setAccuracy(Criteria.ACCURACY_FINE);// 高精度
- criteria.setAltitudeRequired(false);// 设置不需要获取海拔方向数据
- criteria.setBearingRequired(false);// 设置不需要获取方位数据
- criteria.setCostAllowed(true);// 设置允许产生资费
- criteria.setPowerRequirement(Criteria.POWER_LOW);// 低功耗
- String provider = mLocationManager.getBestProvider(criteria, true);// 获取GPS信息
- Location location = mLocationManager.getLastKnownLocation(provider);// 通过GPS获取位置
- updateUIToNewLocation(location);
- // 设置监听器,自动更新的最小时间为间隔N秒(这里的单位是微秒)或最小位移变化超过N米(这里的单位是米)
- mLocationManager.requestLocationUpdates(provider, 1 * 1000, 0.00001F,
- locationListener);
- }
- private void updateUIToNewLocation(Location location) {
- if (location != null) {
- mTextView.setText("纬度:" + location.getLatitude() + "\n经度"
- + location.getLongitude());
- // Location类的方法:
- // getAccuracy():精度(ACCESS_FINE_LOCATION/ACCESS_COARSE_LOCATION)
- // getAltitude():海拨
- // getBearing():方位,行动方向
- // getLatitude():纬度
- // getLongitude():经度
- // getProvider():位置提供者(GPS/NETWORK)
- // getSpeed():速度
- // getTime():时刻
- } else {
- mTextView.setText("无法获取地理信息");
- }
- }
- // 定义对位置变化的监听函数
- LocationListener locationListener = new LocationListener() {
- public void onLocationChanged(Location location) {
- System.out.println("onLocationChanged");
- System.out.println("纬度:" + location.getLatitude() + "\n经度"
- + location.getLongitude());
- }
- public void onStatusChanged(String provider, int status, Bundle extras) {
- System.out.println("onStatusChanged");
- System.out.println("privider:" + provider);
- System.out.println("status:" + status);
- System.out.println("extras:" + extras);
- }
- public void onProviderEnabled(String provider) {
- System.out.println("onProviderEnabled");
- System.out.println("privider:" + provider);
- }
- public void onProviderDisabled(String provider) {
- System.out.println("onProviderDisabled");
- System.out.println("privider:" + provider);
- }
- };
- }
步骤: 要实用Adnroid平台的GPS设备,首先需要添加上权限,所以需要添加如下权限:
      <


      uses


      -


      permission android:name


      =


      "


      android.permission.ACCESS_FINE_LOCATION


      "


      >


      uses


      -


      permission


      >
具体实现代码如下:
首先判断GPS模块是否存在或者是开启:

 代码
代码
       private


       void


        openGPSSettings() {
        LocationManager alm


       =


        (LocationManager)


       this


                .getSystemService(Context.LOCATION_SERVICE);


       if


        (alm
                .isProviderEnabled(android.location.LocationManager.GPS_PROVIDER)) {
            Toast.makeText(


       this


       ,


       "


       GPS模块正常


       "


       , Toast.LENGTH_SHORT)
                    .show();


       return


       ;
        }

        Toast.makeText(


       this


       ,


       "


       请开启GPS!


       "


       , Toast.LENGTH_SHORT).show();
        Intent intent


       =


       new


        Intent(Settings.ACTION_SECURITY_SETTINGS);
        startActivityForResult(intent,


       0


       );


       //


       此为设置完成后返回到获取界面


    }
如果开启正常,则会直接进入到显示页面,如果开启不正常,则会进行到GPS设置页面:
获取代码如下:
代码
       private


       void


        getLocation()
    {


       //


        获取位置管理服务


               LocationManager locationManager;
        String serviceName


       =


        Context.LOCATION_SERVICE;
        locationManager


       =


        (LocationManager)


       this


       .getSystemService(serviceName);


       //


        查找到服务信息


               Criteria criteria


       =


       new


        Criteria();
        criteria.setAccuracy(Criteria.ACCURACY_FINE);


       //


        高精度


               criteria.setAltitudeRequired(


       false


       );
        criteria.setBearingRequired(


       false


       );
        criteria.setCostAllowed(


       true


       );
        criteria.setPowerRequirement(Criteria.POWER_LOW);


       //


        低功耗


        String provider


       =


        locationManager.getBestProvider(criteria,


       true


       );


       //


        获取GPS信息


               Location location


       =


        locationManager.getLastKnownLocation(provider);


       //


        通过GPS获取位置


               updateToNewLocation(location);


       //


        设置监听器,自动更新的最小时间为间隔N秒(1秒为1*1000,这样写主要为了方便)或最小位移变化超过N米


               locationManager.requestLocationUpdates(provider,


       100


       *


       1000


       ,


       500


       ,
                locationListener);


           }
到这里就可以获取到地理位置信息了,但是还是要显示出来,那么就用下面的方法进行显示:
代码
       private


       void


        updateToNewLocation(Location location) {

        TextView tv1;
        tv1


       =


        (TextView)


       this


       .findViewById(R.id.tv1);


       if


        (location


       !=


       null


       ) {


       double


         latitude


       =


        location.getLatitude();


       double


        longitude


       =


        location.getLongitude();
            tv1.setText(


       "


       维度:


       "


       +


         latitude


       +


       "


       \n经度


       "


       +


        longitude);
        }


       else


        {
            tv1.setText(


       "


       无法获取地理信息


       "


       );
        }

    }
这样子就能获取到当前使用者所在的地理位置了,至少如何下地图上实现,在下面将进行获取,并显示出来!
LocationMangager,位置管理器。要想操作定位相关设备,必须先定义个LocationManager。我们可以通过如下代码创建LocationManger对象。
LocationManger locationManager=(LocationManager) this.getSystemService(Context.LOCATION_SERVICE);
二、LocationListener
LocationListener,位置监听,监听位置变化,监听设备开关与状态。
private LocationListener locationListener= new LocationListener() {
/**
* 位置信息变化时触发
*/
public void onLocationChanged(Location location) {
updateView(location);
Log.i(TAG, "时间:"+location.getTime());
Log.i(TAG, "经度:"+location.getLongitude());
Log.i(TAG, "纬度:"+location.getLatitude());
Log.i(TAG, "海拔:"+location.getAltitude());
}
/**
* GPS状态变化时触发
*/
public void onStatusChanged(String provider, int status, Bundle extras) {
switch (status) {
// GPS状态为可见时
case LocationProvider.AVAILABLE:
Log.i(TAG, "当前GPS状态为可见状态");
break;
// GPS状态为服务区外时
case LocationProvider.OUT_OF_SERVICE:
Log.i(TAG, "当前GPS状态为服务区外状态");
break;
// GPS状态为暂停服务时
case LocationProvider.TEMPORARILY_UNAVAILABLE:
Log.i(TAG, "当前GPS状态为暂停服务状态");
break;
}
}
/**
* GPS开启时触发
*/
public void onProviderEnabled(String provider) {
Location location=lm.getLastKnownLocation(provider);
updateView(location);
}
/**
* GPS禁用时触发
*/
public void onProviderDisabled(String provider) {
updateView( null);
}
};
三、Location
Location,位置信息,通过Location可以获取时间、经纬度、海拔等位置信息。上面采用locationListener里面的onLocationChanged()来获取location,下面讲述如何主动获取location。
Location location=locationManager.getLastKnownLocation(LocationManager.GPS_PROVIDER);
system.out.println("时间:"+location.getTime());
system.out.println("经度:"+location.getLongitude());
注意:Location location=new Location(LocationManager.GPS_PROVIDER)方式获取的location的各个参数值都是为0。
四、GpsStatus.Listener
GpsStatus.Listener ,GPS状态监听,包括GPS启动、停止、第一次定位、卫星变化等事件。
// 状态监听
GpsStatus.Listener listener = new GpsStatus.Listener() {
public void onGpsStatusChanged( int event) {
switch (event) {
// 第一次定位
case GpsStatus.GPS_EVENT_FIRST_FIX:
Log.i(TAG, "第一次定位");
break;
// 卫星状态改变
case GpsStatus.GPS_EVENT_SATELLITE_STATUS:
Log.i(TAG, "卫星状态改变");
// 获取当前状态
GpsStatus gpsStatus=lm.getGpsStatus( null);
// 获取卫星颗数的默认最大值
int maxSatellites = gpsStatus.getMaxSatellites();
// 创建一个迭代器保存所有卫星
Iterator
int count = 0;
while (iters.hasNext() && count <= maxSatellites) {
GpsSatellite s = iters.next();
count++;
}
System.out.println("搜索到:"+count+"颗卫星");
break;
// 定位启动
case GpsStatus.GPS_EVENT_STARTED:
Log.i(TAG, "定位启动");
break;
// 定位结束
case GpsStatus.GPS_EVENT_STOPPED:
Log.i(TAG, "定位结束");
break;
}
};
};
// 绑定监听状态
lm.addGpsStatusListener(listener);
五、GpsStatus
GpsStatus,GPS状态信息,上面在卫星状态变化时,我们就用到了GpsStatus。
// 实例化
GpsStatus gpsStatus = locationManager.getGpsStatus( null); // 获取当前状态
// 获取默认最大卫星数
int maxSatellites = gpsStatus.getMaxSatellites();
// 获取第一次定位时间(启动到第一次定位)
int costTime=gpsStatus.getTimeToFirstFix();
// 获取卫星
Iterable
// 一般再次转换成Iterator
Iterator
六、GpsSatellite
GpsSatellite,定位卫星,包含卫星的方位、高度、伪随机噪声码、信噪比等信息。
// 获取卫星
Iterable
// 再次转换成Iterator
Iterator
// 通过遍历重新整理为ArrayList
ArrayList
int count=0;
int maxSatellites=gpsStatus.getMaxSatellites();
while (itrator.hasNext() && count <= maxSatellites) {
GpsSatellite satellite = itrator.next();
satelliteList.add(satellite);
count++;
}
System.out.println("总共搜索到"+count+"颗卫星");
// 输出卫星信息
for( int i=0;i
System.out.println(satelliteList.get(i).getAzimuth());
// 卫星的高度,浮点型数据
System.out.println(satelliteList.get(i).getElevation());
// 卫星的伪随机噪声码,整形数据
System.out.println(satelliteList.get(i).getPrn());
// 卫星的信噪比,浮点型数据
System.out.println(satelliteList.get(i).getSnr());
// 卫星是否有年历表,布尔型数据
System.out.println(satelliteList.get(i).hasAlmanac());
// 卫星是否有星历表,布尔型数据
System.out.println(satelliteList.get(i).hasEphemeris());
// 卫星是否被用于近期的GPS修正计算
System.out.println(satelliteList.get(i).hasAlmanac());
}
为了便于理解,接下来模拟一个案例,如何在程序代码中使用GPS获取位置信息。
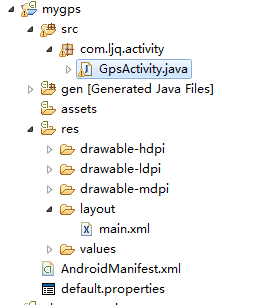
第一步:新建一个Android工程项目,命名为mygps,目录结构如下
第二步:修改main.xml布局文件,修改内容如下:
xml version="1.0" encoding="utf-8" ?>
< LinearLayout xmlns:android ="http://schemas.android.com/apk/res/android"
android:orientation ="vertical"
android:layout_width ="fill_parent"
android:layout_height ="fill_parent" >
< EditText android:layout_width ="fill_parent"
android:layout_height ="wrap_content"
android:cursorVisible ="false"
android:editable ="false"
android:id ="@+id/editText" />
LinearLayout >
第三步:实用Adnroid平台的GPS设备,需要添加上权限
< uses-permission android:name ="android.permission.ACCESS_FINE_LOCATION" />
< uses-permission android:name ="android.permission.ACCESS_COARSE_LOCATION" />
第四步:修改核心组件activity,修改内容如下
package com.ljq.activity;
import java.util.Iterator;
import android.app.Activity;
import android.content.Context;
import android.content.Intent;
import android.location.Criteria;
import android.location.GpsSatellite;
import android.location.GpsStatus;
import android.location.Location;
import android.location.LocationListener;
import android.location.LocationManager;
import android.location.LocationProvider;
import android.os.Bundle;
import android.provider.Settings;
import android.util.Log;
import android.widget.EditText;
import android.widget.Toast;
public class GpsActivity extends Activity {
private EditText editText;
private LocationManager lm;
private static final String TAG="GpsActivity"; @Override
protected void onDestroy() {
// TODO Auto-generated method stub
super.onDestroy();
lm.removeUpdates(locationListener);
}
@Override
public void onCreate(Bundle savedInstanceState) {
super.onCreate(savedInstanceState);
setContentView(R.layout.main);
editText=(EditText)findViewById(R.id.editText);
lm=(LocationManager)getSystemService(Context.LOCATION_SERVICE);
// 判断GPS是否正常启动
if(!lm.isProviderEnabled(LocationManager.GPS_PROVIDER)){
Toast.makeText( this, "请开启GPS导航...", Toast.LENGTH_SHORT).show();
// 返回开启GPS导航设置界面
Intent intent = new Intent(Settings.ACTION_LOCATION_SOURCE_SETTINGS);
startActivityForResult(intent,0);
return;
}
// 为获取地理位置信息时设置查询条件
String bestProvider = lm.getBestProvider(getCriteria(), true);
// 获取位置信息
// 如果不设置查询要求,getLastKnownLocation方法传人的参数为LocationManager.GPS_PROVIDER
Location location= lm.getLastKnownLocation(bestProvider);
updateView(location);
// 监听状态
lm.addGpsStatusListener(listener);
// 绑定监听,有4个参数
// 参数1,设备:有GPS_PROVIDER和NETWORK_PROVIDER两种
// 参数2,位置信息更新周期,单位毫秒
// 参数3,位置变化最小距离:当位置距离变化超过此值时,将更新位置信息
// 参数4,监听
// 备注:参数2和3,如果参数3不为0,则以参数3为准;参数3为0,则通过时间来定时更新;两者为0,则随时刷新
// 1秒更新一次,或最小位移变化超过1米更新一次;
// 注意:此处更新准确度非常低,推荐在service里面启动一个Thread,在run中sleep(10000);然后执行handler.sendMessage(),更新位置
lm.requestLocationUpdates( LocationManager.GPS_PROVIDER, 1000, 1, locationListener);
}
// 位置监听
private LocationListener locationListener= new LocationListener() {
/**
* 位置信息变化时触发
*/
public void onLocationChanged(Location location) {
updateView(location);
Log.i(TAG, "时间:"+location.getTime());
Log.i(TAG, "经度:"+location.getLongitude());
Log.i(TAG, "纬度:"+location.getLatitude());
Log.i(TAG, "海拔:"+location.getAltitude());
}
/**
* GPS状态变化时触发
*/
public void onStatusChanged(String provider, int status, Bundle extras) {
switch (status) {
// GPS状态为可见时
case LocationProvider.AVAILABLE:
Log.i(TAG, "当前GPS状态为可见状态");
break;
// GPS状态为服务区外时
case LocationProvider.OUT_OF_SERVICE:
Log.i(TAG, "当前GPS状态为服务区外状态");
break;
// GPS状态为暂停服务时
case LocationProvider.TEMPORARILY_UNAVAILABLE:
Log.i(TAG, "当前GPS状态为暂停服务状态");
break;
}
}
/**
* GPS开启时触发
*/
public void onProviderEnabled(String provider) {
Location location=lm.getLastKnownLocation(provider);
updateView(location);
}
/**
* GPS禁用时触发
*/
public void onProviderDisabled(String provider) {
updateView( null);
}
};
// 状态监听
GpsStatus.Listener listener = new GpsStatus.Listener() {
public void onGpsStatusChanged( int event) {
switch (event) {
// 第一次定位
case GpsStatus.GPS_EVENT_FIRST_FIX:
Log.i(TAG, "第一次定位");
break;
// 卫星状态改变
case GpsStatus.GPS_EVENT_SATELLITE_STATUS:
Log.i(TAG, "卫星状态改变");
// 获取当前状态
GpsStatus gpsStatus=lm.getGpsStatus( null);
// 获取卫星颗数的默认最大值
int maxSatellites = gpsStatus.getMaxSatellites();
// 创建一个迭代器保存所有卫星
Iterator
int count = 0;
while (iters.hasNext() && count <= maxSatellites) {
GpsSatellite s = iters.next();
count++;
}
System.out.println("搜索到:"+count+"颗卫星");
break;
// 定位启动
case GpsStatus.GPS_EVENT_STARTED:
Log.i(TAG, "定位启动");
break;
// 定位结束
case GpsStatus.GPS_EVENT_STOPPED:
Log.i(TAG, "定位结束");
break;
}
};
};
/**
* 实时更新文本内容
*
* @param location
*/
private void updateView(Location location){
if(location!= null){
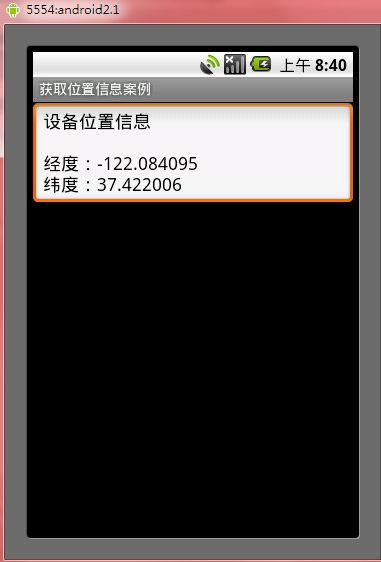
editText.setText("设备位置信息\n\n经度:");
editText.append(String.valueOf(location.getLongitude()));
editText.append("\n纬度:");
editText.append(String.valueOf(location.getLatitude()));
} else{
// 清空EditText对象
editText.getEditableText().clear();
}
}
/**
* 返回查询条件
* @return
*/
private Criteria getCriteria(){
Criteria criteria= new Criteria();
// 设置定位精确度 Criteria.ACCURACY_COARSE比较粗略,Criteria.ACCURACY_FINE则比较精细
criteria.setAccuracy(Criteria.ACCURACY_FINE);
// 设置是否要求速度
criteria.setSpeedRequired( false);
// 设置是否允许运营商收费
criteria.setCostAllowed( false);
// 设置是否需要方位信息
criteria.setBearingRequired( false);
// 设置是否需要海拔信息
criteria.setAltitudeRequired( false);
// 设置对电源的需求
criteria.setPowerRequirement(Criteria.POWER_LOW);
return criteria;
}
}
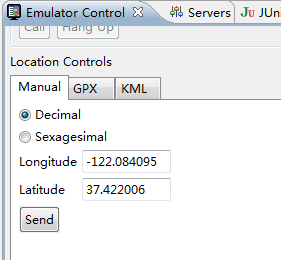
第五步:启动模拟器,如果启动完成,请在Myeclipse中按如下选项一步一步操作:Emulator Control->Location Controls->Manual->选中Decimal->输入经纬度,类似如下
演示效果如下: