ASP.NET Core分布式项目实战(集成ASP.NETCore Identity)--学习笔记
任务24:集成ASP.NETCore Identity
之前在 Index 页面写了一个 strong 标签,需要加个判断再显示,不然为空没有错误的时候也会显示
@if (!ViewContext.ModelState.IsValid)
{
    Error""

}
因为 asp-validation-summary 是 asp.net view 视图会自动控制,而 strong 不会,所以要显示标题需要添加一个判断,那么这里我们直接移除掉,当有错误信息的时候直接显示即可,这里作为上一节的补充
这一节主要把 Identity 加入进来
一开始我们把 startup 中的 Identity 注释掉了,只需要开启即可
添加包 IdentityServer4,IdentityServer4.AspNetIdentity,添加之后就可以把 AddTestUsers 移除掉,它就不会再用测试里面的 user,
Startup.cs
public void ConfigureServices(IServiceCollection services)
{
    services.AddDbContext(options =>
    {
        options.UseSqlServer(Configuration.GetConnectionString("DefaultConnection"));
    });

    services.AddIdentity()
        .AddEntityFrameworkStores()
        .AddDefaultTokenProviders();

    services.AddIdentityServer()
            .AddDeveloperSigningCredential()
            .AddInMemoryClients(Config.GetClients())
            .AddInMemoryApiResources(Config.GetApiResource())
            .AddInMemoryIdentityResources(Config.GetIdentityResources())
            .AddAspNetIdentity();

    //services.AddAuthentication(CookieAuthenticationDefaults.AuthenticationScheme)
    //    .AddCookie(options => {
    //        options.LoginPath = "/Account/Login";
    //    });

    //services.Configure(options =>
    //{
    //    options.Password.RequireLowercase = true;
    //    options.Password.RequireNonAlphanumeric = true;
    //    options.Password.RequireUppercase = true;
    //    options.Password.RequiredLength = 12;
    //});

    services.AddScoped();

    services.AddMvc();
}
接下来要到 AccountController 中切换回原先的登录逻辑
AccountController
private UserManager _userManager;
private SignInManager _signInManager;
private IIdentityServerInteractionService _interaction;

//private readonly TestUserStore _users;

//public AccountController(TestUserStore users)
//{
//    _users = users;
//}

public AccountController(UserManager userManager,
    SignInManager signInManager,
    IIdentityServerInteractionService interaction)
{
    _userManager = userManager;
    _signInManager = signInManager;
    _interaction = interaction;
}
接下来改造 AccountController 的 Register 方法,首先把 RegisterViewModel 的 UserName 改回为 Email
RegisterViewModel
public string Email { get; set; }
//public string UserName { get; set; }
AccountController
[HttpPost]
public async Task Register(RegisterViewModel registerViewModel, string returnUrl  = null)
{
    if (ModelState.IsValid)
    {
        ViewData["ReturnUrl"] = returnUrl;
        var identityUser = new ApplicationUser
        {
            Email = registerViewModel.Email,
            UserName = registerViewModel.Email,
            NormalizedUserName = registerViewModel.Email,
        };

        var identityResult = await _userManager.CreateAsync(identityUser, registerViewModel.Password);
        if (identityResult.Succeeded)
        {
            await _signInManager.SignInAsync(identityUser, new AuthenticationProperties { IsPersistent = true });
            return RedirectToLoacl(returnUrl);
        }
        else
        {
            AddErrors(identityResult);
        }
    }

    return View();
}
接着改造 AccountController 的 Login 方法,首先把 LoginViewModel 的 UserName 也改回为 Email,并加上一个 RememberMe 字段
LoginViewModel
public string Email { get; set; }
//public string UserName { get; set; }
public bool RememberMe { get; set; }
调用 UserManager 的查找和登录的逻辑
AccountController
[HttpPost]
public async Task Login(LoginViewModel loginViewModel,string returnUrl)
{
    if (ModelState.IsValid)
    {
        ViewData["ReturnUrl"] = returnUrl;
        var user = await _userManager.FindByEmailAsync(loginViewModel.Email);
        if (user == null)
        {
            ModelState.AddModelError(nameof(loginViewModel.Email), "Email not exists");
        }
        else
        {
            if (await _userManager.CheckPasswordAsync(user, loginViewModel.Password))
            {
                AuthenticationProperties props = null;
                if (loginViewModel.RememberMe)
                {
                    props = new AuthenticationProperties
                    {
                        IsPersistent = true,
                        ExpiresUtc = DateTimeOffset.UtcNow.Add(TimeSpan.FromMinutes(30)),
                    };
                }

                await _signInManager.SignInAsync(user, props);

                if (_interaction.IsValidReturnUrl(returnUrl))
                {
                    return Redirect(returnUrl);
                }

                return Redirect("~/");
            }

            ModelState.AddModelError(nameof(loginViewModel.Password), "Wrong Password");
        }
    }

    return View(loginViewModel);
}
还原 Logout 方法
Logout
public async Task Logout()
{
    await _signInManager.SignOutAsync();
    //await HttpContext.SignOutAsync();
    return RedirectToAction("Index", "Home");
}
检查一下 view,将 Login.cshtml 里面的 UserName 修改为 Email,model 改为 LoginViewModel
Login.cshtml
@model LoginViewModel;
恢复 Program 中 EF 的初始化
Program
public static void Main(string[] args)
{
    BuildWebHost(args)
        .MigrateDbContext((context, services) =>
        {
            new ApplicationDbContextSeed().SeedAsync(context, services)
            .Wait();
        })
        .Run();
}
启动程序之后会根据 appsettings.json 中的配置创建数据库
appsettings.json
"ConnectionStrings": {
"DefaultConnection": "Server=(localdb)\\mssqllocaldb;Database=aspnet-IdentitySample-CE9DD12E-9C3B-4072-8E38-6F33420849CB;Trusted_Connection=True;MultipleActiveResultSets=true"
}
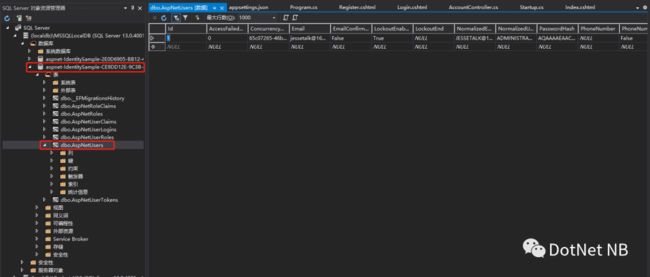
编译启动程序,可以看到用户表有一条数据
这条数据来自 ApplicationDbContextSeed
public class ApplicationDbContextSeed
{
    private UserManager _userManager;

    public async Task SeedAsync(ApplicationDbContext context, IServiceProvider services)
    {
        if (!context.Users.Any())
        {
            _userManager = services.GetRequiredService>();

            var defaultUser = new ApplicationUser {
                UserName="Administrator",
                Email ="[email protected]",
                NormalizedUserName ="admin"
            };

            var result = await _userManager.CreateAsync(defaultUser, "Password$123");
            if (!result.Succeeded)
            {
                throw new Exception("初始默认用户失败");
            }
        }
    }
}
浏览器访问
http://localhost:5000/
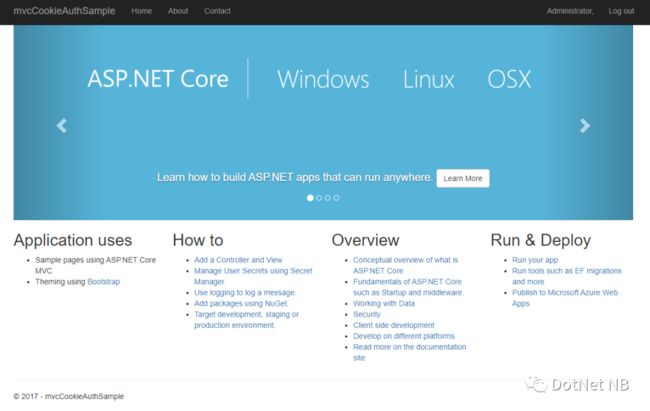
使用邮箱登录
退出登录之后启动客户端,浏览器访问 5001 之后会跳转到 5000
http://localhost:5001/
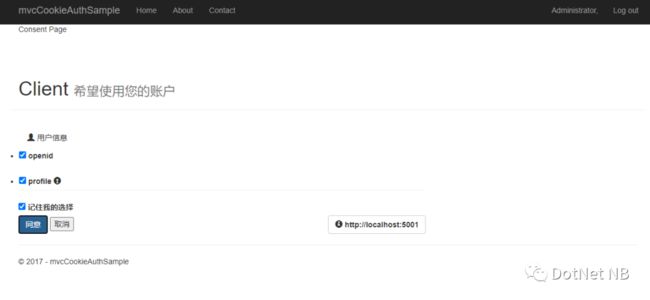
输入邮箱和密码之后会来到 consent 页面
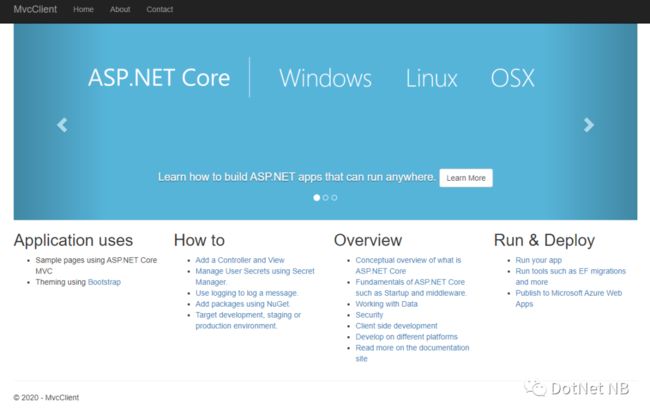
点击同意之后跳转到 MvcClient
点击 About 看到用户名是 Administrator,就是数据库里面的用户
这就是我们把程序里面的 TestUserStore 替换为 Identity
课程链接
http://video.jessetalk.cn/course/explore
相关文章
ASP.NET Core分布式项目实战(Consent 代码重构)--学习笔记
ASP.NET Core分布式项目实战(Consent 确认逻辑实现)--学习笔记
ASP.NET Core分布式项目实战(运行Consent Page)--学习笔记
ASP.NET Core分布式项目实战(Consent Controller Get请求逻辑实现)--学习笔记
ASP.NET Core分布式项目实战(Consent视图制作)--学习笔记
ASP.NET Core分布式项目实战(Identity Server 4回顾,Consent 实现思路介绍)--学习笔记
ASP.NET Core分布式项目实战(oauth2 + oidc 实现 client部分)--学习笔记
ASP.NET Core分布式项目实战(oauth2 + oidc 实现 server部分)--学习笔记
ASP.NET Core分布式项目实战(oauth2与open id connect 对比)--学习笔记
ASP.NET Core分布式项目实战(详解oauth2授权码流程)--学习笔记
ASP.NET Core分布式项目实战(oauth密码模式identity server4实现)--学习笔记
ASP.NET Core分布式项目实战(第三方ClientCredential模式调用)--学习笔记
ASP.NET Core分布式项目实战(客户端集成IdentityServer)--学习笔记
ASP.NET Core分布式项目实战(业务介绍,架构设计,oAuth2,IdentityServer4)--学习笔记
ASP.NET Core分布式项目实战(课程介绍,MVP,瀑布与敏捷)--学习笔记
ASP.NET Core快速入门 -- 学习笔记汇总
![]()


