分布式日志分析系统(一):基于Elasticsearch+Filebeat+Kibana的搭建
0、引言
最近在实习做了一个课题,关于分布式的日志分析系统的部署,一般做这一块,网上有现成的ELK框架(Elasticsearch+Logstash+Kibana)完成,老大说Logstash在服务器上部署资源消耗比较大,推荐用Filebeat,于是我就简单地搭了下环境,跑了起来。话不多说,直接上干货。
1、安装JDK,至少是1.8版本的,网上有很多攻略,可以找一个看看;
在cmd下执行java -version,如果显示java版本是1.8的,这一步可以不用做;
2、Elasticsearch安装配置
2.1、可以上官网下载:Elasticsearch下载,我下的是zip版本的;
2.2、下载完了之后,解压,然后修改配置文件,路径是:你下载的路径/config/elasticsearch.yml
# ---------------------------------- Cluster -----------------------------------
#
# Use a descriptive name for your cluster:
#
cluster.name: "xiaoyi-host"
#
# ------------------------------------ Node ------------------------------------
#
# Use a descriptive name for the node:
#
node.name: "xiaoyi-node-1"
#
# Add custom attributes to the node:
#
#node.attr.rack: r1
#
# ----------------------------------- Paths ------------------------------------
#
# Path to directory where to store the data (separate multiple locations by comma):
#
path.data: G:\
#
# Path to log files:
#
path.logs: G:\
#
主要是对路径进行修改,可以自己新建一个文件夹把数据存储进去,节点名字跟集群名字可以改成自己的
2.3 修改/config/jvm.option(可选项)
# Xms represents the initial size of total heap space
# Xmx represents the maximum size of total heap space

-Xms1g
-Xmx1g
主要是对jvm内存进行调整,如果运行的时候报内存溢出的话,可以适当地把内存调大一些,因为我机子配置没有报错,所以这一步我是默认的。
2.4 打开/bin/elasticsearch.bat,用管理员身份运行
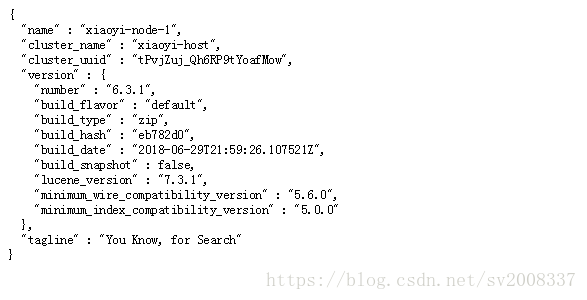
打开浏览器,输入你配置的ip、端口号:9200,然后回车:
如果显示是这样子的话,恭喜你,这一步你已经成功了!
3、Elasticsearch-head配置
3.1 下载安装包
这一步有很多种下载方式,我用的是从Github下载过来的,地址:Elasticsearch-head;
3.2 安装部署node
链接:Node下载地址;
配置环境变量,可以直接把安装路径加到Path下,然后在cmd下执行 node -v
如果显示有版本号,说明安装成功了;
Tips:node要保持最新版本,不然后面的安装可能会出现问题;
3.3 安装部署grunt
因为head的安装,需要用grunt安装,所以得安装个grunt;
逻辑就是:咱们要安装head这个插件,需要grunt安装,而安装grunt呢,需要node安装,所以得先装一个node;
cmd下执行命令:
npm install -g grunt-cli因为默认连接的是国外的镜像,所以速度会比较慢,需要自己手动地改成国内的镜像:
npm config set registry https://registry.npm.taobao.org这里有可能会提示一个npm版本非最新的错误,可以执行下面的命令解决:
npm install -g npmTips:如果更新后的结果还是报错,注意查看安装路径下/node_modules下有没有npm/node_modules路径,如果存在这样的路径,把所有的文件复制到父文件夹下即可,问题解决;
一般到了这一步,没有报错,等它安装完,在当前路径下执行:
grunt -version如果有版本提示,说明已经成功安装了,如果提示没有存在命令,我记得需要移动俩个grunt文件过来当前文件夹下的;
Tips:grunt安装后的文件是在C盘的某个路径下,注意看清楚哦
然后在head的路径下执行:
grunt server启动head,打开浏览器,输入你的ip,端口号:9100,然后你会看到:
 4、Filebeat安装部署
4.1 安装链接:filebeat安装
4.2 打开并修改当前路径下的配置文件filebeat.yml
#=========================== Filebeat inputs =============================

filebeat.inputs:

# Each - is an input. Most options can be set at the input level, so
# you can use different inputs for various configurations.
# Below are the input specific configurations.

- type: log

  # Change to true to enable this input configuration.
  enabled: true

  # Paths that should be crawled and fetched. Glob based paths.
  paths:
    - G:\CSAIR\log_test\*.log
    #- c:\programdata\elasticsearch\logs\*
主要是对日志路径的修改,还有一个enable要设置成true才能生效;
然后另一个需要改动的地方是在output下更改,根据自己的需要,我是用filebeat直接output到elasticsearch上,所以只配置了elasticsearch上的output
#================================ Outputs =====================================

# Configure what output to use when sending the data collected by the beat.

#-------------------------- Elasticsearch output ------------------------------
output.elasticsearch:
  # Array of hosts to connect to.
  hosts: ["10.95.32.11:9200"]

  #结点的个数
  worker: 1
  #index: "filebeat-%{+YYYY-MM-dd}"
  # Optional protocol and basic auth credentials.
  #protocol: "https"
  #username: "elastic"
  #password: "changeme"

  #setup.template.name: "xiaoyi_template_name"
  #setup.template.fields: "./fields.yml"
  #setup.template.overwrite: true
  #setup.template.enabled: true
如果需要部署集群的话,需要在hosts后加ip,然后更改结点worker的个数;
4.3 启动Filebeat
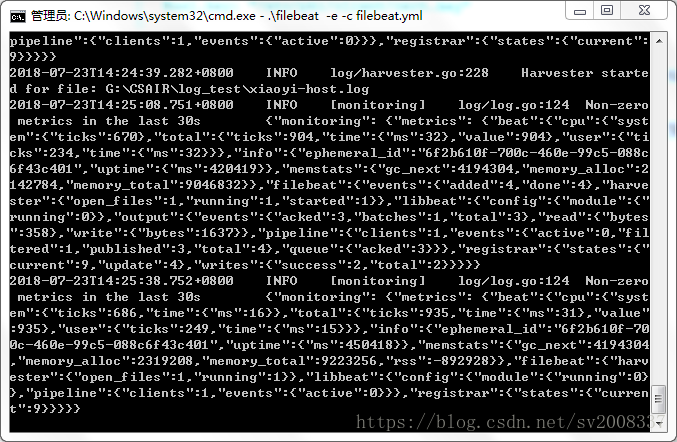
.\filebeat -e -c filebeat.yml运行界面:
到这一步说明Filebeat已经开始运行了。
5、Kibana安装部署
5.1 安装链接:Kibana下载
5.2 更改配置文件:/config/kibana.yml
#端口号
server.port: 5601
#host
server.host: "10.95.32.11"
# The Kibana server's name.  This is used for display purposes.
server.name: "xiaoyi-kibana"
# The URL of the Elasticsearch instance to use for all your queries.
elasticsearch.url: "http://10.95.32.11:9200"
# Kibana uses an index in Elasticsearch to store saved searches, visualizations and
# dashboards. Kibana creates a new index if the index doesn't already exist.
kibana.index: ".kibana"
记得最后kibana的index要放出来;
Tips:有些电脑可能会报错:Your Kibana index is out of date, reset it or use the X-Pack upgrade assistant.,把index改成“.kibana6”可解决问题;
5.3 kibana启动
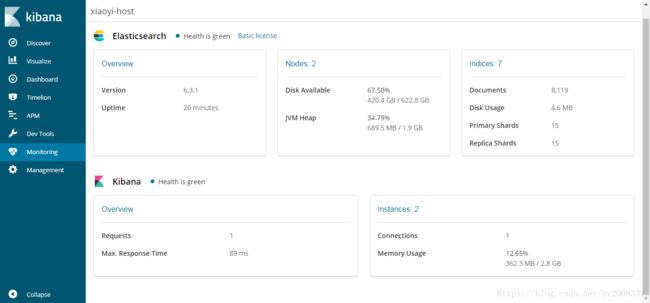
.\bin\kibana.bat这一步需要等一点时间,有点慢,在浏览器上输入:你的ip:5601,我的运行界面如下:
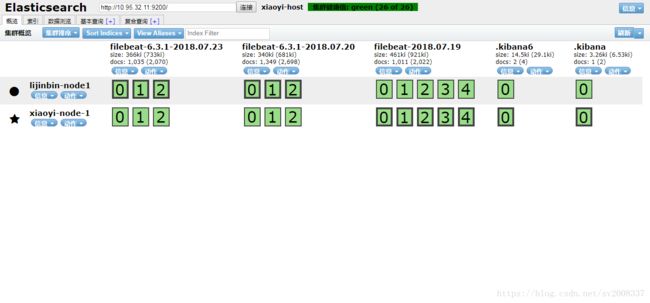
6、集群部署
修改elasticsearch的配置文件:
# ---------------------------------- Cluster -----------------------------------
#
# Use a descriptive name for your cluster:
#
cluster.name: "xiaoyi-host"
#
Tips:单台机器的配置在前面已经介绍了,只是注意,我一开始部署完多台机器总是不能部署到一起,后来才发现,必须所有的的机器的cluster name是一致的才行。这一点很重要。
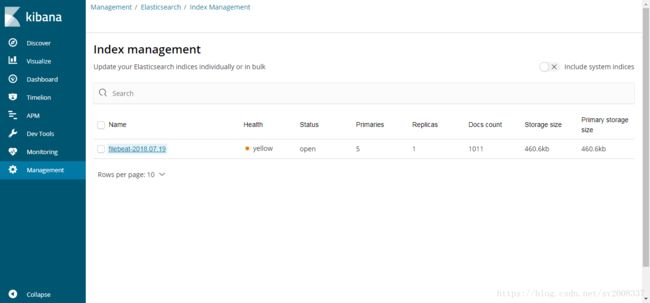
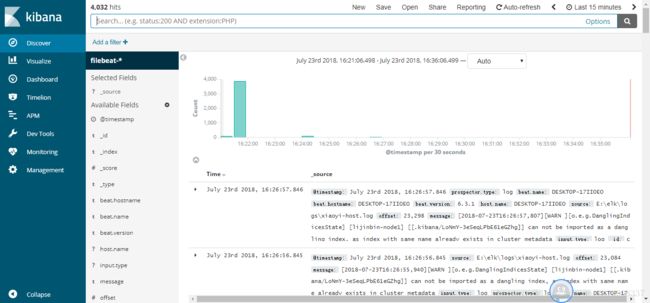
最后附上我做实验时候的一些截图:
希望能帮助到大家~有问题可以留言交流~ 感谢同事的帮助~
