Flume安装&以及常用的代理配置
第一部分 单节点flume配置
安装参考http://flume.apache.org/FlumeUserGuide.html
http://my.oschina.net/leejun2005/blog/288136
这边简单的介绍,运行agent的命令
$ bin/flume-ng agent -n $agent_name -c conf-f conf/flume-conf.properties.template
1.单节点配置如下
# example.conf: A single-node Flume configuration
# created by Cesar.x 2015/12/14

# Name the components on this agent
a1.sources = r1
a1.sinks = k1
a1.channels = c1

# Describe/configure the source
a1.sources.r1.type = netcat
a1.sources.r1.bind = localhost
a1.sources.r1.port = 44444

# Describe the sink
a1.sinks.k1.type = logger

# Use a channel which buffers events in memory
a1.channels.c1.type = memory
a1.channels.c1.capacity = 1000
a1.channels.c1.transactionCapacity = 100

# Bind the source and sink to the channel
a1.sources.r1.channels = c1
a1.sinks.k1.channel = c1
2.然后运行指令
bin/flume-ng agent --conf conf --conf-fileconf/myconf/example.conf --name a1 -Dflume.root.logger=INFO,console
PS:-Dflume.root.logger=INFO,console仅为 debug 使用,请勿生产环境生搬硬套,否则大量的日志会返回到终端。。。
3.然后重新开个shell窗口
$ telnet localhost 44444
Trying 127.0.0.1...
Connected to localhost.localdomain(127.0.0.1).
Escape character is '^]'.
Hello world!
OK
问题1
这里我们有可能会遇到没有安装telnet的问题,我这里是redhat系统,如果没有安装的话,直接yum –y -install telnet 指令进行安装。
问题2
Telnet连接拒绝的问题
我们查看44444端口的监听
netstat -anltup | grep :44444
参考
http://www.2cto.com/os/201411/352191.html
发现监听是本地
修改telnet 命令
发现,已经连上没有问题。
然后我们输入hello,回车
再去刚刚那个终端查看
![]()
发现已经搜集到我们的信息。
第二部分 更详细的讨论代理配置
Zookeeper相关
我们可以把刚刚配置的agent1的配置文件存在zk上。刚配置文件上传之后,我们使用如下的命令的来启动agent;
因为官网上说了,这是实验性质的,所以我这边就不尝试了。
在zk中的节点示意图。
- /flume
|- /a1 [Agent config file]
|- /a2 [Agent config file]
bin/flume-ng agent –conf conf -zzkhost:2181,zkhost1:2181 -p /flume –name a1 -Dflume.root.logger=INFO,console

nohup bin/flume-ng agent --confconf --conf-file conf/myconf/flume_colletc_test.conf -n collectorMainAgent&
nohup bin/flume-ng agent --conf conf--conf-file conf/myconf/flume_colletc_test.conf -n collectorMainAgent &
flume到hdfs
配置文件
# Define a memory channel called ch1 on agent1
# Created by Cesar.X 2015/12/14
agent1.channels.ch1.type = memory
agent1.channels.ch1.capacity = 100000
agent1.channels.ch1.transactionCapacity = 100000
agent1.channels.ch1.keep-alive = 30

# Define an Avro source called avro-source1 on agent1 and tell it
# to bind to 0.0.0.0:41414. Connect it to channel ch1.
#agent1.sources.avro-source1.channels = ch1
#agent1.sources.avro-source1.type = avro
#agent1.sources.avro-source1.bind = 0.0.0.0
#agent1.sources.avro-source1.port = 41414
#agent1.sources.avro-source1.threads = 5

#define source monitor a file
agent1.sources.avro-source1.type = exec
agent1.sources.avro-source1.shell = /bin/bash -c
agent1.sources.avro-source1.command = tail -n +0 -F /usr/local/hadoop/apache-flume-1.6.0-bin/tmp/id.txt
agent1.sources.avro-source1.channels = ch1
agent1.sources.avro-source1.threads = 5

# Define a logger sink that simply logs all events it receives
# and connect it to the other end of the same channel.
agent1.sinks.log-sink1.channel = ch1
agent1.sinks.log-sink1.type = hdfs
agent1.sinks.log-sink1.hdfs.path = hdfs://mycluster/user/flumeTest
agent1.sinks.log-sink1.hdfs.writeFormat = Text
agent1.sinks.log-sink1.hdfs.fileType = DataStream
agent1.sinks.log-sink1.hdfs.rollInterval = 0
agent1.sinks.log-sink1.hdfs.rollSize = 1000000
agent1.sinks.log-sink1.hdfs.rollCount = 0
agent1.sinks.log-sink1.hdfs.batchSize = 1000
agent1.sinks.log-sink1.hdfs.txnEventMax = 1000
agent1.sinks.log-sink1.hdfs.callTimeout = 60000
agent1.sinks.log-sink1.hdfs.appendTimeout = 60000

# Finally, now that we've defined all of our components, tell
# agent1 which ones we want to activate.
agent1.channels = ch1
agent1.sources = avro-source1
agent1.sinks = log-sink1
启动
bin/flume-ng agent --conf conf --conf-fileconf/myconf/flume_directHDFS.conf -n agent1 -Dflume.root.logger=INFO,console然后往配置文件中的文件写入内容模拟
Echo “test” >> 1.txt![]()
观察hdfs中的文件
查看文件中的内容
多agent 到hdfs
我们这里就以两台agent为例
分别在172.21.99.124 和172.21.99.125和172.21.99.126上布置angent,在172.21.99.134和172.21.99.135上布置collect
下面是每个webserver(就是3个agent)的配置
参考
https://cwiki.apache.org/confluence/display/FLUME/Getting+Started#GettingStarted-flume-ngavro-clientoptions
在此之前,我们需要改修flume的默认内存配置,打开flume-env.sh
export JAVA_OPTS="-Xms8192m -Xmx8192m -Xss256k -Xmn2g -XX:+UseParNewGC -XX:+UseConcMarkSweepGC -XX:-UseGCOverheadLimit"配置我强烈建议静下心来看官网的说明,写得很清楚
http://flume.apache.org/FlumeUserGuide.html#setting-multi-agent-flow
这边我们,直接看多agent要如何配置
# list the sources, sinks and channels for the agent
.sources =
.sinks =
.channels =
根据上面的示意图,我们需要配置多个sinks,
以下是我们部署在每个appliation 上agent的配置文件
这里有个东西要注意一下
就是,sources 的type类型,官网也说得很清楚。
这里我们测试选用spooldir。
但是我们实际做项目的时候,可能不会选择spooldir方式
多agent 遇到的问题
Log出现Expected timestamp in the Flume event headers, but it was null
官网上已经说明,说事件之前必须有时间戳,除非TimestampInterceptor被设置为true
所以我们加上
Flume到kafka
参考官网
1.可能会遇到的问题
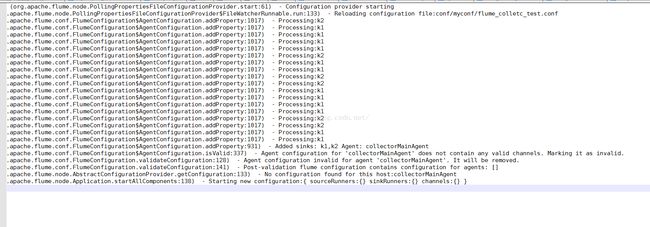
1.1 加上2个通道flume启动不了问题
具体现象如下图
后来尝试单独建议1个agent到kafka.
配置如下
请务必注意红框里面的内容,要使用hostname,并且在collect节点上配置hostname
否则会报错
正确配置后,再我们的kafka集群,启动一个console-consumer
bin/kafka-console-consumer.sh --zookeeper localhost:2181 --from-beginning --topic my-replicated-topic具体的命令参考官网
http://kafka.apache.org/documentation.html#quickstart
然后我们点击网站上的按钮,或者访问网站,就能实现从
js 到nginxlog 到 flume_agent 到flume_collect到kafka provider,这个整个一个流程
然后在kafka消息中间件的consumer窗口显示出来
以上打印的就是作为kafka consumer上,我们点击网站所产生的访问记录。


