Logstash+Elasticsearch+Kibana 联合使用搭建日志分析系统(Windows系统)
最近在做日志分析这块儿,要使用 Logstash+Elasticsearch+Kibana 实现日志的导入、过滤及可视化管理,官方文档写的不够详细,网上的文章大多要么是针对Linux系统的用法,要么就是抄袭别人的配置大都没法运行。费了很大劲才搞定了这仨东西,写一篇用法心得,废话不多说,进入主题。
首先,你的电脑上要装Java 的JDK环境,要使用 Logstash+Elasticsearch+Kibana,需要下载这三个软件和一些必要的插件,列表如下 :
1、Java JDK (最新版Logstash 需要 JDK1.8) http://www.oracle.com/technetwork/java/javase/downloads/jdk8-downloads-2133151.html
2、Logstash https://www.elastic.co/downloads
3、Elasticsearch https://www.elastic.co/downloads
4、Kibana https://www.elastic.co/downloads
5、Curl插件 http://curl.haxx.se/download.html
一、 Elasticsearch配置
将下载下来的Elasticsearch 解压,进入到config目录下,修改elasticsearch.yml 文件,写入以下代码:
discovery.zen.ping.multicast.enabled: false #关闭广播,如果局域网有机器开9300 端口,服务会启 动不了
network.host: 192.168.1.91 #指定主机地址,其实是可选的,但是最好指定因为后面跟 kibana集成的时候会报http连接出错(直观体现好像是 监听了:::9200而不是0.0.0.0:9200)
http.cors.allow-origin: "/.*/"
http.cors.enabled: true
这样就添加了9200端口的elasticsearch监听,为后面Logstash估准备。
二、Logstash 配置
Logstash 核心命令是 Input--->Filter--->Output,既可以在dos窗口中输入配置信息,也可以将配置信息保存在.conf文件中,本文使用配置文件加载方式。
将下载下来的Logstash压缩包解压,然后在bin目录中新建 stdin.conf 文件,其中配置代码如下 :
input {
stdin{}
}
output {
elasticsearch {
host => "192.168.1.91"
}
}
这段代码的作用是将控制台中输入的信息发给elasticsearch
三、Kibana 配置
将下载下来的Kibana压缩文件解压,同样的进入到config文件中修改kibana.yml文件:
port: 7873
host: "192.168.1.91"
elasticsearch_url: "http://192.168.1.91:9200"
要做的配置已经基本完成,下面开始执行这些环境:
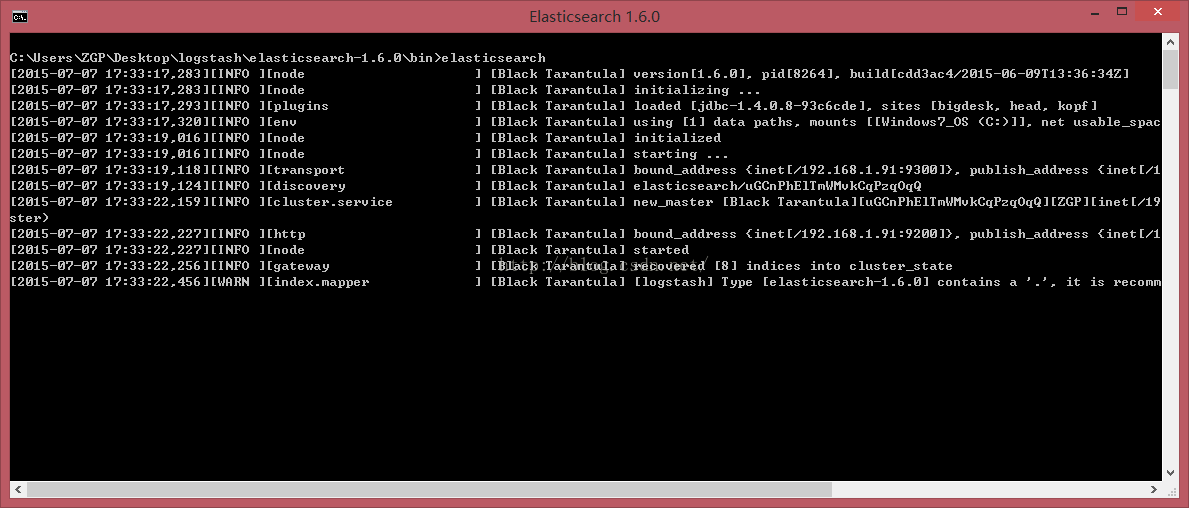
1、CMD进入到Elasticsearc的bin目录下,执行以下命令: elasticsearch
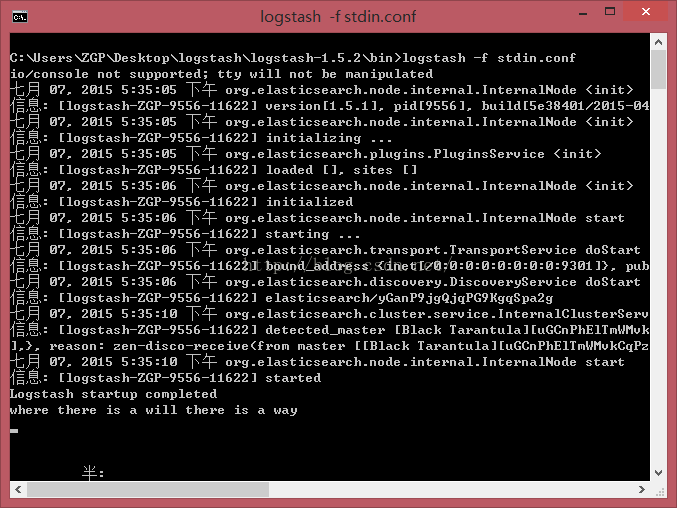
2、CMD进入到Elasticsearc的bin目录下,执行以下命令: logstash -f stdin.conf ,看到Logstash startup completed 代表Logstash已经启动,在下面输入 : where there is a will there is a way按回车。
3、CMD进入到Kibana的bin目录下(也可以在bin目录下按着Shift+鼠标右键 选择“在此处打开命令窗口”),执行以下命令: kibana
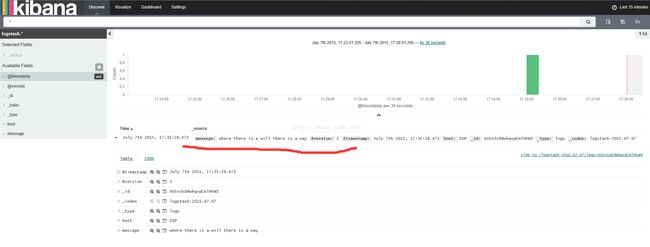
4、浏览器中输入 http://localhost:7873 即可看到你输入的信息啦:
PS:
1、最后一步我已在网页上配置过相关mapping,故直接打开了结果,你可以按照网页上的提示进行配置,祝你成功~~~
2、关于Curl插件,它可以在DOS端将elasticsearch的结果显示出来。用法为:将下载下来的Curl.exe程序放到logstash的bin目录下,在执行完上述第二步logstash -f stdin.conf的命令并输入信息后,cmd进入 到logstash的bin目录下,运行curl "http://192.168.1.91:9200/_search?pretty" 同样可看到结果。

