values-sw320dp是什么意思?
就是宽度位320dp
dp有多长
dp,是安卓开发用的单位,1dp表示在屏幕点密度为160ppi时1px长度。
160ppi的意思是,每英寸有160个像素点,像素点的间隔是2.54/160=15.8mm。
来台实际的pix机器看下:
sailfish:/ # wm size
Physical size: 1080x1920
sailfish:/ # wm density
Physical density: 420
屏幕分辨率是1080*1920,屏幕ppi是420,那么这个屏幕是多大尺寸呢?
首先计算对角线的像素数量:2202
尺寸=2202/420=5.2英寸
华为机器:
HWPCT:/ wm density
Physical density: 480
xhdpi: 320dpi
hdpi: 240dpi
mdpi: 160dpi(baseline)
ldpi: 120dpi
参考:https://blog.csdn.net/walk_and_think/article/details/64920011
https://blog.csdn.net/weixin_33991727/article/details/91456406
DialogFragment和Dialog的区别?
DialogFragment更先进一点
dialog嵌套ConstraintLayout,ConstraintLayout设置的大小不生效?
发现是使用了
View root = LayoutInflater.from(getContext()).inflate(getLayoutId(), null);的锅。
不过自定义dialog的确没有parent。只能这样子搞了。
参考:
https://www.jianshu.com/p/41796f541e67
推荐googlesample的实现
https://github.com/googlesamples/android-FingerprintDialog
dialog的根view是什么?
一般dialog不直接使用,而是使用AlertDialog。
根view是/frameworks/base/core/res/res/layout/alert_dialog.xml
一个dialog的创建流程是怎样的?
其实整个view都是在show方法里面创建的。
相当于show之前,只是设置了参数
    public void show() {

       //使用参数创建view
        if (!mCreated) {
            dispatchOnCreate(null);
        }

        //回调onStart
        onStart();
       //获取DecorView
        mDecor = mWindow.getDecorView();

        //ActionBar处理
        if (mActionBar == null && mWindow.hasFeature(Window.FEATURE_ACTION_BAR)) {
            final ApplicationInfo info = mContext.getApplicationInfo();
            mWindow.setDefaultIcon(info.icon);
            mWindow.setDefaultLogo(info.logo);
            mActionBar = new WindowDecorActionBar(this);
        }
        //获取window参数
        WindowManager.LayoutParams l = mWindow.getAttributes();

        if ((l.softInputMode
                & WindowManager.LayoutParams.SOFT_INPUT_IS_FORWARD_NAVIGATION) == 0) {
            WindowManager.LayoutParams nl = new WindowManager.LayoutParams();
            nl.copyFrom(l);
            nl.softInputMode |=
                    WindowManager.LayoutParams.SOFT_INPUT_IS_FORWARD_NAVIGATION;
            l = nl;
        }
        //addView 触发绘制
        mWindowManager.addView(mDecor, l);
        mShowing = true;

        sendShowMessage();
    }
在AlertDialog中
    @Override
    protected void onCreate(Bundle savedInstanceState) {
        super.onCreate(savedInstanceState);
        mAlert.installContent();
    }
最后调用到了AlertController中
    public void installContent() {
        int contentView = selectContentView();
        mWindow.setContentView(contentView);
        setupView();
    }
selectContentView代码如下
    private int selectContentView() {
        if (mButtonPanelSideLayout == 0) {
            return mAlertDialogLayout;
        }
        if (mButtonPanelLayoutHint == AlertDialog.LAYOUT_HINT_SIDE) {
            return mButtonPanelSideLayout;
        }
        // TODO: use layout hint side for long messages/lists
        return mAlertDialogLayout;
    }
mButtonPanelSideLayout是什么东西呢?
在AlertController的构造函数中创建的
    public AlertController(Context context, DialogInterface di, Window window) {
        final TypedArray a = context.obtainStyledAttributes(null,
                R.styleable.AlertDialog, R.attr.alertDialogStyle, 0);
        ..........
        mAlertDialogLayout = a.getResourceId(
                R.styleable.AlertDialog_layout, R.layout.alert_dialog);
        mButtonPanelSideLayout = a.getResourceId(
                R.styleable.AlertDialog_buttonPanelSideLayout, 0);
         ..........
    }
TypedArray又是什么鬼呢?
其实是自定义的属性值,参考
https://www.cnblogs.com/yydcdut/p/4251572.html
说明自己定义了一个属性,属性名就叫做alertDialogStyle

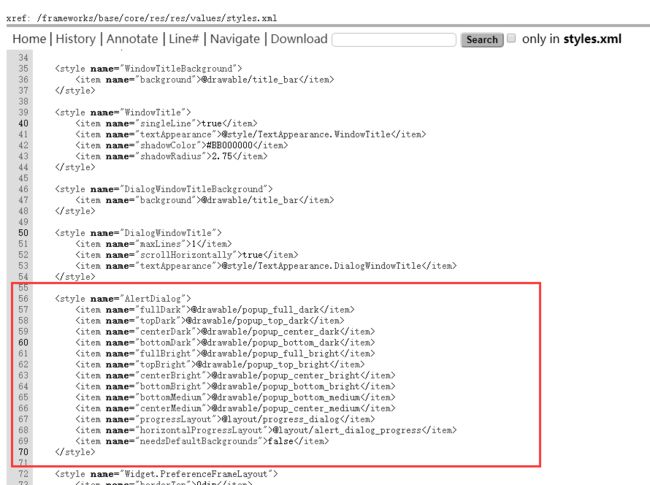
那么谁在布局文件用了这个属性呢?
搜索了一下,发现有这么多。

那究竟用的是哪个呢?这就相当于涉及到默认主题的问题了。
假设选择了AlertDialog.Material主题,看下他是怎么定义的?
在文件/frameworks/base/core/res/res/values/styles_material.xml中

可以看到定义了一些长宽高,还有布局等等。
如果是最普通的就是下面这样子的
这一句代码,相当于获取layout的属性
mAlertDialogLayout = a.getResourceId(
R.styleable.AlertDialog_layout, R.layout.alert_dialog);
对于AlertDialog.Material,有定义layout

而默认的则没有。
那我们用默认的来分析好了。默认的话相当于用的是R.layout.alert_dialog布局。
/frameworks/base/core/res/res/layout/alert_dialog.xml
妈耶,超长,不过细细看,就包含topPanel,contentPanel,customPanel,buttonPanel。
总结,最后可以看到系统的AlertDialog设置view的方式是通过
mWindow.setContentView(contentView);
而不是什么inflate!!!!!!!!!别用inflate了!!!!!!!!!!!!!!!!!!!!!!!!!!!!!!!!!!!!!!!
AlertDialog的按键事件是怎么传递的?
app的写法如下
builder.setPositiveButton("当然是好看了!!", new DialogInterface.OnClickListener() {
    @Override
    public void onClick(DialogInterface dialog, int which) {
        Toast.makeText(AlertDialogActivity.this, "嘻嘻嘻",Toast.LENGTH_SHORT).show();
    }
});
builder.setNeutralButton("我觉得一般", new DialogInterface.OnClickListener() {
    @Override
    public void onClick(DialogInterface dialog, int which) {
        Toast.makeText(AlertDialogActivity.this,"那你再瞅瞅~",Toast.LENGTH_SHORT).show();
    }
});
builder.setNegativeButton("我觉得不好看", new DialogInterface.OnClickListener() {
    @Override
    public void onClick(DialogInterface dialog, int which) {
        Toast.makeText(AlertDialogActivity.this,"嘤嘤嘤",Toast.LENGTH_SHORT).show();
    }
});
mContentParent与decordView的关系是什么?
/frameworks/base/core/java/com/android/internal/policy/PhoneWindow.java
@Override
public void setContentView(int layoutResID) {
installDecor();
mLayoutInflater.inflate(layoutResID, mContentParent); //自定义布局的父视图是mContentParent
}

private void installDecor() {
        mDecor = generateDecor(-1);   //新建一个DecorView对象,其实是一个FrameLayout
        mContentParent = generateLayout(mDecor);
}

protected ViewGroup generateLayout(DecorView decor) {
    layoutResource = R.layout.screen_simple;   //decorView的布局
    mDecor.onResourcesLoaded(mLayoutInflater, layoutResource);    //将布局inflate进来
    ViewGroup contentParent = (ViewGroup)findViewById(ID_ANDROID_CONTENT);  //找到id为ID_ANDROID_CONTENT的view
    return contentParent;
}
所以他的样子是如下图,图是源自这篇博客的:https://blog.csdn.net/guxiao1201/article/details/41744107

看看decorView的布局是怎么样的,以screen_simple为例子
http://androidxref.com/7.0.0_r1/xref/frameworks/base/core/res/res/layout/screen_simple.xml#3
下面是一个实际的例子,可以看到是一一对应上的。自定义布局的

参考:https://www.jianshu.com/p/c2b38bada5ba
ViewGroup测量流程是怎样的?

以下的布局:
setContentView直接用id的ConstraintLayout的参数
        View root = LayoutInflater.from(getContext()).inflate(getLayoutId(), null);
        setContentView(getLayoutId());

宽度为1050。
setContentView直接用view的ConstraintLayout的参数
        View root = LayoutInflater.from(getContext()).inflate(getLayoutId(), null);
        setContentView(root);

宽度为-1。
所以用inflate的方法的时候,如果没有传入parent,就出测量失效。
FrameLayout的测量代码如下
public class FrameLayout extends ViewGroup {


    public FrameLayout(@NonNull Context context) {
        super(context);
    }


    @Override
    protected void onMeasure(int widthMeasureSpec, int heightMeasureSpec) {
        int count = getChildCount();

        final boolean measureMatchParentChildren =
                MeasureSpec.getMode(widthMeasureSpec) != MeasureSpec.EXACTLY ||
                MeasureSpec.getMode(heightMeasureSpec) != MeasureSpec.EXACTLY;
        mMatchParentChildren.clear();

        int maxHeight = 0;
        int maxWidth = 0;
        int childState = 0;

        for (int i = 0; i < count; i++) {
            final View child = getChildAt(i);
            if (mMeasureAllChildren || child.getVisibility() != GONE) {
                measureChildWithMargins(child, widthMeasureSpec, 0, heightMeasureSpec, 0);
            }
        }
    }
}
LayoutInflater的Inflater流程是怎样的?
以下面的布局为例子
代码如下
public View inflate(XmlPullParser parser, @Nullable ViewGroup root, boolean attachToRoot) {
synchronized (mConstructorArgs) {
Trace.traceBegin(Trace.TRACE_TAG_VIEW, "inflate");
final Context inflaterContext = mContext;
final AttributeSet attrs = Xml.asAttributeSet(parser);
Context lastContext = (Context) mConstructorArgs[0];
mConstructorArgs[0] = inflaterContext;
View result = root;
try {
// Look for the root node.
int type;
while ((type = parser.next()) != XmlPullParser.START_TAG &&
type != XmlPullParser.END_DOCUMENT) {
// Empty
}
if (type != XmlPullParser.START_TAG) {
throw new InflateException(parser.getPositionDescription()
+ ": No start tag found!");
}
//找到TAG name,例如androidx.constraintlayout.widget.ConstraintLayout
final String name = parser.getName();
if (DEBUG) {
System.out.println("**************************");
System.out.println("Creating root view: "
+ name);
System.out.println("**************************");
}
if (TAG_MERGE.equals(name)) {
if (root == null || !attachToRoot) {
throw new InflateException("
Inflater 产生的view的layout param是哪里来的?
在setContentView中来的

DecorView的layout param是在哪里赋值的?
在WindowManagerGlobal中
 public void addView(View view, ViewGroup.LayoutParams params,
            Display display, Window parentWindow) {
            root = new ViewRootImpl(view.getContext(), display);
            view.setLayoutParams(wparams);  //在这里设置的
            mViews.add(view);
            mRoots.add(root);
            mParams.add(wparams);
            root.setView(view, wparams, panelParentView);
    }
DecorView的onMeasure是怎么执行的?
track如下图

    public static final int FILL_PARENT = -1;
    public static final int MATCH_PARENT = -1;
    public static final int WRAP_CONTENT = -2;
        layoutResource = R.layout.screen_simple;
        mDecor.onResourcesLoaded(mLayoutInflater, layoutResource);

    void onResourcesLoaded(LayoutInflater inflater, int layoutResource) {
        final View root = inflater.inflate(layoutResource, null);
        addView(root, 0, new ViewGroup.LayoutParams(MATCH_PARENT, MATCH_PARENT));
    }
看上面的代码,可以知道layoutParam是MATCH_PARENT, MATCH_PARENT,跟xml里面写的布局也是一致的。
下面这句是整个测量的入口,看看参数都有什么
            // Ask host how big it wants to be
            windowSizeMayChange |= measureHierarchy(host, lp, res,
                    desiredWindowWidth, desiredWindowHeight);
lp是什么呢?
WindowManager.LayoutParams lp = mWindowAttributes;
Dialog的decorview的LayoutParams的长宽来源于哪里?
对于Dialog来说,这个params来源于show函数
   public void show() {
        WindowManager.LayoutParams l = mWindow.getAttributes();
        mWindowManager.addView(mDecor, l);
    }
在LayoutParams构造函数中,长宽的默认值是MATCH_PARENT,MATCH_PARENT
        public LayoutParams() {
            super(LayoutParams.MATCH_PARENT, LayoutParams.MATCH_PARENT);
            type = TYPE_APPLICATION;
            format = PixelFormat.OPAQUE;
        }
然后再generalLayout过程中,判断是floating窗口,然后设置成wrap_content
        if (mIsFloating) {
            setLayout(WRAP_CONTENT, WRAP_CONTENT);
            setFlags(0, flagsToUpdate);
        }
decorView的onMeasure的过程
入口如下:
            windowSizeMayChange |= measureHierarchy(host, lp, res,
                    desiredWindowWidth, desiredWindowHeight);
TypedValue是什么东西?
用来做dp和px转换的
MeasureSpec.AT_MOST和LayoutParams.MATCH_PARENT的关系?
AT_MOST是view的测量模式,MATCH_PARENT是你布局里面写的参数。
子view的测量模式是怎么来的呢?
其实是根据父view的测量模式和子view再布局里面写的参数决定的。代码如下
    public static int getChildMeasureSpec(int spec, int padding, int childDimension) {
        int specMode = MeasureSpec.getMode(spec);  //父view的参数
        int specSize = MeasureSpec.getSize(spec);

        int size = Math.max(0, specSize - padding);

        int resultSize = 0;
        int resultMode = 0;

        switch (specMode) {
        // Parent has imposed an exact size on us
        case MeasureSpec.EXACTLY:
            if (childDimension >= 0) {
                resultSize = childDimension;
                resultMode = MeasureSpec.EXACTLY;
            } else if (childDimension == LayoutParams.MATCH_PARENT) {
                // Child wants to be our size. So be it.
                resultSize = size;
                resultMode = MeasureSpec.EXACTLY;
            } else if (childDimension == LayoutParams.WRAP_CONTENT) {
                // Child wants to determine its own size. It can't be
                // bigger than us.
                resultSize = size;
                resultMode = MeasureSpec.AT_MOST;
            }
            break;

        // Parent has imposed a maximum size on us
        case MeasureSpec.AT_MOST:               //如果父view是wrapcontent
            if (childDimension >= 0) {   //子view给了特定的大小
                // Child wants a specific size... so be it
                resultSize = childDimension;
                resultMode = MeasureSpec.EXACTLY;
            } else if (childDimension == LayoutParams.MATCH_PARENT) { //子view是match parent
                // Child wants to be our size, but our size is not fixed.
                // Constrain child to not be bigger than us.
                resultSize = size;
                resultMode = MeasureSpec.AT_MOST;
            } else if (childDimension == LayoutParams.WRAP_CONTENT) { //子view是warp content
                // Child wants to determine its own size. It can't be
                // bigger than us.
                resultSize = size;
                resultMode = MeasureSpec.AT_MOST;
            }
            break;

        // Parent asked to see how big we want to be
        case MeasureSpec.UNSPECIFIED:
            if (childDimension >= 0) {
                // Child wants a specific size... let him have it
                resultSize = childDimension;
                resultMode = MeasureSpec.EXACTLY;
            } else if (childDimension == LayoutParams.MATCH_PARENT) {
                // Child wants to be our size... find out how big it should
                // be
                resultSize = View.sUseZeroUnspecifiedMeasureSpec ? 0 : size;
                resultMode = MeasureSpec.UNSPECIFIED;
            } else if (childDimension == LayoutParams.WRAP_CONTENT) {
                // Child wants to determine its own size.... find out how
                // big it should be
                resultSize = View.sUseZeroUnspecifiedMeasureSpec ? 0 : size;
                resultMode = MeasureSpec.UNSPECIFIED;
            }
            break;
        }
        //noinspection ResourceType
        return MeasureSpec.makeMeasureSpec(resultSize, resultMode);
    }
由上面的代码我们可以知道,如果父view是wrap content,如果子view没有设定特定的大小,则子view就是wrap content。这也其实可以理解。