用nodejs实现爬虫
前言:
作为一个有c++基础的学生,我本来觉得学web编程会稍微轻松一点(我还是太年轻了)。后来发现这好像 根本和c++没什么共同的地方,于是相当于从0学起,甚至看到第一次实验项目时连爬虫是什么都不知道(是真的不知道),所以只能一步一步慢慢学。
先得知道什么是爬虫:网络爬虫(又称为网页蜘蛛,网络机器人,在FOAF社区中间,更经常的称为网页追逐者),是一种按照一定的规则,自动地抓取万维网信息的程序或者脚本。另外一些不常使用的名字还有蚂蚁、自动索引、模拟程序或者蠕虫。
(摘自百度)
在了解了什么是爬虫(这百度了也看不懂,还是听老师上课吧) 后开始了学习。
第一次实验项目:
新闻爬虫及爬取结果的查询网站
核心需求:
1、选取3-5个代表性的新闻网站(比如新浪新闻、网易新闻等,或者某个垂直领域权威性的网站比如经济领域的雪球财经、东方财富等,或者体育领域的腾讯体育、虎扑体育等等)建立爬虫,针对不同网站的新闻页面进行分析,爬取出编码、标题、作者、时间、关键词、摘要、内容、来源等结构化信息,存储在数据库中。
2、建立网站提供对爬取内容的分项全文搜索,给出所查关键词的时间热度分析。
技术要求:
1、必须采用Node.JS实现网络爬虫
2、必须采用Node.JS实现查询网站后端,HTML+JS实现前端(尽量不要使用任何前后端框架)
一、基础爬虫代码
老师给的代码例子:
var myRequest = require('request')
var myCheerio = require('cheerio')
var myURL = 'https://www.ecnu.edu.cn/e5/bc/c1950a255420/page.htm'
function request(url, callback) {//request module fetching url
    var options = {
        url: url,  encoding: null, headers: null
    }
    myRequest(options, callback)
}
request(myURL, function (err, res, body) {
    var html = body;
    var $ = myCheerio.load(html, { decodeEntities: false });
    console.log($.html());
})
是从https://www.ecnu.edu.cn/e5/bc/c1950a255420/page.htm网站上爬下来的东西。
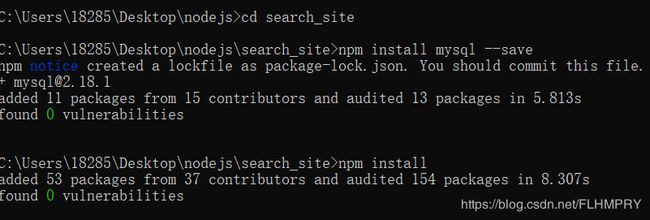
于是按照老师要求,安装request和cheerio包并运行代码。

request和cheerio包安装成功
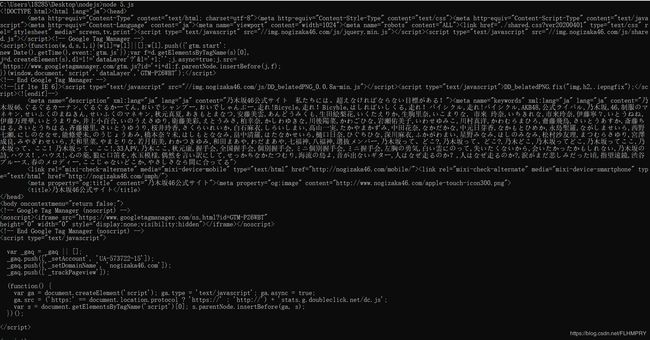
运行node 5.js

(太长了就截一部分)
这我也知道了爬虫的基本概念,是截取某网站上的信息。
观察代码,发现
var myURL = 'https://www.ecnu.edu.cn/e5/bc/c1950a255420/page.htm'
代表所爬取的网站。
那么是否修改网址就能爬取不同网站呢?
于是修改网址:
var myURL = 'https://www.nogizaka46.com/'
二、种子页面爬取
种子页面就我理解也就是一个总网站下的各个分网站(链接)
同样还是先看老师的代码:
var source_name = "中国新闻网";
var domain = 'http://www.chinanews.com/';
var myEncoding = "utf-8";
var seedURL = 'http://www.chinanews.com/';

var seedURL_format = "$('a')";
var keywords_format = " $('meta[name=\"keywords\"]').eq(0).attr(\"content\")";
var title_format = "$('title').text()";
var date_format = "$('#pubtime_baidu').text()";
var author_format = "$('#editor_baidu').text()";
var content_format = "$('.left_zw').text()";
var desc_format = " $('meta[name=\"description\"]').eq(0).attr(\"content\")";
var source_format = "$('#source_baidu').text()";
var url_reg = /\/(\d{4})\/(\d{2})-(\d{2})\/(\d{7}).shtml/;
var regExp = /((\d{4}|\d{2})(\-|\/|\.)\d{1,2}\3\d{1,2})|(\d{4}年\d{1,2}月\d{1,2}日)/

var fs = require('fs');
var myRequest = require('request')
var myCheerio = require('cheerio')
var myIconv = require('iconv-lite')
require('date-utils');

//防止网站屏蔽我们的爬虫
var headers = {
    'User-Agent': 'Mozilla/5.0 (Macintosh; Intel Mac OS X 10_10_1) AppleWebKit/537.36 (KHTML, like Gecko) Chrome/39.0.2171.65 Safari/537.36'
}

//request模块异步fetch url
function request(url, callback) {
    var options = {
        url: url,
        encoding: null,
        //proxy: 'http://x.x.x.x:8080',
        headers: headers,
        timeout: 10000 //
    }
    myRequest(options, callback)
}

request(seedURL, function(err, res, body) { //读取种子页面
    // try {
    //用iconv转换编码
    var html = myIconv.decode(body, myEncoding);
    //console.log(html);
    //准备用cheerio解析html
    var $ = myCheerio.load(html, { decodeEntities: true });
    // } catch (e) { console.log('读种子页面并转码出错:' + e) };

    var seedurl_news;

    try {
        seedurl_news = eval(seedURL_format);
        //console.log(seedurl_news);
    } catch (e) { console.log('url列表所处的html块识别出错:' + e) };

    seedurl_news.each(function(i, e) { //遍历种子页面里所有的a链接
        var myURL = "";
        try {
            //得到具体新闻url
            var href = "";
            href = $(e).attr("href");
            if (href.toLowerCase().indexOf('http://') >= 0) myURL = href; //http://开头的
            else if (href.startsWith('//')) myURL = 'http:' + href; ////开头的
            else myURL = seedURL.substr(0, seedURL.lastIndexOf('/') + 1) + href; //其他

        } catch (e) { console.log('识别种子页面中的新闻链接出错:' + e) }

        if (!url_reg.test(myURL)) return; //检验是否符合新闻url的正则表达式
        //console.log(myURL);
        newsGet(myURL); //读取新闻页面
    });
});

function newsGet(myURL) { //读取新闻页面
    request(myURL, function(err, res, body) { //读取新闻页面
        //try {
        var html_news = myIconv.decode(body, myEncoding); //用iconv转换编码
        //console.log(html_news);
        //准备用cheerio解析html_news
        var $ = myCheerio.load(html_news, { decodeEntities: true });
        myhtml = html_news;
        //} catch (e) {    console.log('读新闻页面并转码出错:' + e);};

        console.log("转码读取成功:" + myURL);
        //动态执行format字符串,构建json对象准备写入文件或数据库
        var fetch = {};
        fetch.title = "";
        fetch.content = "";
        fetch.publish_date = (new Date()).toFormat("YYYY-MM-DD");
        //fetch.html = myhtml;
        fetch.url = myURL;
        fetch.source_name = source_name;
        fetch.source_encoding = myEncoding; //编码
        fetch.crawltime = new Date();

        if (keywords_format == "") fetch.keywords = source_name; // eval(keywords_format);  //没有关键词就用sourcename
        else fetch.keywords = eval(keywords_format);

        if (title_format == "") fetch.title = ""
        else fetch.title = eval(title_format); //标题

        if (date_format != "") fetch.publish_date = eval(date_format); //刊登日期
        console.log('date: ' + fetch.publish_date);
        fetch.publish_date = regExp.exec(fetch.publish_date)[0];
        fetch.publish_date = fetch.publish_date.replace('年', '-')
        fetch.publish_date = fetch.publish_date.replace('月', '-')
        fetch.publish_date = fetch.publish_date.replace('日', '')
        fetch.publish_date = new Date(fetch.publish_date).toFormat("YYYY-MM-DD");

        if (author_format == "") fetch.author = source_name; //eval(author_format);  //作者
        else fetch.author = eval(author_format);

        if (content_format == "") fetch.content = "";
        else fetch.content = eval(content_format).replace("\r\n" + fetch.author, ""); //内容,是否要去掉作者信息自行决定

        if (source_format == "") fetch.source = fetch.source_name;
        else fetch.source = eval(source_format).replace("\r\n", ""); //来源

        if (desc_format == "") fetch.desc = fetch.title;
        else fetch.desc = eval(desc_format).replace("\r\n", ""); //摘要

        var filename = source_name + "_" + (new Date()).toFormat("YYYY-MM-DD") +
            "_" + myURL.substr(myURL.lastIndexOf('/') + 1) + ".json";
        ////存储json
        fs.writeFileSync(filename, JSON.stringify(fetch));
    });
}
这次代码好像有点长…,得一步步看。
var source_name = "中国新闻网";
var domain = 'http://www.chinanews.com/';
var myEncoding = "utf-8";
var seedURL = 'http://www.chinanews.com/';
这是要爬取的网站
var seedURL_format = "$('a')";
var keywords_format = " $('meta[name=\"keywords\"]').eq(0).attr(\"content\")";
var title_format = "$('title').text()";
var date_format = "$('#pubtime_baidu').text()";
var author_format = "$('#editor_baidu').text()";
var content_format = "$('.left_zw').text()";
var desc_format = " $('meta[name=\"description\"]').eq(0).attr(\"content\")";
var source_format = "$('#source_baidu').text()";
var url_reg = /\/(\d{4})\/(\d{2})-(\d{2})\/(\d{7}).shtml/;
var regExp = /((\d{4}|\d{2})(\-|\/|\.)\d{1,2}\3\d{1,2})|(\d{4}年\d{1,2}月\d{1,2}日)/
这是爬取的信息:关键词、作者、日期等。
var fs = require('fs');
var myRequest = require('request')
var myCheerio = require('cheerio')
var myIconv = require('iconv-lite')
require('date-utils');
所要求的包
var headers = {
    'User-Agent': 'Mozilla/5.0 (Macintosh; Intel Mac OS X 10_10_1) AppleWebKit/537.36 (KHTML, like Gecko) Chrome/39.0.2171.65 Safari/537.36'
}
防止爬虫被屏蔽
function request(url, callback) {
    var options = {
        url: url,
        encoding: null,
        //proxy: 'http://x.x.x.x:8080',
        headers: headers,
        timeout: 10000 //
    }
    myRequest(options, callback)
}
构造模拟浏览器的request——爬下来的内容以浏览网址形式储存
request(seedURL, function(err, res, body) { //读取种子页面
    // try {
    //用iconv转换编码
    var html = myIconv.decode(body, myEncoding);
    //console.log(html);
    //准备用cheerio解析html
    var $ = myCheerio.load(html, { decodeEntities: true });
    // } catch (e) { console.log('读种子页面并转码出错:' + e) };

    var seedurl_news;

    try {
        seedurl_news = eval(seedURL_format);
        //console.log(seedurl_news);
    } catch (e) { console.log('url列表所处的html块识别出错:' + e) };

    seedurl_news.each(function(i, e) { //遍历种子页面里所有的a链接
        var myURL = "";
        try {
            //得到具体新闻url
            var href = "";
            href = $(e).attr("href");
            if (href.toLowerCase().indexOf('http://') >= 0) myURL = href; //http://开头的
            else if (href.startsWith('//')) myURL = 'http:' + href; ////开头的
            else myURL = seedURL.substr(0, seedURL.lastIndexOf('/') + 1) + href; //其他

        } catch (e) { console.log('识别种子页面中的新闻链接出错:' + e) }

        if (!url_reg.test(myURL)) return; //检验是否符合新闻url的正则表达式
        //console.log(myURL);
        newsGet(myURL); //读取新闻页面
    });
});
读取种子页面——解析种子页面的所有a href链接并遍历——规整化链接,符合新闻url的正则表达式的就爬取
function newsGet(myURL) { //读取新闻页面
    request(myURL, function(err, res, body) { //读取新闻页面
        //try {
        var html_news = myIconv.decode(body, myEncoding); //用iconv转换编码
        //console.log(html_news);
        //准备用cheerio解析html_news
        var $ = myCheerio.load(html_news, { decodeEntities: true });
        myhtml = html_news;
        //} catch (e) {    console.log('读新闻页面并转码出错:' + e);};

        console.log("转码读取成功:" + myURL);
        //动态执行format字符串,构建json对象准备写入文件或数据库
        var fetch = {};
        fetch.title = "";
        fetch.content = "";
        fetch.publish_date = (new Date()).toFormat("YYYY-MM-DD");
        //fetch.html = myhtml;
        fetch.url = myURL;
        fetch.source_name = source_name;
        fetch.source_encoding = myEncoding; //编码
        fetch.crawltime = new Date();
创建一个空fetch用于储存数据
 if (keywords_format == "") fetch.keywords = source_name; // eval(keywords_format);  //没有关键词就用sourcename
        else fetch.keywords = eval(keywords_format);

        if (title_format == "") fetch.title = ""
        else fetch.title = eval(title_format); //标题

        if (date_format != "") fetch.publish_date = eval(date_format); //刊登日期
        console.log('date: ' + fetch.publish_date);
        fetch.publish_date = regExp.exec(fetch.publish_date)[0];
        fetch.publish_date = fetch.publish_date.replace('年', '-')
        fetch.publish_date = fetch.publish_date.replace('月', '-')
        fetch.publish_date = fetch.publish_date.replace('日', '')
        fetch.publish_date = new Date(fetch.publish_date).toFormat("YYYY-MM-DD");

        if (author_format == "") fetch.author = source_name; //eval(author_format);  //作者
        else fetch.author = eval(author_format);

        if (content_format == "") fetch.content = "";
        else fetch.content = eval(content_format).replace("\r\n" + fetch.author, ""); //内容,是否要去掉作者信息自行决定

        if (source_format == "") fetch.source = fetch.source_name;
        else fetch.source = eval(source_format).replace("\r\n", ""); //来源

        if (desc_format == "") fetch.desc = fetch.title;
        else fetch.desc = eval(desc_format).replace("\r\n", ""); //摘要

        var filename = source_name + "_" + (new Date()).toFormat("YYYY-MM-DD") +
            "_" + myURL.substr(myURL.lastIndexOf('/') + 1) + ".json";
        ////存储json
        fs.writeFileSync(filename, JSON.stringify(fetch));
    });
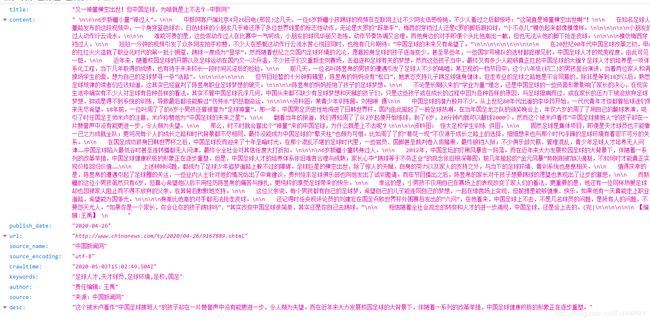
将爬取内容储存到fetch中并建立文件
var source_name = "看看新闻";
var domain = 'http://www.kankanews.com/';
var myEncoding = "utf-8";
var seedURL = 'http://www.kankanews.com/';
var seedURL_format = "$('a')";
var keywords_format = " $('meta[name=\"keywords\"]').eq(0).attr(\"content\")";
var title_format = "$('title').text()";
var date_format = "$('#pubtime_baidu').text()";
var author_format = "$('#editor_baidu').text()";
var content_format = "$('.left_zw').text()";
var desc_format = " $('meta[name=\"description\"]').eq(0).attr(\"content\")";
var source_format = "$('#source_baidu').text()";
var url_reg = /\/(\d{4})\/(\d{2})-(\d{2})\/(\d{7}).shtml/;
var regExp = /((\d{4}|\d{2})(\-|\/|\.)\d{1,2}\3\d{1,2})|(\d{4}年\d{1,2}月\d{1,2}日)/
这一块没有改(太愚蠢了),于是去要爬取的网站去修改相应代码:
var seedURL_format = "$('a')";
var keywords_format = " $('meta[name=\"Keywords\"]').eq(0).attr(\"content\")";
var title_format = "$('title').text()";
var date_format = "$('#time').text()";
var author_format = "$('#resource').text()";
var content_format = "$('textBody').text()";
var desc_format = " $('meta[name=\"Description\"]').eq(0).attr(\"content\")";
var source_format = "$('#resource').text()";
var url_reg = /a\/(\d{4})-(\d{2})-(\d{2})\/(\d{10}).shtml/;
var regExp = /((\d{4}|\d{2})(\-|\/|\.)\d{1,2}\3\d{1,2})|(\d{4}年\d{1,2}月\d{1,2}日)/
然后:

额,于是去询问老师,结果是因为源代码是class,所以要把#改为.
var seedURL_format = "$('a')";
var keywords_format = " $('meta[name=\"Keywords\"]').eq(0).attr(\"content\")";
var title_format = "$('title').text()";
var date_format = "$('.time').text()";
var author_format = "$('.resource').text()";
var content_format = "$('.textBody').text()";
var desc_format = " $('meta[name=\"Description\"]').eq(0).attr(\"content\")";
var source_format = "$('.resource').text()";
var url_reg = /a\/(\d{4})-(\d{2})-(\d{2})\/(\d{10}).shtml/;
var regExp = /((\d{4}|\d{2})(\-|\/|\.)\d{1,2}\3\d{1,2})|(\d{4}年\d{1,2}月\d{1,2}日)/
三、mysql数据库
MySQL是一个关系型数据库管理系统,MySQL在过去由于性能高、成本低、可靠性好,已经成为最流行的开源数据库,因此被广泛地应用在Internet上的中小型网站中。(百度一下,你就知道)
第一步:先下载并安装mysql:

安装成功,然后尝试用mysql创建表格(借用老师的fetches.sql代码):

创建成功,接下来尝试用mysql进行爬虫,对之前的kankan新闻的爬虫进行修改:
1.引用mysql
var mysql = require('./mysql.js');
2.用mysql爬虫:
 var fetchAddSql = 'INSERT INTO fetches(url,source_name,source_encoding,title,' +
        'keywords,author,publish_date,crawltime,content) VALUES(?,?,?,?,?,?,?,?,?)';
        var fetchAddSql_Params = [fetch.url, fetch.source_name, fetch.source_encoding,
        fetch.title, fetch.keywords, fetch.author, fetch.publish_date,
        fetch.crawltime.toFormat("YYYY-MM-DD HH24:MI:SS"), fetch.content
    ];

    //执行sql,数据库中fetch表里的url属性是unique的,不会把重复的url内容写入数据库
    mysql.query(fetchAddSql, fetchAddSql_Params, function(qerr, vals, fields) {
        if (qerr) {
            console.log(qerr);
        }
     }); //mysql写入
开始运行:

看似成功了,然而。。。。。

不管怎么查,总是empty set,也不知道为啥(哭)
然后发现是没有给权限,于是
alter user 'root'@'localhost' identified with mysql_native_password by 'root';
flush privileges;
给予权限成功

结果title又出问题了,后来发现是title的jquery写错了,然后修改,结果还是不行,猜想是limit 10就限定了之前的10个,后面修改的没有显示出来,于是选择删除数据库(drop database crawl),重新创建,然后成功了!
(哦耶!)
四、爬虫的拓展
1.用mysql查询指定内容
var mysql = require('./mysql.js');
var title = '上海';
var select_Sql = "select title,author,publish_date from fetches where title like '%" + title + "%'";

mysql.query(select_Sql, function(qerr, vals, fields) {
    console.log(vals);
});
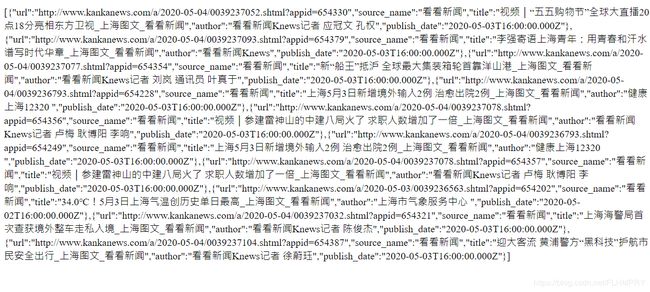
显然这是查询之前爬取内容中title含有‘上海’的内容:

所以只要改title的内容就能查询相应的内容了。
但显然每次都要到代码中修改title内容很麻烦,于是是否可以创建一个网页,输入title内容就能显示呢?
2.前后端查询
先创建一个html文件以输入title内容:
<!DOCTYPE html>
<html>

<body>
    <form action="http://127.0.0.1:8080/7.02.html" method="GET">
        <br> 标题:<input type="text" name="title">
        <input type="submit" value="Submit">
    </form>
    <script>
    </script>
</body>

</html>
var http = require('http');
var fs = require('fs');
var url = require('url');
var mysql = require('./mysql.js');
http.createServer(function(request, response) {
    var pathname = url.parse(request.url).pathname;
    var params = url.parse(request.url, true).query;
    fs.readFile(pathname.substr(1), function(err, data) {
        response.writeHead(200, { 'Content-Type': 'text/html; charset=utf-8' });
        if ((params.title === undefined) && (data !== undefined))
            response.write(data.toString());
        else {
            response.write(JSON.stringify(params));
            var select_Sql = "select title,author,publish_date from fetches where title like '%" +
                params.title + "%'";
            mysql.query(select_Sql, function(qerr, vals, fields) {
                console.log(vals);
            });
        }
        response.end();
    });
}).listen(8080);
console.log('Server running at http://127.0.0.1:8080/');
开始运行:

在框内输入“上海”并回车:
显示了标题含有上海的内容,如果换成“疫情”:

同样显示出来了,但是很明显都是在后端显示查询内容,无法在前端显示,接下来则要从前端显示出查询内容。
3.前端显示查询内容
html文件与2中相似,仅仅在网站后加了process_get以获得路径
<form action="http://127.0.0.1:8080/process_get" method="GET">
然后对js代码进行处理:
app.get('/process_get', function(req, res) {
    res.writeHead(200, { 'Content-Type': 'text/html;charset=utf-8' }); //设置res编码为utf-8
    //sql字符串和参数
    var fetchSql = "select url,source_name,title,author,publish_date from fetches where title like '%" +
        req.query.title + "%'";
    mysql.query(fetchSql, function(err, result, fields) {
        console.log(result);
        res.end(JSON.stringify(result));
    });
})
var server = app.listen(8080, function() {
    console.log("访问地址为 http://127.0.0.1:8080/7.03.html")

})
即访问process_get时获取url,title等信息并输出在前端(console.log(result))
然后再运行并输入标题:

于是前端显示出来相应的内容了,但是显示起来相当不好看(看起来很难受),接下来看是否能以表格形式显示(如同二的mysql)。
4.用表格显示查询结果
(1)用express脚手架创建网站框架


搭建完成
(2)后续工作
修改index内容以在前端显示:
var express = require('express');
var router = express.Router();
var mysql = require('./mysql.js');

/* GET home page. */
router.get('/', function(req, res, next) {
    res.render('index', { title: 'Express' });
});

router.get('/process_get', function(request, response) {
    //sql字符串和参数
    var fetchSql = "select url,source_name,title,author,publish_date " +
        "from fetches where title like '%" + request.query.title + "%'";
    mysql.query(fetchSql, function(err, result, fields) {
        response.writeHead(200, {
            "Content-Type": "application/json"
        });
        response.write(JSON.stringify(result));
        response.end();
    });
});
module.exports = router;
建立search.html完成网站架构:
<!DOCTYPE html>
<html>
<header>
<script src="https://cdn.bootcss.com/jquery/3.4.1/jquery.js"></script>
</header>
<body>
<form>
<br> 标题:<input type="text" name="title_text">
<input class="form-submit" type="button" value="查询">
</form>
<div class="cardLayout" style="margin: 10px 0px">
<table width="100%" id="record2"></table>
</div>
<script>
$(document).ready(function() {
$("input:button").click(function() {
$.get('/process_get?title=' + $("input:text").val(), function(data) {
$("#record2").empty();
$("#record2").append('url source_name ' +
'title author publish_date ';
Object.values(list).forEach(element => {
table += (element + ' ');
});
$("#record2").append(table + ' 然后node bin/www后搜索相应标题即可:

这样看上去就舒服了(爽)。
总结:
作为一个对爬虫一无所知的人,我觉得能做到这里已经很满足了,当然大部分还是借鉴了老师的代码以及询问老师(问了好多都不好意思了)(当然自己也解决了一部分问题【狗头表情 】),像最后的拓展、网页的设计其实可以有更多发展,奈何自己懒 能力有限,希望可以之后学更多,能自己更加美化完善爬虫。


