OpenCV python: 任意多边形填充和凸多边形填充(fillPoly和fillConvexPoly的区别,有图有真相!)
我们经常会使用contour或者自己圈出来的区域填上对应的值或者,所以经常会使用这样两个函数:fillPoly和fillConvexPoly,至于这两个函数有什么区别呢?小伙伴从题目中就可以看出来了,一个是任意多边形进行填充(有可能是非凸的),一个是对凸多边形进行填充。
两个函数的使用方法和说明:
官方文档:函数fillConvexPoly绘制一个填充的凸多边形。 该函数比函数fillPoly快得多。 它不仅可以填充凸多边形,而且可以填充任何不具有自相交的单调多边形,即,其轮廓与每个水平线(扫描线)相交的多边形最多两次(尽管其最顶部和/或底部边缘可能是 水平)。
def fillConvexPoly(img, points, color, lineType=None, shift=None): # real signature unknown; restored from __doc__
    """
    fillConvexPoly(img, points, color[, lineType[, shift]]) -> img
    .   @brief Fills a convex polygon.
    .
    .   The function cv::fillConvexPoly draws a filled convex polygon. This function is much faster than the
    .   function #fillPoly . It can fill not only convex polygons but any monotonic polygon without
    .   self-intersections, that is, a polygon whose contour intersects every horizontal line (scan line)
    .   twice at the most (though, its top-most and/or the bottom edge could be horizontal).
    .
    .   @param img Image.
    .   @param points Polygon vertices.
    .   @param color Polygon color.
    .   @param lineType Type of the polygon boundaries. See #LineTypes
    .   @param shift Number of fractional bits in the vertex coordinates.
    """
    pass
官方文档:函数fillPoly填充由多个多边形轮廓所界定的区域。 该功能可以填充复杂的区域,例如,带有孔的区域,具有自相交的轮廓(部分轮廓)等等。
def fillPoly(img, pts, color, lineType=None, shift=None, offset=None): # real signature unknown; restored from __doc__
    """
    fillPoly(img, pts, color[, lineType[, shift[, offset]]]) -> img
    .   @brief Fills the area bounded by one or more polygons.
    .
    .   The function cv::fillPoly fills an area bounded by several polygonal contours. The function can fill
    .   complex areas, for example, areas with holes, contours with self-intersections (some of their
    .   parts), and so forth.
    .
    .   @param img Image.
    .   @param pts Array of polygons where each polygon is represented as an array of points.
    .   @param color Polygon color.
    .   @param lineType Type of the polygon boundaries. See #LineTypes
    .   @param shift Number of fractional bits in the vertex coordinates.
    .   @param offset Optional offset of all points of the contours.
    """
    pass
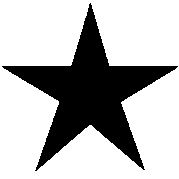
用起来也相当方便了,写了个小例子
import cv2
img_star = cv2.imread("../test_imgs/star.jpeg")
img_star_gray = cv2.cvtColor(img_star, cv2.COLOR_BGR2GRAY)
kernel =cv2.getStructuringElement(cv2.MORPH_RECT,(5,5))
retval, dst = cv2.threshold(img_star_gray, 0, 255, cv2.THRESH_OTSU)
cv2.imshow("bin: ", dst)
cv2.waitKey(0)
contours, _ = cv2.findContours(dst, cv2.RETR_TREE, cv2.CHAIN_APPROX_SIMPLE)

cv2.fillPoly(img_star, [contours[0]], (0,255,255))
#cv2.fillConvexPoly(img_star, contours[0], (0,255,255))
cv2.imshow("dst: ", img_star)
cv2.waitKey(0)
cv2.destroyAllWindows()
这个例子应该相当明显了(≧▽≦)/啦啦啦!


