kvm创建镜像源导入openstack+ceph环境——code:1006报错解决方法
文章目录
- 一:搭建kvm服务器
- 1.1 安装系统,勾选cpu虚拟化
- 1.2 准备kvm环境
- 1.3 安装kvm所需要的软件
- 1.4 重启验证
- 1.5 开启libvirtd服务
- 1.6 设置kvm网络
- 二:centos镜像制作
- 2.0 centos镜像制作思路
- 2.1 将centos 7 、CentOS7-Base-163.repo和centos-cloud-init.sh 上传到服务器
- 2.2 开启libvirtd(或者在图形界面终端设置,更简单)
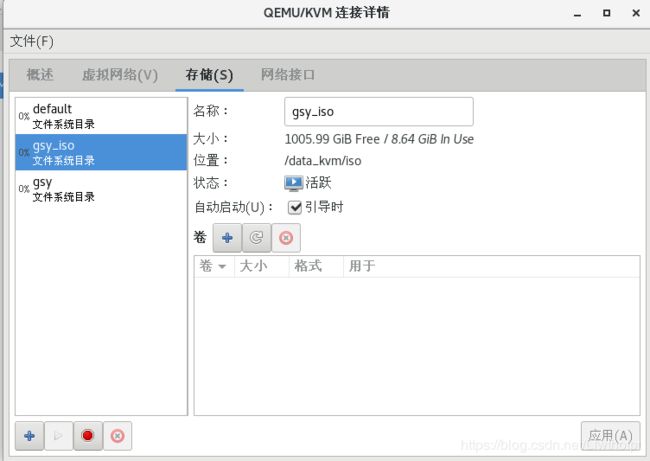
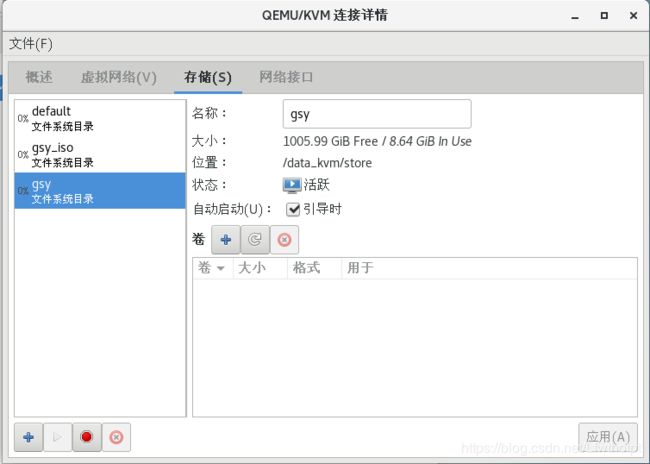
- 2.2.1 添加存储池
- 2.2.2 创建虚拟机
- 2.3 登录虚拟机
- 2.4 安装一些装机必备的组件
- 2.5 关闭防火墙、核心防护
- 2.6 OpenStack云优化--centos-cloud-init.sh(商业版有用,社区版无用)
- 2.7 grub优化
- 2.8 备注:ssh 连接较慢的修改
- 2.9 重启虚拟机,查看镜像
- 三:依照现有镜像创建新的虚拟机
- 3.1 查看状态
- 四:创建一个img格式的镜像,上传到openstack测试
- 4.1 将imgscp到控制节点
- 4.2 创建卷
- 4.3 创建实例
- 4.4 查看实例
- 4.5 绑定浮动IP,实现互联互通
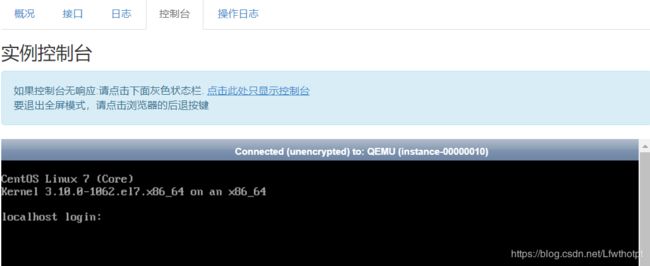
- 五:解决dashboard中实例控制台code:1006报错问题
- 5.1 修改计算节点的配置文件:/etc/nova/nova.conf
- 5.2 重启nova-compute服务
- 5.3 再次查看
一:搭建kvm服务器
IP:192.168.247.14
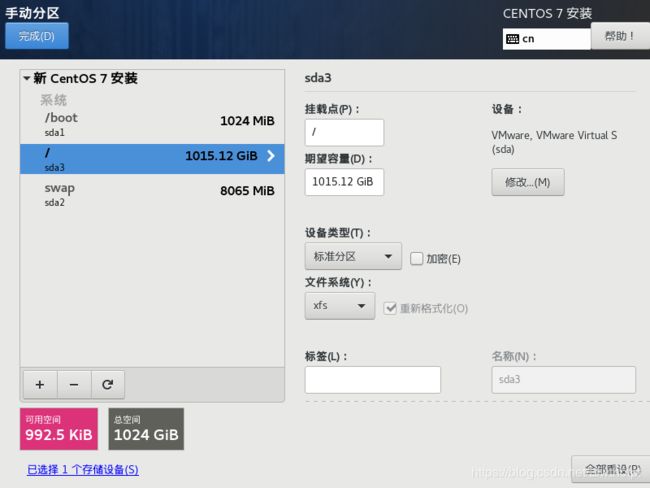
1.1 安装系统,勾选cpu虚拟化
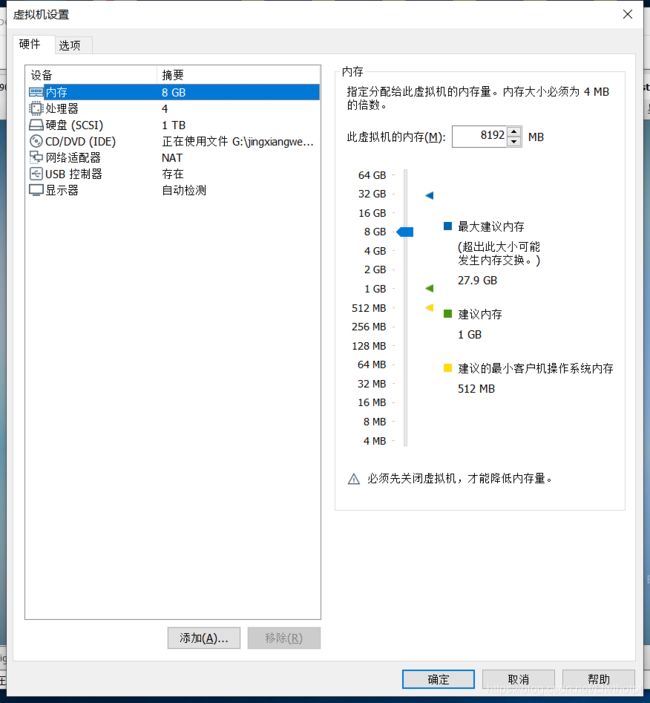
这里安装的是1908版本,nat的网卡是vm8:192.168.247.0/24
1.2 准备kvm环境
- 配置网络
[root@localhost ~]# vi /etc/sysconfig/network-scripts/ifcfg-ens33
TYPE=Ethernet
PROXY_METHOD=none
BROWSER_ONLY=no
BOOTPROTO=static
DEFROUTE=yes
IPV4_FAILURE_FATAL=no
IPV6INIT=yes
IPV6_AUTOCONF=yes
IPV6_DEFROUTE=yes
IPV6_FAILURE_FATAL=no
IPV6_ADDR_GEN_MODE=stable-privacy
NAME=ens33
UUID=84fdb62a-efd6-478a-aad1-93654e175104
DEVICE=ens33
ONBOOT=yes
IPADDR=192.168.247.14
GATEWAY=192.168.247.2
NETMASK=255.255.255.0
DNS1=8.8.8.8
DNS2=114.114.114.114
[root@localhost ~]# ifconfig
ens33: flags=4163  mtu 1500
        inet 192.168.247.14  netmask 255.255.255.0  broadcast 192.168.247.255
[root@localhost ~]# ping 8.8.8.8
PING 8.8.8.8 (8.8.8.8) 56(84) bytes of data.
64 bytes from 8.8.8.8: icmp_seq=1 ttl=128 time=35.2 ms
64 bytes from 8.8.8.8: icmp_seq=2 ttl=128 time=35.0 ms
64 bytes from 8.8.8.8: icmp_seq=3 ttl=128 time=35.7 ms
^C
--- 8.8.8.8 ping statistics ---
3 packets transmitted, 3 received, 0% packet loss, time 2003ms
rtt min/avg/max/mdev = 35.085/35.365/35.780/0.369 ms
- 搭建本地仓库
[root@localhost ~]# mkdir /abc
[root@localhost ~]# mount /dev/sr0 /acb
mount: mount point /acb does not exist
[root@localhost ~]# mount /dev/sr0 /abc
mount: /dev/sr0 is write-protected, mounting read-only
[root@localhost ~]# vi /etc/fstab
/dev/sr0        /abc    iso9660 defaults        0       0
[root@localhost ~]# df -Th
Filesystem     Type      Size  Used Avail Use% Mounted on
/dev/sr0       iso9660   4.4G  4.4G     0 100% /abc
[root@localhost ~]# reboot
连接断开
连接成功
Last login: Tue Mar 10 19:21:54 2020 from 192.168.254.1
[root@localhost ~]# df -Th
Filesystem     Type      Size  Used Avail Use% Mounted on
/dev/sr0       iso9660   4.4G  4.4G     0 100% /abc
[root@localhost ~]# cd /etc/yum.repos.d/
[root@localhost yum.repos.d]# ls
CentOS-Base.repo  CentOS-Debuginfo.repo  CentOS-Media.repo    CentOS-Vault.repo
CentOS-CR.repo    CentOS-fasttrack.repo  CentOS-Sources.repo
[root@localhost yum.repos.d]# mkdir bak
[root@localhost yum.repos.d]# mv * bak/
mv: cannot move ‘bak’ to a subdirectory of itself, ‘bak/bak’
[root@localhost yum.repos.d]# vi abc.repo
[abc]
name=abc
baseurl=file:///abc
gpgcheck=0
enabled=1
[root@localhost yum.repos.d]# yum makecache
- 关闭核心防护和防火墙
[root@localhost ~]# systemctl stop firewalld
[root@localhost ~]# systemctl disable firewalld
[root@localhost ~]# setenforce 0
[root@localhost ~]# vi /etc/selinux/config
SELINUX=disable
1.3 安装kvm所需要的软件
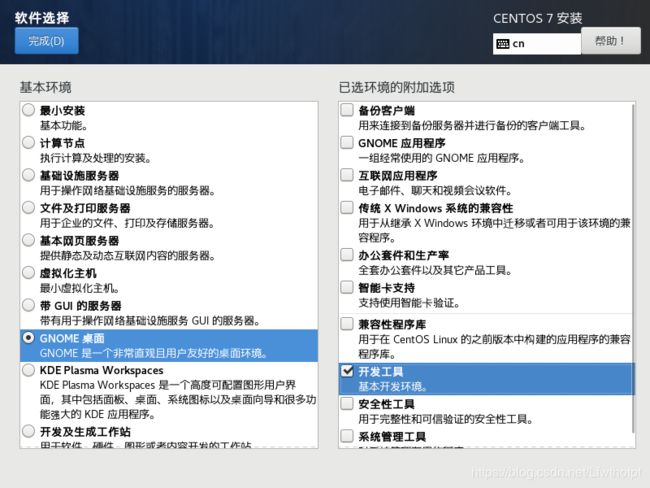
yum groupinstall -y "GNOME Desktop"         ####安装 GNOME 桌面环境  如果装了图形界面不需要装了
yum -y install qemu-kvm                               ####KVM 模块
yum -y install qemu-kvm-tools                       ####KVM 调试工具,可不安装
yum -y install virt-install                                  ####构建虚拟机的命令行工具
yum -y install qemu-img                                ####qemu 组件,创建磁盘、 启动虚拟机等
yum -y install bridge-utils                                      ####网络支持工具
yum -y install libvirt                                                ####虚拟机管理工具
yum -y install virt-manager                                    ####图形界面管理虚拟机
注意: 在使用 yum 安装完桌面后执行 ln -sf /lib/systemd/system/graphical.target
/etc/systemd/system/default.target 命 令 , 将 系 统 的 默 认 运 行 target 更 改 为
graphical.targe。 重启后系统将进入图形化界面。 若不执行上述命令更改系统的默认运行
target, 重启时可能报错
ln -sf /lib/systemd/system/graphical.target /etc/systemd/system/default.target
1.4 重启验证
[root@localhost ~]# init 6
[root@localhost ~]# cat /proc/cpuinfo | grep vmx          ###查看CPU是否支持虚拟化
[root@localhost ~]# lsmod | grep kvm 		//查看KVM模块是否安装
kvm_intel             188644  0
kvm                   621480  1 kvm_intel
irqbypass              13503  1 kvm
1.5 开启libvirtd服务
[root@localhost ~]#  systemctl start libvirtd        ####开启libvirtd服务
[root@localhost ~]#  systemctl enable libvirtd     ####开机启动libvirtd服务
1.6 设置kvm网络
宿主服务器安装完成 KVM, 首先要设定网络, 在 libvirt 中运行 KVM 网络有两种方法:
NAT 和 Bridge, 默认是 NAT。
关于两种模式的说明:
●用户模式, 即 NAT 方式, 这种方式是默认网络, 数据包由 NAT 方式通过主机的接口进行
传送, 可以访问外网, 但是无法从外部访问虚拟机网络。
●桥接模式, 这种模式允许虚拟机像一台独立的主机一样拥有网络, 外部的机器可以直接
访问到虚拟机内部, 但需要网卡支持, 一般有线网卡都支持。
这里以 Bridge(桥接) 为例。
[root@localhost ~]# vim /etc/sysconfig/network-scripts/ifcfg-ens33
BRIDGE=br0			//添加这个参数
//注释掉ip信息
#IPADDR=192.168.247.14
#GATEWAY=192.168.247.2
#NETMASK=255.255.255.0
#DNS1=8.8.8.8
#DNS2=114.114.114.114
[root@localhost ~]# vim /etc/sysconfig/network-scripts/ifcfg-br0
TYPE=Bridge
OTPROTO=static
DEFROUTE=yes
PEERDNS=yes			//
PEERROUTES=yes		//
IPV4_FAILURE_FATAL=no
IPV6INIT=yes
IPV6_AUTOCONF=yes
IPV6_DEFROUTE=yes
IPV6_PEERDNS=yes					//
IPV6_PEERROUTES=yes					//
IPV6_FAILURE_FATAL=no
IPV6_ADDR_GEN_MODE=stable-privacy
NAME=br0
DEVICE=br0
ONBOOT=yes
IPADDR=192.168.247.14
NETMASK=255.255.255.0
GATEWAY=192.168.247.2
DNS1=8.8.8.8
DNS2=114.114.114.114
[root@localhost ~]# systemctl restart network
[root@localhost ~]# ifconfig
br0: flags=4163  mtu 1500
        inet 192.168.247.14  netmask 255.255.255.0  broadcast 192.168.247.255

ens33: flags=4163  mtu 1500
二:centos镜像制作
2.0 centos镜像制作思路
1、部署KVM,KVM的网络要桥接,(能分配IP地址、而且能上网)
2、安装centos7.6操作系统,在设置镜像的属性
3、正常的安装操作系统,时区、分区、最小化安装、网络(DHCP能获取IP地址)、设置root密码
4、yum源优化(我们国内用163的YUM源)
5、防火墙核心防护做优化(根据你的业务需求优化)
6、OpenStack云优化–centos-cloud-init.sh(商业版有用,社区版无用)
7、grub优化
2.1 将centos 7 、CentOS7-Base-163.repo和centos-cloud-init.sh 上传到服务器
[root@localhost opt]# ll
total 4554760
-rw-r--r--. 1 root root       1458 Mar 10 17:28 CentOS7-Base-163.repo
-rw-r--r--. 1 root root 4664066048 Mar 10 17:30 CentOS-7-x86_64-DVD-1908.iso
-rw-r--r--. 1 root root       1735 Mar 10 17:28 centos-cloud-init.sh
drwxr-xr-x. 2 root root          6 Oct 31  2018 rh
2.2 开启libvirtd(或者在图形界面终端设置,更简单)
[root@localhost opt]# mkdir -p /data_kvm
[root@localhost opt]# mkdir -p /data_kvm/iso
[root@localhost opt]# mkdir -p /data_kvm/store
[root@localhost ~]# virt-manager
详细步骤可以看我之前的操作文档
2.2.1 添加存储池
[root@localhost opt]# mv CentOS-7-x86_64-DVD-1908.iso /data_kvm/iso/
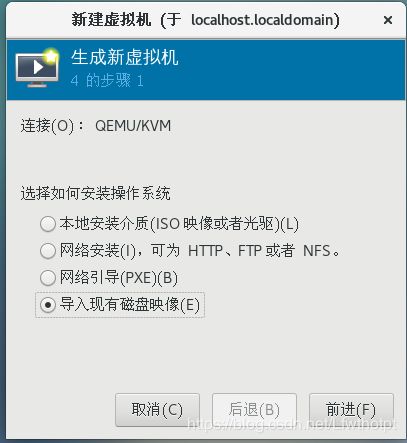
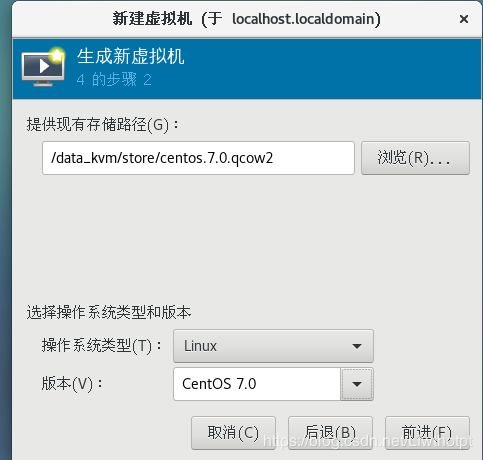
2.2.2 创建虚拟机
步骤略有不同的位置我会标出来
[外链图片转存失败,源站可能有防盗链机制,建议将图片保存下来直接上传(img-iTmuyAqK-1584006404300)(C:\Users\Administrator\AppData\Roaming\Typora\typora-user-images\1583833520945.png)]
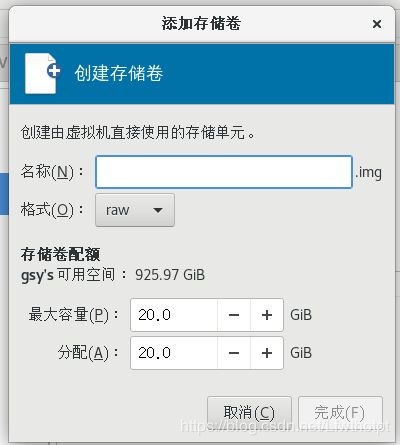
备注:在创建镜像或者创建自定义存储时,若是直接创建,就是qcow2格式
若是想要做img格式,需要在存储池里先创建raw卷,然后在创建虚拟机的时候,指定自定义存储
开始安装
这里为了区分,将宿主机主机名修改一下
[root@localhost opt]# hostnamectl set-hostname gsy
[root@localhost opt]# su
[root@gsy opt]#
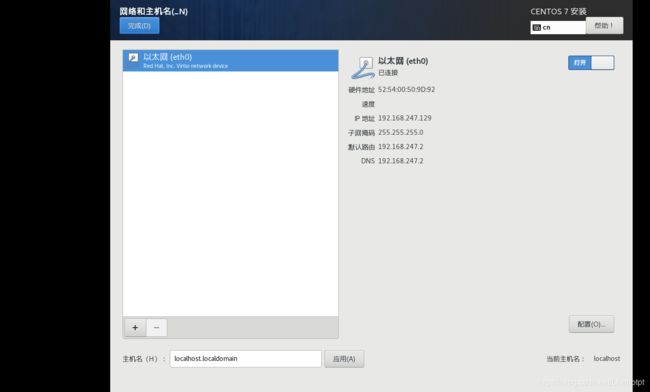
2.3 登录虚拟机
[root@localhost ~]# ip addr
1: lo:  mtu 65536 qdisc noqueue state UNKNOWN group default qlen 1000
    link/loopback 00:00:00:00:00:00 brd 00:00:00:00:00:00
    inet 127.0.0.1/8 scope host lo
       valid_lft forever preferred_lft forever
    inet6 ::1/128 scope host
       valid_lft forever preferred_lft forever
2: eth0:  mtu 1500 qdisc pfifo_fast state UP group default qlen 1000
    link/ether 52:54:00:50:9d:92 brd ff:ff:ff:ff:ff:ff
    inet 192.168.247.129/24 brd 192.168.247.255 scope global noprefixroute dynamic eth0
       valid_lft 5358540sec preferred_lft 5358540sec
    inet6 fe80::5e28:9c13:f79e:c76d/64 scope link noprefixroute
       valid_lft forever preferred_lft forever
[root@localhost ~]# ping 8.8.8.8
PING 8.8.8.8 (8.8.8.8) 56(84) bytes of data.
64 bytes from 8.8.8.8: icmp_seq=1 ttl=128 time=34.9 ms
64 bytes from 8.8.8.8: icmp_seq=2 ttl=128 time=36.6 ms
^C
--- 8.8.8.8 ping statistics ---
2 packets transmitted, 2 received, 0% packet loss, time 1001ms
rtt min/avg/max/mdev = 34.987/35.799/36.611/0.812 ms
[root@localhost ~]# ping www.baidu.com
PING www.a.shifen.com (180.101.49.12) 56(84) bytes of data.
64 bytes from 180.101.49.12 (180.101.49.12): icmp_seq=1 ttl=128 time=11.0 ms
64 bytes from 180.101.49.12 (180.101.49.12): icmp_seq=2 ttl=128 time=7.59 ms
64 bytes from 180.101.49.12 (180.101.49.12): icmp_seq=3 ttl=128 time=9.63 ms
^C
--- www.a.shifen.com ping statistics ---
- 修改虚拟机yum仓库
[root@localhost ~]# cd /etc/yum.repos.d/
[root@localhost yum.repos.d]# mkdir bak
[root@localhost yum.repos.d]# mv * bak
mv: cannot move ‘bak’ to a subdirectory of itself, ‘bak/bak’
[root@localhost yum.repos.d]# ls
bak
[root@localhost yum.repos.d]# scp [email protected]:/opt/CentOS7-Base-163.repo ./
[root@localhost yum.repos.d]# ls
bak  CentOS7-Base-163.repo
[root@localhost yum.repos.d]# yum clean all
Loaded plugins: fastestmirror
Cleaning repos: base extras updates
[root@localhost yum.repos.d]# yum list
2.4 安装一些装机必备的组件
[root@localhost yum.repos.d]# yum -y install vim net-tools bash-completion
2.5 关闭防火墙、核心防护
[root@localhost yum.repos.d]# vi /etc/sysconfig/selinux
SELINUX=disabled
[root@localhost yum.repos.d]# setenforce 0
[root@localhost yum.repos.d]# systemctl stop firewalld
[root@localhost yum.repos.d]# systemctl disable firewalld
Removed symlink /etc/systemd/system/multi-user.target.wants/firewalld.service.
Removed symlink /etc/systemd/system/dbus-org.fedoraproject.FirewallD1.service.
2.6 OpenStack云优化–centos-cloud-init.sh(商业版有用,社区版无用)
[root@localhost yum.repos.d]# scp [email protected]:/opt/centos-cloud-init.sh ./
[root@localhost yum.repos.d]# ls
bak  CentOS7-Base-163.repo  centos-cloud-init.sh
[root@localhost yum.repos.d]# mv centos-cloud-init.sh cloud-init.sh
[root@localhost yum.repos.d]# chmod 755 cloud-init.sh
[root@localhost yum.repos.d]# chmod +x cloud-init.sh
[root@localhost yum.repos.d]# sed -i 's/\r//g' cloud-init.sh
[root@localhost yum.repos.d]# mv cloud-init.sh /usr/bin/
[root@localhost yum.repos.d]# echo ' /bin/bash /usr/bin/cloud-init.sh' >> /etc/rc.d/rc.local
2.7 grub优化
[root@localhost yum.repos.d]# vim /etc/sysconfig/grub
GRUB_TIMEOUT=5
GRUB_DISTRIBUTOR="$(sed 's, release .*$,,g' /etc/system-release)"
GRUB_DEFAULT=saved
GRUB_DISABLE_SUBMENU=true
GRUB_TERMINAL_OUTPUT="console"
GRUB_CMDLINE_LINUX="crashkernel=auto console=ttyS0,115200n8 rhgb quiet"
GRUB_DISABLE_RECOVERY="true"
- 修改开机启动参数后,使用grub2-mkconfig 命令使得参数设置有效
[root@localhost yum.repos.d]# grub2-mkconfig -o /boot/grub2/grub.cfg
Generating grub configuration file ...
Found linux image: /boot/vmlinuz-3.10.0-1062.el7.x86_64
Found initrd image: /boot/initramfs-3.10.0-1062.el7.x86_64.img
Found linux image: /boot/vmlinuz-0-rescue-2453516ae82e4840a8b05a6816d89b91
Found initrd image: /boot/initramfs-0-rescue-2453516ae82e4840a8b05a6816d89b91.img
done
2.8 备注:ssh 连接较慢的修改
sed 's/.*UseDNS.*/UseDNS no/g' /etc/ssh/sshd_config -i

sed 's/^#PermitRootLogin.*/PermitRootLogin yes/g'  /etc/ssh/sshd_config -i

sed 's/GSSAPIAuthentication.*/GSSAPIAuthentication no/g' /etc/ssh/sshd_config -i
2.9 重启虚拟机,查看镜像
[root@localhost yum.repos.d]# reboot
在服务器上查看
[root@gsy opt]# cd /var/lib/libvirt/images/
[root@gsy images]# ls
centos7.0.qcow2
[root@gsy images]# cp centos7.0.qcow2 /data_kvm/store/centos7.0.qcow2
[root@gsy store]# ls
centos.7.0.qcow2
三:依照现有镜像创建新的虚拟机
3.1 查看状态
[root@gsy data_kvm]# virsh start centos7.0
error: Domain is already active
[root@gsy store]# virsh list --all
 Id    Name                           State
----------------------------------------------------
 4     centos7.0-2                    running
 5     centos7.0                      running
[root@gsy data_kvm]# virsh dominfo centos7.0
Id:             5
Name:           centos7.0
UUID:           2453516a-e82e-4840-a8b0-5a6816d89b91
OS Type:        hvm
State:          running
CPU(s):         2
CPU time:       60.7s
Max memory:     2097152 KiB
Used memory:    2097152 KiB
Persistent:     yes
Autostart:      disable
Managed save:   no
Security model: selinux
Security DOI:   0
Security label: system_u:system_r:svirt_t:s0:c139,c633 (permissive)
[root@gsy store]# virsh dominfo centos7.0-2
Id:             4
Name:           centos7.0-2
UUID:           00e45a74-d1b6-4fec-a6e6-422ba5b11deb
OS Type:        hvm
State:          running
CPU(s):         2
CPU time:       63.7s
Max memory:     2097152 KiB
Used memory:    2097152 KiB
Persistent:     yes
Autostart:      disable
Managed save:   no
Security model: selinux
Security DOI:   0
Security label: system_u:system_r:svirt_t:s0:c107,c189 (permissive)
[root@gsy store]# virsh console centos7.0
Connected to domain centos7.0
Escape character is ^]

CentOS Linux 7 (Core)
Kernel 3.10.0-1062.el7.x86_64 on an x86_64

localhost login: root
密码:
Last login: Tue Mar 10 19:28:52 on tty1
[root@localhost ~]#
[root@localhost ~]# init 0
[ 1164.571474] Power down.
[root@gsy store]# virsh console centos7.0
error: The domain is not running
[root@gsy store]# virsh start centos7.0
Domain centos7.0 started
四:创建一个img格式的镜像,上传到openstack测试
4.1 将imgscp到控制节点
[root@ct opt]# scp [email protected]:/data_kvm/store/gsy.img ./
The authenticity of host '192.168.247.14 (192.168.247.14)' can't be established.
ECDSA key fingerprint is SHA256:U3w1AX+lJGEWG/GGjCj3jP82B2sbAe0eV2dzkv7n2ok.
ECDSA key fingerprint is MD5:1b:2d:e0:41:2f:c5:fd:13:7b:66:8c:fb:cf:f7:96:b0.
Are you sure you want to continue connecting (yes/no)? yes
Warning: Permanently added '192.168.247.14' (ECDSA) to the list of known hosts.
[email protected]'s password:
gsy.img                                                 62%   12GB  78.4MB/s   01:38 ETA
[root@ct opt]# ls
gsy.img  openstack_rocky  openstack_rocky.tar.gz
4.2 创建卷
名为gsy,镜像文件是gsy.img,磁盘格式为raw,–container-format bare 共享的–progress显示进程
备注:另外一种方法
openstack image list //查看已有镜像列表
openstack image show 镜像名 //查看镜像的具体信息
openstack image create --file 镜像文件名 --disk-format qcow2 --container-format bare --public centos7
//创建镜像,创建一个qcow2格式的镜像,名字为centos7
openstack image delete 镜像名 //删除镜像
[root@ct opt(keystone_admin)]# glance image-create --name "gsy" --file gsy.img --disk-format raw --container-format bare --progress
[>                             ] 1%	13.30
[=============================>] 100%		13.39
+------------------+----------------------------------------------------------------------------------+
| Property         | Value
                                |
+------------------+----------------------------------------------------------------------------------+
| checksum         | 9e3faabdbddc848dbed11ef151c3b526
                                |
| container_format | bare
                                |
| created_at       | 2020-03-12T05:30:06Z
                                |
| disk_format      | raw
                                |
| id               | 9c80fd3d-8f3e-4c3b-84e5-fab2916a041b
                                |
| min_disk         | 0
                                |
| min_ram          | 0
                                |
| name             | gsy
                                |
| os_hash_algo     | sha512
                                |
| os_hash_value    | 2fce238e911f68676ba583295b11e5563c27b47d6abca17f3af108d7dc5e931b6354ec4a31156971 |
|                  | de0c7087ad3664310f9706b74b70e910e493e0869b37f816
                                |
| os_hidden        | False
                                |
| owner            | cd08a577c9d1405c8aa8615808a2f242
                                |
| protected        | False
                                |
| size             | 21474836480
                                |
| status           | active
                                |
| tags             | []
                                |
| updated_at       | 2020-03-12T05:37:37Z
                                |
| virtual_size     | Not available
                                |
| visibility       | shared
                                |
+------------------+---------------------------------------------------------------------------------+
4.3 创建实例
4.4 查看实例
[root@comp1 ~]# tail -f /var/log/nova/nova-compute.log
[root@ct opt(keystone_admin)]# ceph -s
  cluster:
    id:     15200f4f-1a57-46c5-848f-9b8af9747e54
    health: HEALTH_OK

  services:
    mon: 3 daemons, quorum ct,comp1,comp2
    mgr: ct(active), standbys: comp1, comp2
    osd: 3 osds: 3 up, 3 in

  data:
    pools:   3 pools, 192 pgs
    objects: 3.40 k objects, 23 GiB
    usage:   73 GiB used, 2.9 TiB / 3.0 TiB avail
    pgs:     192 active+clean

  io:
    client:   255 B/s wr, 0 op/s rd, 0 op/s wr

You have new mail in /var/spool/mail/root
4.5 绑定浮动IP,实现互联互通
ssh链接
依旧ping不通外网
[root@host-192-168-0-23 ~]# rpm -q centos-release
centos-release-7-7.1908.0.el7.centos.x86_64
五:解决dashboard中实例控制台code:1006报错问题
5.1 修改计算节点的配置文件:/etc/nova/nova.conf
所有的计算节点都修改,指向本地的主机名
[root@comp1 ~]# vi /etc/nova/nova.conf
10977 vncserver_proxyclient_address=comp1
10978 vncserver_listen=0.0.0.0
5.2 重启nova-compute服务
[root@comp1 ~]# systemctl restart openstack-nova-compute
[root@comp2 ~]# systemctl restart openstack-nova-compute
