飞桨PaddleHub带你环游世界,快来试试Python一键视频抠图吧
![]()
在视频创作过程中,有时会遇到人像抠图的需求,最一般的做法是使用PR、AE等工具将视频中的每一帧图像手动抠图。这么繁琐的步骤在理工男面前简直是不可存在的,那么有什么简单的方法能快速抠图吗?当然有啦,接下来给大家介绍如何使用PaddleHub一键视频人像抠图。
效果展示
首先展示一些抠图完毕的小片段,上一秒我还在家里的小房间,下一秒我就出现在了土耳其。
那顺便去看看埃菲尔铁塔呗。
到洛杉矶的海边散散步。
到上海欢乐谷锻炼锻炼身体。
最后到东京的观景台上看个日落
视频效果是不是很逼真呢,一天环游世界不是梦哈哈哈……
其实这些人像素材都是在房间里拍摄,然后使用PaddleHub工具库一键抠图,最后使用PR进行后期创作的,接下来介绍下如何操作吧。
这是如何实现的?
关注飞桨的小伙伴是否还记得前几天推过的别再用PS了,我用5行Python代码就实现了批量抠图,视频人像抠图也是类似的,只要把视频的每一帧图像所含有的人像提取出来,然后加上背景重新合成视频就可以啦。大体的步骤知道了,那接下来开始实践吧。
哦对了,还得有一段含有人像的素材,小伙伴们可以自己拍摄或者从网络搜集。
01
安装必要组建
需要安装的是飞桨框架和PaddleHub工具库,安装步骤可以参考别再用PS了,我用5行Python代码就实现了批量抠图。或者直接进入飞桨官网查看安装步骤:
https://www.paddlepaddle.org.cn
02
人像抠图制作素材
由于目前PaddleHub人像抠图模型API的输入是单张图像的路径,故需要先将视频的每一帧图像分离存储后才能进行抠图。当然也可以通过修改模型的源码,将API的输入修改成图像输入,这样就省去了视频分离存储的步骤,具体的源码可以参考:
https://aistudio.baidu.com/aistudio/projectdetail/370260,这里主要介绍前一种方法。
2.1 导入所有相关模块
import cv2
import os
import numpy as np
from PIL import Image
import paddlehub as hub
2.2 将视频内图像分离存储
def CutVideo2Image(video_path, img_path):
    cap = cv2.VideoCapture(video_path)
    index = 0
    while(True):
        ret,frame = cap.read()
        if ret:
            cv2.imwrite(img_path + '%d.jpg' % index, frame)
            index += 1
        else:
            break
    cap.release()
    print('Video cut finish, all %d frame' % index)
该步骤将会把每一帧图像保存到本地目录。
2.3 导入模型进行人像抠图
def GetHumanSeg(frame_path, out_path):
    # 加载模型
    module = hub.Module(name="deeplabv3p_xception65_humanseg")
    # 配置
    test_img_path = [os.path.join(frame_path, fname) for fname in os.listdir(in_path)]
    input_dict = {"image": test_img_path}

    results = module.segmentation(data=input_dict, output_dir=out_path)
    # Tips:使用GPU加速需安装paddlepaddle-gpu
    # results = module.segmentation(data=input_dict, use_gpu = gpu, batch_size = 10,output_dir=out_path)
该步骤将会把人像提取并保存为png至本地
2.4 生成绿幕并与人像合成
为什么要使用绿幕呢,主要是为了后续在视频后期软件里方便使用素材。当然熟悉Python的同学也可以直接使用一些Python模块进行视频后期。但是在这里还是推荐使用PR、AE这类专业软件,可以方便地对素材进行缩放、变速、位置处理、以及添加特效等操作。更重要的是,可以对素材进行调色,与新的背景更好地融合。
def init_canvas(width, height, color=(255, 255, 255)):
    canvas = np.ones((height, width, 3), dtype="uint8")
    canvas[:] = color
    return canvas
# 生成绿幕

def GetGreenScreen(size, out_path):
    canvas = init_canvas(size[0], size[1], color=(0, 255, 0))
    cv2.imwrite(out_path, canvas)

def BlendImg(fore_image, base_image, output_path):
    """
    将抠出的人物图像换背景
    fore_image: 前景图片,抠出的人物图片
    base_image: 背景图片
    """
    # 读入图片
    base_image = Image.open(base_image).convert('RGB')
    fore_image = Image.open(fore_image).resize(base_image.size)

    # 图片加权合成
    scope_map = np.array(fore_image)[:,:,-1] / 255
    scope_map = scope_map[:,:,np.newaxis]
    scope_map = np.repeat(scope_map, repeats=3, axis=2)
    res_image = np.multiply(scope_map, np.array(fore_image)[:,:,:3]) + np.multiply((1-scope_map), np.array(base_image))

    # 保存图片
    res_image = Image.fromarray(np.uint8(res_image))
    res_image.save(output_path)

def BlendHumanImg(in_path, screen_path, out_path):
    humanseg_png = [filename for filename in os.listdir(in_path)]
    for i, img in enumerate(humanseg_png):
        img_path = os.path.join(in_path + '%d.png' % (i))
        output_path_img = out_path + '%d.png' % i
        BlendImg(img_path, screen_path, output_path_img)
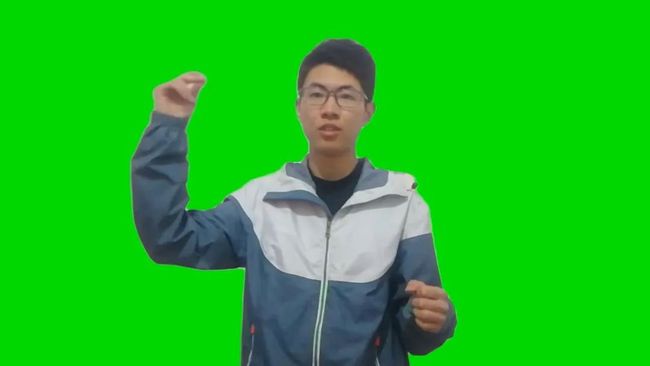
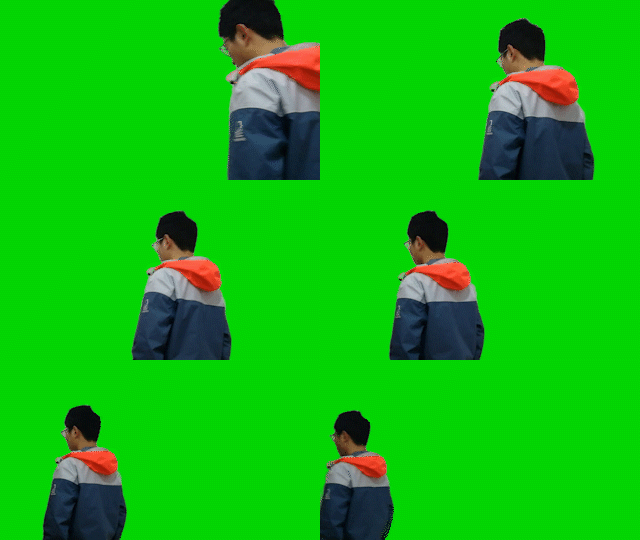
该步骤完成后将会得到类似这样的绿幕图片:
2.5 视频合成
def CompVideo(in_path, out_path, size):
    fourcc = cv2.VideoWriter_fourcc(*'mp4v')
    out = cv2.VideoWriter(out_path,fourcc, 30.0, size)
    files = os.listdir(in_path)


    for i in range(len(files)):
        img = cv2.imread(in_path + '%d.png' % i)
        out.write(img)    # 保存帧
    out.release()
该步骤完成后即可得到类似下图的人体绿幕素材
2.6 主程序
# Config
Video_Path = 'video/0.mp4'
Video_Size = (1920, 1080)
FrameCut_Path = 'video/frame/'
FrameSeg_Path = 'video/frame_seg/'
FrameCom_Path = 'video/frame_com/'
GreenScreen_Path = 'video/green.jpg'
ComOut_Path = 'output.mp4'

if __name__ == "__main__":
    # 第一步:视频->图像
    if not os.path.exists(FrameCut_Path):
        os.mkdir(FrameCut_Path)
        CutVideo2Image(Video_Path, FrameCut_Path)

    # 第二步:抠图
    if not os.path.exists(FrameSeg_Path):
        os.mkdir(FrameSeg_Path)
        GetHumanSeg(FrameCut_Path, FrameSeg_Path)

    # 第三步:生成绿幕并合成
    if not os.path.exists(GreenScreen_Path):
        GetGreenScreen(Video_Size, GreenScreen_Path)

    if not os.path.exists(FrameCom_Path):
        os.mkdir(FrameCom_Path)
        BlendHumanImg(FrameSeg_Path, GreenScreen_Path, FrameCom_Path)

    # 第四步:合成视频
    if not os.path.exists(ComOut_Path):
        CompVideo(FrameCom_Path, ComOut_Path, Video_Size)
OK,绿幕素材都已经制作完毕,下一步就可以导入到后期软件内进行创作啦,这里以PR为例。
03
后期创作
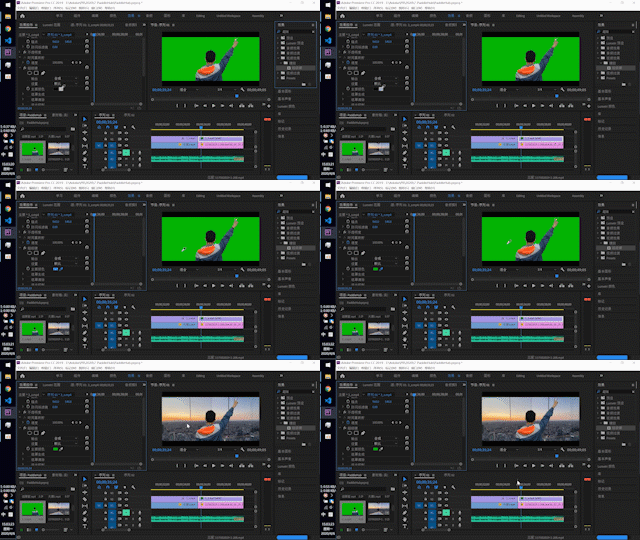
将绿幕素材和背景素材导入PR,在绿幕素材上使用`超级键`效果,并将主要颜色选取为绿幕的颜色,即可轻松去除绿幕颜色。
再往后的各种骚操作就看各位小伙伴的想象力啦!
这里附上我的作品:[AI人像抠图]|百度PaddleHub抠图创意赛[附教程、代码]:
https://www.bilibili.com/video/BV1cA411b7r2
目前存在的问题:
-
头发、手指等细节部分还需要进一步完善。
-
人体动作幅度大导致图像帧模糊,会造成提取失败。
-
模型的API接口有待继续丰富。
不过听说百度飞桨后续会针对视频流推出更高效的人像分割模型,真是让人期待呀!
如果使用过程中遇到任何问题,大家可通过以下联系方式进行技术交流及问题反馈。
PaddleHub issue:
https://github.com/PaddlePaddle/PaddleHub/issues
官方QQ群:703252161。如果您加入官方QQ群,您将遇上大批志同道合的深度学习同学。
如果您想详细了解更多飞桨的相关内容,请参阅以下文档。
官网地址:https://www.paddlepaddle.org.cn
-
PaddleHub项目地址:
GitHub: https://github.com/PaddlePaddle/PaddleHub
Gitee: https://gitee.com/paddlepaddle/PaddleHub
-
PaddleHub 官网:
https://www.paddlepaddle.org.cn/hub
-
PaddleHub 预训练模型:
https://www.paddlepaddle.org.cn/hublist
-
PaddleHub 文档:
https://github.com/PaddlePaddle/PaddleHub/tree/release/v1.6/docs
-
PaddleHub demo:
https://github.com/PaddlePaddle/PaddleHub/tree/release/v1.6/demo
-
PaddleHub AI Studio官方教程示例:
https://aistudio.baidu.com/aistudio/personalcenter/thirdview/79927
-
飞桨PaddleSeg项目地址:
https://github.com/PaddlePaddle/PaddleSeg
-
飞桨开源框架项目地址:
GitHub: https://github.com/PaddlePaddle/Paddle
Gitee: https://gitee.com/paddlepaddle/Paddle
END
![]()


