商品展示案例(SQLite数据库存储和ListView的使用)
1.创建程序
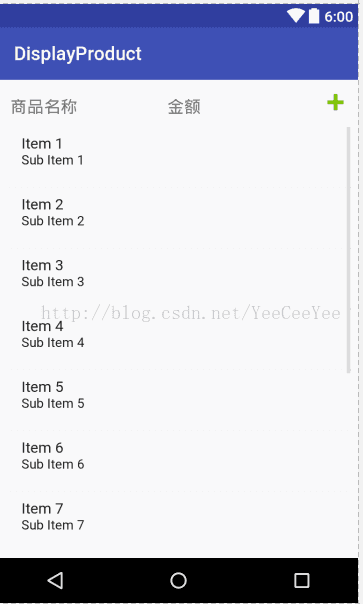
首先创建一个名为“DisplayProduct”的应用程序,设计用户交互界面,如下图所示:
其相应的布局文件(activity_main.xml)如下所示:
xml version="1.0" encoding="utf-8"?>
<LinearLayout xmlns:android="http://schemas.android.com/apk/res/android"
    xmlns:tools="http://schemas.android.com/tools"
    android:id="@+id/activity_main"
    android:layout_width="match_parent"
    android:layout_height="match_parent"
    android:orientation="vertical"
    android:layout_margin="8dp"
    tools:context="cn.edu.bzu.displayproduct.MainActivity">
    <LinearLayout
        android:id="@+id/addLL"
        android:layout_width="match_parent"
        android:layout_height="wrap_content"
        android:orientation="horizontal">
        <EditText
            android:id="@+id/nameET"
            android:layout_width="0dp"
            android:layout_height="wrap_content"
            android:layout_weight="1"
            android:hint="商品名称"
            android:inputType="textPersonName"
            />
        <EditText
            android:id="@+id/balanceET"
            android:layout_width="0dp"
            android:layout_height="wrap_content"
            android:layout_weight="1"
            android:hint="金额"
            android:inputType="number"
            />
        <ImageView
            android:onClick="add"
            android:id="@+id/addIV"
            android:layout_width="wrap_content"
            android:layout_height="wrap_content"
            android:src="@android:drawable/ic_input_add"
            />
    LinearLayout>
    <ListView
        android:id="@+id/accountLV"
        android:layout_width="match_parent"
        android:layout_height="match_parent"
        android:layout_below="@id/addLL">ListView>
LinearLayout>
2.创建ListView Item布局
由于本案例用到了ListView布局,因此需要编写一个ListView Item的布局文件。在res/layout目录下创建一个item.xml文件,编写出如下图所示的界面:
其代码如下:
xml version="1.0" encoding="utf-8"?>
<LinearLayout xmlns:android="http://schemas.android.com/apk/res/android"
    android:orientation="horizontal"
    android:layout_width="match_parent"
    android:layout_height="wrap_content"
    android:padding="10dp">
    <TextView
        android:id="@+id/idTV"
        android:layout_width="0dp"
        android:layout_height="wrap_content"
        android:layout_weight="1"
        android:text="13"
        android:textColor="#000000"
        android:textSize="20sp"
        />
    <TextView
        android:id="@+id/nameTV"
        android:layout_width="0dp"
        android:layout_height="wrap_content"
        android:layout_weight="2"
        android:singleLine="true"
        android:text="PQ"
        android:textColor="#000000"
        android:textSize="20sp"
        />
    <TextView
        android:id="@+id/balanceTV"
        android:layout_width="0dp"
        android:layout_height="wrap_content"
        android:layout_weight="2"
        android:singleLine="true"
        android:text="123456"
        android:textColor="#000000"
        android:textSize="20sp"
        />
    <LinearLayout
        android:layout_width="wrap_content"
        android:layout_height="wrap_content"
        android:orientation="vertical"
        >
        <ImageView
            android:id="@+id/upIV"
            android:layout_width="wrap_content"
            android:layout_height="wrap_content"
            android:layout_marginBottom="2dp"
            android:src="@android:drawable/arrow_up_float"/>
        <ImageView
        android:id="@+id/downIV"
        android:layout_width="wrap_content"
        android:layout_height="wrap_content"
        android:src="@android:drawable/arrow_down_float"/>
    LinearLayout>
    <ImageView
        android:id="@+id/deleteIV"
        android:layout_width="25dp"
        android:layout_height="25dp"
        android:src="@android:drawable/ic_menu_delete"/>
LinearLayout>
3.创建数据库
创建数据库属于数据操作,因此需要在cn.edu.bzu.product包下创建一个名为dao的包,并在该包下定义一个MyHelper类继承自SQLiteOpenHelper,创建数据库的代码如下:
public class MyHelper extends SQLiteOpenHelper {
    public MyHelper(Context context){
        super(context,"itcast.db",null,2);

    }
    @Override
    public void onCreate(SQLiteDatabase db) {
        System.out.println("onCreate");
        db.execSQL("Create table account(_id INTEGER PRIMARY KEY AUTOINCREMENT,name VARCHAR(20),balance INTEGER)");
    }

    @Override
    public void onUpgrade(SQLiteDatabase db, int oldVersion, int newVersion) {
        System.out.println("onUpgrade");
    }
}
4.创建Account类
在操作数据库时将数据存放至一个JavaBean对象中操作起来会比较方便。因此,需要在cn.edu.bzu.product包下创建一个bean包用于存放JavaBean类,然后在cn.edu.bzu.product。bean包下定义一个Account类,具体代码如下:
public class Account {
    private Long id;
    private String name;
    private Integer balance;
    public Long getId(){
        return id;
    }
    public void setId(Long id){
        this.id=id;
    }
    public String getName(){
        return name ;
    }
    public void setName(String name){
        this.name=name;
    }
    public Integer getBalance(){
        return balance;
    }
    public void setBalance(Integer balance){
        this.balance=balance;
    }
    public Account(Long id,String name,Integer balance) {
        super();
        this.id=id;
        this.name=name;
        this.balance=balance;
    }
    public Account(String name,Integer balance){
        super();
        this.name=name;
        this.balance=balance;
    }
    public Account(){
        super();
    }
    public String toString(){
        return "[序号:"+id+",商品名称:"+name+",余额:"+balance+"]";
    }
}
5.创建数据操作逻辑类
在cn.edu.bzu.product。dao包下创建一个AccountDao类用于操作数据,具体代码如下:
public class AccountDao { private MyHelper helper; public AccountDao(Context context){ helper=new MyHelper(context); } public void insert(Account account){ SQLiteDatabase db=helper.getWritableDatabase(); ContentValues values=new ContentValues(); values.put("name",account.getName()); values.put("balance",account.getBalance()); long id=db.insert("account",null,values); account.setId(id); db.close(); } //根据id删除数据 public int delete(long id){ SQLiteDatabase db=helper.getWritableDatabase(); int count=db.delete("account","_id=?",new String[]{id+""}); db.close(); return count; } //更新数据库 public int update(Account account){ SQLiteDatabase db=helper.getWritableDatabase(); ContentValues values=new ContentValues(); values.put("name",account.getName()); values.put("balance",account.getBalance()); int count=db.update("account",values,"_id=?",new String[]{ account.getId()+"" }); db.close(); return count; } //查询所有数据倒序排列 public ListqueryAll(){ SQLiteDatabase db=helper.getReadableDatabase(); Cursor c=db.query("account",null,null,null,null,null,"balance DESC"); List list=new ArrayList (); while(c.moveToNext()){ long id=c.getLong(c.getColumnIndex("_id")); String name=c.getString(1); int balance=c.getInt(2); list.add(new Account(id,name,balance)); } c.close(); db.close(); return list; } }
6.编写界面交互代码(MainActivity)
数据库的操作完成之后需要界面与数据库进行交互,用于实现将数据库中的数据以ListView的形式展示在界面上,具体代码如下所示:
public class MainActivity extends Activity { private Listlist; private AccountDao dao; private EditText nameET; private EditText balanceET; private ListView accountLV; private MyAdapter adapter; @Override protected void onCreate(Bundle savedInstanceState) { super.onCreate(savedInstanceState); setContentView(R.layout.activity_main); initView(); dao = new AccountDao(this); list=dao.queryAll(); adapter=new MyAdapter(); accountLV.setAdapter(adapter); } private void initView() { accountLV=(ListView) findViewById(R.id.accountLV); nameET=(EditText)findViewById(R.id.nameET); balanceET=(EditText)findViewById(R.id.balanceET); accountLV.setOnItemClickListener(new MyOnItemClickListener()); } public void add(View view){ String name =nameET.getText().toString().trim(); String balance=balanceET.getText().toString().trim(); Account a=new Account(name,balance.equals("")?0:Integer.parseInt(balance)); dao.insert(a); list.add(a); adapter.notifyDataSetChanged(); accountLV.setSelection(accountLV.getCount()-1); nameET.setText(""); balanceET.setText(""); } private class MyAdapter extends BaseAdapter{ public int getCount(){ return list.size(); } public Object getItem(int position){ return list.get(position); } public long getItemId(int position){ return position; } public View getView(int position,View convertView,ViewGroup parent){ View item=convertView!=null?convertView:View.inflate(getApplicationContext(),R.layout.item,null); TextView idTV=(TextView) item.findViewById(R.id.idTV); TextView nameTV=(TextView) item.findViewById(R.id.nameTV); TextView balanceTV=(TextView) item.findViewById(R.id.balanceTV); final Account a=list.get(position); idTV.setText(a.getId()+""); nameTV.setText(a.getName()); balanceTV.setText((a.getBalance()+"")); ImageView upIV=(ImageView) item.findViewById(R.id.upIV); ImageView downIV=(ImageView)item.findViewById(R.id.downIV); ImageView deleteIV=(ImageView)item.findViewById(R.id.deleteIV); upIV.setOnClickListener(new View.OnClickListener() { @Override public void onClick(View v) { a.setBalance(a.getBalance()+1); notifyDataSetChanged(); dao.update(a); } }); downIV.setOnClickListener(new View.OnClickListener() { @Override public void onClick(View v) { a.setBalance(a.getBalance()-1); notifyDataSetChanged(); dao.update(a); } }); deleteIV.setOnClickListener(new View.OnClickListener() { @Override public void onClick(View v) { android.content.DialogInterface.OnClickListener listener= new android.content.DialogInterface.OnClickListener(){ public void onClick(DialogInterface dialog, int which){ list.remove(a); dao.delete(a.getId()); notifyDataSetChanged(); } }; AlertDialog.Builder builder=new AlertDialog.Builder(MainActivity.this); builder.setTitle("确定要删除吗?"); builder.setPositiveButton("确定",listener); builder.setNegativeButton("取消",null); builder.show(); } }); return item; } } private class MyOnItemClickListener implements AdapterView.OnItemClickListener { @Override public void onItemClick(AdapterView parent, View view, int position, long id) { Account a=(Account)parent.getItemAtPosition(position); Toast.makeText(getApplicationContext(),a.toString(),Toast.LENGTH_SHORT).show(); } } }
7.运行程序展示商品
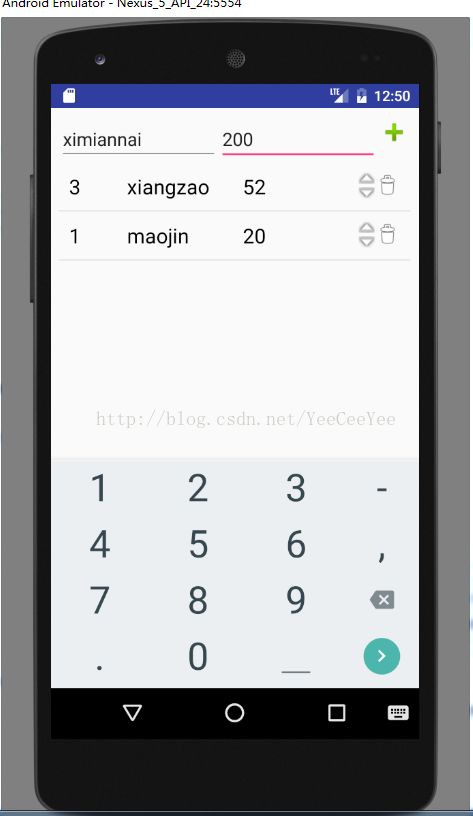
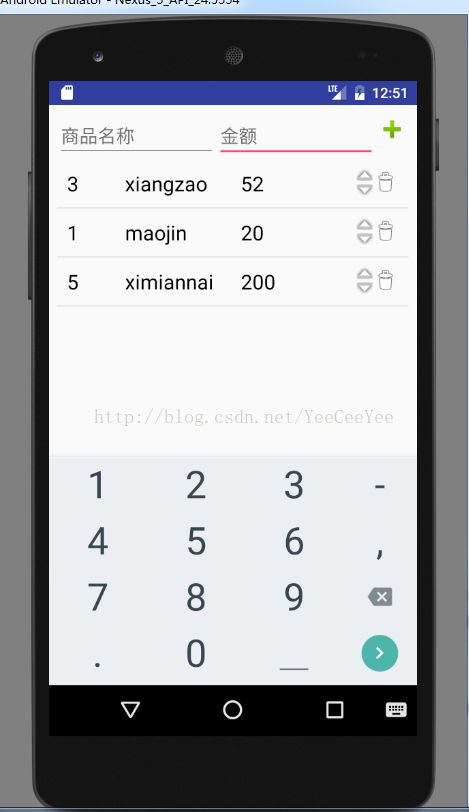
我们在文本框中输入商品的相关数据,点击右侧的“+”,商品就会被添加到我们的ListView中进行展示
当我们点击删除按钮的时候的会弹出一个对话框,当我们点击确定时,数据被删除
当我们点击某一行的时候会弹出一个Toast
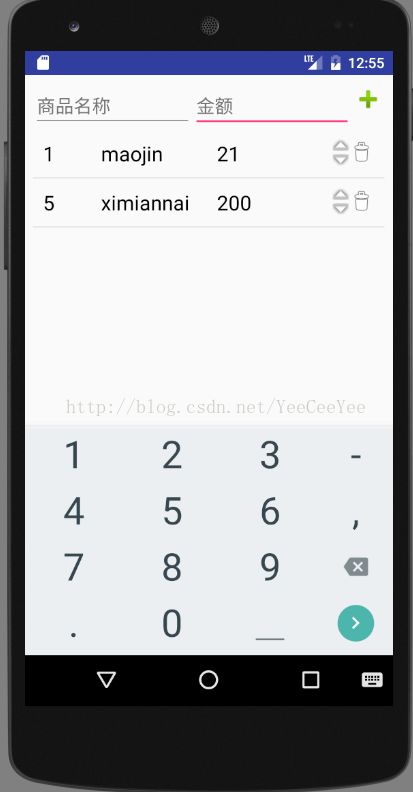
当我们点击向上的箭头时会将价格加1,点击向下的箭头时价格将减1
这是原来的商品界面:
这是当我们点击向上的箭头时的运行界面
这是当我们点击向下的箭头时的运行界面


