Azkaban安装部署(附资源)
资源链接:
链接:https://pan.baidu.com/s/1OBrW7BgjoOkvuaWr5gIZpg
提取码:v34e
1. solo-server模式部署
1.1. 节点规划
1.2 解压配置
将 azkaban-solo-server-0.1.0-SNAPSHOT.tar.gz 上传服务器, 并解压
执行命令:
mkdir /export/servers/azkaban
tar -zxvf azkaban-solo-server-0.1.0-SNAPSHOT.tar.gz -C /export/servers/azkaban/
配置文件修改:
有两个地方需要修改,第一个是时区,需要的是上海时区;
第二个是 不检查内存,因为azkaban默认内存需要3个G,剩余内存不足会报异常
vim conf/azkaban.properties
修改:
default.timezone.id=Asia/Shanghai #修改时区
执行:
vim plugins/jobtypes/commonprivate.properties
添加:
memCheck.enabled=false
1.3. 启动验证
cd azkaban-solo-server-0.1.0-SNAPSHOT/
bin/start-solo.sh
注:启动/关闭必须进到azkaban-solo-server-0.1.0-SNAPSHOT/目录下。
执行jps如下:
[root@node01 azkaban-solo-server-0.1.0-SNAPSHOT]# jps
1900 -- process information unavailable
2556 AzkabanSingleServer
AzkabanSingleServer(对于Azkaban solo‐server模式,Exec Server和Web Server在同一个进程中)
1.4. 登录web页面
访问Web Server:
http://node01:8081/
默认用户名密码azkaban
1.5. 测试
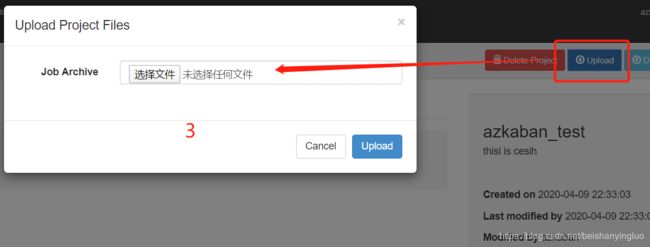
登录=>Create Project=>Upload zip包 =>execute flow 执行一步步操作即可。
创建两个文件one.job two.job,内容如下,打包成zip包。
cat one.job
    type=command
    command=echo "this is job one"
cat two.job
    type=command
    dependencies=one
    command=echo "this is job two"
2. two-server模式部署
2.1 节点规划
2.2. mysql配置初始化
将 azkaban-db-0.1.0-SNAPSHOT.tar.gz 上传node03:
mkdir /export/servers/azkaban
tar -zxvf azkaban-db-0.1.0-SNAPSHOT.tar.gz –C /export/servers/azkaban/
进入mysql命令:
mysql -u root -p
输入密码,回车:
[root@node03 ~]# mysql -u root -p
Enter password:
Welcome to the MySQL monitor.  Commands end with ; or \g.
Your MySQL connection id is 2
Server version: 5.1.73 Source distribution

Copyright (c) 2000, 2013, Oracle and/or its affiliates. All rights reserved.

Oracle is a registered trademark of Oracle Corporation and/or its
affiliates. Other names may be trademarks of their respective
owners.

Type 'help;' or '\h' for help. Type '\c' to clear the current input statement.

mysql>
Mysql上创建对应的库、增加权限、创建表
mysql> CREATE DATABASE azkaban_two_server; #创建数据库
mysql> use azkaban_two_server;
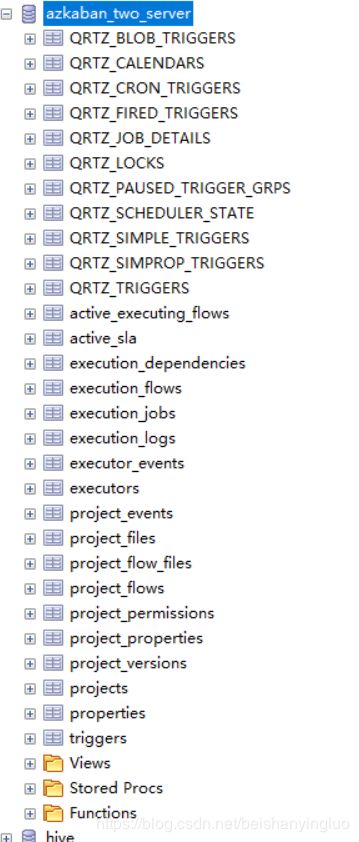
mysql> source /export/servers/azkaban/azkaban-db-0.1.0-SNAPSHOT/create-all-sql-0.1.0-SNAPSHOT.sql; #加载初始化sql创建表
这就是 azkaban的初始化数据表!
2.3. web-server服务器配置
在 node02服务器上:
mkdir /export/servers/azkaban
tar -zxvf azkaban-web-server-0.1.0-SNAPSHOT.tar.gz –C /export/servers/azkaban/
tar -zxvf azkaban-exec-server-0.1.0-SNAPSHOT.tar.gz –C /export/servers/azkaban/
生成ssl证书:
执行:
keytool -keystore keystore -alias jetty -genkey -keyalg RSA
运行此命令后,会提示输入当前生成keystore的密码及相应信息,输入的密码请记住(所有密码统一以123456输入)。
结果:
[root@node02 azkaban]# keytool -keystore keystore -alias jetty -genkey -keyalg RSA
Enter keystore password:
Re-enter new password:
What is your first and last name?
  [Unknown]:
What is the name of your organizational unit?
  [Unknown]:
What is the name of your organization?
  [Unknown]:
What is the name of your City or Locality?
  [Unknown]:
What is the name of your State or Province?
  [Unknown]:
What is the two-letter country code for this unit?
  [Unknown]:
Is CN=Unknown, OU=Unknown, O=Unknown, L=Unknown, ST=Unknown, C=Unknown correct?
  [no]:  yes

Enter key password for <jetty>
	(RETURN if same as keystore password):
Re-enter new password:

Warning:
The JKS keystore uses a proprietary format. It is recommended to migrate to PKCS12 which is an industry standard format using "keytool -importkeystore -srckeystore keystore -destkeystore keystore -deststoretype pkcs12".
You have new mail in /var/spool/mail/root
在当前目录下,生成了一个 keystore 的文件
完成上述工作后,将在当前目录生成keystore证书文件,将keystore拷贝到 azkaban web服务器根目录中。
如: cp keystore azkaban-web-server-0.1.0-SNAPSHOT/
配置文件: 配置conf/azkaban.properties:
修改或添加:
default.timezone.id=Asia/Shanghai # 时区注意后面不要有空格

# Azkaban Jetty server properties. 开启使用ssl 并且知道端口
jetty.use.ssl=true
jetty.ssl.port=8443

executor.host=localhost
executor.port=12321

#  KeyStore for SSL ssl相关配置  注意密码和证书路径
jetty.keystore=keystore
jetty.password=123456
jetty.keypassword=123456
jetty.truststore=keystore
jetty.trustpassword=123456

mysql.port=3306
mysql.host=node03
mysql.database=azkaban_two_server
mysql.user=root
mysql.password=123456
mysql.numconnections=100

#Multiple Executor 设置为false
azkaban.use.multiple.executors=true
#azkaban.executorselector.filters=StaticRemainingFlowSize,MinimumFreeMemory,CpuStatus   #内存监测屏蔽掉!!
改文件的完整内容为:
# Azkaban Personalization Settings
azkaban.name=Test
azkaban.label=My Local Azkaban
azkaban.color=#FF3601
azkaban.default.servlet.path=/index
web.resource.dir=web/
default.timezone.id=Asia/Shanghai

# Azkaban UserManager class
user.manager.class=azkaban.user.XmlUserManager
user.manager.xml.file=conf/azkaban-users.xml

# Loader for projects
executor.global.properties=conf/global.properties
azkaban.project.dir=projects

# Velocity dev mode
velocity.dev.mode=false

# Azkaban Jetty server properties.
jetty.use.ssl=true
jetty.ssl.port=8443
jetty.maxThreads=25

# Azkaban Executor settings
executor.host=localhost
executor.port=12321

#  KeyStore for SSL ssl相关配置  注意密码和证书路径
jetty.keystore=keystore
jetty.password=123456
jetty.keypassword=123456
jetty.truststore=keystore
jetty.trustpassword=123456

# mail settings
mail.sender=
mail.host=
# User facing web server configurations used to construct the user facing server URLs. They are useful when there is a reverse proxy between Azkaban web servers and users.
# enduser -> myazkabanhost:443 -> proxy -> localhost:8081
# when this parameters set then these parameters are used to generate email links.
# if these parameters are not set then jetty.hostname, and jetty.port(if ssl configured jetty.ssl.port) are used.
# azkaban.webserver.external_hostname=myazkabanhost.com
# azkaban.webserver.external_ssl_port=443
# azkaban.webserver.external_port=8081
job.failure.email=
job.success.email=
lockdown.create.projects=false
cache.directory=cache
# JMX stats
jetty.connector.stats=true
executor.connector.stats=true

# Azkaban mysql settings by default. Users should configure their own username and password.
database.type=mysql
mysql.port=3306
mysql.host=node03
mysql.database=azkaban_two_server
mysql.user=root
mysql.password=123456
mysql.numconnections=100

#Multiple Executor
azkaban.use.multiple.executors=true
#azkaban.executorselector.filters=StaticRemainingFlowSize,MinimumFreeMemory,CpuStatus
azkaban.executorselector.comparator.NumberOfAssignedFlowComparator=1
azkaban.executorselector.comparator.Memory=1
azkaban.executorselector.comparator.LastDispatched=1
azkaban.executorselector.comparator.CpuUsage=1
添加azkaban.native.lib=false 和 execute.as.user=false属性:
在 web 的根目录,执行:
mkdir -p plugins/jobtypes
vim commonprivate.properties
添加:
azkaban.native.lib=false
execute.as.user=false
memCheck.enabled=false
2.4. exec-server服务器配置
配置conf/azkaban.properties:
修改或添加:
default.timezone.id=Asia/Shanghai
# Where the Azkaban web server is located
azkaban.webserver.url=https://node02:8443


mysql.host=node03
mysql.database=azkaban_two_server
mysql.user=root
mysql.password=123456

executor.port=12321
完整内容:
# Azkaban Personalization Settings
azkaban.name=Test
azkaban.label=My Local Azkaban
azkaban.color=#FF3601
azkaban.default.servlet.path=/index
web.resource.dir=web/
default.timezone.id=Asia/Shanghai

# Azkaban UserManager class
user.manager.class=azkaban.user.XmlUserManager
user.manager.xml.file=conf/azkaban-users.xml
# Loader for projects
executor.global.properties=conf/global.properties
azkaban.project.dir=projects
# Velocity dev mode
velocity.dev.mode=false
# Azkaban Jetty server properties.
jetty.use.ssl=false
jetty.maxThreads=25
jetty.port=8081

# Where the Azkaban web server is located
azkaban.webserver.url=https://node02:8443

# mail settings
mail.sender=
mail.host=
# User facing web server configurations used to construct the user facing server URLs. They are useful when there is a reverse proxy between Azkaban web servers and users.
# enduser -> myazkabanhost:443 -> proxy -> localhost:8081
# when this parameters set then these parameters are used to generate email links.
# if these parameters are not set then jetty.hostname, and jetty.port(if ssl configured jetty.ssl.port) are used.
# azkaban.webserver.external_hostname=myazkabanhost.com
# azkaban.webserver.external_ssl_port=443
# azkaban.webserver.external_port=8081
job.failure.email=
job.success.email=
lockdown.create.projects=false
cache.directory=cache
# JMX stats
jetty.connector.stats=true
executor.connector.stats=true
# Azkaban plugin settings
azkaban.jobtype.plugin.dir=plugins/jobtypes

# Azkaban mysql settings by default. Users should configure their own username and password.
database.type=mysql
mysql.port=3306
mysql.host=node03
mysql.database=azkaban_two_server
mysql.user=root
mysql.password=123456
mysql.numconnections=100
# Azkaban Executor settings
executor.maxThreads=50
executor.port=12321
executor.flow.threads=30
2.5. 集群启动
先启动exec-server
再启动web-server。
一定要在根目录下执行启动命令 :
bin/start-exec.sh
[root@node02 azkaban-exec-server-0.1.0-SNAPSHOT]# bin/start-exec.sh
[root@node02 azkaban-exec-server-0.1.0-SNAPSHOT]# jps
1898 -- process information unavailable
2522 AzkabanExecutorServer
注意:exec-server 启动后,需要进行手动激活,每次启动,都需要进行激活操作!!!!
激活方法:
发送一个get请求:
[root@node02 azkaban-exec-server-0.1.0-SNAPSHOT]# curl -G "node02:$(<./executor.port)/executor?action=activate" && echo
{"status":"success"}
如果不激活, web启动时,通过jps会发现启动不成功,可以通过日志文件查看启动不成功原因:

启动 web:
在web的根目录下,执行:
bin/start-web.sh
启动webServer之后进程失败消失,可通过安装包根目录下对应启动日志进行排查。一般就是上面exec-server没有手动激活导致的!
[root@node02 azkaban-web-server-0.1.0-SNAPSHOT]# bin/start-web.sh
You have new mail in /var/spool/mail/root
[root@node02 azkaban-web-server-0.1.0-SNAPSHOT]# jps
2661 AzkabanWebServer
2681 Jps
1898 -- process information unavailable
2522 AzkabanExecutorServer
启动成功!!!
访问页面:
https://node02:8443/
用户名和密码还是 azkaban!
3. multiple-executor模式部署
multiple-executor模式是多个executor Server分布在不同服务器上,只需要将azkaban-exec-server安装包拷贝到不同机器上即可组成分布式。
3.1. 节点规划
3.2. scp executor server安装包到node01
启动之后,需要手动激活executor
nod01上激活:
curl -G "node01:$(<./executor.port)/executor?action=activate" && echo
node02上激活:
curl -G "node02:$(<./executor.port)/executor?action=activate" && echo
这里也可以通过数据,直接修改,进行激活!!
注意: 必须先执行 exct服务器,再执行web服务器!!


