Jenkins+Gitlab+Generic Webhook Trigger插件
目标:
1、Git被提交代码到对应分支,Jenkins对应的分支触发构建
(原来的方法是设定每分钟轮询的,这种方法能用但是不好)。
2、使用Pipeline脚本
方法:
使用Jenkins插件Generic Webhook Trigger,将Jenkins和Gitlab配合起来。
步骤:
1、Jenkins插件中心安装插件 Generic Webhook Trigger
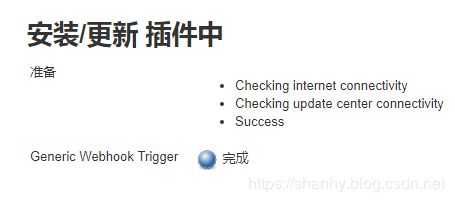
2、设置API Token
Jenkins》系统管理》管理用户》修改用户信息》API Token》添加 Token》
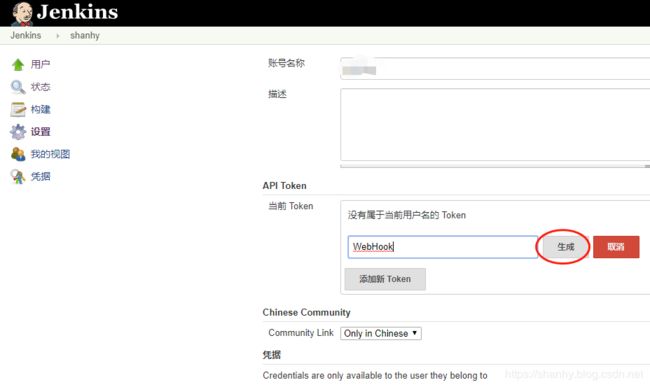
点击 “生成” 按钮后,然后记录下token串,然后底下保存。
3、配置Gitlab Hook
登录Gitlab进入某个项目》Settings》Integrations》Add webhook
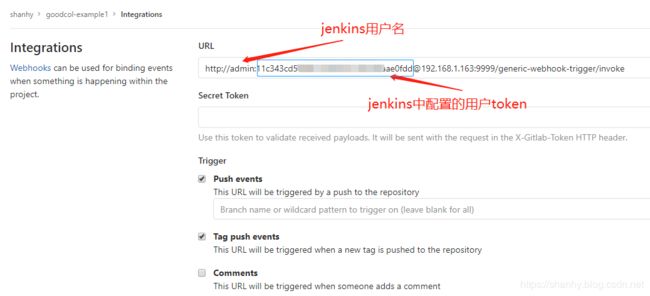
然后保存,下面可以手工触发进行测试。
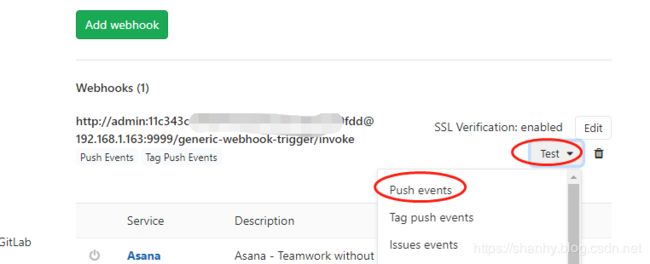
当点击触发事件的时候,Jenkins 就会收到来自 Gitlab 的请求。
如下是我基于 Jenkins Pipeline 的关键脚本片段:
//////////////省略代码若干//////////////
    properties([
      disableConcurrentBuilds(), // 这行与本例无关
      buildDiscarder(logRotator(artifactDaysToKeepStr: '', artifactNumToKeepStr: '', daysToKeepStr: '1', numToKeepStr: '3')), // 这行与本例无关
      pipelineTriggers([
       [$class: 'GenericTrigger',
        genericVariables: [
         [
          key: 'ref',
          value: '$.ref'
         ],
         [
          key: 'before',
          value: '$.before',
          expressionType: 'JSONPath', //Optional, defaults to JSONPath
          regexpFilter: '', //Optional, defaults to empty string
          defaultValue: '' //Optional, defaults to empty string
         ],
         [
          key: 'after',
          value: '$.after',
          expressionType: 'JSONPath', //Optional, defaults to JSONPath
          regexpFilter: '', //Optional, defaults to empty string
          defaultValue: '' //Optional, defaults to empty string
         ],
         [
          key: 'projectName',
          value: '$.project.name',
          expressionType: 'JSONPath', //Optional, defaults to JSONPath
          regexpFilter: '', //Optional, defaults to empty string
          defaultValue: '' //Optional, defaults to empty string
         ]
        ],
        causeString: 'Triggered on $projectName > $ref',

        //token: 'jenkins-token',// webhook触发端将token追加到请求后(放header中也可以)示例:http://admin:[email protected]:9999/generic-webhook-trigger/invoke?token=goodcol-jenkins

        printContributedVariables: true,
        printPostContent: true,
        silentResponse: false,
        regexpFilterText: '$ref',
        regexpFilterExpression: 'refs/heads/' + BRANCH_NAME
       ]
      ])
    ])
//////////////省略代码若干//////////////
PS:
1、如果你不是Gitlab,这个也很简单,你写个简单的程序,暴露一个 invoke 连接,然后上面配置的地址配置成自己的 invoke 地址。然后进行触发测试,你可以debug 看收到的报文内容。然后根据内容调整上面代码中的key和value识别即可。当然你也可以写一个普通程序,调用这个接口来触发构建。
所以,理论上这个触发的接口扩展性不错。
2、使用Jenkinsfile的Pipeline脚本来构建项目,如果你脚本内容修改了,你需要执行一次构建,才会生效新的 properties,如果你改的是脚本中的其他命令内容,则不需要。
小坑:
错误提示
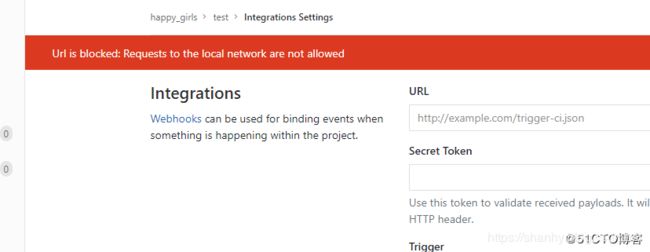
很多朋友使用最新版本的gitlab做自动部署时,在增加web钩子那一步时会报错:
Url is blocked: Requests to the local network are not allowed
解决方法:
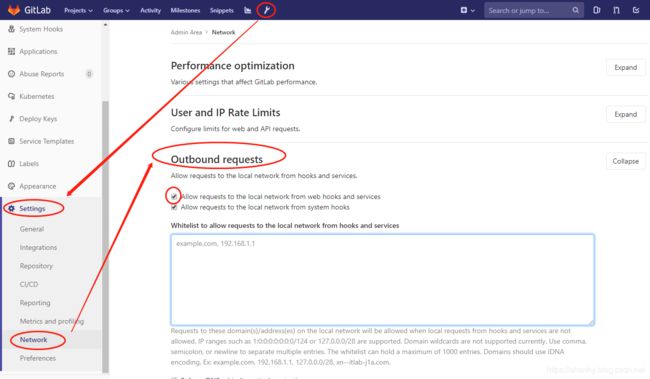
这是因为新版的gitlab为了安全默认禁止了本地局域网地址调用web hook,我们在设置里允许就行,具体步骤如下:
Settings》Network》Outbound requests》Expand》勾选 Allow requests to the local network from web hooks and services 或者文本域中添加白名单》Save Changes
插件官方地址: https://plugins.jenkins.io/generic-webhook-trigger
(END)