iOS开发学习周报(七)
iOS开发学习周报(七)
简介
| 课程名称 | IOS开发实训 | 任课老师 | 郑贵锋老师&字节跳动工程师 |
|---|---|---|---|
| 学号 | 16340015 | 专业(方向) | 软件工程(计应) |
| 姓名 | 陈彬彬 | [email protected] | |
| 开始日期 | 2019/04/27 | 完成日期 | 2019/05/02 |
文章目录
- iOS开发学习周报(七)
- 简介
- 本周记录
- 0.概括
- 1.UICollectionView基本使用
- 2.UIImageView基本使用
- 3.UIImageView异步加载网络图片
- 遇到的问题
- 总结
本周记录
0.概括
- UICollectionView基本使用
- UIImageView基本使用
- UIImageView异步加载网络图片
1.UICollectionView基本使用
参考:
iOS学习之UICollectionView
UILabel文字大小自适应之--SizeToFit
iOS 自定义UICollectionViewCell
iOS之流布局UICollectionView全系列教程
概括:
相比于 UITableview ,UICollectionview 是 iOS6 之后引入的一个新的UI控件,它和 UITableview 有着许多的相似之处,但是它是一个比 UITableView 更加强大的一个视图控件,使用过程中需要实现数据源以及代理方法,其使用优点如下:
(1)系统自带的流水布局支持水平和垂直两种方式的布局;
(2)通过layout配置方式进行布局;
(3)collectionview中item的大小和位置可以自定义
(4)可以自定义一套layout的布局方案
关键代码:
ViewController.m添加UICollectionView并实现相关协议。
//
//  ViewController.m
//  week7-demo
//
//  Created by chenbb6 on 2019/5/11.
//  Copyright © 2019 chenbb6. All rights reserved.
//

#import "ViewController.h"
#import "CollectionViewCell.h"

@interface ViewController () <UICollectionViewDataSource, UICollectionViewDelegate, UICollectionViewDelegateFlowLayout>

@property(nonatomic, strong) UICollectionView *collectionView;
@property(nonatomic, strong) NSString *identifier;

@end

@implementation ViewController

- (instancetype)init
{
    self = [super init];
    if (self) {
        [self initialize];
    }
    return self;
}

- (void)initialize {
    self.identifier = @"ReuseCell";
}

- (void)viewDidLoad {
    [super viewDidLoad];
    // Do any additional setup after loading the view.
    [self loadSubView];
}

- (void)loadSubView{
    self.collectionView = ({
      	// 垂直布局
        UICollectionViewFlowLayout *fl = [[UICollectionViewFlowLayout alloc] init];
        fl.scrollDirection = UICollectionViewScrollDirectionVertical;
        UICollectionView *collectionView = [[UICollectionView alloc] initWithFrame:self.view.frame collectionViewLayout:fl];
        [collectionView registerClass:[CollectionViewCell class] forCellWithReuseIdentifier:self.identifier];
        [collectionView setBackgroundColor:[UIColor whiteColor]];
        collectionView.delegate = self;
        collectionView.dataSource = self;
        collectionView;
    });
    [self.view addSubview:self.collectionView];
}

# pragma mark -UICollectionViewDataSource

// cell样式设置
- (nonnull __kindof UICollectionViewCell *)collectionView:(nonnull UICollectionView *)collectionView cellForItemAtIndexPath:(nonnull NSIndexPath *)indexPath {
    CollectionViewCell *collectionViewCell = (CollectionViewCell *)[collectionView dequeueReusableCellWithReuseIdentifier:self.identifier forIndexPath:indexPath];
    if(indexPath.item % 2 == 0) {
        [collectionViewCell.imageView setImage:[UIImage imageNamed:@"img1.png"]];
        [collectionViewCell.label setText:[NSString stringWithFormat:@"(%zd,%zd)", indexPath.section, indexPath.item]];
      	[collectionViewCell.label sizeToFit];
        [collectionViewCell setBackgroundColor:[UIColor blueColor]];
    }
    else {
        [collectionViewCell.imageView setImage:[UIImage imageNamed:@"img2.png"]];
        [collectionViewCell.label setText:[NSString stringWithFormat:@"(%zd,%zd)", indexPath.section, indexPath.item]];
      	[collectionViewCell.label sizeToFit];
        [collectionViewCell setBackgroundColor:[UIColor yellowColor]];
    }

    return collectionViewCell;
}

// items数目(单个section内)
- (NSInteger)collectionView:(nonnull UICollectionView *)collectionView numberOfItemsInSection:(NSInteger)section {
    return 100;
}

// sections 数目
- (NSInteger)numberOfSectionsInCollectionView:(UICollectionView *)collectionView {
    return 1;
}

// 单个cell尺寸
- (CGSize)collectionView:(UICollectionView *)collectionView layout:(UICollectionViewLayout *)collectionViewLayout sizeForItemAtIndexPath:(NSIndexPath *)indexPath {
    return CGSizeMake(100, 40);
}

// section内下间距
- (CGFloat)collectionView:(UICollectionView *)collectionView layout:(UICollectionViewLayout *)collectionViewLayout minimumLineSpacingForSectionAtIndex:(NSInteger)section{
    return 20;
}

// section内横间距
- (CGFloat)collectionView:(UICollectionView *)collectionView layout:(UICollectionViewLayout *)collectionViewLayout minimumInteritemSpacingForSectionAtIndex:(NSInteger)section {
    return 20;
}

# pragma mark -UICollectionViewDelegate

// item点击事件
- (void)collectionView:(UICollectionView *)collectionView didSelectItemAtIndexPath:(NSIndexPath *)indexPath {
    NSLog(@"[select item] %zd %zd", indexPath.section, indexPath.item);
}

@end
CollectionViewCell.m中实现自定义的UICollectionViewCell,放上一个UILabel和UIImageView
//
// CollectionViewCell.m
// week7-demo
//
// Created by chenbb6 on 2019/5/11.
// Copyright © 2019 chenbb6. All rights reserved.
//
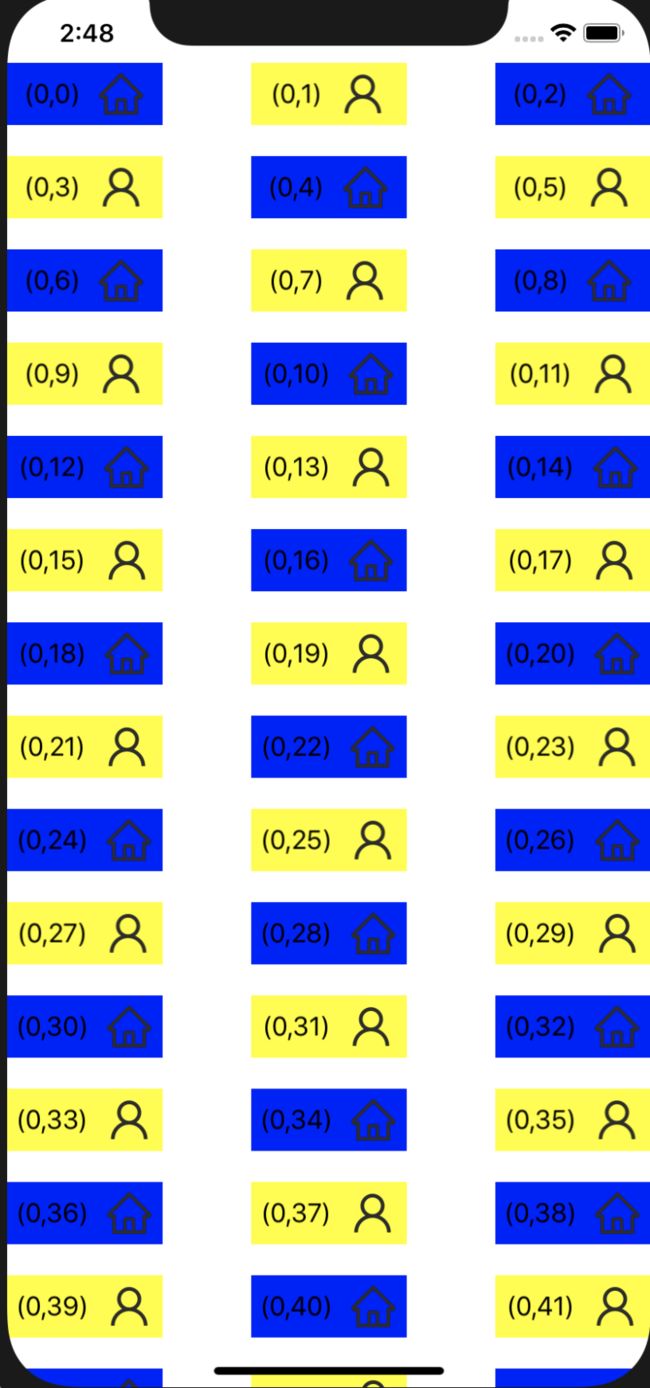
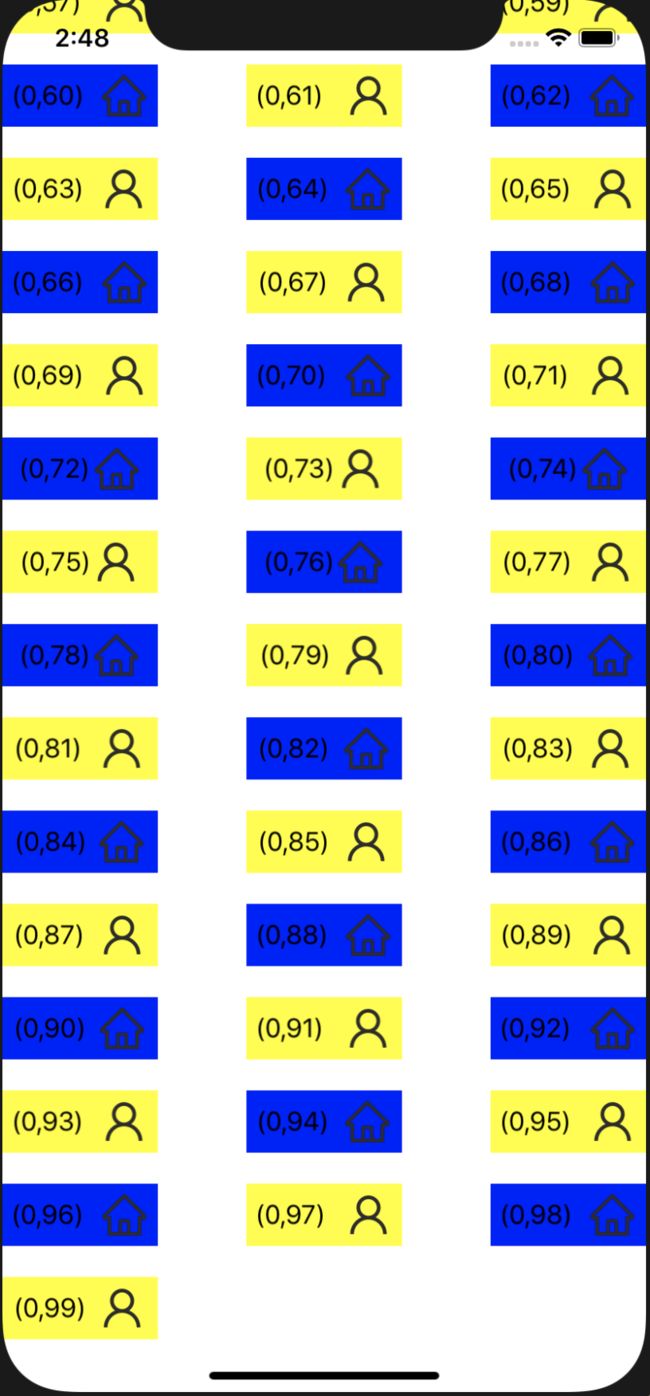
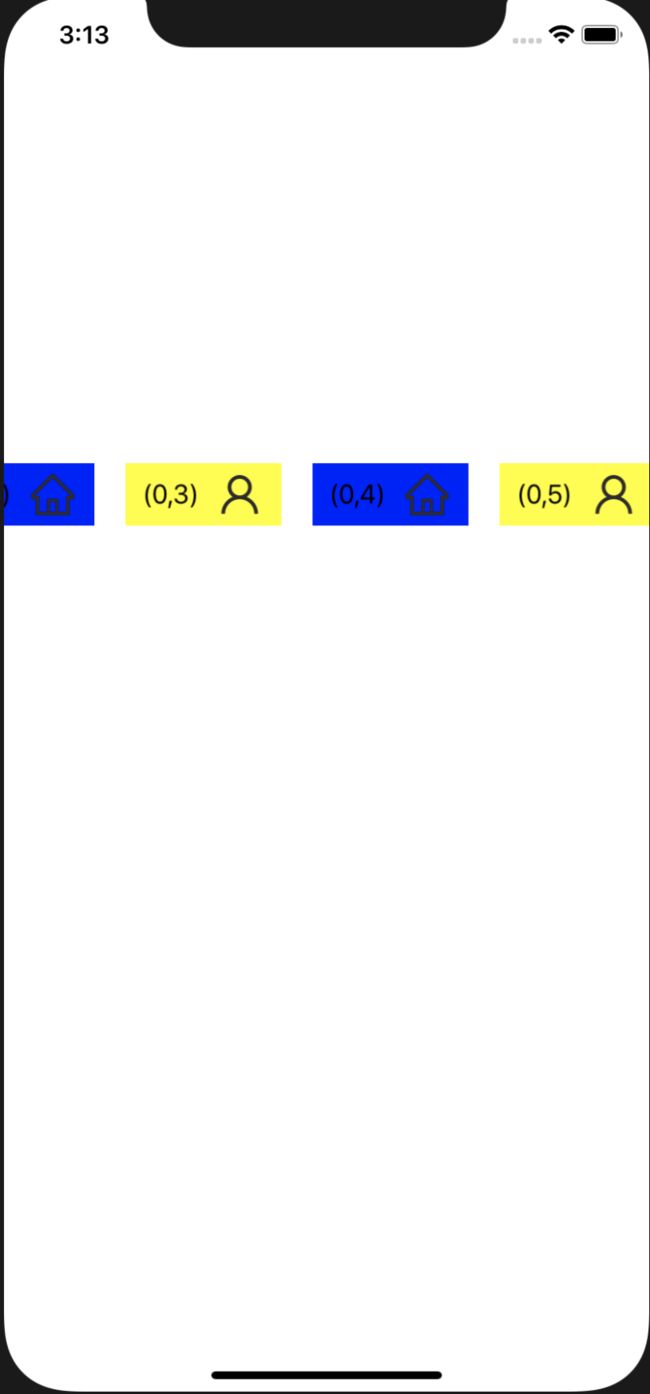
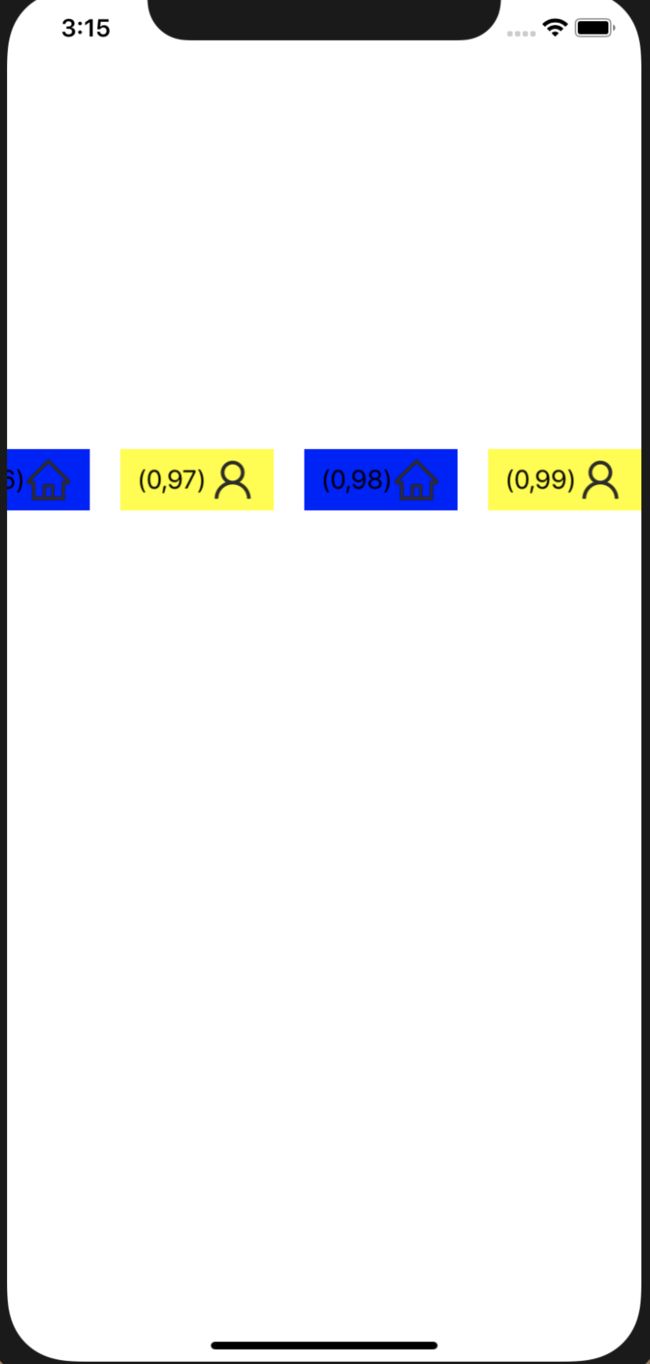
#import 完成效果:
垂直布局:
水平布局:
2.UIImageView基本使用
参考:
IOS–UIImageView的使用方法
概述:
// UIImageView的常用方法
UIImage *oneImage = [UIImage imageNamed:@"max.png"]; // 使用ImageView通过name找到图片

UIImageView *oneImageView = [[UIImageView alloc] initWithImage:oneImage]; //把oneImage添加到oneImageView上

oneImageView.frame = CGRectMake(10, 10, 300, 300); // 设置图片位置和大小

oneImageView.bounds = CGRectMake(10, 10, 280, 280); // 设置图片位置和大小,如果设置了frame,那么它这是的位置将不起作用

oneImageView.backgroundColor = [UIColor redColor]; // 设置背景颜色

oneImageView.alpha = 1.0; // 设置透明度

oneImageView.contentMode = UIViewContentModeTop; // 设置填充模式

oneImageView.center = CGPointMake(150, 300); // 修改图片center的位置

oneImageView.transform = CGAffineTransformMakeTranslation(20, 20); // 把一个图片移动一段距离 其中20表示想要往x或者y方向移动多少,而不是移动到多少。

oneImageView.transform = CGAffineTransformMakeRotation(0.0f); // 旋转图像一定角度 注意:单位是弧度,而不是我们最常用的度数,所以可以写一个宏定义:#define degreesToRadians(x) (M_PI*(x)/180.0)

oneImageView.transform = CGAffineTransformMakeScale(0.5, 0.5); // 其中,CGFloat scale_w与CGFloat scale_h分别表示将原来的宽度和高度缩放到多少倍,下图是缩放到原来的0.5倍

oneImageView.hidden = NO;    // 隐藏或者显示图片 YES为隐藏

[oneImageView sizeToFit];    // 将图片尺寸调整为与内容图片相同
// 为图片添加点击事件
// 一定要先将userInteractionEnabled置为YES,这样才能响应单击事件

oneImageView.userInteractionEnabled = YES; // 设置图片可以交互

UITapGestureRecognizer *singleTap = [[UITapGestureRecognizer alloc] initWithTarget:self action:@selector(tapImageView:)]; // 设置手势

[oneImageView addGestureRecognizer:singleTap]; // 给图片添加手势
// 设置图片连续播放,实现动画效果

oneImageView.animationImages = [NSArray arrayWithObjects:[UIImageimageNamed:@"max.png"], [UIImage imageNamed:@"min.png"], nil];

oneImageView.animationDuration = 0.3f; // 设置循环一次的时间

oneImageView.animationRepeatCount = 0; // 循环的次数。设置为0时无线循环

[oneImageView startAnimating]; // 开始动画

// [oneImageView stopAnimating]; // 停止动画
3.UIImageView异步加载网络图片
参考:
UIImageView异步加载网络图片
iOS 多线程:『NSOperation、NSOperationQueue』详尽总结
方法1:
使用主线程加载网络图片,代码简单,但是会阻塞UI主线程。(我们通过不断使用主线程加载UICollectionView里面的各个cell的网络图片,当我们滑动UICollectionView的时候,它加载后面cell的图片,会发现滑动有阻塞感,就是主线程被阻塞了)
UIImageView *headview = [[UIImageView alloc] initWithFrame:CGRectMake(self.view.frame.size.width/2-100, 400, 200, 200)];
NSURL *photourl = [NSURL URLWithString:[self.imgurl_array objectAtIndex:7]];
//url请求实在UI主线程中进行的
UIImage *images = [UIImage imageWithData:[NSData dataWithContentsOfURL:photourl]];//通过网络url获取uiimage
headview.image = images;
方法2:
使用NSOperationQueue实现子线程加载图片。
一个NSOperationQueue 操作队列,就相当于一个线程管理器,而非一个线程。因为你可以设置这个线程管理器内可以并行运行的的线程数量等等。
- (void)viewDidLoad
{
    [super viewDidLoad];

    NSOperationQueue *operationQueue = [[NSOperationQueue alloc] init];

    self.imageview  = [[[UIImageView alloc] initWithFrame:CGRectMake(110, 50, 100, 100)] autorelease];
    [self.imageview setBackgroundColor:[UIColor grayColor]];
    [self.view addSubview:self.imageview];

    NSInvocationOperation *op = [[NSInvocationOperation alloc] initWithTarget:self selector:@selector(downloadImage) object:nil];
    [operationQueue addOperation:op];
}

- (void)downloadImage
{
    NSURL *imageUrl = [NSURL URLWithString:HEADIMAGE_URL];
    UIImage *image = [UIImage imageWithData:[NSData dataWithContentsOfURL:imageUrl]];
    self.imageview.image = image;
}
效果:
遇到的问题
1.如何获取UICollectionView中的某个cell
参考博客:
如何获取UICollectionView的某个Cell
问题描述:
我们希望当我们点击UICollectionView里面的cell时,主界面的大图图源选中换成小图里面的图源。
解决方法:
// item点击事件
- (void)collectionView:(UICollectionView *)collectionView didSelectItemAtIndexPath:(NSIndexPath *)indexPath {
    NSLog(@"[select item] %zd %zd", indexPath.section, indexPath.item);
    CollectionViewCell *selectCell = (CollectionViewCell *)[self.collectionView cellForItemAtIndexPath:indexPath];
    [self.headiew setImage:selectCell.imageView.image];
}
2.selector 如何传递多个参数值给函数
参考博客:
iOS之@selector的函数传递多个参数
iOS多线程(一):NSInvocationOperation 和 NSBlockOperation 使用
问题描述:
当我们异步加载UICollectionView的cell中的网络图片,我们异步加载发现需要调度selector解析回调,面临selector方法传参的问题。
解决方法:
传递一个NSDictionary进去,里面包含了要传的多个参数。
- (void)loadUrlImage:(NSDictionary *)data {
    NSIndexPath *indexPath = [data valueForKey:@"IndexPath"];
    NSString *url = [data valueForKey:@"Url"];
    // TODO: do sth
}
总结
这周学习UITableView布局的升级版UICollectionView,用法基本是相似的,但是它的使用比前者更加灵活,同样的可以自定义Cell View,并且可以控制Cell View的大小等等,进阶地还可以完成除了垂直和水平布局以外的,例如环形布局、瀑布流布局等,这些是需要我们进阶继续学习的。
还学习了UIImageView是如何异步加载网络图片,当我们前后端分离后,我们很多图片需要用到Url进行加载图片,这时候我们需要掌握子线程异步加载网络图片的实现与技巧。
